
What is APIPA?
APIPA, which stands for Automatic Private IP Addressing, is a feature commonly found in modern operating systems that allows devices to assign themselves an IP address when they are unable to obtain one from a DHCP server. DHCP, or Dynamic Host Configuration Protocol, is a network protocol that assigns unique IP addresses to devices on a network. However, in certain situations where a DHCP server is not available or unreachable, APIPA comes into play to provide a temporary IP address to ensure network connectivity.
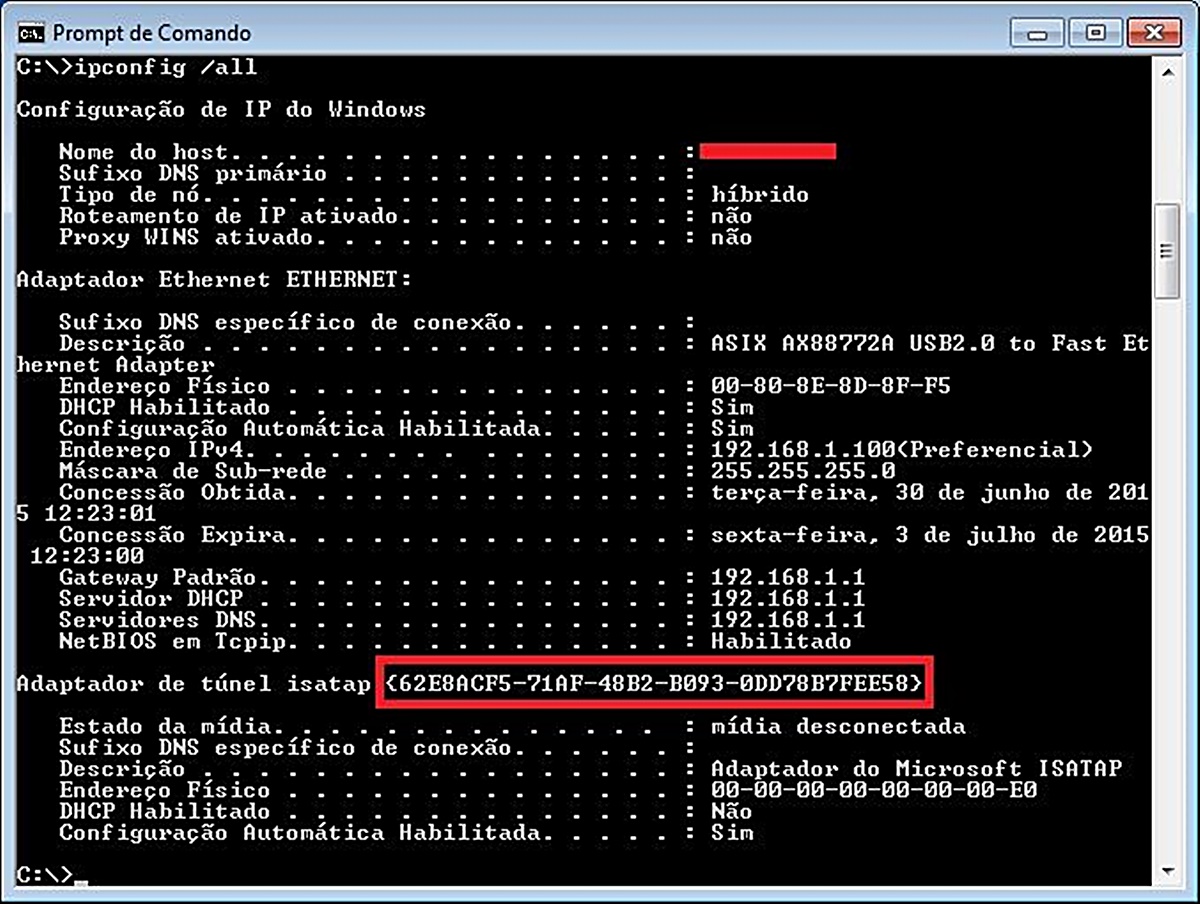
APIPA works by employing a predefined range of IP addresses that are reserved for private use only. These IP addresses fall within the range of 169.254.0.1 to 169.254.255.254, with 169.254.0.0 and 169.254.255.255 being reserved as network and broadcast addresses respectively. When a device is unable to obtain a valid IP address through DHCP, it will automatically assign itself an IP address from this reserved APIPA range.
The main purpose of APIPA is to allow devices to have basic connectivity within a local network without manual configuration or the presence of a DHCP server. This is particularly useful in situations where network administrators may not have complete control over all devices on a network or when troubleshooting network configuration issues.
APIPA operates independently on each device, ensuring that each device has a unique IP address within the reserved range. By using APIPA, devices can continue to communicate with each other within the local network even when a DHCP server is unavailable or misconfigured.
It is important to note that APIPA is only meant to provide temporary IP addressing. Once a DHCP server becomes available or the network issue is resolved, devices will attempt to obtain a valid IP address through DHCP and revert back to regular network configuration. The temporary APIPA address will be released, and the device will acquire a valid IP address from the DHCP server.
Overall, APIPA is a helpful feature that ensures network connectivity in circumstances where obtaining an IP address from a DHCP server is not possible. It allows devices to assign themselves a temporary IP address within a reserved range, allowing for basic communication within the local network. Understanding APIPA and its functionality can be invaluable in troubleshooting network issues and maintaining connectivity in challenging network environments.
How does APIPA work?
APIPA, or Automatic Private IP Addressing, operates by following a set of predefined rules for assigning IP addresses to devices within a local network when a DHCP server is not available or unreachable. Here is a step-by-step explanation of how APIPA works:
- Device attempts to obtain an IP address through DHCP: When a device is connected to a network, it initially tries to obtain an IP address automatically by sending a request to a DHCP server. The DHCP server is responsible for assigning unique IP addresses to devices on the network.
- DHCP server is unavailable or unreachable: In some cases, the DHCP server may be down, misconfigured, or simply not reachable by the device. This may be due to network issues, server downtime, or other reasons.
- Device assigns itself an APIPA address: When the device fails to acquire an IP address from the DHCP server, it falls back to APIPA as a means of establishing network connectivity. The device generates a random IP address from the reserved APIPA range, typically starting with 169.254.x.x, where x.x represents the device-specific address assigned by the device itself.
- Device checks for IP address conflicts: Before fully using the generated APIPA address, the device checks whether there is another device in the network using the same IP address. If a conflict is detected, the device will generate another APIPA address and repeat the conflict checking process until a unique address is obtained.
- Device configures network parameters: Once the device has successfully assigned an APIPA address, it configures other network parameters, such as subnet mask and default gateway, using predefined values. This allows the device to communicate with other devices within the local network.
- Device communicates within the local network: With the APIPA address and configured network parameters, the device can now communicate with other devices within the same local network. This ensures basic connectivity despite the absence of a DHCP server for IP address assignment.
It’s important to note that APIPA is designed as a temporary solution. As soon as a DHCP server becomes available or the network issue is resolved, the device will attempt to obtain a valid IP address through DHCP and transition back to regular network configuration. The APIPA address will be released, and the device will obtain a new IP address from the DHCP server.
Understanding how APIPA works can be crucial for troubleshooting network connectivity issues and ensuring that devices can stay connected even in the absence of a DHCP server.
Benefits of APIPA
APIPA, or Automatic Private IP Addressing, offers several benefits that contribute to network connectivity and ease of use in certain situations. Here are some of the key advantages of APIPA:
- Simplified network setup: With APIPA, network setup becomes much simpler and less dependent on manual configuration. Devices can automatically assign themselves IP addresses from the reserved APIPA range without requiring intervention from network administrators.
- Network connectivity in the absence of a DHCP server: APIPA ensures that devices can establish network connectivity even when a DHCP server is not available or unreachable. This is particularly useful in situations where DHCP servers are temporarily down, misconfigured, or not present, allowing devices to have basic communication within the local network.
- No conflicts with existing IP addresses: Before assigning an APIPA address, devices perform conflict checking to ensure that the generated address is unique within the local network. This helps avoid IP address conflicts, which can cause disruptions and hinder network communication.
- Seamless transition back to DHCP: When a DHCP server becomes available again or the network issue is resolved, devices using APIPA will automatically attempt to obtain a valid IP address through DHCP. This ensures a seamless transition back to regular network configuration without the need for manual reconfiguration.
- Flexibility in network environments: APIPA provides flexibility in network environments where network administrators may not have complete control over all devices or when troubleshooting network configuration issues. Devices can utilize APIPA to establish connectivity without relying on externally managed DHCP servers.
- Reduced dependency on static IP addressing: In scenarios where static IP addresses are not practical or feasible, APIPA eliminates the need for manual IP address assignment. This simplifies network setup, especially in environments with a large number of devices or frequent device additions and removals.
- Faster network troubleshooting: APIPA can be a valuable tool for troubleshooting network connectivity issues. It enables devices to establish basic communication within the local network, aiding in the identification and resolution of network problems more efficiently.
Overall, APIPA offers a convenient and reliable solution for temporary IP addressing in situations where a DHCP server is not available or cannot be reached. Its benefits include simplified network setup, seamless transition back to DHCP, flexibility in network environments, and faster troubleshooting. Understanding these advantages can help network administrators effectively utilize APIPA to maintain network connectivity and optimize resource allocation.
Limitations of APIPA
While APIPA, or Automatic Private IP Addressing, provides a convenient solution for temporary IP addressing, it is important to be aware of its limitations. Here are the key limitations of APIPA:
- Limited to local network communication: APIPA addresses are only valid within the local network. Devices with APIPA addresses cannot communicate with devices outside of the local network or access resources on the internet.
- Cannot establish connectivity between separate local networks: APIPA addresses are designed for communication within a single local network. If there are multiple segmented networks or VLANs, devices with APIPA addresses will not be able to establish connectivity between these separate local networks.
- Does not support DNS resolution: APIPA does not provide support for DNS (Domain Name System) resolution. DNS resolution is the process of translating domain names to IP addresses. Without DNS resolution, devices using APIPA addresses will not be able to access network resources using domain names.
- Limited to IPv4: APIPA is limited to IPv4 addressing and does not work with IPv6 addresses. As IPv6 becomes more prevalent, there may be situations where APIPA is not usable or compatible with certain network configurations.
- Potential IP address conflicts: While APIPA includes conflict checking to ensure unique IP addresses within a local network, there is still a possibility of IP address conflicts. In rare cases, two devices on the same network may assign themselves the same APIPA address, which can lead to connectivity issues and disruptions.
- Temporary nature: APIPA addresses are temporary and are meant to provide basic network connectivity until a valid IP address can be obtained from a DHCP server. This means that devices using APIPA addresses should not rely on them for long-term network operations or services.
- Cannot be used for remote administration: APIPA addresses cannot be used for remote administration or accessing devices outside of the local network. Remote management tools typically require devices to have valid, routable IP addresses to establish remote connections.
Understanding the limitations of APIPA is crucial in determining when and where it can be effectively used. It is important to consider these limitations when implementing APIPA in a network environment and to ensure that proper measures are taken to address any potential issues that may arise.
How to Enable APIPA on Windows
Enabling APIPA (Automatic Private IP Addressing) on Windows is a straightforward process that can be done using the network settings. Here are the steps to enable APIPA on Windows:
- Open the Control Panel: Press the Windows key on your keyboard, type “Control Panel”, and select it from the search results.
- Go to Network and Internet Settings: In the Control Panel, click on “Network and Internet” to access the network settings.
- Select Network and Sharing Center: In the Network and Internet settings, click on “Network and Sharing Center” to open the network configuration options.
- Access the Ethernet or Wi-Fi Properties: In the Network and Sharing Center, locate the network connection you want to enable APIPA for. This could be either the Ethernet or Wi-Fi connection. Right-click on the connection and select “Properties” from the context menu.
- Select Internet Protocol Version 4 (TCP/IPv4): In the Properties window, scroll down and find “Internet Protocol Version 4 (TCP/IPv4)” in the list of items. Select it and click on the “Properties” button below.
- Enable APIPA: In the Internet Protocol Version 4 (TCP/IPv4) Properties, make sure the “Obtain an IP address automatically” and “Obtain DNS server address automatically” options are selected. APIPA will be automatically enabled when these settings are selected.
- Save the changes: Click on the “OK” button to save the changes and exit the properties window.
- Restart the network connection: To ensure the changes take effect, restart the network connection by disabling and re-enabling it, or by restarting the computer.
After following these steps, APIPA will be enabled on the selected network connection in Windows. The device will assign itself an IP address from the reserved APIPA range if it fails to acquire an IP address from a DHCP server.
It’s worth noting that APIPA will only be enabled on the specific network connection for which you’ve followed these steps. If you have multiple network connections, such as Ethernet and Wi-Fi, you’ll need to enable APIPA on each connection individually.
By enabling APIPA on Windows, you can ensure that your device remains connected to the local network and can communicate with other devices even when DHCP server configurations are unavailable or unreachable.
How to Enable APIPA on macOS
Enabling APIPA (Automatic Private IP Addressing) on macOS involves configuring the network settings using the System Preferences. Follow these steps to enable APIPA on macOS:
- Click on the Apple menu: Click on the Apple logo in the top-left corner of the screen to open the Apple menu.
- Select System Preferences: From the Apple menu, select “System Preferences” to access the system configuration options.
- Open Network settings: In the System Preferences window, locate and click on the “Network” icon to open the network settings.
- Select the Network Connection: In the Network settings, select the network connection for which you want to enable APIPA. This could be Ethernet, Wi-Fi, or any other active network connection. Click on the connection to highlight it.
- Click on Advanced: At the bottom-right corner of the Network settings window, click on the “Advanced” button. This will open the advanced network configuration options.
- Go to TCP/IP tab: In the advanced network settings, select the “TCP/IP” tab to access the TCP/IP configuration options.
- Configure IPv4 settings: In the TCP/IP tab, select the “Using DHCP” option for the IPv4 configuration. This ensures that the network connection attempts to obtain an IP address dynamically.
- Close the network settings: Click on the “OK” button to close the advanced network settings. Then, click on the “Apply” button in the main Network settings window to save the changes.
- Restart the network connection: To ensure the changes take effect, restart the network connection by disabling and re-enabling it, or by restarting the computer.
After following these steps, APIPA will be enabled on the selected network connection in macOS. The device will assign itself an IP address from the reserved APIPA range if it fails to acquire an IP address from a DHCP server.
Note that enabling APIPA on macOS will only apply to the specific network connection for which you’ve followed these steps. If you have multiple network connections, such as Ethernet and Wi-Fi, you’ll need to enable APIPA on each connection individually.
Enabling APIPA on macOS ensures that your device can maintain network connectivity and communicate with other devices within the local network, even when DHCP server configurations are not available or unreachable.
How to Enable APIPA on Linux
Enabling APIPA (Automatic Private IP Addressing) on Linux requires modifying the network configuration settings. The exact steps may vary depending on the Linux distribution and the network configuration tool being used. Here is a general guide on how to enable APIPA on Linux:
- Open a terminal: Launch a terminal window on your Linux system. This can typically be done by searching for “Terminal” in the application launcher or by using the keyboard shortcut.
- Edit the network configuration file: Use a text editor such as nano or vi to open the network configuration file. The location and name of the file may vary depending on the Linux distribution. For example, on Ubuntu, the file is usually located at `/etc/network/interfaces`.
- Locate the network interface section: Within the network configuration file, locate the section that corresponds to the network interface you want to enable APIPA for. Typically, this section starts with a line like `iface eth0 inet` or `iface ens33 inet`.
- Add APIPA configuration: In the network interface section, add the following lines to enable APIPA:
    auto interface_name
    iface interface_name inet auto
Replace `interface_name` with the name of your network interface. For example, `eth0` or `ens33`.
- Save the changes: Save the updated network configuration file and close the text editor.
- Restart the network service: Restart the network service to apply the new configuration. The command to restart the network service may vary depending on the Linux distribution. For example, on Ubuntu, you can use the command `sudo systemctl restart networking.service`.
After following these steps, APIPA will be enabled on the specified network interface in Linux. The device will assign itself an IP address from the reserved APIPA range if it fails to acquire an IP address from a DHCP server.
It’s important to note that the specific commands and files mentioned here are generic examples. The actual commands and file locations may vary depending on the Linux distribution and network configuration tool being used. It’s recommended to consult the documentation specific to your Linux distribution for precise instructions.
By enabling APIPA on Linux, you can ensure that your Linux system maintains network connectivity within the local network, even when DHCP server configurations are not available or unreachable.
Troubleshooting APIPA Issues
While APIPA (Automatic Private IP Addressing) can be a useful feature for maintaining network connectivity, it’s not immune to issues and complications. Here are some troubleshooting steps to address common APIPA issues:
- Check network connectivity: Verify that your device has an active physical connection to the local network. Ensure that cables are properly connected and that Wi-Fi is enabled and connected to the correct network.
- Restart the device: Sometimes, a simple restart can resolve temporary network issues. Try restarting your device and check if APIPA starts functioning properly.
- Verify DHCP server availability: APIPA is meant to be used when a DHCP server is unavailable or unreachable. Confirm that the DHCP server is active and accessible. Check network settings and ensure that the DHCP server’s IP address is correctly configured.
- Check IP address conflicts: If multiple devices on the same network are using APIPA, there can be IP address conflicts. Use an IP address scanner tool or check the network configuration of each device to ensure that there are no duplicate IP addresses.
- Reset network configuration: Resetting the network configuration can help resolve certain issues. On Windows, you can use the command `ipconfig /renew` to attempt to acquire a new IP address from a DHCP server. On macOS and Linux, you can restart the network service or reboot the system.
- Update network drivers: Outdated or incompatible network drivers can cause issues with obtaining IP addresses. Check for updates to the network drivers and install any available updates to ensure compatibility.
- Disable and re-enable the network connection: Temporarily disabling and re-enabling the network connection can sometimes resolve connectivity issues. On Windows, you can do this through the network adapter settings. On macOS and Linux, you can use network manager tools or commands to restart the network interface.
- Test with a different device: If possible, test APIPA functionality with a different device on the same network. This can help determine if the issue is specific to the device or the network itself.
- Consult network administrator: If the above steps do not resolve the APIPA issues, it may be helpful to consult the network administrator or IT support team. They can provide further assistance in diagnosing and resolving the problem.
Remember that APIPA is designed as a temporary solution, and it’s always recommended to have a working DHCP server for proper IP address assignment. Troubleshooting APIPA issues can help maintain network connectivity when a DHCP server is unavailable, ensuring that devices can continue to communicate within the local network.
Alternatives to APIPA
While APIPA (Automatic Private IP Addressing) provides a temporary solution for network connectivity in the absence of a DHCP server, there are alternatives that offer more robust functionality and flexibility. Here are a few alternatives to consider:
- Static IP addressing: Unlike APIPA, static IP addressing involves manually assigning a permanent IP address to each device on the network. This ensures that devices always have the same IP address, allowing for more predictable and consistent network configuration. However, static IP addressing requires careful planning and manual configuration for each device, making it more time-consuming and prone to human error.
- DHCP with a failover configuration: Instead of relying solely on a single DHCP server, a failover configuration involves setting up multiple DHCP servers in a redundant setup. This ensures that if one DHCP server becomes unavailable, another server can take over and continue to assign IP addresses to devices. This provides enhanced reliability and availability compared to APIPA, as well as the ability to handle larger network environments.
- DHCP reservations: DHCP reservations allow network administrators to assign specific IP addresses to devices based on their MAC addresses. This provides the benefits of automatic IP address assignment while still ensuring that devices receive consistent IP addresses. DHCP reservations are particularly useful for devices that require static IP addresses for various reasons, such as printers or servers.
- IPv6 Stateless Address Autoconfiguration (SLAAC): For networks that utilize IPv6, SLAAC is the equivalent of APIPA. It allows devices to automatically assign themselves unique IPv6 addresses based on the network prefix advertised by the router. SLAAC provides more advanced features and better scalability compared to APIPA, making it a suitable alternative for IPv6-enabled networks.
- Centralized network management solutions: In larger network environments, deploying a centralized network management solution can provide greater control and automation. Solutions like Network Access Control (NAC) or Network Configuration Manager (NCM) allow network administrators to dynamically manage network configurations, including IP address assignment, across multiple devices and locations. These tools provide more comprehensive management capabilities and can enforce stricter network security policies.
When considering alternatives to APIPA, it’s essential to assess the specific needs and requirements of the network environment. Factors such as the size of the network, the need for static IP assignments, compatibility with IPv6, and the level of automation desired should be taken into account. Choosing the most suitable alternative will help establish a more robust and efficient network infrastructure.