
Choosing the Right Monopod
When it comes to achieving stability and precision in crane shots, selecting the right monopod is essential. The monopod serves as the foundational support for the camera, ensuring smooth and steady movements throughout the shot. Here are key considerations for choosing the ideal monopod:
Weight Capacity
The weight capacity of the monopod is a critical factor to consider. It should comfortably support the weight of your camera and any additional equipment, such as a telephoto lens or external microphone. Ensure that the monopod's weight capacity aligns with the total weight of your gear to maintain stability and prevent potential strain on the equipment.
Material and Durability
Opt for a monopod constructed from high-quality materials such as aluminum or carbon fiber. These materials offer the necessary durability while remaining lightweight for ease of use. Additionally, consider the monopod's build quality, as it should withstand outdoor conditions and frequent usage without compromising stability.
Height and Adjustability
The monopod's height and adjustability are crucial for achieving the desired camera positioning. Look for a model that offers sufficient height to capture elevated shots while allowing for smooth adjustments to accommodate varying shooting angles. A monopod with adjustable leg sections provides versatility, enabling you to customize the height based on the specific requirements of each shot.
Portability and Convenience
For on-the-go shooting scenarios, portability is a key factor. Choose a monopod that is lightweight and collapsible, facilitating easy transportation and swift setup. Additionally, consider features such as quick-release leg locks and ergonomic grips, which enhance the monopod's overall convenience and user-friendliness during operation.
Compatibility with Accessories
Consider the compatibility of the monopod with various accessories, such as fluid heads and quick-release plates. This ensures seamless integration with your existing gear, allowing for efficient setup and enhanced functionality when executing crane shots.
Budget and Value
While considering the features and specifications, evaluate the monopod's overall value in relation to your budget. Seek a balance between quality and cost-effectiveness, aiming to invest in a monopod that aligns with your specific shooting requirements while offering long-term reliability and performance.
By carefully assessing these key factors, you can select a monopod that not only meets your immediate needs but also enhances the overall stability and precision of your crane shots. The right monopod serves as a dependable foundation, enabling you to execute smooth and professional-looking crane shots with confidence.
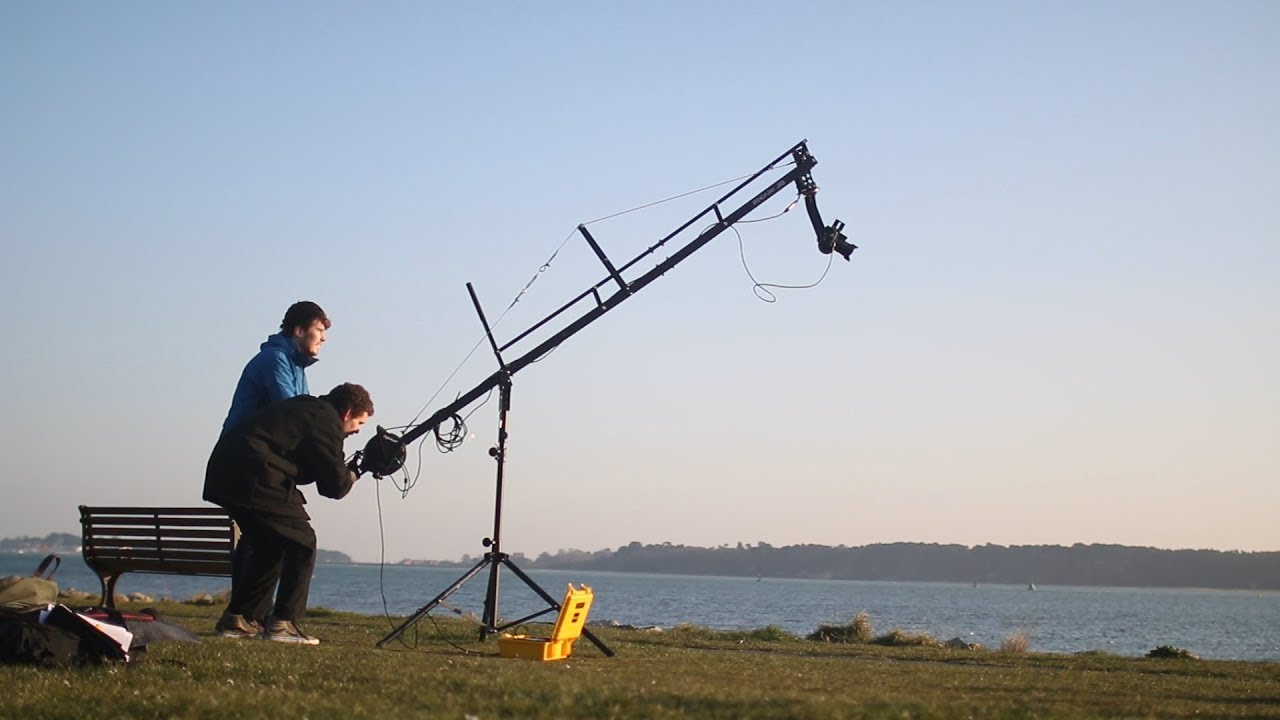
Setting Up the Monopod
Properly setting up the monopod is a fundamental step in preparing for a steady crane shot. Follow these guidelines to ensure a stable and secure foundation for your camera:
Choosing the Location
Begin by selecting a suitable shooting location that offers the desired perspective for your crane shot. Assess the terrain and ground surface to identify a stable and level area where the monopod can be positioned without instability or slippage. Avoid placing the monopod on uneven or slippery surfaces to prevent potential accidents and ensure the safety of your equipment.
Extending the Monopod
Extend the monopod to the desired height while ensuring that each section is securely locked in place. Utilize the monopod’s adjustable leg sections to achieve the appropriate elevation for capturing the crane shot. Verify that the locking mechanisms are fully engaged to prevent any unexpected collapse or movement during operation.
Securing the Base
Once the monopod is extended to the desired height, firmly plant the base onto the chosen location, applying gentle pressure to ensure stability. If the monopod features a retractable foot or spike at the base, consider deploying it to enhance grip and anchoring, especially when shooting on soft or uneven surfaces. This additional stability minimizes unwanted swaying or tilting during the crane shot.
Testing Stability
Before mounting the camera, perform a stability check by gently applying horizontal and vertical pressure to the monopod. Assess its resistance to movement and verify that it remains steady and upright. If any instability is detected, reassess the positioning and base support to address the issue before proceeding with the camera setup.
Securing the Camera Mount
Once the monopod is securely positioned and tested for stability, proceed to attach the camera mount or tripod head to the monopod’s mounting plate. Ensure that the connection is snug and secure, minimizing any potential wobbling or shifting during the crane shot. Double-check the tightness of the mounting mechanism to prevent any unexpected loosening during operation.
By meticulously following these steps, you can establish a reliable and stable setup for your monopod, laying the groundwork for executing a seamless and steady crane shot. The careful preparation and attention to detail during the setup phase contribute significantly to the overall success of the crane shot, allowing you to capture captivating footage with precision and confidence.
Positioning the Camera
Positioning the camera correctly on the monopod is pivotal in capturing a steady and well-composed crane shot. The following steps outline the optimal approach to achieve the desired camera positioning:
Leveling the Camera
Begin by ensuring that the camera is perfectly level on the monopod. Utilize the built-in spirit level on the camera or an external bubble level to confirm that the horizon line is straight and aligned. This level positioning serves as the foundation for maintaining visual balance and stability throughout the crane shot, preventing any unintended tilting or skewing of the footage.
Adjusting the Camera Height
Determine the ideal height for the camera based on the specific framing and composition required for the crane shot. Carefully extend or retract the monopod to achieve the desired elevation, taking into account the overall perspective and framing of the scene. Ensure that the camera’s viewpoint aligns with the creative vision for the shot, whether it involves capturing expansive aerial views or focused ground-level sequences.
Securing the Camera Orientation
Once the desired height is established, securely lock the monopod’s adjustable leg sections to prevent any inadvertent shifting or height variation during the crane shot. Confirm that the camera is firmly secured to the monopod’s mounting plate, minimizing any potential rotation or swiveling that could compromise the planned composition. This secure orientation maintains the intended framing and prevents unintended deviations during the shot.
Framing and Composition
With the camera positioned and secured, carefully assess the framing and composition within the viewfinder or on the camera’s display. Fine-tune the camera’s orientation to capture the intended subject matter and surroundings, ensuring that the composition aligns with the creative objectives of the crane shot. Pay attention to the rule of thirds, leading lines, and other compositional techniques to enhance the visual impact of the footage.
Verifying Stability
Prior to commencing the crane shot, conduct a final stability check to confirm that the camera remains steady and secure on the monopod. Gently apply subtle movements to the monopod and observe the camera’s response, ensuring that it maintains stability and does not exhibit any unexpected wobbling or shifting. This verification step is crucial for preemptively addressing any potential instability before initiating the crane shot.
By meticulously adhering to these guidelines, you can position the camera with precision and confidence, setting the stage for capturing a seamless and visually compelling crane shot. The careful attention to leveling, height adjustment, orientation, and stability ensures that the camera is optimally positioned to translate the creative vision into captivating footage.
Adjusting the Tilt and Pan
Once the camera is securely positioned on the monopod, the next crucial step in executing a steady crane shot involves adjusting the tilt and pan to achieve dynamic and fluid movements. The following steps outline the process of fine-tuning the tilt and pan settings for optimal results:
Setting the Initial Tilt
Begin by establishing the initial tilt angle of the camera to align with the desired framing and composition of the crane shot. Gradually adjust the tilt mechanism, ensuring smooth and controlled movements to position the camera at the appropriate angle. Take into account the creative objectives of the shot, whether it involves capturing upward or downward movements, and adjust the tilt accordingly to frame the scene effectively.
Refining the Tilt Movement
As the crane shot progresses, continuously monitor and refine the tilt movement to maintain visual coherence and fluidity. Smoothly adjust the tilt angle in response to the evolving composition and subject dynamics within the frame, ensuring that the camera movement enhances the storytelling and visual impact of the footage. Exercise precision and finesse in controlling the tilt to achieve seamless transitions and compelling perspectives throughout the shot.
Initiating Controlled Panning
Simultaneously, initiate controlled panning movements to complement the tilt adjustments and expand the visual scope of the crane shot. Gradually pan the camera to capture sweeping vistas, dynamic subject movements, or immersive environmental sequences, enhancing the cinematic quality of the footage. Coordinate the pan movements with the tilt adjustments to orchestrate a harmonious and immersive visual narrative that engages the audience.
Responding to Subject Dynamics
Remain attentive to the dynamics of the subjects or elements within the frame, adjusting the tilt and pan movements to maintain compelling visual engagement. Anticipate the trajectory of moving subjects and adapt the camera movements accordingly, ensuring that the composition remains cohesive and visually impactful. This responsiveness to subject dynamics contributes to the overall fluidity and storytelling prowess of the crane shot.
Ensuring Smooth Transitions
Foster seamless transitions between tilt and pan movements to sustain the visual continuity and coherence of the crane shot. Avoid abrupt or disjointed shifts in camera orientation, instead prioritizing gradual and fluid transitions that enhance the cinematic flow and immersive experience. This meticulous attention to smooth transitions elevates the overall quality and professionalism of the crane shot.
By methodically adjusting the tilt and pan settings with precision and attentiveness, you can orchestrate a visually captivating and seamless crane shot that effectively conveys the intended narrative and aesthetic impact. The synergy between controlled tilt and pan movements enhances the cinematic quality of the footage, elevating the storytelling potential and visual allure of the crane shot.
Executing the Crane Shot
Executing a crane shot with a monopod involves a meticulous and coordinated approach to achieve smooth and dynamic camera movements. The following steps outline the process of seamlessly executing a crane shot, capturing compelling footage with precision and finesse:
Establishing a Clear Vision
Prior to initiating the crane shot, define a clear vision for the intended visual narrative and emotional impact of the footage. Determine the key storytelling elements, framing dynamics, and thematic nuances that will guide the execution of the crane shot. This clarity of vision serves as the creative compass for orchestrating the camera movements and capturing the desired cinematic essence.
Commencing Controlled Movements
Initiate the crane shot with deliberate and controlled movements, gradually adjusting the monopod’s height, tilt, and pan to convey the intended visual progression. Exercise finesse and precision in orchestrating the camera movements, ensuring seamless transitions and compelling perspectives that align with the narrative and emotional resonance of the scene. Maintain a steady and fluid pace to imbue the footage with cinematic allure and visual impact.
Adapting to Environmental Factors
Remain adaptable and responsive to environmental factors, such as wind conditions, terrain variations, and lighting dynamics, that may influence the execution of the crane shot. Anticipate and mitigate potential challenges by adjusting the camera movements and positioning to accommodate the evolving environmental elements while preserving the integrity of the shot. This adaptability enhances the resilience and professionalism of the crane shot, resulting in visually captivating footage.
Emphasizing Cinematic Transitions
Emphasize cinematic transitions between different phases of the crane shot, leveraging controlled movements to convey visual intrigue and narrative progression. Whether transitioning between expansive aerial views and intimate ground-level sequences or capturing dynamic subject movements, prioritize seamless and visually engaging transitions that elevate the storytelling impact of the footage. This emphasis on cinematic transitions enriches the visual narrative and captivates the audience.
Maintaining Visual Cohesion
Throughout the execution of the crane shot, maintain visual cohesion and consistency in framing, composition, and camera movements to uphold the narrative integrity and cinematic quality of the footage. Continuously monitor the camera’s positioning and orientation, ensuring that each movement contributes to the overall visual narrative and reinforces the intended emotional resonance of the scene. This commitment to visual cohesion enhances the professionalism and impact of the crane shot.
By methodically executing the crane shot with precision, adaptability, and a keen emphasis on visual storytelling, you can capture visually captivating footage that effectively conveys the intended narrative and emotional resonance. The seamless coordination of controlled movements and cinematic transitions elevates the overall quality and impact of the crane shot, resulting in compelling and immersive footage that resonates with the audience.
Troubleshooting and Tips
During the process of executing a crane shot with a monopod, encountering potential challenges and leveraging practical tips can significantly enhance the overall quality and success of the footage. Here are troubleshooting strategies and valuable tips to optimize the execution of crane shots:
Addressing Unwanted Vibrations
If you encounter unwanted vibrations or instability during the crane shot, consider adjusting the tension of the monopod’s leg locks and mounting mechanisms. Ensure that all components are securely fastened and that the monopod is positioned on a stable surface. Additionally, incorporating vibration-dampening accessories, such as rubberized pads or shock-absorbing mounts, can mitigate vibrations and enhance the overall stability of the camera setup.
Minimizing Wind Interference
In outdoor shooting environments, wind interference can pose challenges to executing a smooth crane shot. To minimize the impact of wind, position yourself in a sheltered location whenever possible and use windshields or wind socks to protect the microphone from unwanted noise. Additionally, consider adjusting the height and tilt of the monopod to reduce the surface area exposed to strong winds, thereby enhancing stability and minimizing potential disturbances in the footage.
Optimizing Camera Balance
Ensure that the camera and lens combination is properly balanced on the monopod to prevent front or back heaviness, which can affect stability and smooth movements. Utilize a quick-release plate with adjustable mounting points to fine-tune the balance and distribute the weight evenly. Regularly check and readjust the balance as you switch lenses or modify the camera setup to maintain optimal stability and control during the crane shot.
Utilizing Counterweights
When executing crane shots with heavier camera setups, consider using counterweights to balance the monopod and minimize strain on the equipment. Attach counterweights to the base of the monopod to offset the weight of the camera and lens, enhancing stability and reducing the likelihood of tilting or swaying. This strategic use of counterweights contributes to smoother and more controlled crane movements, particularly when working with larger and more substantial camera rigs.
Maximizing Fluid Movements
Emphasize the use of fluid head attachments and pan bars to facilitate seamless and controlled pan movements during crane shots. Opt for monopods with integrated fluid cartridges or invest in fluid heads that offer smooth and precise panning capabilities. Additionally, practice gradual and deliberate movements to achieve cinematic fluidity, maintaining consistent speed and control to capture visually captivating crane shots with professional finesse.
By proactively addressing potential challenges and integrating these practical tips into the execution of crane shots, you can optimize the stability, smoothness, and overall visual impact of the footage. The strategic application of troubleshooting strategies and valuable tips enhances the professionalism and creative prowess of crane shot execution, resulting in visually compelling and immersive footage that resonates with the audience.