
Choosing the Right Monopod
When it comes to capturing stunning photographs and smooth videos, a monopod can be an invaluable tool. However, with a wide array of monopods available on the market, it’s crucial to select the right one to suit your specific needs. Here are some essential factors to consider when choosing the ideal monopod for your photography or videography endeavors:
- Weight Capacity: Determine the weight of your camera equipment, including the heaviest lens you plan to use. Select a monopod that can comfortably support this weight to ensure stability and prevent any potential accidents.
- Material: Monopods are commonly constructed from aluminum, carbon fiber, or a combination of both. Aluminum monopods are durable and budget-friendly, while carbon fiber monopods are lightweight and offer excellent vibration reduction.
- Height and Portability: Consider the maximum and minimum height of the monopod, as well as its collapsed length. If you frequently travel or shoot on location, a compact and lightweight monopod may be more suitable for your needs.
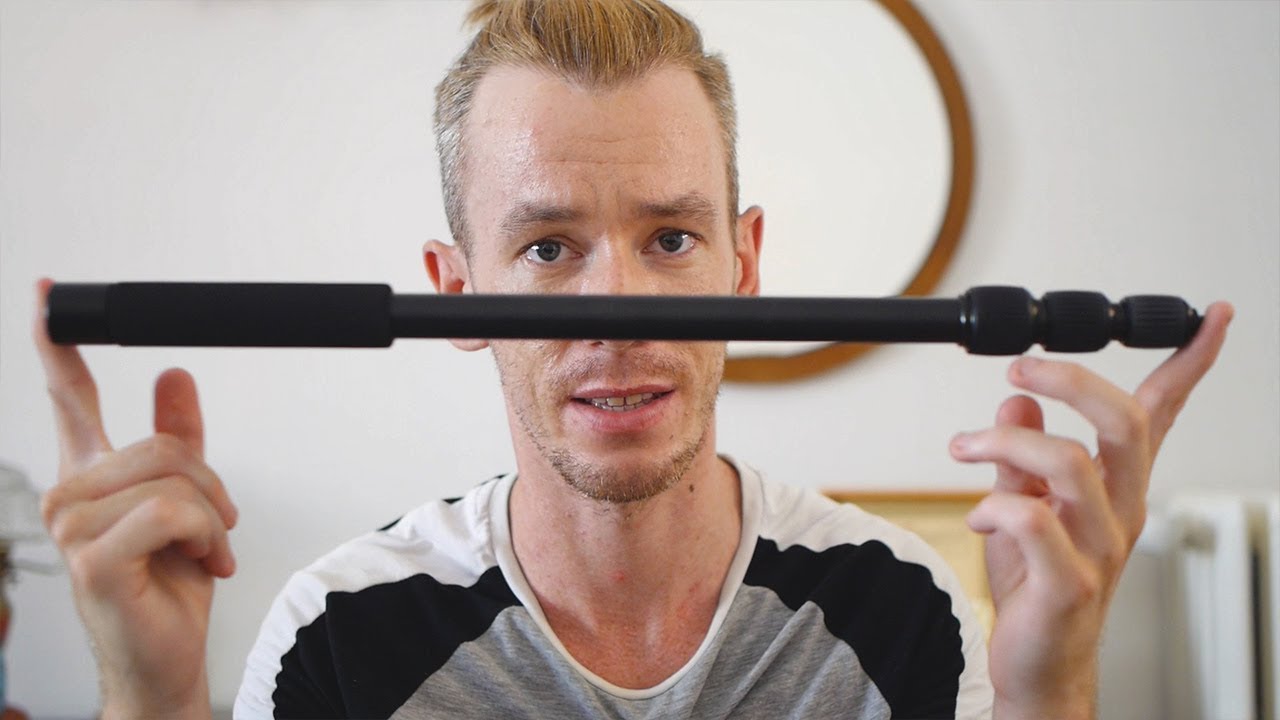
- Locking Mechanism: Evaluate the locking mechanism of the monopod’s sections. Twist locks are quick and easy to use, while flip locks provide a more secure hold. Choose the option that best aligns with your shooting style and preferences.
- Base: Some monopods feature fold-out tripod feet or a detachable base for added stability, especially when shooting in challenging conditions or using heavy gear. Assess whether these features would benefit your photographic pursuits.
- Budget: Set a realistic budget for your monopod purchase. While it’s important to invest in quality equipment, there are various options available at different price points to accommodate your financial constraints.
By carefully considering these aspects, you can make an informed decision when selecting a monopod that aligns with your specific shooting requirements and preferences. Remember, the right monopod can significantly enhance the quality and stability of your photographic and videographic endeavors.
Setting Up Your Monopod
Once you’ve chosen the ideal monopod for your photography or videography needs, the next step is to properly set it up to achieve optimal stability and support. Follow these steps to ensure that your monopod is securely positioned and ready for use:
- Extend the Monopod: Begin by extending the monopod to your desired height. Ensure that each section is securely locked in place to prevent any unexpected collapses during use. If your monopod features multiple leg sections, start with the thicker, lower sections for added stability.
- Attach the Camera: Once the monopod is fully extended, securely mount your camera to the monopod’s head using a compatible quick-release plate or mounting system. Double-check that the camera is firmly attached to prevent any accidental detachment during use.
- Stabilize the Base: Position the monopod’s base firmly on the ground and ensure that it is stable. If your monopod features a fold-out tripod base or detachable feet, deploy them to provide additional support and stability, especially when shooting on uneven terrain or in windy conditions.
- Adjust the Tension: Some monopods feature a tension control knob or lever near the monopod head. Adjust the tension to your preference, taking into account the weight of your camera and the level of resistance you require for smooth panning and tilting movements.
- Test Stability: Before fully engaging in your photography or videography session, test the stability of the monopod by gently applying downward pressure to the top of the monopod. Ensure that it remains steady and doesn’t wobble excessively, indicating that it can adequately support your equipment.
By following these steps, you can effectively set up your monopod for a wide range of photographic and videographic applications. Properly preparing your monopod for use is crucial for achieving steady and professional-looking results, whether you’re capturing still images or recording dynamic video footage.
Using the Monopod for Stability
One of the primary benefits of utilizing a monopod in photography and videography is the enhanced stability it provides, particularly in situations where handholding a camera may result in shaky or blurred images. To maximize the stability offered by a monopod, it’s essential to understand the proper techniques for using this versatile support tool:
- Body Positioning: Stand with your feet shoulder-width apart and position the monopod in front of you, holding it with one hand while operating the camera with the other. This stance provides a stable foundation and allows for smooth panning and tilting movements.
- Lean into the Monopod: Gently lean your body weight into the monopod while maintaining a relaxed posture. This technique helps counteract any potential swaying or movement, resulting in steadier shots, especially when using longer focal lengths or shooting in low-light conditions.
- Breath Control: Practice controlled breathing to minimize any inadvertent camera shake. Take a deep breath, exhale slowly, and then gently press the shutter release button during the natural pause in your breathing cycle to capture stable images with minimal motion blur.
- Utilize Image Stabilization: If your camera or lens is equipped with image stabilization technology, ensure that it is activated to further enhance the stability of your shots. This feature compensates for small movements and vibrations, resulting in sharper images and smoother video footage.
By employing these stability-enhancing techniques, you can harness the full potential of a monopod to achieve sharp, clear, and professional-looking images and videos. Whether you’re capturing fast-paced action or shooting in challenging lighting conditions, the stability provided by a monopod can significantly elevate the quality of your photographic and videographic output.
Adjusting the Height
Adapting the height of your monopod to suit various shooting scenarios is essential for achieving optimal composition and stability. Whether you’re capturing sweeping landscapes, intimate portraits, or dynamic action shots, knowing how to adjust the height of your monopod effectively can greatly enhance the quality of your photographic and videographic endeavors. Here are some key considerations for adjusting the height of your monopod:
- Flexible Height Options: Most monopods feature adjustable leg sections that allow for versatile height adjustments. Familiarize yourself with the locking mechanisms and extension capabilities of your monopod to seamlessly modify its height based on your specific shooting requirements.
- Low-Angle Shots: When photographing subjects or scenes from a low vantage point, collapse the monopod to its minimum height or partially extend it to achieve the desired composition. This technique is particularly useful for capturing unique perspectives and adding visual interest to your images.
- Elevated Perspectives: Extend the monopod to its maximum height to elevate your camera above obstacles or crowds, allowing you to capture expansive vistas or overhead views with ease. This adjustment is invaluable for achieving a commanding viewpoint and enhancing the depth and scale of your photographs.
- Quick Height Adjustments: Practice swiftly adjusting the height of your monopod to adapt to changing shooting conditions or subjects in motion. This agility enables you to seamlessly transition between different shooting angles and perspectives, ensuring that you can capture decisive moments with precision.
By mastering the art of adjusting the height of your monopod, you can effectively tailor your shooting approach to diverse photographic and videographic scenarios. Whether you’re exploring creative compositions or responding to dynamic subject matter, the ability to modify the height of your monopod empowers you to capture compelling and visually engaging content with ease.
Panning and Tilting with a Monopod
Mastering the art of panning and tilting with a monopod can significantly elevate the dynamism and visual impact of your photography and videography. These techniques allow you to smoothly track moving subjects, capture sweeping panoramic views, and create cinematic sequences with fluid motion. To effectively execute panning and tilting maneuvers with a monopod, consider the following guidance:
- Fluid Movement: Begin by establishing a firm grip on the monopod and gently initiate the panning or tilting motion with controlled and deliberate movements. Aim to maintain a consistent speed and fluidity throughout the maneuver to achieve seamless transitions in your footage or compositions.
- Stable Footing: Plant your feet firmly on the ground and pivot your body to follow the direction of the panning or tilting movement. This technique helps stabilize the monopod and ensures that your motions are smooth and controlled, resulting in professional-looking results.
- Subject Tracking: When panning to track a moving subject, anticipate the subject’s trajectory and adjust the speed of your panning motion accordingly. By synchronizing your movements with the subject’s path, you can maintain focus and capture compelling footage with precision.
- Composition Control: Use the monopod’s panning and tilting capabilities to compose visually engaging shots and explore different perspectives. Experiment with diagonal tilts, horizontal pans, and vertical movements to infuse your imagery with creativity and depth.
By honing your panning and tilting skills with a monopod, you can expand your creative horizons and infuse your photographic and videographic work with captivating movement and visual intrigue. Whether you’re documenting fast-paced events, exploring scenic landscapes, or crafting narrative sequences, the versatility of panning and tilting techniques empowers you to convey compelling stories and evoke immersive experiences through your visual content.
Using a Monopod for Video
Employing a monopod for video recording can greatly enhance the stability, versatility, and visual impact of your footage. Whether you’re capturing cinematic sequences, vlogs, or dynamic action shots, a monopod serves as a valuable tool for achieving professional-looking video content. Here are key considerations for effectively utilizing a monopod in your videography endeavors:
- Steady Footage: When recording video with a monopod, focus on maintaining a steady grip and fluid movements to minimize camera shake and ensure smooth, stable footage. The monopod’s single-point support provides greater stability compared to handholding, resulting in professional-quality video output.
- Dynamic Movement: Explore the versatility of a monopod by incorporating dynamic panning, tilting, and tracking shots into your video compositions. These movements add visual interest, convey a sense of motion, and elevate the cinematic appeal of your footage, enhancing storytelling and viewer engagement.
- On-the-Go Filming: The portability and quick setup of a monopod make it an ideal companion for on-location video shoots. Whether you’re navigating crowded spaces, capturing events, or conducting interviews, the monopod offers agile support and facilitates seamless transitions between different shooting angles and perspectives.
- Vlog and Self-Shooting: For vloggers and solo content creators, a monopod provides a convenient solution for capturing self-directed video content. Its compact design and adjustable height enable effortless framing and composition, allowing you to maintain a professional presentation while filming solo segments or on-the-go updates.
By leveraging the capabilities of a monopod in your video production workflow, you can elevate the production value of your content and unleash your creative vision with confidence. Whether you’re striving to achieve polished visual storytelling, dynamic cinematic sequences, or engaging vlogs, the versatility and stability of a monopod empower you to craft compelling and immersive video experiences for your audience.
Tips for Using a Monopod
Maximizing the effectiveness of a monopod in your photography and videography endeavors involves mastering essential techniques and adopting practical strategies to optimize its performance. Consider the following tips to harness the full potential of your monopod and elevate the quality of your visual content:
- Practice Stability Techniques: Experiment with different body positioning, leaning angles, and breathing control to achieve maximum stability when using a monopod. These techniques are crucial for minimizing camera shake and capturing sharp, clear images and videos.
- Utilize a Ball Head for Flexibility: Pairing your monopod with a ball head or fluid head allows for seamless panning, tilting, and multidirectional adjustments, enhancing the versatility of your monopod setup for diverse shooting scenarios.
- Experiment with Height Adjustments: Explore the impact of varying the monopod’s height on your compositions and shooting perspectives. Adapting the height to suit different subjects and environments can yield compelling visual results and creative opportunities.
- Invest in a Monopod with a Fold-Out Base: Consider acquiring a monopod with a fold-out tripod base or detachable feet to enhance stability, especially when shooting in challenging conditions or using heavy camera equipment.
- Engage Image Stabilization Features: If your camera or lens offers image stabilization, ensure that this feature is activated to complement the stability provided by the monopod and further enhance the sharpness of your images and videos.
- Embrace Fluid Motion Techniques: Mastering smooth panning, tilting, and tracking movements with your monopod can add cinematic flair to your video recordings and elevate the visual dynamism of your footage.
- Regularly Inspect Locking Mechanisms: Routinely check the integrity of the monopod’s locking mechanisms to prevent potential slippage or instability during use, ensuring the safety of your camera equipment.
- Practice Quick Setup and Adjustment: Familiarize yourself with efficiently setting up and adjusting your monopod to swiftly adapt to changing shooting conditions and seize spontaneous photographic opportunities.
By incorporating these tips into your workflow and honing your proficiency with a monopod, you can elevate the quality, stability, and creative potential of your photographic and videographic output. Embracing these strategies empowers you to capture compelling visual content with precision and artistry, ensuring that your monopod becomes an indispensable tool in your pursuit of captivating imagery and engaging storytelling.