
Getting Started with the Sony PSP
The Sony PSP (PlayStation Portable) is a popular handheld gaming console that allows you to play games, watch movies, listen to music, and more. If you’ve just purchased a PSP or are thinking about getting one, this guide will help you get started and make the most out of your gaming experience.
Before you dive into playing games on your PSP, there are a few things you need to do to set it up properly. First, ensure that the battery is charged. Connect the AC adapter to the PSP and plug it into a power outlet. The PSP uses a lithium-ion battery, which provides hours of gameplay on a full charge. It’s always a good idea to fully charge the battery before using the PSP for the first time.
Once your battery is charged, turn on the PSP by sliding the power switch on the bottom right-hand side of the console. You’ll be greeted with the Sony logo followed by the PSP startup screen. It’s important to note that the PSP has different versions or models, such as the PSP-1000, PSP-2000, PSP-3000, and later versions like the PSP Slim and PSP Go. Each model has its own unique features and specifications, so make sure you know which model you have.
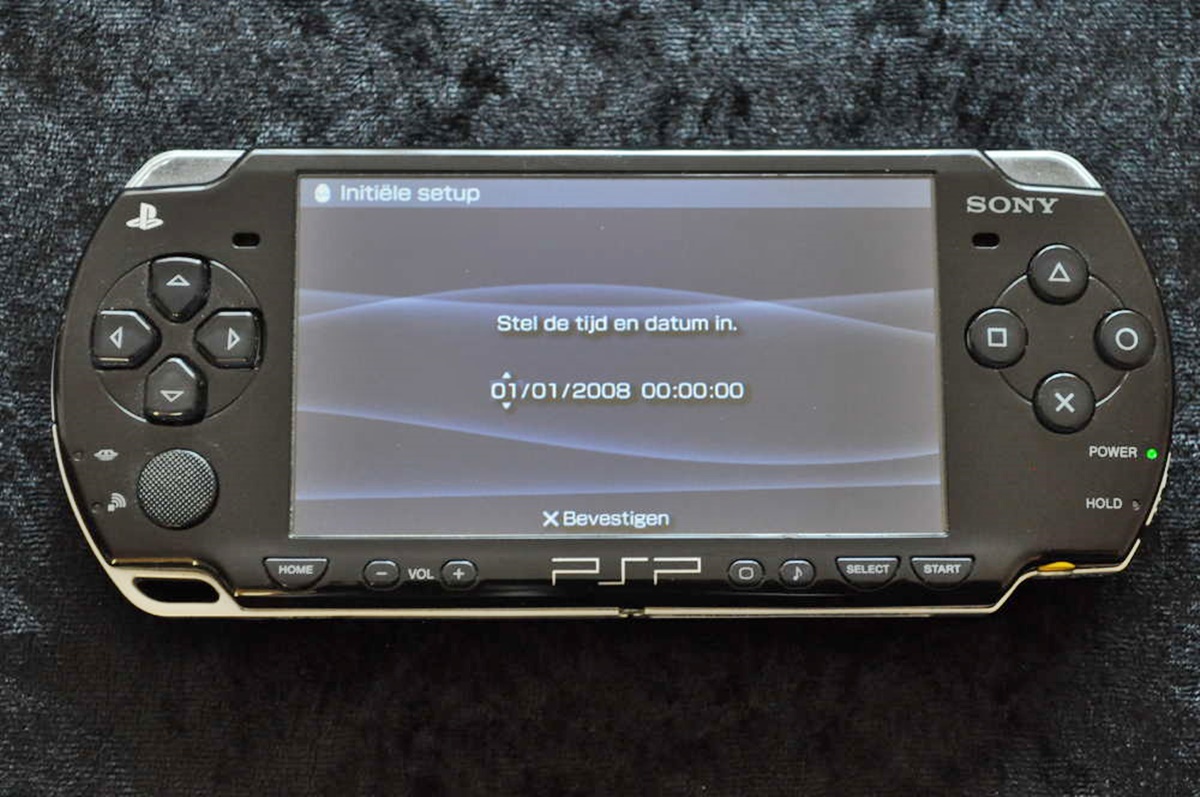
After you’ve powered on your PSP, you’ll be prompted to set the system language, date, and time. Use the “X” button to confirm your selections and the arrow keys to navigate through the menus. Once you’ve completed the initial setup, you can start exploring the PSP menu and its various features.
The PSP menu is organized into different categories, such as Games, Music, Video, Settings, and System Storage. Use the analog stick or the arrow keys to navigate through the menu options and press the “X” button to make a selection. Familiarize yourself with the menu layout to easily access the various functions the PSP offers.
To get the best gaming experience on your PSP, it’s essential to understand the controls. The PSP features a directional pad on the left side, similar to a console controller, which you can use to move your character in games. On the right side, you’ll find the action buttons, including the familiar “X,” “O,” “Square,” and “Triangle” buttons.
Additionally, the PSP has shoulder buttons on the top, labeled as “L” and “R,” as well as the “Start” and “Select” buttons. Familiarize yourself with the controls, as different games may utilize them in different ways.
Now that you’re familiar with the basics of getting started with the Sony PSP, you can begin exploring the vast library of games, multimedia functions, and online features it offers. Get ready to experience immersive gaming on the go!
Understanding the Features of the PSP Console
The Sony PSP (PlayStation Portable) is not just a gaming console; it’s a versatile device with numerous features that enhance your entertainment experience. Let’s take a closer look at some of the key features that make the PSP a must-have device for gaming enthusiasts.
One of the standout features of the PSP is its stunning display. The console boasts a vibrant, high-resolution screen that brings games, movies, and photos to life. Whether you’re playing action-packed games or watching your favorite movies, the PSP’s display ensures a visually immersive experience.
In addition to its impressive display, the PSP also offers a rich audio experience. The console features built-in stereo speakers, which deliver clear and immersive sound quality. You can also connect headphones to the PSP to enjoy your games and media with enhanced audio fidelity.
The PSP’s library of games is another key feature that sets it apart. From action and adventure to sports and puzzle games, the PSP offers a wide range of titles to cater to different gaming preferences. Whether you’re a casual gamer or a hardcore enthusiast, you’ll find plenty of games to keep you entertained for hours on end.
Another notable feature of the PSP is its multimedia capabilities. The console supports various media formats, allowing you to enjoy your favorite music, videos, and photos on the go. You can transfer media files to the PSP through a USB connection or by using a memory stick. With the PSP, you can carry your media library with you wherever you go.
Furthermore, the PSP offers internet connectivity options that enable you to access online features and content. By connecting to a Wi-Fi network, you can browse the internet, download game updates, and even play multiplayer games with friends. The online features add an extra layer of excitement and social interaction to your gaming experience.
Portability is another key feature of the PSP. Its compact and lightweight design makes it easy to carry the console in your pocket or bag. Whether you’re on a long trip or waiting for a friend, the PSP allows you to enjoy gaming and multimedia entertainment wherever you are.
Lastly, the PSP offers customizable options to enhance your personal experience. You can customize the interface with different themes and wallpapers, allowing you to personalize the look and feel of your PSP. Additionally, you can expand the console’s storage capacity using memory sticks, giving you ample space to store your games, music, and videos.
Exploring the Different PSP Models
The Sony PSP (PlayStation Portable) has evolved over the years, with several different models released to cater to the varying needs of gamers. Each PSP model comes with its own set of features and improvements. Let’s explore the different PSP models and see how they differ from one another.
The original PSP model, known as the PSP-1000, was the first to hit the market. It came with a 4.3-inch LCD screen, a single analog stick, stereo speakers, and a UMD (Universal Media Disc) drive for physical game discs. While the PSP-1000 paved the way for handheld gaming, subsequent models brought notable improvements.
The PSP-2000, also known as the PSP Slim, was the second iteration of the PSP. It featured a slimmer and lighter design, making it more portable than its predecessor. The PSP Slim also introduced several new features, including video output capabilities, allowing users to connect the console to a TV for a larger display. It also included increased memory and improved battery life.
The third model in the PSP lineup was the PSP-3000. This version introduced an enhanced LCD screen with improved color reproduction and contrast. The PSP-3000 also featured an anti-reflective coating, reducing screen glare and providing better visibility in bright environments. With these enhancements, the PSP-3000 offered an even more visually stunning gaming experience.
Following the PSP-3000, Sony introduced the PSP Go, a radical departure from previous models. The PSP Go featured a slide-out design with a smaller 3.8-inch screen and no UMD drive. Instead, it relied on digital downloads through the PlayStation Store. The PSP Go was designed to be more compact and portable, catering to gamers who preferred digital content over physical media.
It’s worth mentioning that all PSP models are backward compatible, meaning you can play games from previous versions on the newer models. This allows you to access a vast library of PSP games, regardless of the model you choose.
Each PSP model offers its own unique blend of features and improvements, catering to different preferences and budgets. Whether you prioritize screen quality, portability, or digital downloads, there’s a PSP model that suits your needs. Take the time to compare the specifications and features of each model to determine which one best aligns with your gaming preferences.
How to Set Up Your PSP Console
Setting up your Sony PSP (PlayStation Portable) console is a straightforward process that allows you to start gaming and enjoying multimedia content in no time. Here’s a step-by-step guide on how to set up your PSP and get it ready for action.
1. Charge the battery: Before you begin, make sure your PSP battery is fully charged. Connect the provided AC adapter to the PSP and plug it into a power outlet. Let the battery charge until the indicator light shows that it’s fully charged. This ensures that you have optimal battery life for your gaming sessions.
2. Power on the PSP: Once the battery is charged, locate the power switch on the bottom right-hand side of the console. Slide the power switch upwards to turn on the PSP. You will see the Sony logo followed by the PSP startup screen.
3. Set up language, date, and time: After powering on your PSP, you will be prompted to set the system language, date, and time. Use the directional pad or arrow keys to navigate through the options, and press the “X” button to confirm your selections. This step is important as it ensures that your PSP is set up according to your preferences.
4. Create a PlayStation Network account (optional): If you want to access online features, multiplayer gaming, and downloadable content, consider creating a PlayStation Network (PSN) account. Select the “Sign in to PlayStation Network” option in the PSP menu, and follow the on-screen prompts to create an account or sign in if you already have one.
5. Update PSP firmware (optional): It’s recommended to keep your PSP’s firmware up to date to ensure compatibility with the latest games and features. Connect your PSP to a Wi-Fi network by going to “Settings” > “Network Settings” > “Infrastructure mode.” Select your network, enter the credentials if required, and connect. Go to “Settings” > “System Update” to check for any available firmware updates. Follow the on-screen instructions to download and install the update.
6. Insert a UMD game or access the PlayStation Store: If you have a UMD game, insert it into the UMD drive on the back of the PSP. The game will load automatically, and you can start playing. Alternatively, you can access the PlayStation Store to download and install digital games directly to your PSP. Go to “PlayStation Store” in the PSP menu, browse the available games, and download them to your console.
By following these steps, you can easily set up your PSP console and start enjoying your favorite games, music, videos, and more. Don’t forget to explore the various features and customization options available to enhance your gaming experience further.
Getting to Know the PSP Menu and Navigation
The PSP (PlayStation Portable) menu is your gateway to all the features and functions that the console has to offer. To make the most of your gaming experience, it’s important to familiarize yourself with the PSP menu and its navigation. Let’s dive into the details.
When you power on your PSP, you’ll be greeted with the main menu. The menu is organized into several categories, including Games, Music, Video, Photo, Settings, System Storage, and more. Each category contains specific functions and options related to its respective content.
Navigating through the menu is easy. You can use the analog stick or the directional pad to move the cursor, while the “X” button is used for selection. Pressing the “O” button acts as a back or cancel function. The “Triangle” button usually opens additional options or context-specific menus.
Let’s explore some of the key categories in the PSP menu:
- Games: This category is where you’ll find all your PSP games. You can select a game from your library and start playing. Make sure you have a UMD game inserted or have downloaded digital games from the PlayStation Store.
- Music: Access your music library in this category. You can listen to your favorite tracks, create playlists, and even customize the background music for the PSP menu.
- Video: The video category allows you to watch videos on your PSP. You can play video files that are compatible with the console, including MP4, AVI, and MPEG formats. Transfer your video files to the PSP via USB or download them from the PlayStation Store.
- Photo: In this category, you can view and organize your photos on the PSP. Transfer image files from your computer to the PSP’s memory stick or use the built-in camera (available on certain PSP models) to capture photos directly.
- Settings: The settings category is where you can customize various aspects of your PSP. Adjust system settings, Wi-Fi connections, screen brightness, sound settings, and more to suit your preferences.
- System Storage: This category displays the available storage space on your PSP’s memory stick. You can manage your files, including game saves, music, videos, and photos, to free up space or delete unwanted items.
Exploring the PSP menu and its navigation is a crucial step to fully utilize the features and functions of the console. Take some time to familiarize yourself with the layout and options available in each category. This will allow you to effortlessly access and enjoy your games, media files, and settings on the PSP.
Mastering the PSP Controls
Understanding and mastering the controls of your PSP (PlayStation Portable) console is essential for an optimal gaming experience. The PSP features a set of buttons and controls that allow you to navigate menus, control gameplay, and interact with the console’s various functions. Let’s take a closer look at the PSP controls and how to utilize them effectively.
The directional pad (D-pad) is located on the left side of the console. It consists of four buttons arranged in a cross shape: up, down, left, and right. The D-pad is primarily used for menu navigation, character movement in games, and selecting options. Familiarize yourself with the D-pad’s responsiveness and sensitivity to provide smooth and accurate input.
On the right side of the PSP, you’ll find the action buttons – the familiar “X,” “O,” “Square,” and “Triangle” buttons. These buttons are used extensively in gaming to perform various actions, such as jumping, attacking, or interacting with objects. Each game may assign different functions to these buttons, so be sure to pay attention to on-screen prompts and controls explanations provided within the game.
Located on the very top of the PSP console are the shoulder buttons: “L” and “R.” These buttons provide additional input options in games. Many games utilize the shoulder buttons for actions such as aiming, shooting, or changing camera perspectives. The shoulder buttons add versatility and control to your gameplay experience.
Just below the screen on the front of the PSP, you’ll find the “Start” and “Select” buttons. The “Start” button is usually used to initiate or pause gameplay, while the “Select” button is often used for accessing menus or activating specific game functions. These buttons provide quick access to essential gameplay options and settings.
The PSP also features an analog stick, known as the nub, located on the left side of the console, above the D-pad. The analog stick allows for more precise character movement in games, providing a similar experience to using an analog stick on a traditional console controller. Some games may require specific input from the analog stick, so it’s crucial to get comfortable using it for precision and control.
Additionally, the PSP has volume buttons on the right side of the console, enabling you to adjust the volume without navigating through menus. It’s convenient for quickly adjusting audio levels during gameplay or media playback.
Mastering the controls of your PSP comes with practice and familiarity. Experiment with different games and genres to get accustomed to the button layout, responsiveness, and input requirements. Take advantage of in-game tutorials and controls explanations to fully understand how to utilize each button effectively.
With time and experience, you’ll become adept at maneuvering through menus, executing precise movements in games, and effortlessly accessing the various functions and features of your PSP console.
Charging and Battery Life of the PSP
The Sony PSP (PlayStation Portable) is powered by a rechargeable lithium-ion battery, which provides hours of gaming on a single charge. Understanding how to effectively charge your PSP and maximize its battery life is crucial for uninterrupted gaming sessions. Let’s delve into the details of charging and managing the battery life of your PSP.
To charge your PSP, connect the provided AC adapter to the console’s charging port. Then, plug the adapter into a power outlet. The PSP can be charged while the power is on or off. When you connect the AC adapter, a charging indicator light will turn on, indicating that the battery is being charged. Once the battery is fully charged, the indicator light will change color or turn off, depending on the PSP model.
It’s important to note that the initial charge for a brand-new PSP may take a few hours. It’s recommended to charge the battery fully before using the device for the first time. Subsequent charges may not take as long, depending on the remaining battery level.
To ensure the longevity of your PSP battery, follow these tips:
- Full discharges: It’s not necessary to fully discharge the PSP battery before charging it again. In fact, partial discharges and regular recharging can help maintain the battery’s health.
- Charging duration: It’s best to charge the PSP until the battery is full, then disconnect the AC adapter. Overcharging the battery may lead to decreased battery efficiency over time.
- Battery-saving features: The PSP offers various power-saving features that can extend battery life. Adjusting the screen brightness, setting an idle timer, and turning off wireless functions when not in use can help conserve power.
- Power-save mode: When the PSP reaches a low battery level, it may automatically enter power-save mode. In this mode, the console dims the screen and reduces the processor speed to conserve battery power. You can exit power-save mode by charging the PSP or connecting it to a power source.
- External chargers: If you require extended gaming sessions or are traveling without access to a power outlet, consider investing in an external battery charger or a portable power bank designed for the PSP. These accessories can provide additional charging options on the go.
Keep in mind that battery life can vary depending on various factors, including game intensity, screen brightness, sound volume, and wireless usage. Graphics-intensive games and activities such as multimedia playback may consume more power and reduce battery life. Monitoring and adjusting these factors accordingly can help you optimize battery usage on your PSP.
By following these guidelines, you can effectively charge your PSP and prolong its battery life, ensuring that you can enjoy uninterrupted gaming sessions and entertainment on the go.
Installing and Playing PSP Games
The Sony PSP (PlayStation Portable) offers a vast library of games, allowing you to immerse yourself in exciting gaming experiences wherever you go. Installing and playing PSP games is a straightforward process that allows you to enjoy your favorite titles on the console. Let’s explore how to install and play PSP games on your device.
There are two main ways to play PSP games: using Universal Media Discs (UMDs) or downloading digital copies from the PlayStation Store. UMDs are physical discs specifically designed for the PSP and are commonly used to play games. The PSP’s UMD drive is located on the back of the console. To install a UMD game, simply insert the disc into the UMD drive and wait for the game to load. You can then start playing the game directly from the UMD.
Alternatively, you can download and play digital PSP games from the PlayStation Store. The PlayStation Store can be accessed directly from the PSP menu. Make sure your PSP is connected to the internet via Wi-Fi, and select the PlayStation Store option from the PSP menu. Browse the available games, choose the one you want, and download it directly to your PSP. Once the download is complete, the game will be installed on your console, and you can start playing.
Before downloading digital games, ensure that you have enough storage space on your PSP. The PSP supports using memory stick storage, allowing you to expand the available space. You can manage your storage and transfer files between your PSP and a computer by connecting the console via USB cable.
Once you have installed a game, you can access it from the Games category in the PSP menu. Select the game with the directional pad or analog stick and press the “X” button to start playing. Follow any on-screen instructions or prompts specific to the game to navigate menus, control characters, and enjoy the gameplay experience.
It’s worth mentioning that the PSP is backward compatible, meaning that you can play PSP games from previous models on newer models. Additionally, some digital PSP games may be playable on other PlayStation devices, such as the PlayStation 3 or PlayStation Vita, depending on compatibility.
When you’re finished playing a game, you can exit back to the PSP menu by pressing the PSP “Home” button located below the screen. From the menu, you can switch to another game, access different functions, or power off the console.
Whether you’re playing games from UMDs or downloading digital copies, the PSP provides a seamless gaming experience. Explore the diverse library of PSP games, ranging from action and adventure to sports and puzzle genres, and enjoy gaming on the go.
Tips and Tricks for Optimal Gaming Experience on PSP
The Sony PSP (PlayStation Portable) offers a wide range of games and features that can enhance your gaming experience. To make the most of your time with the PSP, here are some tips and tricks to optimize your gameplay and maximize enjoyment.
1. Keep your PSP updated: Regularly update your PSP firmware to ensure compatibility with the latest games and features. Check for updates in the “Settings” menu and follow the prompts to download and install updates when available.
2. Adjust screen brightness: Optimize the screen brightness to suit your preferences and reduce eye strain during gaming sessions. You can adjust the brightness in the “Settings” menu under “Display Settings.”
3. Customize controls: Some games allow you to customize control schemes to your liking. Take advantage of this feature to optimize controls for your preferred playstyle and comfort.
4. Utilize sleep mode: If you need to take a break during gameplay, utilize the sleep mode feature to conserve battery life. Simply press the PSP “Home” button and select the “Sleep Mode” option. This allows you to quickly resume your game when you’re ready.
5. Play games with headphones: For an immersive audio experience, consider using headphones while playing games on your PSP. This allows you to enjoy game sound effects and music with enhanced clarity and depth.
6. Explore demo versions: The PlayStation Store offers demo versions of many PSP games. Take advantage of this to try out various games before making a purchase. It can help you make informed decisions and discover new gaming experiences.
7. Optimize battery life: To extend battery life during gaming sessions, adjust settings such as screen brightness, volume, and wireless connections. Additionally, closing unused applications and disabling unnecessary background processes can help conserve battery power.
8. Protect your PSP: Invest in a protective case or screen protector to safeguard your PSP from scratches, dirt, and damage. This ensures that your console remains in optimal condition for long-term use.
9. Explore multiplayer options: Some PSP games offer multiplayer features, allowing you to play with friends or compete against other players. Take advantage of the PSP’s Wi-Fi capabilities to enjoy multiplayer gaming experiences, either locally or online.
10. Clean your PSP: Regularly clean your PSP to maintain its performance and longevity. Use a soft cloth to wipe the screen and remove dust or smudges. Avoid using harsh cleaners or abrasive materials that may damage the console.
By following these tips and tricks, you can enhance your gaming experience on the PSP and unlock even more enjoyment from your favorite games. Whether it’s adjusting settings, exploring multiplayer options, or optimizing battery life, these techniques can take your PSP gaming to the next level.
Exploring Multimedia Functions on the PSP
The Sony PSP (PlayStation Portable) is not just a gaming console; it also offers a range of multimedia functions that allow you to enjoy various forms of entertainment. From music and videos to photos and internet browsing, let’s explore the multimedia capabilities of the PSP in more detail.
Let’s start with music. The PSP supports various audio formats, including MP3, AAC, and WMA. You can transfer your favorite music files from your computer to the PSP using a USB connection or by using a memory stick. Navigate to the “Music” category in the PSP menu to access your music library and create playlists. By connecting headphones or external speakers to the PSP, you can enjoy your music with high-quality sound wherever you go.
Moving on to videos, the PSP allows you to watch your favorite movies, TV shows, and video clips on its brilliant screen. It supports video formats such as MP4, AVI, and MPEG. Similar to music files, you can transfer video files to the PSP via USB or download them from the PlayStation Store. Navigate to the “Video” category in the PSP menu to access your video library and enjoy your favorite content on the go.
The PSP also offers a photo viewer function, allowing you to view and organize your photos. You can transfer image files from your computer to the PSP, or use the built-in camera (available on certain PSP models) to capture photos directly. Navigate to the “Photo” category in the PSP menu to access your photo library, create slideshows, and even set your favorite images as wallpapers.
For those who enjoy internet browsing, the PSP provides browsing capabilities through its built-in internet browser. Connect to a Wi-Fi network and navigate to the “Internet Browser” category in the PSP menu. You can access websites, view web pages, and even watch online videos using popular streaming platforms.
Additionally, the PSP supports RSS feeds, which allow you to stay updated with the latest news, blog posts, and other web content. You can subscribe to RSS feeds and receive updates directly on your PSP, keeping you informed while on the go.
By exploring the multimedia functions of the PSP, you can transform it into a versatile entertainment device. Whether you’re listening to music, watching videos, browsing the internet, or viewing your photo collection, the PSP ensures that you’re entertained and connected at all times.
Connecting to Wi-Fi and Online Features
The Sony PSP (PlayStation Portable) offers online features that allow you to connect with the gaming community, access additional content, and enhance your gaming experience. To take advantage of these online features, you need to connect your PSP to a Wi-Fi network. Let’s explore how to connect your PSP to Wi-Fi and what online features you can access.
To connect your PSP to a Wi-Fi network, begin by navigating to the “Settings” category in the PSP menu. Then, select “Network Settings” followed by “Infrastructure Mode.” You will be prompted to choose a connection that you want to set up or modify.
If you have an available network, select it and enter the network password if required. Once connected, your PSP will be able to take advantage of various online features.
One of the primary online features of the PSP is accessing the PlayStation Store. The PlayStation Store allows you to download additional games, demos, trailers, themes, and other multimedia content directly to your PSP. Explore the vast library of games, digital comics, and exclusive content to expand your gaming experience.
In addition to the PlayStation Store, you can also access online multiplayer features on supported games. Through Wi-Fi connectivity, you can connect and play with other PSP owners locally or even compete against players worldwide. Engage in challenging multiplayer battles, join online tournaments, or team up with friends for cooperative gameplay.
Online connectivity also enables you to access system updates and patches for your PSP. Keeping your PSP updated ensures compatibility with the latest games, improves system stability, and may introduce new features and enhancements.
Browsing the internet is another online feature available on the PSP. Once connected to a Wi-Fi network, navigate to the “Internet Browser” category in the PSP menu. From there, you can access websites, search the web, and even watch online videos. While the browsing experience on the PSP may differ from using a computer or smartphone, it enables you to stay connected and access online content on the go.
When using online features, it’s crucial to ensure that your PSP is connected to a secure and trusted Wi-Fi network. Be mindful of protecting your personal information and only download content from reputable sources.
By connecting your PSP to Wi-Fi and accessing online features, you can unlock a whole new level of gaming engagement and expand the capabilities of your console. Explore the online community, discover new games, and connect with fellow gamers to create memorable gaming experiences.
Customizing Your PSP with Themes and Wallpapers
The Sony PSP (PlayStation Portable) allows you to personalize and customize the appearance of your console with themes and wallpapers. Adding a personal touch to your PSP not only makes it visually appealing but also enhances your overall gaming experience. Let’s explore how you can customize your PSP with themes and wallpapers.
Themes are pre-designed layouts that change the overall look and feel of the PSP menu. They include customized icons, background images, and sometimes even customizable sounds. To apply a theme to your PSP, navigate to the “Settings” category in the PSP menu and select “Theme Settings.” From there, you can browse the available themes and select the one you want to apply. Themes often revamp the entire menu, giving it a fresh and unique appearance.
In addition to themes, you can also customize your PSP with wallpapers. Wallpapers are images that you can select as the background of your PSP menu. You can use personal photos, downloaded images, or even screenshots from your favorite games as wallpapers. To set a wallpaper on your PSP, navigate to the “Photo” category in the PSP menu and select the image you want to use as a wallpaper. Once selected, choose the option to set the image as a wallpaper, and it will automatically be applied to your PSP menu.
To further customize the look of your PSP, you can create custom themes and wallpapers. Some online communities and forums offer downloadable themes and wallpapers created by enthusiasts. You can download and transfer these files to your PSP via USB or by using a memory stick.
By customizing your PSP with themes and wallpapers, you can create a unique and personalized gaming experience. Whether you prefer sleek and minimalist designs, vibrant and colorful themes, or wallpapers featuring your favorite game characters, there are endless possibilities to explore. Switching themes and wallpapers from time to time can breathe new life into your PSP and keep the visual appeal fresh.
Experiment with different themes and wallpapers to find the ones that truly reflect your style and preferences. Immerse yourself in a visually captivating PSP menu that enhances your gaming journey and makes it even more enjoyable.
Remember, the process of customizing your PSP with themes and wallpapers is reversible, allowing you to change them as often as you like. So go ahead and unleash your creativity to create a PSP console that truly feels like your own.
Understanding the Memory Stick and Expanding Storage
The Sony PSP (PlayStation Portable) uses a memory stick as its primary storage medium. The memory stick allows you to store games, multimedia files, and game saves, providing you with ample space to enjoy your favorite content on the go. Let’s explore the memory stick and how you can expand the storage capacity of your PSP.
The PSP is compatible with various types of memory sticks, including Memory Stick PRO Duo and Memory Stick Micro (M2). The memory stick slot is located on the left side of the console. To insert a memory stick, open the slot cover and insert the memory stick with the gold contacts facing down. Push the memory stick gently until it clicks into place. To remove the memory stick, push it in once to release it and then pull it out carefully.
The available storage capacity of the memory stick determines how much content you can store on your PSP. Memory sticks come in different sizes, ranging from a few megabytes to several gigabytes. Larger capacity memory sticks allow you to store more games, music, videos, photos, and other content on your PSP.
If you find that the storage capacity of your current memory stick is insufficient, you can easily expand it by purchasing a memory stick with a larger capacity. When shopping for a new memory stick, ensure that it is compatible with the PSP and matches the capacity requirements you desire.
To transfer files between your computer and the memory stick, you can connect your PSP to the computer via USB. After connecting, select “USB Connection” on the PSP to enable the USB mode. Your PSP will appear as a removable drive on your computer, allowing you to drag and drop files to and from the memory stick. Remember to safely eject the PSP from your computer before disconnecting the USB cable.
In addition to the memory stick, it’s important to note that the PSP also has internal storage referred to as “System Storage.” This internal storage is primarily used for system data, firmware updates, and game saves. The system storage capacity varies depending on the PSP model, but it is generally limited in comparison to the expandable memory provided by the memory stick.
By understanding the memory stick and expanding the storage capacity of your PSP, you can ensure that you have sufficient space to store your favorite games, multimedia files, and game saves. With ample storage, you can enjoy a diverse library of content on your PSP and keep your gaming experience uninterrupted.
Transferring and Managing Media Files on Your PSP
The Sony PSP (PlayStation Portable) allows you to enjoy various forms of media, including music, videos, and photos. To make the most of your multimedia experience, it’s important to understand how to transfer and manage media files on your PSP. Let’s explore the process involved in transferring and managing media files.
Transferring Music and Videos:
To transfer music and videos from your computer to your PSP, you’ll need to connect the PSP to your computer using a USB cable. Once connected, select “USB Connection” on the PSP to enable USB mode. Your PSP will appear as a removable drive on your computer.
On your computer, locate the music or video files you want to transfer to the PSP. Simply drag and drop the files from your computer onto the appropriate folders on the PSP. For music files, place them in the “Music” folder, and for video files, place them in the “Video” folder.
After transferring the files, safely eject the PSP from your computer, and disconnect the USB cable. The music and videos will now be accessible on your PSP, ready to be enjoyed.
Transferring Photos:
To transfer photos to your PSP, you can follow a similar process as transferring music and videos. Connect your PSP to your computer using a USB cable and enable USB mode on the PSP. The PSP will appear as a removable drive on your computer.
Locate the photos you want to transfer from your computer and copy them to the “Photo” folder on your PSP. Alternatively, you can create new folders within the “Photo” folder to organize your photos.
After transferring the photos, safely eject the PSP from your computer, and disconnect the USB cable. You can now view and manage your photos on the PSP.
Managing Media Files:
On your PSP, you can access your music, videos, and photos through the respective categories in the PSP menu. Use the directional pad or analog stick to navigate to the desired category, such as “Music,” “Video,” or “Photo.” From there, you can browse and play your media files.
Within each category, you can create playlists for music, create folders to organize videos, and even create slideshows for your photos. These features allow you to manage and customize your media library on the PSP.
Additionally, if you need to free up space or remove unwanted media files, you can navigate to the “System Storage” category in the PSP menu. From there, you can manage and delete files from the internal storage, such as game saves or system data.
By understanding how to transfer and manage media files on your PSP, you can curate your own multimedia library and enjoy a seamless and personalized entertainment experience on the go.
Exploring Homebrew and Emulation on PSP
The Sony PSP (PlayStation Portable) allows you to go beyond the official software and explore a world of homebrew applications and emulation. Homebrew refers to software developed by independent programmers and enthusiasts for use on the PSP, while emulation allows you to play games from older consoles on your PSP. Let’s delve into the exciting world of homebrew and emulation on the PSP.
Homebrew Applications:
Homebrew applications are software programs developed by the PSP community that can be installed and run on a modified PSP. These applications offer a wide range of utilities, tools, emulators, multimedia players, and even games that are not available on the official PSP software. Homebrew applications allow you to customize your PSP experience and explore unique functionalities.
To access homebrew applications, you’ll need to install custom firmware on your PSP. Custom firmware overrides the official PSP firmware, allowing you to run homebrew applications and unlock additional features. It’s important to note that installing custom firmware may void your warranty and carries its own risks, so it’s recommended to thoroughly research and understand the process before proceeding.
Emulation:
Emulation on the PSP allows you to enjoy games from older consoles on your PSP. Emulators are software programs that mimic the hardware of different gaming systems, allowing you to play games designed for those systems on modern devices like the PSP. Emulation opens up a world of nostalgia, enabling you to experience classic games from consoles like the NES, SNES, Sega Genesis, and more.
To use emulators, you’ll need to download and install specific emulator software on your PSP. Additionally, you’ll need the game ROMs, which are digital copies of the games you want to play. It’s essential to ensure that you own the original games or have obtained the ROMs legally to comply with copyright laws.
It’s worth noting that the performance of emulators on the PSP can vary depending on the system being emulated and the PSP model you have. Some emulators require more processing power and memory, so compatibility and performance may differ across different games and consoles.
While exploring homebrew and emulation on the PSP can be exciting, it’s crucial to exercise caution and only use legitimate software and ROMs. Downloading and using unauthorized or pirated content is illegal and can have consequences.
By delving into the world of homebrew and emulation, you can expand the capabilities of your PSP and enjoy a wider array of applications and games. However, it’s important to do thorough research, understand the risks involved, and proceed responsibly to ensure a safe and enjoyable experience.
Troubleshooting Common Issues with PSP
While the Sony PSP (PlayStation Portable) is a reliable gaming console, you may encounter common issues from time to time. Fortunately, many of these issues can be resolved with simple troubleshooting steps. Let’s explore some common problems that PSP owners may face and how to troubleshoot them.
1. Charging and power issues: If your PSP is not charging or powering on, ensure that the battery is properly inserted and that the AC adapter is connected securely. Try using a different power outlet or USB port to rule out any issues with the power source. If the issue persists, try resetting the PSP by holding the power switch up for at least ten seconds.
2. Display issues: If you’re experiencing a blank screen or a distorted display, start by checking the brightness settings. Adjust the brightness using the PSP menu or the brightness buttons. If this doesn’t resolve the issue, attempt to perform a hard reset by removing the battery for a few seconds and then reinserting it.
3. Game loading issues: If you’re having trouble loading or playing a game, ensure that the game disc is clean and free from scratches or dirt. Wipe the disc gently with a soft cloth, moving from the center to the outer edges. If the problem persists, try cleaning the lens of the UMD drive with a cleaning kit designed specifically for game consoles.
4. Internet and connectivity issues: If you’re having trouble connecting to Wi-Fi or experiencing poor internet connectivity, ensure that you’re within range of a stable network. Check if your network password is correct, and try restarting your router. If connection issues persist, try deleting the existing Wi-Fi network settings on your PSP and creating a new connection profile.
5. Button responsiveness issues: If the buttons on your PSP are not responding as expected, try cleaning them with a soft, slightly damp cloth. Gently wipe away any debris or dust that may have accumulated. If the issue persists, it may indicate a hardware problem, and it’s advised to contact Sony customer support for further assistance.
6. Memory and storage issues: If you’re experiencing problems with memory or storage, start by ensuring that your memory stick is properly inserted and recognized by the PSP. Try formatting the memory stick in the PSP menu if necessary. If you’re running out of storage space, consider deleting unwanted files or transferring them to a computer to free up space.
If none of these troubleshooting steps resolve the issue with your PSP, and it’s still under warranty, it’s recommended to contact Sony customer support or bring it to an authorized service center for further assistance. They can provide specialized guidance and perform repairs if necessary.
By following these troubleshooting steps, you can address common issues with your PSP and enjoy a seamless gaming experience once again.
Upgrading and Updating PSP Firmware
Regularly upgrading and updating the firmware of your Sony PSP (PlayStation Portable) is essential to ensure optimal performance, compatibility with new games, and access to the latest features. Firmware is the system software that controls the operation of the PSP. Let’s explore how to upgrade and update the firmware on your PSP.
1. Checking the current firmware version: Before proceeding with any updates, it’s important to check the current firmware version installed on your PSP. To do this, navigate to the “Settings” category in the PSP menu, select “System Settings,” and then choose “System Information.” The current firmware version will be displayed on the screen.
2. Downloading the firmware update: Visit the official Sony PlayStation website or the PSP manufacturer’s support page to find the latest firmware update available for your PSP model. Ensure that you download the correct firmware update that matches your PSP model.
3. Transferring the firmware update to your PSP: Connect your PSP to your computer using a USB cable and enable USB mode on the PSP. The PSP will appear as a removable drive on your computer. Open the PSP drive and create a new folder named “UPDATE” (in uppercase). Copy the firmware update file into the “UPDATE” folder. Safely eject the PSP from your computer and disconnect the USB cable.
4. Installing the firmware update: Now that you have transferred the firmware update to your PSP, navigate to the “Game” category in the PSP menu and select “Memory Stick.” You will find the firmware update file in the Memory Stick. Select the file and follow the on-screen instructions to begin the update process. Ensure that your PSP is connected to a power source during the update to prevent any interruptions.
5. Finalizing the update: Once the firmware update is complete, your PSP will restart. After restarting, navigate back to the “Settings” category, select “System Settings,” and then choose “System Information” to verify that the firmware has been updated to the latest version.
It’s important to note that custom firmware, also known as “CFW,” is unofficial firmware that allows your PSP to run homebrew applications and provides additional features. If you have custom firmware installed on your PSP, it’s recommended to follow specific instructions provided by the custom firmware developer to upgrade or update your firmware.
By regularly upgrading and updating the firmware on your PSP, you can ensure that your console remains compatible with the latest games, and you have access to new features and improvements. Stay up to date with firmware updates to maximize your gaming experience on the PSP.