
Choosing the Right Video File Format and Specifications
When it comes to preparing and uploading your videos to Vimeo, choosing the right file format and specifications is essential. By selecting the optimal settings, you can ensure that your videos look their best and are compatible with Vimeo’s platform. Here are some factors to consider:
- File Format: Vimeo supports a wide range of video file formats, including MP4, MOV, AVI, and WMV. However, to ensure the best compatibility and playback quality, it is recommended to upload your videos in the MP4 format.
- Video Codec: The H.264 codec is highly recommended for video compression, as it provides good quality while maintaining a relatively small file size. This codec is widely supported and compatible with most devices and browsers.
- Resolution: Vimeo supports videos in various resolutions, including SD (480p), HD (720p and 1080p), and 4K Ultra HD. Choose a resolution that suits your video’s content and intended audience. Keep in mind that higher resolutions require more bandwidth for streaming.
- Frame Rate: The standard frame rate for videos is 24, 25, or 30 frames per second (fps). Higher frame rates, such as 60fps, are ideal for capturing fast motion or smoother animations, but they may result in larger file sizes.
- Bitrate: Bitrate determines the quality and file size of your video. Higher bitrates result in better quality but also larger file sizes. Vimeo provides recommended bitrate settings for different resolutions, and it’s best to follow these guidelines.
Before uploading your video to Vimeo, it’s a good idea to check its specifications and make any necessary adjustments using video editing software or converters. This way, you can ensure that your video meets Vimeo’s requirements and delivers a seamless viewing experience for your audience.
Preparing Your Video for Upload
Before you upload your video to Vimeo, it’s important to take some steps to ensure that it is optimized for the best viewing experience. Here are some tips to help you prepare your video:
- Trimming and Editing: Use video editing software to trim any unnecessary footage and make adjustments as needed. This will help to improve the overall quality and reduce the file size of your video.
- Color Correction and Enhancement: Consider applying color correction and enhancement techniques to make your video visually appealing. Adjusting the brightness, contrast, saturation, and color balance can significantly enhance the visual quality.
- Audio Enhancement: Ensure that the audio quality is clear and balanced. Remove any background noises or distortions, and adjust the volume levels if necessary. Adding suitable background music or sound effects can also enhance the overall experience.
- Export Settings: When exporting the final version of your video, choose the appropriate settings based on Vimeo’s recommended specifications. Pay attention to the output format, resolution, frame rate, and bitrate to ensure compatibility and optimal playback.
- File Naming: Give your video a descriptive and meaningful file name before uploading it. This will make it easier to organize and locate your videos on Vimeo.
- Check Video Length and Size: Videos uploaded to Vimeo should generally be no longer than 10GB in size and no longer than 60 minutes in duration. If your video exceeds these limits, consider compressing it or splitting it into multiple parts.
By taking the time to properly prepare your video before uploading, you can ensure that it looks and sounds its best on Vimeo. Keep in mind that a well-prepared video can make a significant impact on the viewer’s experience and engagement with your content.
Uploading Your Video to Vimeo
Now that you’ve prepared your video, it’s time to upload it to Vimeo and share your content with the world. Follow these steps to successfully upload your video:
- Create a Vimeo Account: If you don’t have one already, sign up for a Vimeo account. You can choose between a free or paid membership, depending on your needs and desired features.
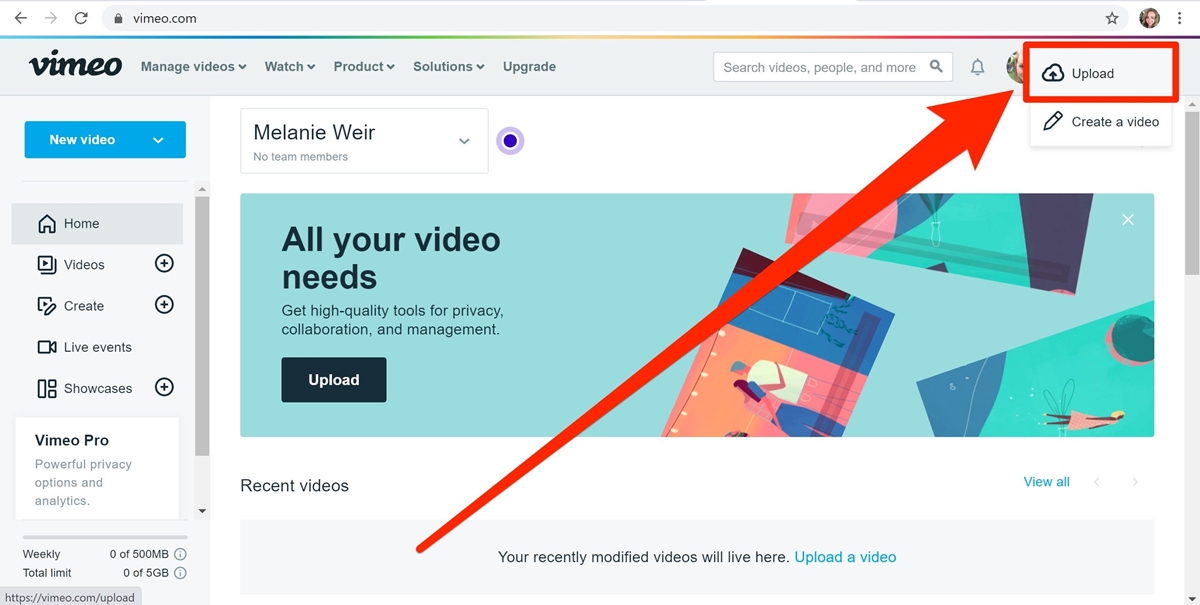
- Access the Upload Page: Log in to your Vimeo account and navigate to the “Upload” page. Here, you’ll find the upload interface where you can start the process.
- Select Your Video: Click on the “Choose a video to upload” button and select the video file from your computer. Wait for the video to finish uploading – the time will depend on the file size and your internet connection speed.
- Add Video Title and Description: Give your video a clear and descriptive title. This will help viewers understand what your video is about. Additionally, provide a detailed description that includes relevant keywords to improve discoverability.
- Select Privacy Settings: Choose whether you want your video to be public, private, or password-protected. Public videos will be visible to anyone, while private videos can only be viewed by those who have the direct link. Password-protected videos require viewers to enter a password to access them.
- Set Additional Settings: Customize your video settings by adjusting options such as the thumbnail, video language, and content rating. You can also choose whether to allow embedding, comments, and video responses.
- Save Changes and Publish: Review all the settings and details of your video. Once you’re satisfied, click the “Save” or “Publish” button to make your video live on Vimeo.
After your video has been uploaded and published, you can share it with others by providing them with the Vimeo link. You can also embed the video on your website or share it on social media platforms to increase its reach and visibility.
Remember to regularly check your Vimeo account for comments and engage with your audience. Uploading your video to Vimeo opens up opportunities for interaction and feedback, allowing you to connect with viewers who appreciate your content.
Understanding Vimeo’s Video Privacy Settings
When uploading your videos to Vimeo, it’s important to consider the privacy settings that best suit your needs. Vimeo provides a range of options to control the visibility and accessibility of your videos. Here’s a breakdown of the video privacy settings:
- Public: Public videos are visible to anyone who visits Vimeo or comes across the video on search engines. This setting is ideal if you want to reach a wide audience and maximize the discoverability of your content.
- Private: Private videos are hidden from the public and can only be viewed by the account holder and those with whom the account holder shares the video directly. This setting is useful for sharing videos with a select group of people or for personal use.
- Password-protected: Password-protected videos provide an added layer of security. Viewers must enter a password to access the video, even if they have the direct link. This setting is suitable for sharing confidential or sensitive content with specific individuals.
- Hide on Vimeo: Enabling the “Hide on Vimeo” option means that your video will be hidden from Vimeo’s public directory and search results, even if it’s set to public. This setting is useful when you want to embed the video on your website or share it privately without attracting attention on Vimeo itself.
- Domain-level privacy: With Vimeo’s domain-level privacy option, you can restrict your video’s playback to specific websites or domains. This feature ensures that your video can only be embedded and played on approved websites.
By understanding and utilizing these privacy settings, you have full control over who can view your videos. Whether you want to share your content publicly, limit access to a select few, or protect sensitive information, Vimeo provides the flexibility to meet your requirements.
Keep in mind that choosing the right privacy settings depends on your video’s purpose, target audience, and desired level of exposure. Regularly review and update your privacy settings as needed to maintain the desired level of privacy and security for your videos on Vimeo.
Adding Basic Metadata and Descriptions to Your Video
When uploading videos to Vimeo, it’s crucial to provide accurate and engaging metadata and descriptions. The metadata you add helps users find your videos in searches and provides essential details about your content. Here’s how you can optimize the metadata and descriptions:
- Title: Choose a concise and descriptive title that accurately reflects your video’s content. Including relevant keywords in the title can improve discoverability in search results.
- Description: Write a detailed and compelling description that provides additional context and information about your video. This is an opportunity to engage viewers with an enticing summary, highlight key points, and include relevant keywords to improve search visibility.
- Tags: Tags are keywords or phrases that are relevant to your video’s content. Adding descriptive tags can help categorize your video and improve its visibility in search results.
- Category: Select the appropriate category for your video to further organize and categorize your content on Vimeo. Choosing the right category can help interested viewers discover your video more easily.
- Custom Thumbnails: A visually appealing thumbnail can entice viewers to click on your video. Vimeo allows you to upload custom thumbnails, so choose an eye-catching image that accurately represents your video’s content.
- Video Language: Specify the language of your video to help Vimeo’s search algorithms and language filters provide better search results for users browsing in specific languages.
When crafting your metadata and descriptions, keep in mind the audience you’re targeting and the goals you have for your video. Use clear and concise language while also being engaging and persuasive. Well-crafted metadata and descriptions can significantly impact how well your video performs in search results and attract the right audience to your content.
Regularly review and update your video’s metadata and descriptions to ensure they remain relevant and up to date. Experiment with different keywords, descriptions, and tags to optimize your video’s visibility and reach on Vimeo.
Adjusting the Appearance and Settings of Your Video Player
After uploading your video to Vimeo, you have the option to customize the appearance and settings of the video player. This customization allows you to create a more personalized and engaging viewing experience for your audience. Here are some ways to adjust the appearance and settings of your video player:
- Player Theme: Vimeo offers a range of player themes to match the look and feel of your website or brand. Choose a theme that aligns with your brand’s aesthetics or personal preferences to create a cohesive visual experience.
- Custom Colors: For further customization, you can select custom colors for different elements of the player, such as the progress bar, play button, and text overlays. Coordinate the colors to match your branding or to create an appealing visual scheme.
- Logo Watermark: Add your logo as a watermark to your videos, ensuring brand visibility throughout playback. This feature is particularly useful for businesses and content creators looking to maintain a strong brand presence.
- Playback Quality: Choose the default playback quality for your video based on the available resolutions. This option allows you to prioritize a specific quality level or let Vimeo’s adaptive streaming automatically adjust the quality based on the viewer’s internet speed.
- Playback Speed: Enable viewers to adjust the playback speed of your video. This feature is helpful for educational content or when viewers want to go through the video at their preferred pace.
- Embedding Options: Determine how your video can be embedded on external websites. You can choose to allow or restrict embedding and specify whether controls and title information should be displayed alongside the embedded video.
- Interaction Settings: Control how viewers can interact with your video by enabling or disabling options such as sharing, commenting, and downloading. This allows you to customize the level of engagement and interaction you want to encourage.
By adjusting the appearance and settings of your video player, you can create a cohesive and immersive experience that aligns with your brand and captivates your audience. Experiment with different options to find the best combination that enhances the viewer’s experience and supports your video’s goals.
Regularly review and update these settings to ensure they are optimized based on viewer feedback and changing trends. By staying attentive to the player’s appearance and functionality, you can continually improve the overall viewer experience and engagement with your videos on Vimeo.
Enhancing Your Video with Captions and Subtitles
Adding captions and subtitles to your videos on Vimeo can greatly enhance the accessibility and engagement of your content. Captions provide a text display of the dialogue and other audio elements in your videos, making them accessible to viewers who are deaf or hard of hearing. Here are some key benefits and tips for enhancing your videos with captions and subtitles:
- Improved Accessibility: Captions and subtitles make your videos accessible to a wider audience, including viewers who are deaf or have hearing impairments. By providing text-based content, you ensure that everyone can understand and engage with your video.
- Language Accessibility: If your video includes dialogue in a language other than the primary language used, adding subtitles can help viewers who may struggle to understand the language spoken. This allows you to reach a global audience and make your content more inclusive.
- SEO Benefit: Captions and subtitles can boost the search engine optimization (SEO) of your videos. Search engines can crawl and index the text in captions, increasing the chances of your videos being discovered through relevant searches.
- Viewer Engagement: Captions and subtitles can improve viewer engagement by providing a clear and concise representation of your video’s content. They help viewers comprehend dialogue, follow along with complex topics, and stay engaged even in noisy environments.
- Accuracy and Quality: When adding captions or subtitles, ensure that they accurately reflect the audio content and provide a high-quality viewing experience. Review and edit the captions or subtitles before finalizing them to avoid any errors or inconsistencies.
- Accessibility Standards: Vimeo allows you to upload captions and subtitles in multiple formats, such as SRT, VTT, and DFXP. These formats adhere to accessibility standards and are compatible with various video players and platforms.
- Enable User-Generated Captions: Vimeo also provides the option for viewers or community members to contribute captions and subtitles to your videos. This crowdsourcing approach can help improve the accuracy and availability of captions, as well as engage your audience in the process.
By enhancing your videos with captions and subtitles, you ensure that your content is accessible to a wider audience, improve viewer engagement, and enhance the overall quality of your videos. Take the time to create accurate and high-quality captions or subtitles for your videos on Vimeo to maximize their impact and reach.
Using Vimeo’s Video Analytics and Insights
Vimeo provides a powerful set of video analytics and insights that can help you gain a deeper understanding of how your videos are performing and how your audience is engaging with your content. By utilizing these analytics, you can make data-driven decisions to optimize your videos and improve their impact. Here are key features and benefits of Vimeo’s video analytics:
- View Count and Engagement: Vimeo’s analytics show you the number of views your videos have received, allowing you to track their popularity. Additionally, you can analyze engagement metrics, such as likes, comments, and shares, to evaluate how viewers are interacting with your content.
- Geographic Insights: Vimeo’s analytics provide geographical data, showing where your viewers are located. This information can help you tailor your content or marketing strategies to specific regions and target audiences more effectively.
- Playback Metrics: Vimeo’s analytics offer detailed playback metrics, including average watch time, play rate, and drop-off points. These insights can help you identify areas of your videos that may need improvement or determine which parts of your content are resonating most with viewers.
- Device and Technology Statistics: Vimeo’s analytics provide data on the devices and technologies viewers are using to watch your videos. This information is valuable in optimizing your videos for different platforms and ensuring a seamless viewing experience across various devices.
- Traffic Sources: Vimeo’s analytics show you how viewers are discovering your videos, whether it’s through search engines, social media, embedded links, or direct referrals. Understanding your traffic sources can help you allocate resources more effectively and focus on strategies that generate the most engagement.
- Audience Insights: Vimeo’s analytics provide demographic information about your audience, such as age, gender, and interests. This data can help you better understand your target audience and tailor your content and marketing efforts accordingly.
- Comparison and Benchmarking: Vimeo’s analytics allow you to compare the performance of your videos against each other or benchmark against industry averages. This helps you identify trends, measure progress, and set goals for future video content.
By using Vimeo’s video analytics and insights, you can measure the success of your videos, identify areas for improvement, and make informed decisions to optimize your content strategy. Regularly monitor and analyze these analytics to refine your approach and deliver video content that resonates with your audience.
Sharing and Embedding Your Video from Vimeo
Once you have uploaded your video to Vimeo, you can easily share it with others and embed it on various platforms, including websites, blogs, and social media. This enables you to reach a wider audience and maximize the visibility of your content. Here’s how you can share and embed your video from Vimeo:
- Direct Link: Vimeo provides a unique URL for each of your videos. You can simply copy and share this link with others through email, messaging apps, or on social media platforms. Anyone with the link can access your video directly on Vimeo.
- Share Buttons: Vimeo offers built-in sharing buttons for popular social media platforms, making it easy to share your video directly from the Vimeo player. Simply click on the share icon and choose the desired platform to post your video on.
- Embedding: Embedding your video allows you to display it directly on your website or blog. Vimeo provides an embed code that you can copy and paste into your website’s HTML editor or content management system. This allows visitors to view your video without leaving your site.
- Customize Embed Settings: When generating the embed code, Vimeo allows you to customize various settings. You can choose the player size, autoplay options, and whether to display the video title, byline, and related videos. These customization options give you control over the appearance and functionality of the embedded video.
- Privacy Considerations: Keep in mind the privacy settings you have applied to your video. If it is set to private or password-protected, those who receive the direct link or embed code will still need the necessary permissions to access the video.
- Monitor Video Performance: Vimeo provides analytics and insights that allow you to track the performance of your videos across different platforms. You can monitor views, engagement, and other metrics to assess the success of your video sharing and embedding strategies.
By sharing your videos and embedding them on relevant platforms, you can expand your audience and increase the exposure of your content. Whether it’s through direct links, social media sharing, or embedding on your website, Vimeo offers versatile options for distributing your videos to reach your desired viewership.
Regularly review the performance of your shared and embedded videos to identify successful distribution channels and refine your sharing strategy. Pay attention to engagement metrics and feedback to optimize your video sharing efforts and maximize their impact.
Troubleshooting Common Video Upload and Playback Issues on Vimeo
While uploading and playing videos on Vimeo is usually a seamless process, occasional issues can arise. Understanding and troubleshooting these common issues can help ensure a smooth viewing experience for your audience. Here are some common video upload and playback issues on Vimeo and how to troubleshoot them:
- Slow Upload Speed: If you encounter slow upload speeds, check your internet connection and ensure that it is stable. Disable any background processes or downloads that may be using up bandwidth and try uploading the video during off-peak hours when internet traffic is lower.
- Failed Uploads: If an upload fails, it may be due to an unstable internet connection or an issue with the video file itself. Verify that your file meets Vimeo’s upload requirements in terms of format, size, and duration. You may also try compressing the video or converting it to a different format before reattempting the upload.
- Buffering or Stuttering Playback: Buffering or stuttering during video playback may indicate a slow internet connection or high network traffic. Check your internet speed, close any bandwidth-intensive applications running in the background, and consider switching to a lower video quality option to ensure smooth playback.
- Playback Error Messages: If you encounter error messages during playback, such as “Video cannot be played” or “Playback error,” try refreshing the page or restarting your browser. Make sure you have the latest version of your browser, disable any browser extensions that may interfere with video playback, and clear your browser cache and cookies.
- Incompatible Browser or Device: If your video isn’t playing on a specific browser or device, ensure that it is supported by Vimeo. Check Vimeo’s list of supported browsers and devices and make sure you are using an up-to-date version. You may need to switch to a different browser or device to resolve compatibility issues.
- Audio/Video Sync Issues: If you notice that the audio and video are out of sync during playback, it may be due to an encoding or playback issue. Try re-encoding the video using recommended settings or adjusting the video playback quality to see if the issue is resolved.
- Embedded Player Problems: If you are experiencing issues with the embedded player on your website or blog, first ensure that you have copied and pasted the correct embed code from Vimeo. Double-check that your website’s HTML and CSS do not conflict with the player and consider seeking assistance from a developer if needed.
If you continue to experience persistent issues, it’s recommended to reach out to Vimeo’s customer support for further assistance. They can provide specific troubleshooting steps based on your unique situation and help resolve any technical issues interfering with video upload or playback.
By familiarizing yourself with these common video upload and playback issues and the corresponding troubleshooting steps, you can overcome challenges and ensure a smooth viewing experience for your audience on Vimeo.