
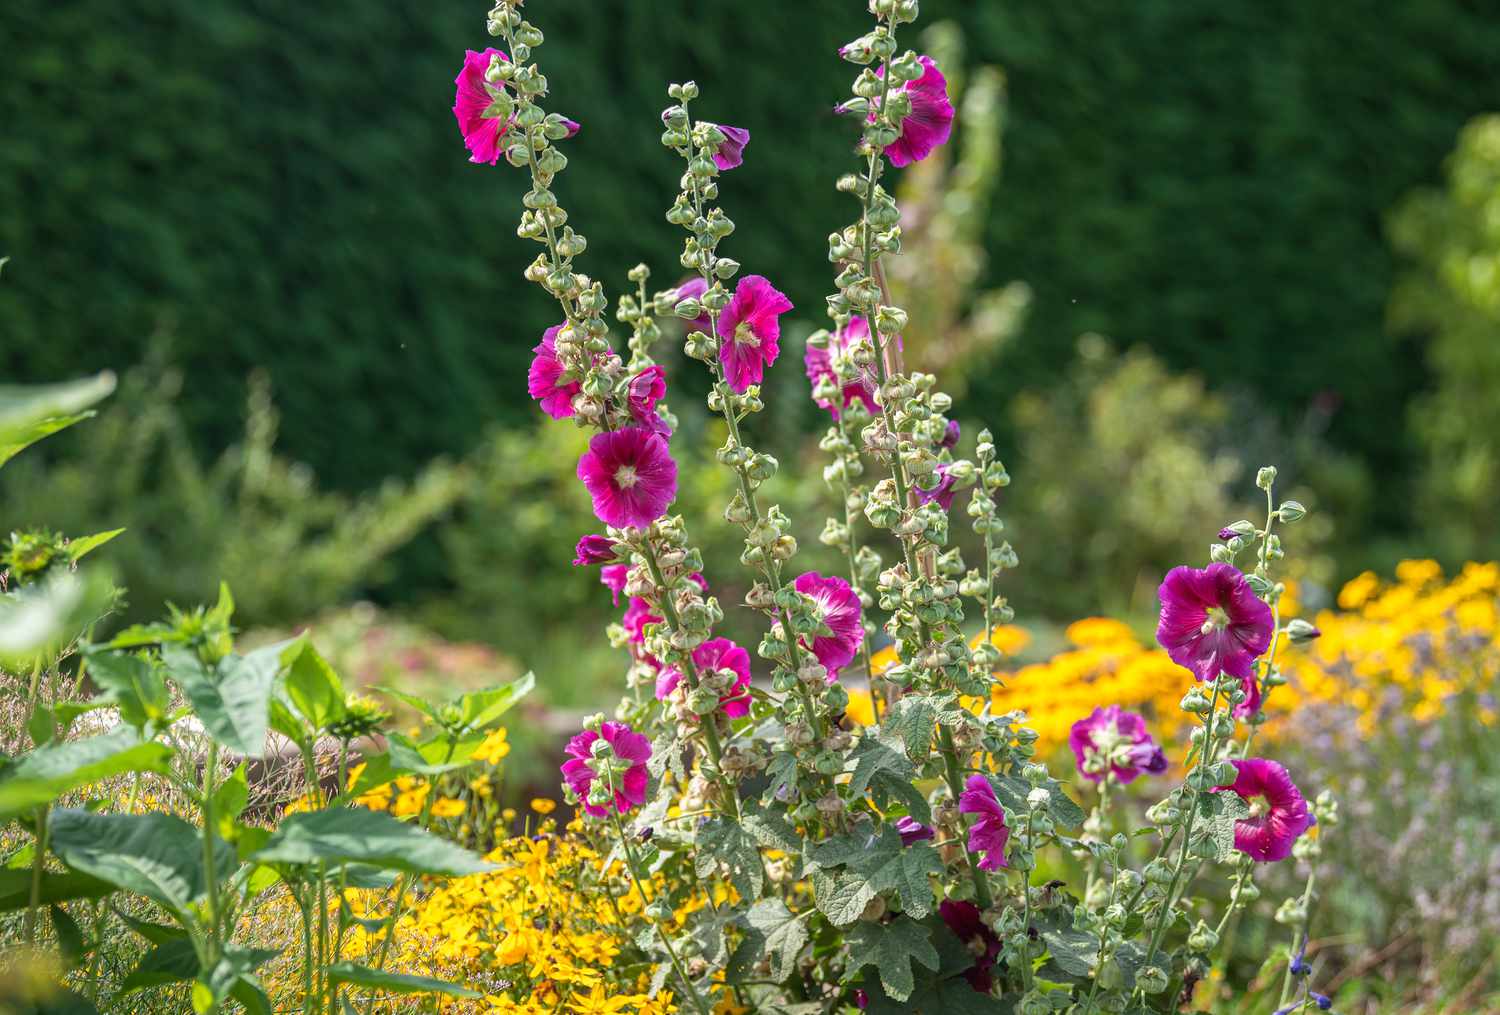
Best Soil for Hollyhocks
When it comes to growing healthy and vibrant hollyhocks, the right soil conditions are crucial. Hollyhocks thrive in rich, well-draining soil that is slightly acidic to neutral in pH. Here are some key points to keep in mind when preparing the soil for your hollyhocks:
- Soil Type: Hollyhocks prefer loamy soil, which is a well-balanced mixture of sand, silt, and clay. Loam soil retains moisture while allowing excess water to drain away, creating the perfect environment for hollyhocks to flourish.
Soil pH: A slightly acidic to neutral pH range of 6.0 to 7.0 is ideal for hollyhocks. You can test the soil pH using a simple kit from your local garden center. If your soil is too acidic, adding lime can help raise the pH level. - Organic Matter: Incorporating organic matter into the soil is essential for supplying nutrients and improving soil structure. Before planting your hollyhocks, add well-rotted compost, aged manure, or other organic amendments to enrich the soil. This will create a nutrient-rich environment that promotes healthy root development and overall plant growth.
- Drainage: Proper drainage is crucial for hollyhocks to avoid root rot and other moisture-related issues. If you have heavy clay soil that tends to hold water, consider amending it with sand or perlite to improve drainage. Alternatively, planting hollyhocks in raised beds or mounds can help ensure good drainage.
- Water Retention: While drainage is important, it’s also necessary for the soil to retain enough moisture for the hollyhocks’ roots to access. Adding organic matter to the soil helps improve water retention, as well as applying a layer of organic mulch around the base of the plants to conserve moisture.
By providing your hollyhocks with the right soil conditions, you will create an optimal growing environment that encourages strong root development and healthy plant growth. Take the time to prepare the soil properly before planting, and you’ll be rewarded with beautiful, resilient hollyhocks that will brighten up your garden for years to come.
Sun Requirements for Hollyhocks
Hollyhocks are sun-loving plants that thrive in full sun to partial shade. Adequate sunlight is crucial for their growth and blooming. Here are some key points to consider regarding the sun requirements for hollyhocks:
- Full Sun: Hollyhocks perform best when they receive at least 6-8 hours of direct sunlight per day. Placing them in a sunny spot in your garden will ensure they receive the necessary amount of sunlight to produce abundant blooms.
- Partial Shade: If you live in an area with intense heat or have limited full sun exposure in your garden, hollyhocks can tolerate some afternoon shade. They will still need at least 4-6 hours of direct sunlight to thrive. Providing them with morning sun and some protection from the intense afternoon heat can help prevent stress and promote healthy growth.
- Site Selection: When choosing a site for planting your hollyhocks, consider the surrounding landscape and structures that may cast shadows during the day. Avoid planting them near tall trees or buildings that could block the sunlight and limit their growth potential.
- Heat Tolerance: While hollyhocks generally prefer cooler temperatures, many varieties are surprisingly heat-tolerant. However, in exceptionally hot climates, providing some shade or dappled sunlight during the hottest part of the day can help prevent heat stress and maintain optimal growth.
- Protection from Strong Winds: Hollyhock stems can be tall and slender, making them susceptible to damage from strong winds. Planting them in a location that offers some protection, such as near a fence or wall, can help minimize wind stress and prevent bending or breakage.
Ensuring that your hollyhocks receive the right amount of sunlight is essential for their overall health and blooming performance. Whether you choose a sunny location or provide some afternoon shade, finding the perfect balance will help your hollyhocks thrive and reward you with stunning, colorful blooms throughout the growing season.
Planting Hollyhocks in Containers
Hollyhocks are not only beautiful in garden beds but can also thrive in containers, adding a touch of elegance and color to your patio, balcony, or any small space. Here are some key points to keep in mind when planting hollyhocks in containers:
- Container Selection: Choose a container that is at least 12-18 inches deep and wide to provide sufficient space for the hollyhock roots to grow. Select a container made of durable materials like ceramic, plastic, or fiberglass that can withstand the weight and won’t easily break.
- Drainage: Good drainage is essential for hollyhocks growing in containers. Ensure that your chosen container has drainage holes at the bottom to prevent waterlogging, which can lead to root rot. You can also add a layer of gravel or broken pottery at the bottom to enhance drainage.
- Soil: Use a well-draining potting mix that is specifically formulated for container gardening. Avoid using garden soil, as it can become compacted and hinder drainage. Incorporate some organic matter, such as compost or aged manure, into the potting mix to provide nutrients for the hollyhock plants.
- Plant Placement: Place your container in a location that receives full sun or partial shade, depending on the hollyhock variety. Ensure that the container is stable and won’t tip over due to strong winds. If needed, place the container against a wall or use stakes for support.
- Watering: Containers tend to dry out more quickly than garden beds, so regular watering is important. Monitor the moisture levels in the container, and water whenever the top inch of soil feels dry. Avoid overwatering, as it can lead to root rot. Mulching the surface of the container with organic mulch can help retain moisture.
- Fertilization: Feed your hollyhocks in containers with a balanced, slow-release fertilizer or use a liquid fertilizer diluted according to the package instructions. Apply the fertilizer every 4-6 weeks during the growing season to provide the necessary nutrients for healthy growth and blooming.
- Staking: Tall hollyhock varieties may require staking in containers to prevent them from falling over. Place stakes in the container early on, and gently tie the stems to the stakes as the plants grow, using soft plant ties. This will provide support and help them remain upright.
Planting hollyhocks in containers allows you to enjoy their beauty in smaller outdoor spaces or even bring them indoors as a temporary display. Follow these guidelines for successful container gardening, and you’ll be rewarded with stunning hollyhock blooms adding a vibrant touch to your landscape or patio.
Planting Hollyhocks in the Ground
Planting hollyhocks in the ground is a wonderful way to create vertical interest and add a splash of color to your garden borders, flower beds, or cottage-style landscapes. Here are some key points to consider when planting hollyhocks in the ground:
- Site Selection: Choose a location with well-draining soil and full sun to partial shade. Hollyhocks prefer soil that is slightly acidic to neutral, with a pH range of 6.0 to 7.0. Avoid planting them in areas that are prone to strong winds or areas that receive excessive shade.
- Soil Preparation: Prepare the soil by removing any weeds, rocks, or debris from the planting area. Loosen the soil to a depth of at least 12 inches, incorporating organic matter such as compost or well-rotted manure to improve soil fertility and drainage.
- Planting Depth: Dig a hole that is slightly wider and deeper than the root ball of the hollyhock plant. Place the plant in the hole, ensuring that the crown of the plant (where the stem meets the root) is level with or slightly above the soil surface. Backfill the hole with soil and gently firm it around the plant.
- Spacing: Space hollyhock plants at least 2-3 feet apart to allow for proper air circulation and room for the plants to grow. Crowded plants can be more susceptible to diseases and may not reach their full potential in terms of size and blooms.
- Watering: After planting, water the hollyhock plants thoroughly to settle the soil and ensure good root-to-soil contact. Continue to water regularly, especially during dry spells, to keep the soil evenly moist but not waterlogged. Avoid overhead watering to prevent fungal diseases.
- Mulching: Apply a layer of organic mulch, such as straw or wood chips, around the base of the hollyhock plants. Mulching helps conserve moisture, suppresses weed growth, and moderates soil temperature fluctuations. Keep the mulch a few inches away from the stems to prevent rotting.
- Support: Tall hollyhock varieties may require support to prevent them from toppling over in strong winds or heavy rain. Install stakes or a plant support system at the time of planting or shortly thereafter. This will provide a sturdy structure for the plant to grow against.
By following these guidelines, you can successfully plant hollyhocks in the ground and enjoy their towering flower spikes and vibrant blooms. With regular care and maintenance, they will bring charm and beauty to your garden for years to come.
Ideal Spacing for Hollyhock Plants
Proper spacing is essential when planting hollyhock plants to allow them enough room to grow and develop fully. Here are some key points to consider regarding the ideal spacing for hollyhock plants:
- Individual Plant Spacing: When planting hollyhock plants, space them at least 2-3 feet apart. This distance ensures proper air circulation between the plants, minimizing the risk of fungal diseases and allowing them to grow to their full potential.
- Spacing in Garden Beds: If you are planting hollyhocks in a garden bed or border, consider the overall design and spacing of other plants. Leave enough room between hollyhocks and neighboring plants to avoid overcrowding and competition for nutrients and resources.
- Vertical Spacing: Hollyhock plants can grow quite tall, with some varieties reaching heights of 5-8 feet or more. To accommodate their vertical growth, it’s important to space hollyhocks apart so they don’t shade or overshadow smaller plants nearby.
- Grouping and Staggered Planting: For a more visually appealing display, consider planting hollyhocks in groups or clusters. This creates a stunning mass of flowers and allows for better pollination. Staggered planting, with plants at different heights, can also add dimension to your garden design.
- Future Growth: Keep in mind that hollyhocks will grow larger and spread over time. Plan for their future growth when deciding on spacing, especially if you want to keep them contained in a specific area. Providing adequate space initially will prevent the need for frequent transplanting or overcrowding issues later on.
- Consideration for Soil and Sunlight: The amount of spacing needed may vary depending on soil fertility and available sunlight. In nutrient-rich soil and full sun conditions, hollyhocks tend to grow vigorously and may require slightly more space between plants compared to those grown in less optimal conditions.
By giving your hollyhock plants the appropriate spacing, you give them the best chance to thrive and reach their full potential. This not only promotes their overall health and vigor but also enhances the overall beauty and impact of your garden or landscape.
Tips for Transplanting Hollyhocks
Transplanting hollyhocks is a common practice when you want to move them to a different location, divide them, or if you’ve started them from seeds indoors and they are ready for outdoor planting. Here are some important tips to keep in mind when transplanting hollyhocks:
- Timing: The best time to transplant hollyhocks is during early spring or late fall when the weather is cooler and the plants are dormant or entering a period of dormancy. This reduces the stress on the plant and promotes successful establishment in the new location.
- Prepare the New Site: Before transplanting, prepare the new planting site by loosening the soil and removing any weeds or debris. Incorporate organic matter, such as compost or well-rotted manure, to improve soil fertility and drainage.
- Water the Plants: Water the hollyhock plants thoroughly before transplanting to ensure they are well-hydrated. Moist soil helps minimize transplant shock and allows the plants to better adjust to their new growing environment.
- Digging and Handling: Gently dig around the base of the hollyhock plant, taking care not to damage the roots. Lift the plant carefully, holding it by the root ball or the base of the stem. Avoid pulling or tugging on the stems, as this can cause injury to the plant.
- Planting Depth: When transplanting, ensure that the crown of the hollyhock plant (where the stem meets the roots) is level with or slightly above the soil surface. Planting too deep can lead to rotting, while planting too shallow can cause the plant to dry out.
- Spacing: Space the transplanted hollyhocks at the recommended distance of 2-3 feet apart to provide adequate air circulation and room for growth. Proper spacing reduces the risk of diseases and ensures that each plant has enough space to thrive.
- Watering: After transplanting, water the hollyhocks thoroughly to settle the soil and eliminate any air pockets around the roots. Continue to water regularly during the establishment period to keep the soil consistently moist, but be careful not to overwater, as this can lead to root rot.
- Provide Support: If you’re transplanting tall hollyhock varieties, install plant stakes or a support system at the time of transplanting. This provides support for the plants as they grow and prevents them from bending or falling over in strong winds.
- Mulching: Apply mulch around the base of the transplanted hollyhocks to conserve moisture, suppress weed growth, and regulate soil temperature. Keep the mulch a few inches away from the stems to prevent rotting.
Careful and proper transplanting techniques are key to ensuring the success of your hollyhocks in their new location. By following these tips, you can minimize transplant shock, encourage healthy root development, and help your hollyhocks thrive in their new surroundings.
Watering Hollyhocks: How Much and How Often?
Proper watering is essential for the health and vitality of hollyhocks. Since these plants have deep taproots, it’s important to establish a watering routine that provides adequate moisture to the roots. Here’s a guide on how much and how often to water your hollyhocks:
- Water Deeply: When watering hollyhocks, aim to moisten the soil deeply. This encourages the roots to grow deeper, making the plants more resilient and better able to withstand dry spells. Water until the top 6-8 inches of soil are evenly moist, allowing the water to penetrate the root zone.
- Frequency: Hollyhocks generally require regular watering, especially during dry periods. However, the frequency of watering depends on various factors such as weather conditions, soil type, and plant maturity. As a general guideline, water your hollyhocks every 7-10 days, adjusting as needed based on soil moisture levels and rainfall.
- Monitor Soil Moisture: To determine when to water, monitor the moisture level in the soil. Stick your finger or a garden trowel into the soil around the base of the hollyhocks. If the top inch of soil feels dry, it’s time to water. Avoid watering if the soil is still moist, as overwatering can lead to root rot and other issues.
- Time of Day: Water your hollyhocks early in the morning or late in the afternoon to minimize water loss due to evaporation. Watering during the cooler parts of the day also reduces stress on the plants and allows the foliage to dry before evening, reducing the risk of fungal diseases.
- Consider Environmental Factors: Environmental factors such as temperature, humidity, and wind can affect the water needs of hollyhocks. During hot or windy conditions, the soil may dry out more quickly, requiring more frequent watering. Adjust your watering schedule accordingly to ensure the plants receive sufficient moisture.
- Avoid Overwatering: While hollyhocks appreciate regular watering, it’s important not to overwater them. Overly wet soil can lead to root rot and other fungal diseases. Ensure that the soil has good drainage and allow the top inch of soil to dry out between waterings to strike the right balance.
- Using Mulch: Applying a layer of organic mulch, such as straw or wood chips, around the base of the hollyhocks can help retain moisture in the soil. Mulch acts as a natural barrier, preventing water evaporation and reducing weed growth. Ensure that the mulch is a few inches away from the stems to prevent rotting.
By following these guidelines, you can ensure that your hollyhocks receive the appropriate amount of water to promote healthy growth and abundant blooms. Monitoring the soil moisture and adjusting your watering routine to meet the specific needs of your hollyhocks will help them thrive in your garden.
Fertilizing Hollyhocks: What You Need to Know
Fertilizing hollyhocks is an important aspect of their care to ensure healthy growth, vibrant blooms, and overall plant vigor. Here’s what you need to know about fertilizing hollyhocks:
- Fertilizer Types: Choose a balanced, slow-release fertilizer specifically formulated for flowering plants. Look for a fertilizer with an N-P-K ratio (nitrogen, phosphorus, potassium) of around 10-10-10 or similar. This balanced formulation provides essential nutrients for healthy foliage and bloom development.
- Timing: Start fertilizing hollyhocks in early spring, just as new growth emerges. Apply the first round of fertilizer when the plants are actively growing. Continue to fertilize every 4-6 weeks throughout the growing season, up until early fall.
- Application Method: Follow the instructions on the fertilizer packaging for the recommended application rates. Sprinkle the fertilizer evenly around the base of the hollyhock plants, taking care to avoid direct contact with the foliage. Lightly scratch or water the fertilizer into the soil to help it penetrate and reach the root zone.
- Avoid Overfertilizing: While fertilizing is important, it’s crucial not to overdo it. Overfertilization can lead to excessive leaf growth at the expense of blooms or can cause nutrient imbalances. Always follow the package instructions and avoid using more fertilizer than recommended.
- Organic Alternatives: If you prefer organic fertilizers, you can use well-decomposed compost or natural amendments like composted manure instead. These organic options provide a slow and steady release of nutrients to the plants.
- Supplemental Micronutrients: In addition to a balanced fertilizer, hollyhocks may benefit from supplemental micronutrients like iron, magnesium, or manganese. These micronutrients can be applied as foliar sprays or included in the soil drench during fertilization, especially if you notice specific nutrient deficiencies in the plants.
- Watering After Fertilizing: After applying fertilizer, water the hollyhocks thoroughly. This helps dissolve the nutrients and carry them to the plants’ roots. It also prevents any fertilizer burn on the foliage. Ensure that the soil is moist but not waterlogged to avoid nutrient leaching.
- Discontinue Fertilizing: As the growing season comes to an end, gradually reduce or discontinue fertilizer application. This helps the hollyhock plants transition into dormancy and prepares them for the upcoming winter months.
Fertilizing hollyhocks provides them with the necessary nutrients to thrive and produce abundant blooms. By following these guidelines and maintaining a balanced fertilization schedule, you can ensure the health and beauty of your hollyhock plants throughout the growing season.
How to Prune Hollyhocks for Optimal Growth
Pruning hollyhocks is an important maintenance practice that promotes optimal growth, enhances plant health, and encourages the production of abundant blooms. Here’s a guide on how to prune hollyhocks for optimal growth:
- Timing: Pruning hollyhocks should be done in early spring or late fall when the plants are dormant. This allows for easier access to the plant and reduces the risk of damage to new growth. Avoid pruning during the peak growing season as it may diminish flowering.
- Remove Dead or Diseased Stems: Begin by inspecting the hollyhock plant and removing any dead or diseased stems. These can be easily identified as they may be discolored, shriveled, or show signs of disease. Pruning them helps prevent the spread of pests or diseases and encourages healthy growth.
- Cut Back to Healthy Growth: If you notice any stems that are weak or overcrowded, selectively prune them back to healthy growth. Make clean cuts just above a healthy bud or lateral branch to promote branching and encourage new growth.
- Encourage Air Circulation: Pruning hollyhocks can also help improve air circulation around the plant, reducing the risk of fungal diseases. Thin out crowded areas or remove overly dense foliage to allow better airflow, which keeps the leaves dry and minimizes the chances of infection.
- Deadhead Spent Blooms: Regular deadheading of spent blooms not only promotes a tidy appearance but also stimulates the production of new flower buds. Remove faded or wilted flowers by cutting the stem just above a set of healthy leaves or lateral bud. This redirects the plant’s energy towards new growth and blooming.
- Support Tall Varieties: Tall hollyhock varieties may require additional support to prevent bending or falling over. Use stakes, trellises, or plant supports to provide vertical stability. Install them before the plants grow too tall to avoid damaging the root system.
- Prune After Flowering: After the initial blooming period, you can perform a more extensive pruning. Cut the flower stems back to their base or just above a healthy set of leaves to encourage the development of new lateral shoots and potential second or even third blooming.
- Dispose of Pruned Material: To reduce the risk of disease or pest transmission, dispose of the pruned plant material properly. Do not compost any diseased or infested plant parts. Bag them and discard them in the household waste or according to your local regulations.
Pruning hollyhocks not only improves their overall appearance but also supports optimal growth and blooming. By following these pruning techniques and incorporating them into your hollyhock care routine, you can enjoy healthier, more productive plants in your garden.
Common Pests and Diseases of Hollyhocks
While hollyhocks are generally hardy and resilient plants, they can be susceptible to certain pests and diseases. Being aware of these common issues will help you identify and address them promptly. Here are some of the most common pests and diseases that can affect hollyhocks:
- Aphids: Aphids are small, sap-sucking insects that can cluster on hollyhock leaves and stems. They can cause stunted growth, distorted foliage, and even transmit diseases. Use a strong jet of water or insecticidal soap to control aphid populations. Ladybugs and other beneficial insects can also help keep aphids in check.
- Japanese Beetles: Japanese beetles are destructive pests that feed on hollyhock leaves, flowers, and buds. Handpick and remove them from the plants or use organic insecticides labeled for Japanese beetles. Timing is crucial, so monitor your plants for the appearance of these beetles and take action promptly.
- Rust: Hollyhocks are susceptible to rust, a fungal disease that causes orange or brown pustules on the leaves. Remove and discard any infected leaves or plants to prevent the spread of rust. Provide good air circulation by thinning crowded foliage and avoid overhead watering to minimize humidity.
- Powdery Mildew: Powdery mildew is a common fungal disease that affects hollyhock leaves, giving them a white, powdery appearance. Improve air circulation, water at the base of the plants, and apply fungicidal sprays if necessary. Properly dispose of infected plant materials to prevent further spread.
- Leaf Spot: Leaf spot is a fungal disease that causes circular brown or black spots on hollyhock leaves. Remove and destroy infected foliage and apply fungicidal treatments if necessary. Avoid wetting the leaves while watering, as this can promote the development and spread of leaf spot.
- Slugs and Snails: Slugs and snails can chew holes in hollyhock leaves, especially during damp or rainy weather. Handpick these pests and dispose of them, or use organic slug and snail baits around the base of the plants. Creating barriers, such as copper tape or crushed eggshells, can also deter them.
- Viruses: Hollyhocks can be susceptible to various viruses, including the Hollyhock Mosaic Virus. These viruses can cause mottled or discolored leaves, stunted growth, and deformed flowers. If a plant is infected, it is best to remove and destroy it to prevent the spread to other nearby plants.
Regular monitoring, proper sanitation, and prompt action are key to managing pests and diseases in hollyhocks. By practicing good garden hygiene, providing proper care, and using organic control methods when needed, you can help keep your hollyhocks healthy and vibrant.
Companion Plants for Hollyhocks
Choosing companion plants that complement hollyhocks can enhance the beauty of your garden, attract beneficial insects, and provide a harmonious planting scheme. When selecting companion plants for hollyhocks, consider factors such as color, height, form, and flowering time. Here are some excellent companion plants to consider:
- Lavender: Lavender’s aromatic blooms and gray-green foliage create a lovely contrast to hollyhocks. Both plants thrive in full sun and well-draining soil. The calming fragrance of lavender also helps deter pests.
- Daylilies: Daylilies provide a stunning display of vibrant colors and pair well with the tall stature of hollyhocks. They flower around the same time and create a beautiful combination in garden borders or cottage-style gardens.
- Phlox: Phlox’s clusters of fragrant flowers in various shades of pink, lavender, and white can create a charming backdrop for hollyhocks. Their extended blooming period ensures a vibrant garden throughout the summer.
- Delphiniums: Delphiniums’ tall, spiky flower spikes complement the vertical growth of hollyhocks. Their vibrant blues, purples, and whites create a striking contrast against the colorful hollyhock blooms.
- Salvia: Salvia’s vibrant, upright flowers provide a stunning contrast to the large, rounded blooms of hollyhocks. Their extended blooming period ensures a continuous splash of color in the garden.
- Globe Thistle: The spiky texture and unique blue flowers of globe thistle create an interesting visual contrast next to hollyhocks. They share similar growth habits and add a touch of architectural interest to the garden.
- Yarrow: Yarrow’s flat-topped clusters of flowers in various shades of yellow, pink, and white create a beautiful backdrop for hollyhocks. They attract pollinators and add a delicate, airy texture to the garden.
- Rosemary: Rosemary’s fragrant foliage and delicate blue flowers make it a wonderful companion plant for hollyhocks. Its height and texture provide an interesting contrast to the tall stems and large leaves of hollyhocks.
- Black-Eyed Susans: Black-eyed Susans’ cheerful bright yellow flowers with dark centers complement the vibrant colors of hollyhocks. Both plants share similar cultural requirements and create a lively and eye-catching combination.
When choosing companion plants for hollyhocks, consider their growth habits, flower colors, and textures to create a visually pleasing and cohesive garden design. Remember to provide adequate spacing between plants to allow for proper airflow and growth. With thoughtful pairing, you can create a stunning and harmonious garden that showcases the beauty of hollyhocks alongside their companion plants.
How to Attract Pollinators to your Hollyhocks
Attracting pollinators to your hollyhocks is not only beneficial for the plants but also contributes to the overall health and biodiversity of your garden. By providing the right environment and resources, you can encourage pollinators to visit and pollinate your hollyhocks. Here’s how to attract pollinators to your hollyhocks:
- Plant Native Flowers: Include a variety of native flowers in your garden alongside hollyhocks. Native plants are well-adapted to the local environment and attract a wide range of pollinators. Choose native wildflowers that bloom at different times to provide a continuous food source.
- Include Nectar-Rich Flowers: Plant flowers that produce abundant nectar, such as bee balm, coneflowers, and lavender. These nectar-rich blooms act as a valuable food source for bees, butterflies, hummingbirds, and other pollinators, attracting them to your garden.
- Grow Flowers with Varying Bloom Times: Select a combination of early, mid, and late-season flowering plants. This ensures a steady supply of nectar throughout the growing season, attracting pollinators at different stages of their life cycles.
- Provide a Water Source: Include a shallow dish or birdbath with water in your garden. Bees, butterflies, and other pollinators need access to water for drinking and staying hydrated. Add some pebbles or floating plants to provide landing spots and prevent drowning.
- Create Habitat and Shelter: Incorporate plants that provide shelter, such as shrubs, grasses, or small trees, to create a habitat for pollinators. These plants offer shelter, nesting sites, and protection during inclement weather, making your garden more inviting to pollinators.
- Avoid Pesticides: Minimize or eliminate the use of pesticides in your garden. Pesticides can harm pollinators, preventing them from accessing the nectar and pollen they need for survival. Embrace organic pest control methods or look for environmentally friendly alternatives if necessary.
- Leave Some Bare Ground: Allow a small portion of your garden to have bare ground or undisturbed soil. Many ground-nesting bees require bare soil for creating their nests. Avoid excessive mulching or tilling in certain areas to provide nesting opportunities for these important pollinators.
- Provide Host Plants: Some pollinators, such as butterflies, require specific host plants for their caterpillars to feed on. Research and include the host plants of the butterflies native to your region to attract and support their life cycles.
- Consider Nesting Boxes: Install nesting boxes or bee houses to provide nesting sites for solitary bees. These structures offer shelter and encourage solitary bees to lay their eggs, promoting their population and pollination activities in your garden.
By following these practices, you can create a welcoming and pollinator-friendly environment for your hollyhocks. A garden buzzing with bees, fluttering with butterflies, and visited by hummingbirds is not only a joy to behold but also supports the vital task of pollination.