
Choosing the Right Time to Plant Hollyhocks
When it comes to planting hollyhocks, timing is crucial. Choosing the right time to plant your hollyhocks can greatly affect their growth and overall success. Whether you are starting from seeds or transplanting seedlings, understanding the optimal planting time is essential.
Typically, hollyhocks are planted in either the spring or fall, depending on your growing zone and the specific cultivar you have chosen. Let’s take a closer look at the pros and cons of each season for planting hollyhocks.
Spring Planting:
Spring is a popular time for planting hollyhocks. This is when the soil begins to warm up, creating favorable conditions for germination and growth. Planting hollyhocks in the spring allows them to establish themselves during the growing season and produce blooms the following year.
One advantage of spring planting is that hollyhocks have a longer growing season ahead of them. They have ample time to develop strong root systems and establish themselves in the garden. Additionally, spring planting allows for easier access to a wide variety of hollyhock seeds and seedlings.
However, spring planting also comes with some challenges. Depending on your location, the weather conditions in spring can be unpredictable. Late frosts or cold snaps may damage young hollyhock plants. It is essential to monitor the weather and protect your plants if necessary.
Fall Planting:
Alternatively, you can opt for fall planting. This approach provides hollyhocks with a head start in the following spring. Planting them in the fall allows them to establish their root systems during the cooler months and be ready to take off as soon as the weather warms up.
One advantage of fall planting is that the soil is still warm from the summer, which promotes root growth even after the foliage has died back. Because the focus is on root development, the plants will be better equipped to withstand harsh winter conditions and produce stronger stems and more vibrant blooms in the spring.
However, one challenge with fall planting is the availability of hollyhock seeds and seedlings. Nurseries and garden centers may have limited stock or may not carry them at all during the cooler months. Planning ahead and sourcing your hollyhock plants or seeds in advance is crucial for fall planting success.
Ultimately, the decision between spring and fall planting will depend on your specific circumstances and preferences. Consider your local climate, availability of plants or seeds, and the time you have available to care for your hollyhocks.
Remember, hollyhocks are resilient plants that can adapt to different planting seasons. With proper care and attention, they can thrive in your garden and reward you with their graceful beauty and vibrant blooms.
Determining Your Growing Zone
Before you start planting hollyhocks, it’s essential to determine your growing zone. Knowing your specific growing zone will help you understand the climate conditions in your area and the best time to plant and care for your hollyhocks.
Growing zones are based on the USDA Hardiness Zone Map, which divides the United States into different regions based on average minimum winter temperatures. This classification system helps gardeners identify the most suitable plants for their area.
To determine your growing zone, you can use various online resources or consult your local agricultural extension office. These sources will provide you with a map or tool to input your zip code and generate your specific growing zone.
Once you know your growing zone, you can use that information to find the best time to plant hollyhocks. Different hollyhock cultivars have different hardiness levels and temperature requirements, so knowing your zone is crucial in determining their success in your garden.
If you live in a colder zone, it might be more challenging for hollyhocks to survive the winter. In such cases, planting in the spring would be more suitable. If you live in a milder climate, fall planting may be an option to give your hollyhocks a head start before the following spring.
It is important to note that the USDA Hardiness Zone Map is a general guide, and local factors such as microclimates, elevation, and proximity to bodies of water can significantly influence the growing conditions. Consider these factors as well when determining the best time to plant hollyhocks in your specific location.
Understanding your growing zone will not only help you choose the right time to plant hollyhocks but also guide you in selecting other plants that are suitable for your area. It’s important to choose plants that are compatible with your climate to ensure their health and longevity.
By determining your growing zone and being mindful of the specific requirements of hollyhocks, you can create an optimal environment for these beautiful flowers to flourish and bring enchanting beauty to your garden.
Understanding Hollyhock Growth Habits
Before planting hollyhocks, it’s important to have a good understanding of their growth habits. By knowing how hollyhocks grow and develop, you can provide optimal care and create a suitable environment for these stunning flowers to thrive.
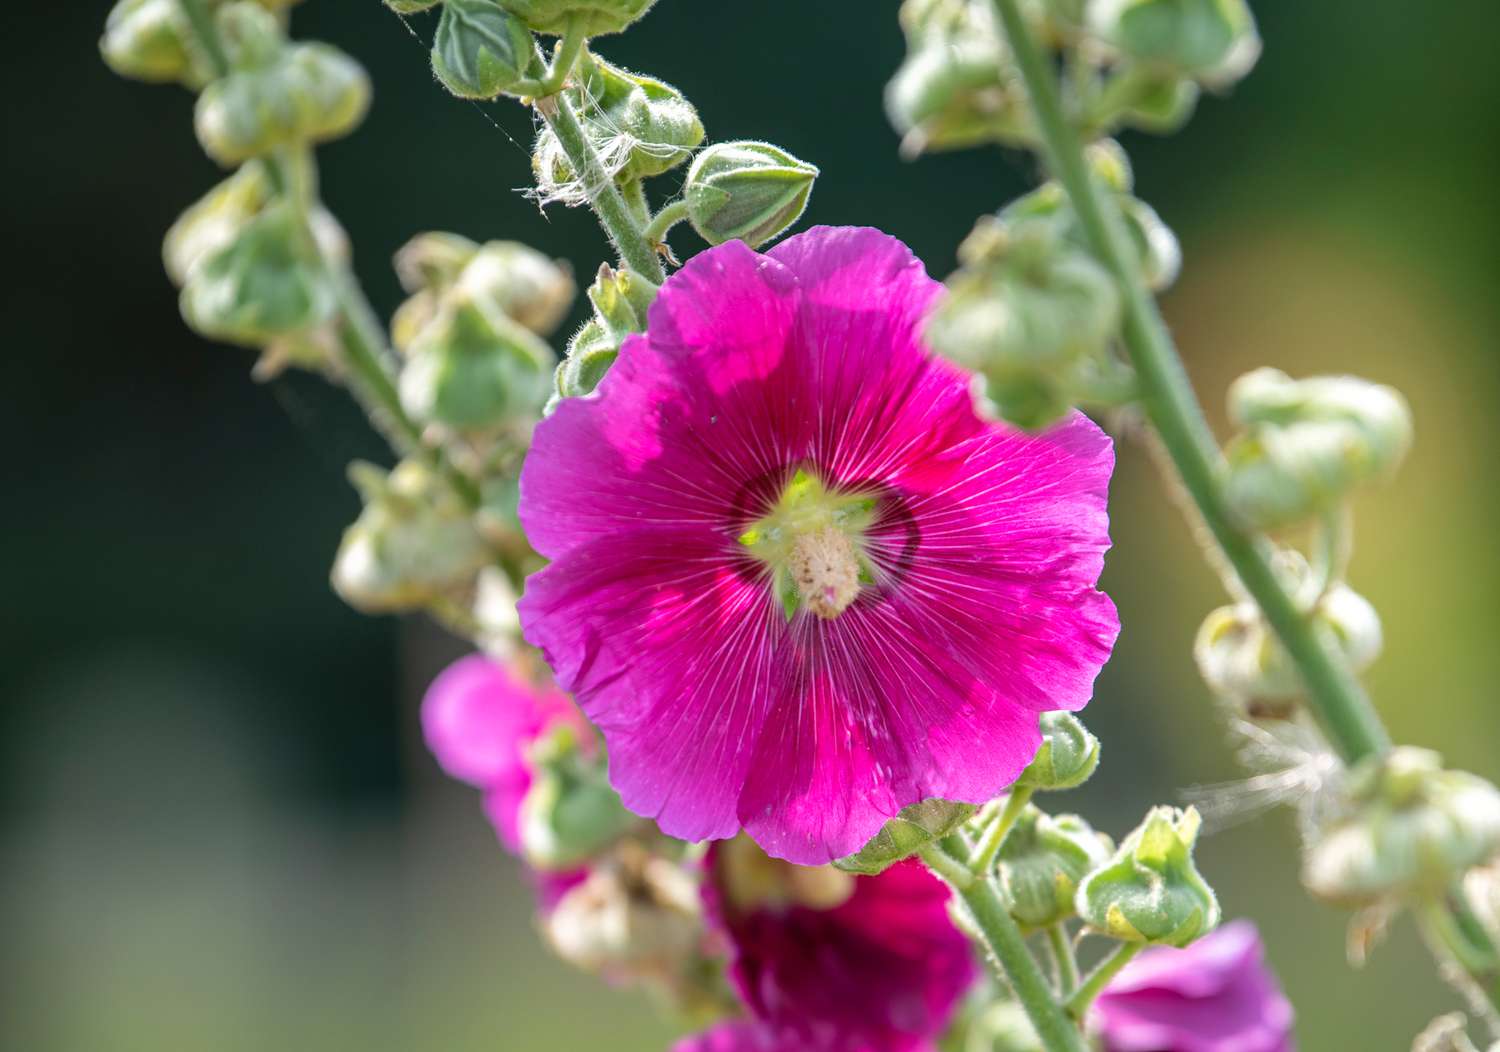
Hollyhocks (Alcea rosea) are biennial or short-lived perennial plants that are known for their tall and dramatic flower stalks. They can reach heights of up to 6 feet, making them a striking addition to any garden landscape.
Here are some key aspects of hollyhock growth habits to consider:
Life Cycle: Hollyhocks typically follow a biennial life cycle. In the first year, they grow foliage and establish a strong root system. During this time, they focus on storing energy for flowering in the following year. In the second year, hollyhocks produce magnificent flower stalks and blooms. However, some hollyhock varieties may also behave as short-lived perennials, meaning they may flower for multiple years before declining.
Growing Conditions: Hollyhocks thrive in full sun to partial shade. They prefer well-draining soil that is rich in organic matter. These plants have deep root systems, so it’s important to prepare the soil adequately to ensure proper growth. Adequate air circulation is key to preventing diseases, so avoid crowding the plants too closely together.
Flowering Season: Hollyhocks typically bloom from midsummer to early fall, depending on the specific cultivar and planting time. The flowers are usually large and showy, with vibrant colors ranging from white and pink to red, yellow, and even black. Hollyhock blooms attract bees, butterflies, and hummingbirds, making them a wonderful addition to pollinator gardens.
Re-Seeding: After flowering, hollyhock plants produce seed pods that contain several seeds. These seeds can drop to the ground and self-sow. If you allow the seed pods to mature and disperse naturally, you may have new hollyhock plants popping up in subsequent years. Alternatively, you can collect the seeds and store them for future planting.
Staking: Due to their height, hollyhocks can become top-heavy and prone to bending or breaking under the weight of their flower stalks. To prevent this, it’s recommended to stake the plants when they reach a height of about 2 to 3 feet. Using bamboo stakes or plant supports can help provide the necessary support and keep the plants upright.
By understanding these growth habits, you can plan and prepare your garden to accommodate hollyhocks. From providing the right growing conditions to supporting their tall structures, you can ensure that your hollyhocks grow strong, produce beautiful flowers, and become a standout feature in your garden for years to come.
Spring Planting: Pros and Cons
Spring planting is a popular choice for hollyhocks, offering both advantages and disadvantages. Understanding the pros and cons of spring planting can help you make an informed decision and ensure the success of your hollyhocks.
Pros of Spring Planting:
- Long Growing Season: One significant advantage of spring planting is the longer growing season ahead. By planting hollyhocks in the spring, they have ample time to establish themselves and develop strong root systems before facing the challenges of winter. This allows for optimal growth and the potential for abundant blooms in the following year.
- Availability of Seeds and Seedlings: Spring is the peak season for nurseries and garden centers. Therefore, you will have a wide variety of hollyhock seeds and seedlings to choose from. This availability gives you the opportunity to select your preferred cultivars and colors.
- Favorable Weather Conditions: Springtime typically offers more favorable weather conditions for hollyhock growth. The warmer temperatures and increased sunlight promote germination and encourage the plants to establish themselves quickly. However, it is important to monitor the weather for late frosts or cold snaps that can harm young hollyhock plants.
Cons of Spring Planting:
- Unpredictable Weather: One of the main challenges of spring planting is the unpredictability of the weather. Depending on your location, spring can bring sudden changes in temperature, unexpected frosts, or heavy rainfall. These conditions can put stress on young hollyhock plants and affect their growth and overall health.
- Protection from Late Frosts: Late frosts are a concern for spring-planted hollyhocks, as they can damage the tender foliage and prevent the plants from thriving. Be prepared to provide protection to your hollyhocks during cold nights by covering them with frost cloths or bringing potted plants indoors.
- Competition with Weeds: Spring is also the time when weeds start to emerge vigorously. Newly planted hollyhocks may face competition from weeds for nutrients, water, and sunlight. Regular maintenance, such as weeding and mulching, is crucial to provide hollyhocks with the best chance of success.
Despite the potential challenges, spring planting can be highly rewarding for hollyhocks. With proper care and attention, these stunning flowers can establish themselves well and delight you with their vibrant blooms during the growing season and for years to come.
Fall Planting: Pros and Cons
Fall planting is an alternative option for hollyhocks, offering its own set of advantages and disadvantages. By understanding the pros and cons of fall planting, you can make an informed decision and maximize the success of your hollyhocks.
Pros of Fall Planting:
- Head Start for Spring Growth: Fall planting provides hollyhocks a head start for the following spring. By establishing their root systems in the cooler months, hollyhocks can focus on root development, which leads to stronger plants in the next growing season. Fall-planted hollyhocks are often quick to emerge and start growing as soon as the weather warms up.
- Warm Soil Conditions: The soil in the fall is still warm from the summer, creating favorable conditions for root growth. The warm soil temperatures help the hollyhocks establish their roots even as the foliage begins to die back. With healthy root systems, the plants are better equipped to withstand winter conditions and experience stronger growth the following year.
- Availability of Seeds and Seedlings: While the availability of hollyhock seeds and seedlings may be more limited in the fall compared to the spring, some nurseries and online stores still offer a selection of fall-planted hollyhocks. Planning ahead and sourcing your plants or seeds in advance is key to taking advantage of fall planting opportunities.
Cons of Fall Planting:
- Limited Availability: One of the main challenges of fall planting is the limited availability of hollyhock plants and seeds. Nurseries and garden centers may reduce their inventory or not carry hollyhocks during the cooler months. It’s important to research and identify reliable sources where you can purchase fall-planted hollyhocks.
- Shorter Growing Season: Fall-planted hollyhocks have a shorter growing season compared to their spring-planted counterparts. They need to establish themselves quickly and grow sufficient roots before winter arrives. While this can limit the plant’s overall growth during the first season, the focus is on root development, ensuring strong and vigorous growth in subsequent years.
- Winter Protection: Fall-planted hollyhocks may need additional protection during the winter months, especially in colder climates. Applying a layer of mulch around the plants and providing a barrier against harsh winter weather conditions can help ensure their survival.
Despite the challenges, fall planting can be a successful strategy for hollyhocks. By giving them a head start in the cooler months and focusing on root development, fall-planted hollyhocks can establish themselves well and become robust, healthy plants that bloom beautifully in the following spring and beyond.
Factors to Consider Before Planting Hollyhocks
Before planting hollyhocks in your garden, it’s important to consider several factors to ensure their successful growth and overall health. By taking these factors into account, you can create an optimal environment for your hollyhocks to thrive and enjoy their beautiful blooms.
Climate and Hardiness: Hollyhocks have different hardiness levels and temperature requirements. It’s crucial to consider your climate and growing zone when selecting hollyhock varieties. Ensure that the climate in your area is suitable for the specific cultivar you plan to grow. Consider the average temperatures, frost dates, and the duration of your growing season.
Sunlight: Hollyhocks thrive in full sun to partial shade. Choose a location in your garden that receives at least 6 hours of direct sunlight each day. Avoid areas with excessive shade, as it can lead to leggy growth and poor blooming.
Soil Conditions: Hollyhocks prefer well-draining soil that is rich in organic matter. Prepare the soil by loosening it and adding compost or well-rotted manure to improve its fertility and drainage. It’s beneficial to perform a soil test to determine the pH level and make any necessary amendments to create the ideal conditions for hollyhocks.
Spacing: Hollyhocks have a tall and broad growth habit. Adequate spacing between plants is important to provide good air circulation and prevent overcrowding. Space hollyhocks about 2-3 feet apart to allow room for their mature size and to minimize the risk of diseases.
Support: Due to their height, hollyhocks may require staking or support to prevent their flower stalks from bending or breaking. Install stakes or use plant supports early in the growing season to provide support as the plants grow taller. This will help maintain their upright structure and protect them from wind damage.
Pollinators and Pests: Hollyhocks are attractive to bees, butterflies, and other pollinators. Consider the impact on the local ecosystem and whether you want to attract these beneficial insects to your garden. Additionally, be aware of common pests that may affect hollyhocks, such as aphids or rust. Implement preventive measures or organic pest control methods to protect your plants.
Companion Plants: Plan your garden layout and consider incorporating companion plants that complement hollyhocks. Combining hollyhocks with other tall perennials or plants with contrasting colors and textures can enhance the overall aesthetic appeal of your garden and provide a diverse habitat for beneficial insects.
Maintenance and Care: Before planting hollyhocks, consider the time and effort you can dedicate to their maintenance. Hollyhocks may require regular watering, deadheading spent blooms, and providing support as needed. Make sure you have the time and resources to properly care for your hollyhocks to promote healthy growth and longevity.
By considering these factors before planting hollyhocks, you can create a favorable environment that meets their specific requirements. This thoughtful approach will contribute to the overall success and beauty of your hollyhock garden, allowing you to enjoy these stunning flowers for many years to come.
Preparing the Soil for Planting
Preparing the soil properly is essential for the successful growth of hollyhocks. By taking the time to prepare the soil before planting, you can create a nutrient-rich and well-draining environment that will support the health and vitality of your hollyhock plants.
Here are some steps to follow when preparing the soil for planting hollyhocks:
1. Choose the Right Location: Select a location in your garden that receives full sun to partial shade. Ensure that the area has enough space to accommodate the mature size of the hollyhock plants and allows good air circulation.
2. Clear the Area: Remove any existing weeds, grass, or debris from the planting area. This will reduce competition for nutrients and give your hollyhocks a better chance to thrive.
3. Loosen the Soil: Use a garden fork or a tiller to loosen the soil to a depth of about 12 inches. This will help improve soil aeration and drainage, which is essential for hollyhock root development.
4. Amend the Soil: Add organic matter such as compost, well-rotted manure, or peat moss to the soil. Organic matter improves soil structure, moisture retention, and nutrient availability. Work the amendments into the soil thoroughly to distribute them evenly.
5. Test the Soil: Consider conducting a soil test to determine the pH level and nutrient content of your soil. Hollyhocks prefer a slightly acidic to neutral soil pH range of around 6.0 to 7.0. Based on the test results, adjust the pH and nutrient levels if needed by adding the appropriate amendments.
6. Provide Drainage: Ensure that the soil has good drainage to prevent waterlogging, which can lead to root rot. If the soil is heavy clay or retains excessive moisture, adding organic matter and coarse sand can help improve drainage.
7. Mulch the Soil: Apply a layer of organic mulch around the base of the hollyhock plants once they are in the ground. The mulch helps retain soil moisture, suppresses weed growth, and regulates soil temperature.
8. Water the Soil: Before planting the hollyhocks, thoroughly water the soil to provide adequate moisture. This will help the plants establish their roots more effectively.
By following these steps to prepare the soil, you can create a fertile, well-draining, and nutrient-rich environment that promotes healthy growth and development of your hollyhock plants. Taking the time to properly prepare the soil will pay off in the long run, ensuring the success and longevity of your hollyhocks in your garden.
Step-by-Step Guide to Planting Hollyhocks
Planting hollyhocks in your garden can be an exciting and rewarding experience. Follow this step-by-step guide to ensure the proper planting and establishment of your hollyhock plants.
1. Choose the Right Time: Determine whether you will be planting in the spring or fall based on your climate and growing zone. Consider the pros and cons of each season and select the most suitable time for your hollyhocks.
2. Select a Planting Site: Choose a location that receives full sun to partial shade and has well-draining soil. Ensure there is enough space to accommodate the mature size of the hollyhock plants.
3. Prepare the Soil: Clear the planting area of weeds and debris. Loosen the soil to a depth of about 12 inches and incorporate organic matter, such as compost or well-rotted manure, to improve soil structure and fertility.
4. Dig Planting Holes: Dig holes that are wide and deep enough to accommodate the root ball of the hollyhock seedling or the depth recommended for planting hollyhock seeds. Space the holes 2-3 feet apart to allow for proper growth and airflow.
5. Planting Seedlings: If planting seedlings, gently remove them from their containers and loosen the roots. Place the seedlings in the holes and backfill with soil, making sure that the crown of the plant is level with the soil surface. Firmly but gently press the soil around the seedling to ensure good contact.
6. Planting Seeds: If planting seeds, follow the instructions on the seed packet for proper depth and spacing. Generally, hollyhock seeds should be sown about 1/8 to 1/4 inch deep. Cover the seeds with soil and gently firm the soil surface.
7. Watering: After planting, thoroughly water the newly planted hollyhocks to settle the soil around the roots. Maintain regular watering, ensuring that the soil remains moist but not waterlogged. Avoid overwatering, which can cause root rot.
8. Mulching: Apply a layer of organic mulch around the base of the hollyhock plants, leaving a small space around the stem to prevent moisture buildup and stem rot. Mulch helps retain soil moisture, suppress weeds, and regulate soil temperature.
9. Supporting Tall Stems: Install stakes or plant supports near the hollyhock plants when they reach a height of about 2-3 feet. This will provide support and prevent the flower stalks from bending or breaking under their own weight.
10. Regular Maintenance: Monitor the hollyhocks regularly for watering needs, weed control, and pest management. Deadhead spent blooms regularly to promote more flowering.
By following this step-by-step guide, you can ensure proper planting and establishment of your hollyhocks. Remember to provide ongoing care and attention as your hollyhocks grow and thrive in your garden, rewarding you with their stunning blooms season after season.
Caring for Hollyhock Seedlings
Caring for hollyhock seedlings is crucial to their healthy growth and development. These young plants require proper attention and care to ensure their successful establishment in your garden. Here are some important tips to help you care for your hollyhock seedlings:
Watering: Keep the soil evenly moist but not waterlogged. Water the seedlings regularly, especially during dry spells, to promote healthy root development. Avoid overwatering, as this can lead to fungal diseases and root rot. Water at the base of the plants, avoiding wetting the foliage to minimize the risk of fungal infections.
Mulching: Apply a layer of organic mulch around the base of the seedlings. The mulch helps retain soil moisture, regulate soil temperature, and suppress weed growth. Leave a small space around the stem to prevent moisture buildup and stem rot.
Support structures: Install stakes or plant supports near the seedlings as they grow taller. Hollyhocks can have tall flower stalks that may require additional support to prevent them from bending or breaking. Tie the seedlings gently to the stakes using plant ties or soft twine, avoiding tight binding to allow for natural movement.
Fertilizing: Apply a balanced, slow-release fertilizer around the seedlings once they have established a few sets of true leaves. Follow the package instructions for proper application rates. Fertilizing helps provide the necessary nutrients for healthy growth and vibrant blooms.
Weed control: Regularly weed the area around the hollyhock seedlings to minimize competition for nutrients, water, and sunlight. Be careful when pulling weeds to avoid disturbing the shallow root systems of the seedlings. Applying a layer of mulch can also help suppress weed growth and make weed removal easier.
Pest and disease management: Keep an eye out for common pests like aphids, snails, and slugs that may feed on hollyhocks. Implement organic pest control methods or use appropriate insecticides if necessary. Monitor the seedlings for any signs of diseases such as rust or powdery mildew and take prompt action if detected, such as removing infected foliage or using fungicides labeled for hollyhocks.
Pruning: Pinching or pruning the growing tips of hollyhock seedlings when they are about 6 to 8 inches tall can help promote bushier growth. Pinching encourages the development of lateral branches, resulting in more flowers and a fuller plant.
Monitoring and care: Regularly inspect the seedlings for any signs of stress, nutrient deficiencies, or pest outbreaks. Provide proper care, such as addressing nutrient deficiencies through foliar spraying or adjusting watering practices as needed.
By following these care tips, you can provide the necessary attention and support for your hollyhock seedlings, ensuring their healthy growth and setting the stage for beautiful blooms as they mature. Remember to monitor their progress, make necessary adjustments, and enjoy the rewarding experience of watching your hollyhock seedlings flourish in your garden.
Transplanting Hollyhocks
Transplanting hollyhocks can be done to either relocate established plants or to transplant seedlings that have outgrown their initial containers. Proper timing and techniques are essential to ensure successful transplantation and minimize stress on the hollyhocks. Here are some important tips to consider when transplanting hollyhocks:
Timing: The best time to transplant hollyhocks is in early spring or early fall when the weather is mild, and the plants are not actively blooming. Avoid transplanting during hot summer months or during times of extreme weather conditions to minimize stress on the plants.
Prepare the New Location: Choose a new planting location with similar growing conditions, including sunlight exposure and soil type. Prepare the soil in the new location by loosening it and incorporating organic matter to improve drainage and fertility.
Water the Hollyhocks: Water the hollyhocks thoroughly a day or two before transplanting. Moist soil helps reduce stress on the plants and makes it easier to excavate the root system without causing damage.
Excavate the Root Ball: Dig around the base of the hollyhock plants, ensuring to go wide and deep enough to fully capture the root system. Gently lift the plants out of the ground, taking care not to damage the roots. If transplanting seedlings, carefully loosen the root mass to encourage root growth in the new location.
Transplanting: Dig a hole in the new location that is wide and deep enough to accommodate the root ball of the hollyhock plants. Place the plants in the hole at the same level as they were previously growing, ensuring that the crown is level with or just slightly above the soil surface. Backfill the hole with soil, firming it gently to eliminate air pockets around the roots.
Water and Mulch: After transplanting, water the hollyhocks thoroughly to settle the soil around the roots. Apply a layer of organic mulch around the base of the plants, leaving a small space around the stem. Mulch helps retain moisture, regulate soil temperature, and suppress weed growth.
Support: If the hollyhocks are tall or appear top-heavy, provide support such as stakes or plant supports to prevent bending or breaking of the flower stalks. Install support structures at the time of transplanting or shortly afterward to avoid disturbing the newly transplanted plants.
Monitor and Care: Keep a close eye on the transplanted hollyhocks and provide proper care, including regular watering, weeding, and addressing any pest or disease issues that may arise. Minimize stress on the plants by avoiding overhead watering and providing adequate airflow around the foliage.
Transplanting hollyhocks requires care and attention to ensure their successful relocation. By following these tips, you can minimize stress on the hollyhocks and promote their healthy reestablishment in their new location. With proper care, transplanted hollyhocks can continue to thrive and reward you with their beautiful blooms for years to come.
Tips for Success When Planting Hollyhocks
Planting hollyhocks can be a rewarding and enjoyable experience. To ensure success and maximize the beauty of these stunning flowers, here are some valuable tips to keep in mind when planting hollyhocks:
- Choose the right varieties: Select hollyhock varieties that are well-suited to your climate and growing conditions. Consider factors such as hardiness, height, and color to find the perfect hollyhocks for your garden.
- Provide proper drainage: Hollyhocks prefer well-draining soil, so ensure the planting area has good drainage. Improve soil structure by adding organic matter such as compost or well-rotted manure.
- Consider staking: Due to their tall height, many hollyhock varieties benefit from staking or plant supports to prevent their flower stalks from bending or breaking under the weight of the blooms. Install supports early in the growing season to provide necessary support.
- Protect from harsh elements: In regions with extreme hot summers or cold winters, consider providing shade or winter protection for hollyhocks. Shielding them from intense sunlight or providing insulation during freezing temperatures can help preserve their health and prolong their lifespan.
- Practice proper watering: Hollyhocks thrive in well-hydrated but not waterlogged soil. Water deeply once or twice a week, allowing the soil to dry out slightly between waterings. Avoid overhead watering to minimize the risk of foliage diseases.
- Deadhead spent blooms: Regularly deadhead or remove faded flowers to encourage prolonged blooming and prevent seed formation. This will divert the plant’s energy towards new growth and encourages the production of more blooms.
- Monitor for pests and diseases: Keep an eye out for common pests like aphids, slugs, and snails, as well as diseases like rust or powdery mildew. Take necessary actions promptly to prevent potential damage to your hollyhocks. Implement organic pest control methods or consult with local experts if needed.
- Mulch for moisture retention: Apply a layer of organic mulch around the base of the hollyhocks to help retain moisture, suppress weed growth, and maintain consistent soil temperatures. Mulching also adds an aesthetically pleasing touch to your garden.
- Support pollinators: Hollyhocks are attractive to bees, butterflies, and other pollinators. Create a pollinator-friendly garden by including companion plants that attract and support these beneficial insects. This helps with the overall health and diversity of your garden ecosystem.
- Regular maintenance: Maintain regular garden maintenance practices such as weeding, fertilizing, and monitoring for any signs of stress or disease. By providing consistent care and attention, you can ensure the health and beauty of your hollyhocks.
By following these tips, you can enhance your success when planting hollyhocks and enjoy the beauty of these vibrant flowers in your garden. Remember to tailor your care to the specific needs of your hollyhocks and adapt to the unique conditions of your growing zone.
Dealing with Common Hollyhock Problems
While hollyhocks are generally resilient plants, they may occasionally encounter common problems that can disrupt their growth and appearance. Being aware of these issues and knowing how to address them can help you maintain healthy and thriving hollyhocks. Here are some common hollyhock problems and how to deal with them:
- Powdery Mildew: Powdery mildew appears as a white, powdery coating on the leaves, stems, and buds. To address this fungal disease, ensure good air circulation around the plants by providing adequate spacing and pruning overcrowded areas. Water at the base of the plants to keep the foliage dry and avoid overhead watering. If necessary, treat with organic fungicides labeled for use on hollyhocks.
- Rust: Rust is another common fungal disease that affects hollyhocks. It appears as orange or reddish-brown spots on the undersides of leaves. Remove and destroy any infected leaves as soon as you notice them to prevent the spread of the disease. Provide proper spacing and air circulation to minimize humidity around the plants, and consider using fungicides if the problem persists.
- Aphids: Aphids are small, soft-bodied insects that suck the sap from plant tissues, causing distorted growth and yellowing leaves. Use a strong spray of water to dislodge aphids from the plants or introduce natural predators like ladybugs or lacewings to control the population. In severe cases, you may need to resort to insecticidal soaps or oils.
- Japanese Beetles: Japanese beetles can feed on hollyhock foliage, leaving behind skeletonized leaves. Handpick the beetles off the plants and drop them into a bucket of soapy water. You can also use traps or apply insecticides labeled for Japanese beetle control, following the instructions carefully.
- Slugs and Snails: Slugs and snails can devour the leaves and stems of hollyhocks, especially in moist conditions. Remove any hiding places such as debris or boards near the plants that can provide shelter for these pests. Use physical barriers like copper tape or diatomaceous earth around the base of the plants to deter them. Additionally, handpicking them during evening hours can help reduce their population.
- Overwatering: Overwatering can lead to root rot and other fungal diseases. Ensure that the soil has good drainage, and only water hollyhocks when the top inch of soil feels dry to the touch. Water deeply and infrequently, allowing the soil to dry out slightly between waterings.
- Weed Competition: Weeds can compete with hollyhocks for nutrients, water, and sunlight. Regularly remove weeds from the area around the hollyhocks to minimize competition. Applying a layer of mulch can also help suppress weed growth and conserve soil moisture.
By being proactive and promptly addressing these common hollyhock problems, you can maintain the health and vitality of your hollyhock plants. Remember to implement proper cultural practices, such as providing good airflow, removing infected plant material, and practicing regular garden maintenance, to minimize the risk of issues and promote the long-term success of your hollyhocks.
Frequently Asked Questions about Planting Hollyhocks
Planting hollyhocks can sometimes raise questions, especially for those who are new to gardening or have not yet experienced growing these beautiful flowers. Here are some frequently asked questions about planting hollyhocks along with their answers:
Q: When is the best time to plant hollyhocks?
A: Hollyhocks can be planted in either the spring or fall, depending on your growing zone and preference. Spring planting allows for a longer growing season ahead, while fall planting gives hollyhocks a head start for the following spring.
Q: How far apart should I space my hollyhock plants?
A: Space hollyhock plants about 2-3 feet apart to allow for proper airflow and to minimize the risk of diseases. Giving them enough space also ensures that they have room to grow and reach their full potential.
Q: Do hollyhocks need full sun?
A: Yes, hollyhocks thrive in full sun to partial shade. They require a minimum of 6 hours of direct sunlight each day to grow and bloom to their fullest potential.
Q: How often should I water hollyhocks?
A: Water hollyhocks deeply once or twice a week, allowing the top inch of soil to dry out slightly between waterings. Adjust watering frequency based on weather conditions and rainfall, ensuring that the soil remains evenly moist but not waterlogged.
Q: Can I grow hollyhocks in containers?
A: While hollyhocks are typically grown in the ground, it is possible to grow them in large containers. Choose deep containers that allow for sufficient root growth, and ensure that the container has good drainage. Use a high-quality potting mix and provide adequate care, including regular watering and fertilizing.
Q: How long does it take for hollyhocks to bloom?
A: Hollyhocks are biennial or short-lived perennials, meaning they usually take two years to bloom. In the first year, they establish their root systems, and in the second year, they produce their striking flower stalks and blooms. Some cultivars may behave as short-lived perennials and bloom for multiple years before declining.
Q: What can I do if my hollyhocks are being eaten by pests?
A: If pests like aphids or Japanese beetles are feeding on your hollyhocks, consider using organic pest control methods such as handpicking, introducing natural predators, or applying specific insecticides. Take prompt action to prevent further damage and protect the health of your hollyhocks.
Q: How do I collect and store hollyhock seeds?
A: To collect hollyhock seeds, allow the seed pods to fully mature on the plant. Once they are dry and brown, carefully remove the pods and break them open to extract the seeds. Store the seeds in a cool, dry location in airtight containers until you are ready to plant them.
By addressing these frequently asked questions, gardeners can feel more confident and prepared when it comes to planting hollyhocks. As you embark on your hollyhock growing journey, remember to adapt your care practices to your specific growing conditions and enjoy the beauty that these flowers bring to your garden.