Why Do You Need to Know Where the Water Filter Is on Your Keurig?
If you are a proud owner of a Keurig coffee maker, you may be wondering why it’s important to know where the water filter is located. Well, the water filter plays a crucial role in ensuring that you have the best possible brewing experience with your Keurig machine. Here are a few reasons why knowing the location of the water filter is essential:
1. Improved Water Quality: The water filter in your Keurig is designed to remove impurities such as chlorine, sediment, and odors from the water. By filtering out these unwanted elements, the water filter helps to enhance the taste and quality of your brewed coffee. It ensures that each cup is clean, pure, and free from any unpleasant flavors.
2. Extended Machine Lifespan: When your Keurig machine is equipped with a water filter, it helps to prevent scale build-up caused by minerals present in tap water. Scale can accumulate over time and clog the internal components of the machine, leading to performance issues and potentially reducing its lifespan. By using a water filter, you can prolong the life of your Keurig and keep it running smoothly for years to come.
3. Convenience and Ease of Use: With a water filter in place, you don’t have to worry about constantly buying and using bottled water or using a separate water filtration system for your coffee. The built-in water filter in your Keurig simplifies the brewing process, allowing you to effortlessly enjoy a fresh and flavorful cup of coffee with just the touch of a button.
4. Cost-Effective Solution: Opting for a water filter in your Keurig is a cost-effective alternative to purchasing bottled water or investing in a separate water filtration system. Not only does it save you money in the long run, but it also reduces plastic waste generated by single-use water bottles.
So, by knowing where the water filter is located on your Keurig machine, you can ensure an enhanced coffee brewing experience, prolong the lifespan of your machine, enjoy convenience, and save money in the process.
How Can You Tell If Your Keurig Has a Water Filter?
Keurig machines come with different models and versions, so it’s important to determine if your specific Keurig model has a water filter built-in. Here are a few ways to tell if your Keurig has a water filter:
1. Check the Instruction Manual: The easiest way to find out if your Keurig has a water filter is by referring to the instruction manual that came with your machine. The manual usually includes a section that mentions the presence of a water filter and provides instructions on how to install and replace it.
2. Look for a Water Filter Cavity: Some Keurig models have a designated cavity or slot where the water filter is inserted. If your machine has this feature, you can visually inspect the top or the side of your Keurig for a removable filter holder or a marked area where the water filter is located.
3. Check the Water Reservoir: Many Keurig machines have a transparent water reservoir that allows you to see the internal components. Look inside the water reservoir and see if there is a small compartment or space where the water filter can be placed. If you find such a space, it’s likely that your Keurig has a built-in water filter.
4. Research your Keurig Model: If you are unsure about whether your Keurig has a water filter or not, you can always look up your specific model online. Keurig’s official website or other reliable sources can provide detailed information about the features and specifications of your machine, including the presence of a water filter.
By following these steps, you can easily determine whether your Keurig has a water filter or not. It’s important to identify if your machine has a water filter so that you can take full advantage of its benefits and properly maintain the filter for optimal brewing performance.
The Benefits of Using a Water Filter in Your Keurig
Using a water filter in your Keurig coffee maker offers several benefits that contribute to a better brewing experience and the longevity of your machine. Let’s take a closer look at some of the advantages:
1. Enhanced Taste and Aroma: The water filter removes impurities, such as chlorine and sediments, from the tap water. By doing so, it helps to enhance the overall taste and aroma of your brewed coffee. Filtering the water ensures that you get a clean and pure cup of coffee without any unwanted flavors or odors.
2. Reduces Scaling and Mineral Build-Up: Tap water often contains minerals that can accumulate in your Keurig machine over time, leading to scaling on the internal components. Using a water filter helps to minimize scaling and prolong the life of your machine. By reducing mineral build-up, you can prevent clogs and ensure that your Keurig operates at its best.
3. Protects Your Investment: Investing in a Keurig machine is a significant decision, and using a water filter is an effective way to protect that investment. By filtering out impurities, the water filter helps to prevent any potential damage caused by mineral deposits. It ensures that your machine stays in excellent working condition for years to come.
4. Convenience and Simplicity: Using a water filter eliminates the need for bottled water or separate water filtration systems. With a built-in water filter, you can simply fill your Keurig’s water reservoir with tap water and be confident that the filtration system will do its job. It makes the brewing process more convenient and hassle-free.
5. Cost-Effective Solution: Using a water filter in your Keurig is a cost-effective alternative to buying bottled water or investing in other water filtration methods. The filter is designed to last for several months, depending on usage, making it a budget-friendly option for consistently enjoying high-quality coffee.
6. Environmentally Friendly: By using a water filter, you can reduce your carbon footprint by eliminating the need for single-use water bottles. It is an eco-friendly choice that helps in minimizing plastic waste and promoting sustainable living.
Overall, using a water filter in your Keurig machine offers a range of benefits, including better-tasting coffee, improved machine performance, convenience, cost savings, and environmental friendliness. It’s a small investment that can significantly enhance your coffee brewing experience.
Steps to Locate the Water Filter on Your Keurig Machine
If you’re unsure where the water filter is located in your Keurig machine, don’t worry! Follow these simple steps to find it:
1. Refer to the Instruction Manual: The first step is to consult the instruction manual that came with your Keurig machine. It provides specific details about the location of the water filter for your particular model. Look for the section that discusses the water filter and its placement.
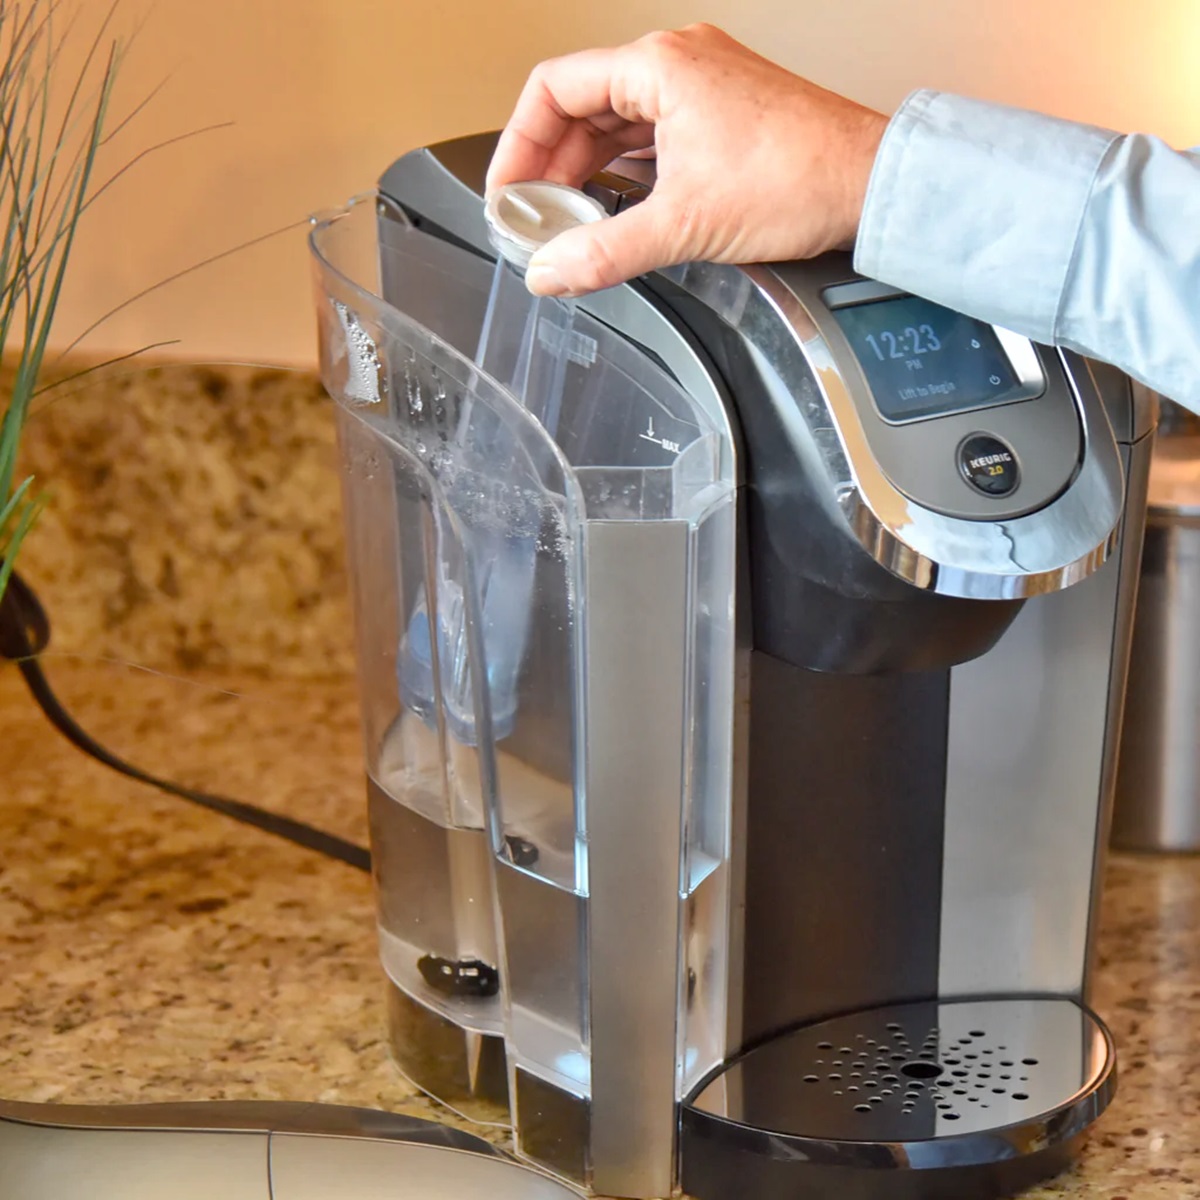
2. Inspect the Water Reservoir: In most Keurig models, the water filter is located within the water reservoir. Remove the water reservoir from the machine and set it aside. Look for a circular opening or compartment within the reservoir. This is where the water filter should be inserted.
3. Identify the Filter Holder: If your Keurig machine has a removable filter holder, it will be located either on the top of the machine or on the side. Check for a small compartment or a marked area where the filter holder is housed. This is where the water filter will be placed.
4. Look for Indicator Labels: Some Keurig models have indicator labels or symbols that indicate the location of the water filter. These labels may be located near the water reservoir or on the control panel of the machine. They provide visual cues to help you easily locate the water filter.
5. Research Online: If you’re still having trouble finding the water filter, consider searching online for specific instructions or videos related to your Keurig model. Keurig’s official website or online forums dedicated to Keurig users can be valuable resources for locating the water filter.
By following these steps and using the resources available to you, you will be able to locate the water filter on your Keurig machine. It’s important to find the water filter so that you can properly maintain it and enjoy the benefits of clean and great-tasting coffee.
How to Remove and Replace the Water Filter in Your Keurig
When it’s time to replace the water filter in your Keurig machine, follow these step-by-step instructions:
1. Prepare your Keurig: Ensure that your Keurig machine is turned off and unplugged. Lift the handle to open the brewer and remove any used K-Cups or pods from the holder.
2. Locate the water filter: Refer to the previous section for locating the water filter in your specific Keurig model. If it is located within the water reservoir, remove the reservoir from the machine. If your Keurig has a removable filter holder, locate the compartment where the filter is inserted.
3. Remove the water filter: If your Keurig has a water filter inside the reservoir, gently lift the filter out by its handle. If your machine has a removable filter holder, push up on the handle or release the latch to open the compartment and remove the filter.
4. Discard the old filter: Once you have removed the water filter, discard it responsibly. Some Keurig models may have specific instructions regarding the disposal of the used filter, so check your instruction manual for guidance.
5. Prepare the new filter: Unwrap the new water filter from its packaging. If applicable, rinse the filter under cold running water for a few seconds to remove any loose carbon particles. This step is not necessary for all water filters, so refer to the instructions provided with the filter.
6. Insert the new water filter: For machines with a water filter in the reservoir, simply slide the new filter into the designated cavity, ensuring that it fits securely. If your Keurig has a removable filter holder, place the new filter inside the compartment and close it firmly.
7. Prime the water filter: For some Keurig models, it is recommended to prime or activate the water filter before use. Consult your instruction manual to determine if this step is necessary for your particular machine and follow the provided instructions.
8. Reinstall the water reservoir: If you removed the water reservoir, reattach it to your Keurig machine, making sure that it is properly aligned and seated in place.
By following these steps, you can easily remove the old water filter and replace it with a new one, ensuring that your Keurig is ready to brew your favorite beverages with fresh, filtered water.
Maintaining and Cleaning the Water Filter in Your Keurig
Proper maintenance and cleaning of the water filter in your Keurig machine are essential to ensure its effectiveness and longevity. Here are some important steps to follow:
1. Replace the Filter Regularly: Water filters in Keurig machines are typically designed to be replaced every two months or after brewing approximately 60 tank refills. It’s crucial to stick to this guideline to ensure optimal filtration and avoid bacterial growth. Setting a reminder or using a calendar can help you keep track of when it’s time for a replacement.
2. Primarily Use Filtered Water: Using filtered water, such as bottled or distilled water, can help prolong the lifespan of your water filter. By reducing the amount of mineral deposits and impurities in the water, you can minimize the strain on the filter and ensure that it continues to work effectively.
3. Regularly Clean the Water Reservoir: Cleaning the water reservoir of your Keurig is crucial for maintaining the cleanliness of the water filter. Empty the reservoir and wash it with warm, soapy water on a regular basis. Rinse thoroughly to remove any residue or soap. This step prevents any build-up or contamination that may affect the performance of the water filter.
4. Run Filtered Water Flushing Cycles: Some Keurig models offer a special function to run a water flushing cycle. This helps to clear any impurities or build-up in the water lines and ensure a clean flow of water through the filter. Consult your machine’s instruction manual to determine how often and how to perform this flushing cycle.
5. Inspect for Clogs and Damage: Periodically inspect the water filter for any signs of clogs or damage. If you notice any blockages or deterioration of the filter, it’s important to replace it promptly. A damaged or clogged filter can hinder the proper flow of water and affect the quality of your brewed coffee.
6. Follow Keurig’s Guidelines: Keurig may provide specific maintenance instructions for the water filter in your particular model. It’s important to follow these guidelines to ensure proper functioning of the filter and to avoid voiding any warranty or support from the manufacturer.
By following these maintenance and cleaning practices, you can keep your water filter in optimal condition, prolong its lifespan, and continue to enjoy the benefits of clean and delicious coffee from your Keurig machine.
Frequently Asked Questions about Keurig Water Filters
Here are some frequently asked questions about Keurig water filters, along with their answers:
1. How often should I replace the water filter in my Keurig?
It is recommended to replace the water filter every two months or after brewing approximately 60 tank refills. This ensures optimal filtration and helps maintain the quality of your brewed coffee.
2. Can I use my Keurig without a water filter?
Yes, you can still use your Keurig without a water filter. However, using a water filter helps improve the taste of your brewed coffee by removing impurities and extending the life of your machine by preventing scale build-up.
3. Can I clean and reuse the water filter in my Keurig?
No, the water filters used in Keurig machines are not meant to be cleaned and reused. It is recommended to replace the filter with a new one every two months for optimal performance.
4. Can I use any brand of water filter in my Keurig?
It is recommended to use genuine Keurig water filters that are specifically designed for your machine. While some generic filters may fit, using non-Keurig filters could impact the performance and potentially damage your machine.
5. How do I know when it’s time to replace the water filter?
Keurig machines often have a filter reminder or indicator light that alerts you when it’s time to replace the water filter. It’s important to follow this indication or refer to the recommended replacement interval of two months.
6. Do I need to soak the water filter before using it in my Keurig?
No, Keurig water filters do not require soaking before use. However, it is recommended to rinse some filters under cold running water for a few seconds to remove any loose carbon particles.
7. Can I use the water filter if my tap water is already filtered?
Yes, you can still use the water filter even if your tap water is already filtered. The Keurig water filter provides an additional layer of filtration, helping to remove any remaining impurities and enhancing the quality of your brewed coffee.
These FAQs address some common concerns and queries about Keurig water filters. If you have further questions or specific concerns, referring to the instruction manual or contacting Keurig’s customer support can provide you with the most accurate and personalized information.