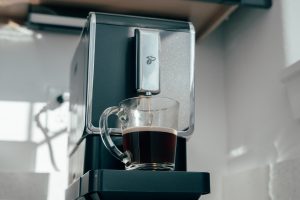
Overview of Keurig Duo
The Keurig Duo is a versatile and innovative coffee machine that combines the convenience of single-serve brewing with the flexibility of a traditional carafe system. It offers the best of both worlds, allowing you to enjoy your favorite coffeehouse-style beverages or brew a full pot for those moments when one cup just isn’t enough.
With its sleek design and user-friendly interface, the Keurig Duo is a perfect addition to any kitchen or office space. It features a large water reservoir, multiple brew sizes, and a programmable timer for added convenience. Whether you prefer a bold cup of coffee or a smooth, silky latte, the Keurig Duo has you covered.
One of the standout features of the Keurig Duo is its ability to set the clock, which ensures your machine is always accurate and ready to brew. Setting the clock is a simple and straightforward process that can be done in just a few minutes.
In this article, we will guide you through the steps to set the clock on your Keurig Duo, as well as provide troubleshooting tips for any clock-related issues you may encounter. So, without further ado, let’s get started on ensuring your Keurig Duo is in perfect sync with your daily brewing routine!
Steps to Set the Clock on Keurig Duo
Setting the clock on your Keurig Duo is a straightforward process that can be done in just a few simple steps. Follow the guide below to ensure your machine is displaying the correct time:
- Step 1: Power on your Keurig Duo
- Step 2: Access the Settings Menu
- Step 3: Adjust the Clock
- Step 4: Set the Clock Format
- Step 5: Confirm and Save the Changes
Make sure your Keurig Duo is plugged into a power source and turned on. The power button is typically located on the top or side of the machine. Once the machine is powered on, it will go through a startup process.
Locate the settings menu on your Keurig Duo. This can usually be found by navigating through the buttons or touchscreen display. Look for an icon or label that resembles a gear or settings symbol.
Once you have accessed the settings menu, navigate to the clock settings. The specific location may vary depending on the model of your Keurig Duo. Use the arrow buttons or touchscreen to adjust the hours and minutes. Take note of whether the time is displayed in 12-hour or 24-hour format.
If you prefer a specific clock format, such as 12-hour or 24-hour, make sure to select the appropriate option in the settings menu. This will ensure that the time is displayed in the format you are accustomed to.
After adjusting the clock and selecting the desired clock format, locate the “Save” or “Confirm” button in the settings menu. Press this button to save the changes and exit the settings menu. Your Keurig Duo should now display the correct time.
By following these simple steps, you can easily set the clock on your Keurig Duo and ensure that it accurately reflects the current time. Now, you can enjoy your favorite beverages at precisely the right moment without any clock-related issues.
Step 1: Power on your Keurig Duo
The first step in setting the clock on your Keurig Duo is to ensure that the machine is powered on and ready for use. Follow the instructions below to properly power on your Keurig Duo:
1. Locate the power button: The power button is typically located on the top or side of the Keurig Duo machine. It is usually labeled with a power symbol or the word “power”.
2. Plug in the machine: Ensure that your Keurig Duo is properly plugged into a power outlet. Check that the power cord is securely connected to both the machine and the outlet.
3. Turn on the machine: Once the Keurig Duo is properly plugged in, press the power button to turn on the machine. You may hear a sound or see the machine’s display light up, indicating that it is powering on.
4. Wait for the startup process: After powering on the Keurig Duo, the machine will go through a startup process. This includes initializing internal systems and preparing for operation. It may take a moment for the machine to complete this process.
5. Check the display: Once the startup process is complete, the display on your Keurig Duo should be active and ready for use. You may see icons, buttons, or a touchscreen that can be used to navigate through the machine’s settings.
Following these steps will ensure that your Keurig Duo is powered on and ready to be configured. With the machine properly turned on, you can now proceed to the next steps to set the clock and personalize your brewing experience.
Step 2: Access the Settings Menu
To set the clock on your Keurig Duo, you’ll need to access the settings menu. This menu allows you to customize various options and preferences on your machine. Follow the steps below to access the settings menu on your Keurig Duo:
1. Locate the settings icon: Look for an icon or label on your Keurig Duo that represents the settings menu. This icon is often shaped like a gear or will have the word “settings” written next to it. It may be located on the machine’s display or on a control panel.
2. Press the settings icon: Once you’ve identified the settings icon, press it to access the settings menu. On some models, you may need to press and hold the icon for a few seconds. This action will open up a new screen or panel that displays various customizable options for your machine.
3. Navigate through the settings: Use the arrow buttons or touchscreen on your Keurig Duo to navigate through the settings menu. Depending on your machine, you may need to scroll up, down, left, or right to find the clock settings. Look for an option that mentions “clock” or “time.”
4. Select the clock settings: Once you’ve found the clock settings option, select it to enter the clock customization screen. Here, you’ll be able to adjust the hours, minutes, and clock format to match the current time and your preference.
By following these steps, you’ll be able to easily access the settings menu on your Keurig Duo and find the clock settings. Once you’re in the settings menu, you can proceed to the next steps for adjusting and setting the clock to ensure accurate time display on your machine.
Step 3: Adjusting the Clock
After accessing the settings menu, you can now proceed to adjust the clock on your Keurig Duo. Follow the steps below to ensure that the time displayed on your machine is accurate:
1. Locate the clock adjustment options: Within the settings menu, navigate to the clock adjustment options. This is where you can change the hours and minutes to reflect the current time. Depending on your Keurig Duo model, you may need to scroll or use arrow buttons to find the clock adjustment settings.
2. Adjust the hours: Once you’ve found the clock adjustment settings, use the arrow buttons or touchscreen to change the hours. Pay attention to whether the clock format is in 12-hour or 24-hour mode. Adjust the hours accordingly until they match the current time.
3. Modify the minutes: After setting the hours, proceed to adjust the minutes. Use the same method as above to increase or decrease the minutes until they match the current time. Take your time to ensure precise minute adjustment.
4. Double-check the time: After adjusting both the hours and minutes, double-check the time displayed on your Keurig Duo. Ensure that it accurately reflects the current time. If necessary, make any additional adjustments to fine-tune the time display.
By following these steps, you can easily adjust the clock on your Keurig Duo and ensure that it reflects the correct time. This will not only keep your machine in sync with your daily routine but also help you brew your favorite beverages precisely when you need them.
Step 4: Setting the Clock Format
After adjusting the hours and minutes on your Keurig Duo, the next step is to set the clock format. The clock format determines whether the time is displayed in a 12-hour or 24-hour format. Follow the steps below to set the clock format on your Keurig Duo:
1. Access the clock format settings: Within the settings menu, look for an option that allows you to adjust the clock format. This option is often labeled as “Clock Format” or “Time Format.” Use the arrow buttons or touchscreen to select this option.
2. Choose the desired clock format: Once you’ve accessed the clock format settings, select the desired format from the available options. If you prefer a 12-hour format, choose “AM/PM” or “12-hour.” If you prefer a 24-hour format, select “24-hour” or “Military Time.”
3. Confirm the clock format selection: After choosing the clock format, confirm your selection by pressing the appropriate button or tapping the touchscreen. This will save the changes and apply the selected clock format to the time display on your Keurig Duo.
4. Verify the clock format: Double-check the time display on your Keurig Duo to ensure that it is showing the correct time format. If necessary, repeat the steps above to adjust the clock format until it reflects your desired choice.
Setting the clock format allows you to customize how the time is displayed on your Keurig Duo. By selecting the format that you are accustomed to, you can easily read and interpret the time on your machine, making your brewing experience even more convenient.
Step 5: Confirming and Saving the Changes
Once you have adjusted and set the clock and clock format on your Keurig Duo, it’s important to confirm and save the changes to ensure that the correct time is displayed. Follow the steps below to complete this final step:
1. Locate the confirmation button: Within the settings menu, look for a button or option that allows you to confirm and save the changes you’ve made to the clock settings. This button is typically labeled as “Save,” “Confirm,” or “Apply.”
2. Press the confirmation button: Once you’ve found the confirmation button, press it to save the changes and exit the clock settings menu. This action will update the clock and clock format on your Keurig Duo to match the settings you’ve chosen.
3. Verify the saved changes: After pressing the confirmation button, take a moment to verify that the clock and clock format on your Keurig Duo are now displaying the correct time. Ensure that both the hours and minutes, as well as the selected clock format, are accurately reflected on the machine’s display.
By following these steps and confirming the changes, you can rest assured that your Keurig Duo is displaying the correct time. This will enable you to schedule your brewing sessions with precision and enjoy your favorite beverages at just the right moment.
Troubleshooting Clock Issues on Keurig Duo
While setting the clock on your Keurig Duo is a relatively simple process, you may encounter some issues along the way. Here are some common clock-related problems and troubleshooting tips to help you resolve them:
1. Clock not updating: If you’ve set the clock on your Keurig Duo but it is not updating or displaying the correct time, try the following steps:
- Ensure that the machine is properly connected to a power source and turned on.
- Double-check that you’ve followed the steps correctly to adjust the clock and save the changes.
- Try resetting the machine by unplugging it from the power source for a few minutes, then plugging it back in and powering it on.
- If the issue persists, consult the user manual or contact Keurig customer support for further assistance.
2. Clock losing time: If you find that your Keurig Duo’s clock consistently loses time, here are a few steps to address the issue:
- Make sure that the machine is connected to a stable power source and that there are no disruptions in the power supply.
- Check the battery backup, if applicable, and replace the batteries if they are low or depleted.
- Ensure that you have properly set the clock format and that it matches your preferred timekeeping system.
- If the problem persists, consider contacting Keurig customer support for further guidance.
3. Clock skipping or advancing time: If you notice that your Keurig Duo’s clock is skipping or advancing time unexpectedly, try the following troubleshooting steps:
- Check if there are any power surges or interruptions that could be affecting the clock’s functionality.
- Ensure that the clock settings are correctly saved and the clock format is properly set.
- If using battery backup, ensure the batteries have sufficient power and are installed correctly.
- If the issue persists, it may be a more complex internal problem. In this case, it is recommended to seek assistance from Keurig customer support or a qualified technician.
By following these troubleshooting tips, you can address common clock issues on your Keurig Duo and ensure that the time displayed on your machine is accurate and reliable. Remember to refer to the user manual or contact Keurig customer support for specific guidance related to your particular model, if needed.
Common Problems and Solutions
While using your Keurig Duo, you may encounter a few common issues related to the clock and timekeeping functions. Here are some of these problems along with their solutions:
1. Clock not displaying: If the clock is not displaying on your Keurig Duo, try the following steps:
- Check if the machine is properly plugged into a power source and turned on.
- Ensure that you’ve followed the steps correctly to set the clock and save the changes.
- Try resetting the machine by unplugging it for a few minutes, then plugging it back in and powering it on.
- If the clock still does not display, it may indicate a hardware issue. Contact Keurig customer support for further assistance.
2. Clock time is incorrect: If the time displayed on your Keurig Duo is incorrect, try the following solutions:
- Check if you’ve adjusted the clock settings correctly and saved the changes.
- Ensure that the machine is connected to a stable power source and there are no interruptions in power supply.
- Verify that you’ve set the correct time zone to ensure accurate time display.
3. Clock losing time: If you notice that the clock on your Keurig Duo consistently loses time, try these troubleshooting steps:
- Ensure that the machine is receiving a consistent power supply and there are no power interruptions.
- Check if the battery backup, if applicable, needs to be replaced or if the batteries need to be recharged.
- Make sure that the clock format is correctly set to your preferred timekeeping system.
- If the issue persists, contact Keurig customer support to explore further solutions.
4. Clock display is flickering: If the clock display on your Keurig Duo is flickering, try the following troubleshooting steps:
- Check if there are any loose connections or damaged cables causing the flickering.
- Try resetting the machine by turning it off and unplugging it for a few minutes before plugging it back in and turning it on again.
- If the flickering continues, it may indicate a hardware issue. Reach out to Keurig customer support for further assistance.
By implementing these solutions, you can address common clock-related problems on your Keurig Duo and ensure that your machine displays the correct time accurately. If the issues persist or if you encounter any other problems with your Keurig Duo, don’t hesitate to contact Keurig customer support for further assistance.