
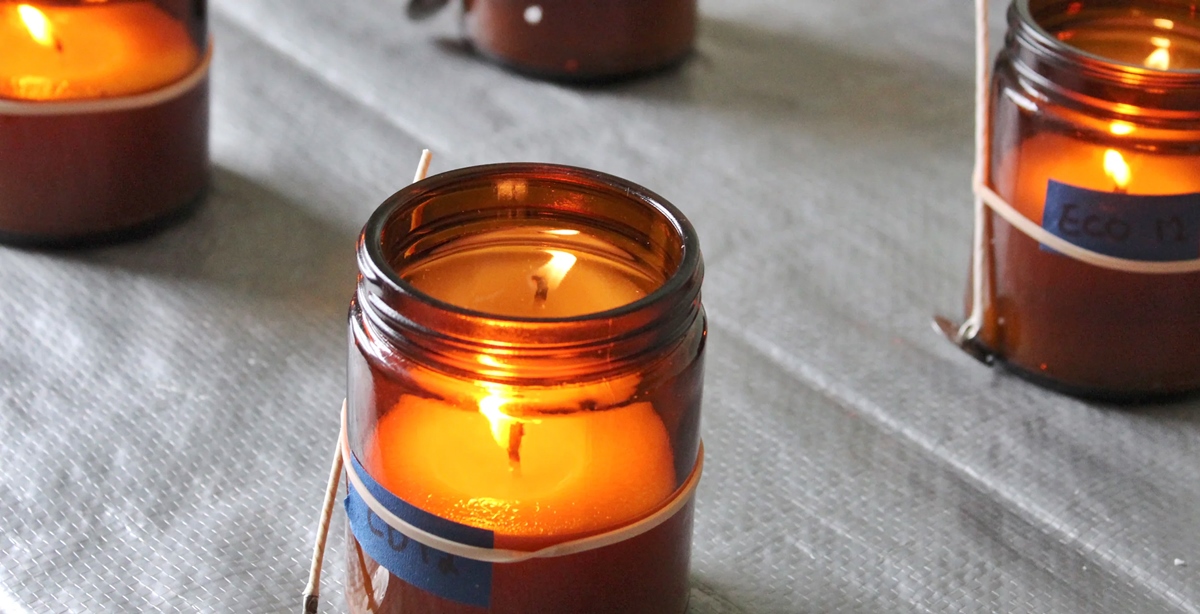
Signs that it’s time to stop burning a candle
There’s something truly magical about lighting a candle and enjoying its warm glow and delightful fragrance. However, it’s important to recognize when it’s time to put out the flame and safely retire the candle. Knowing the signs to look for can help you prevent accidents, extend the lifespan of your candles, and ensure you have the best possible experience. Here are some key indicators that it’s time to stop burning a candle:
-
The candle hasn’t fully melted: Most candles have a recommended burn time indicated on the label. If you consistently blow out the candle before it has a chance to completely melt across the surface, it can lead to tunneling. Tunneling occurs when the wax only melts in a small area around the wick, leaving a rim of unmelted wax along the edges. To avoid tunneling and maximize the fragrance throw of the candle, allow it to burn long enough for the entire top layer to become liquid.
-
The wick is too short or too long: A properly trimmed wick is crucial for a safe and efficient burn. If the wick becomes too short, it may struggle to stay lit, producing a weak flame or none at all. On the other hand, if the wick is too long, it can cause excessive flickering, smoking, and soot buildup. Trim the wick to around 1/4 inch before each burn to maintain a steady and controlled flame.
-
The candle emits smoke: While a little bit of smoke when initially lighting a candle is normal, excessive smoke during burning is a cause for concern. It could indicate that the wick is too long, the candle is in a drafty area, or there is debris, such as dust or burnt match heads, on the wick. Extinguish the candle, trim the wick, and ensure there are no obstructions before relighting.
-
The flame becomes weak or flickers excessively: A healthy flame should be steady, with a consistent height and a bright, teardrop shape. If the flame becomes weak, shrinks in size, or flickers excessively, it could be due to a combination of factors such as a too-long wick, low-quality candle wax, or insufficient oxygen supply. Trim the wick and make sure the candle is in a well-ventilated area to maintain a strong, vibrant flame.
-
The candle wax discolors or blackens: When a candle burns properly, the wax should remain clear or have a slight translucency. However, if the wax starts to turn yellow, brown, or black, it may indicate that debris or soot is building up on the wick or the candle is not of high quality. Discontinue use to prevent further discoloration and potential air pollutant emissions.
-
The candle scent fades or changes: Over time, the fragrance of a candle may become less noticeable or even change entirely. This can occur due to factors such as the quality of the candle, exposure to heat and sunlight, or simply because the scent has dissipated. Once the candle no longer emits a desirable scent, it’s a good sign that it has reached the end of its effectiveness and should no longer be burned.
-
The wax pools unevenly: Ideally, the wax in a candle should evenly pool across the entire surface as it melts. However, if the wax pools unevenly, leaving large amounts of unmelted wax along the sides, it can indicate that the candle is not burning efficiently or that the wick is not centered. As the wax continues to burn in an uneven manner, it may lead to a shorter burn time and an overall unsatisfactory experience.
-
The candle poses a fire hazard: Safety should always be the utmost priority when burning candles. If you notice any signs of a potential fire hazard, such as the flame growing too large, the container becoming excessively hot, or the candle producing sparks or popping sounds, it’s crucial to extinguish the candle immediately. These signs indicate a serious safety concern, and continuing to burn the candle could lead to a dangerous situation.
Keeping an eye out for these signs will not only help you enjoy your candles to the fullest but also ensure your safety throughout the burning process. Remember to always read and follow the manufacturer’s instructions for each individual candle, as different candles may have specific recommendations for optimal burning conditions. By being attentive to these signs, you can create a soothing and safe candle-burning experience.
Before the candle has a chance to fully melt
One of the most common mistakes people make when burning candles is not allowing them enough burn time to fully melt across the surface. This is especially true for larger candles or those with thicker layers of wax. While it may be tempting to blow out the candle once it has created a small pool of melted wax, doing so can lead to a phenomenon known as tunneling.
Tunneling occurs when the wax only melts in a small area around the wick while leaving a rim of unmelted wax along the edges. This not only creates an uneven burn but also significantly reduces the fragrance throw of the candle. Additionally, tunneling can cause the candle to burn more quickly since only a fraction of the wax is being used.
To prevent tunneling and get the most out of your candle, it’s important to allow sufficient burn time during each lighting. The general rule of thumb is to burn the candle for at least one hour per inch in diameter. For example, if you have a 3-inch diameter candle, aim for a minimum burn time of three hours.
By allowing the candle to burn for a longer duration, the heat will gradually melt the wax across the entire surface, ensuring an even burn and maximizing the fragrance distribution. This will also help the candle last longer, allowing you to enjoy its mesmerizing glow and delightful scent for an extended period of time.
It’s worth noting that a longer burn time also contributes to the longevity of the candle’s wick. A consistently short burn time may result in the wick becoming buried within the wax, making it challenging to relight the candle in the future. By giving the candle enough time to fully melt, you can help maintain a well-positioned wick, making subsequent lighting sessions much easier.
Remember, patience is key when it comes to candle burning. Resist the temptation to blow out the candle prematurely and allow it the time it needs to create a full wax pool. Not only will you enjoy a longer-lasting and more fragrant burn, but you’ll also ensure that your candle burns evenly, providing you with a more satisfying and visually appealing experience.
When the wick is too short or too long
The length of the wick plays a crucial role in the overall performance and safety of a candle. If the wick is too short or too long, it can affect the quality of the burn and potentially cause issues. It’s important to regularly trim the wick to the appropriate length before each lighting to ensure an optimal burning experience.
When the wick is too short, it may struggle to stay lit or produce a weak flame. This can result in poor wax consumption, where the candle burns inefficiently and leaves behind a significant amount of unused wax. Additionally, a short wick can lead to the formation of tunneling, where the wax only melts around the wick and leaves a rim of unmelted wax along the edges of the container.
On the other hand, when the wick is too long, it can cause several issues. A long wick may produce a flame that flickers excessively and is prone to smoking. This can lead to an uneven burn and excessive black soot buildup on the container, which can be difficult to remove. A long wick may also result in the candle burning too hot, potentially causing the container to become excessively hot or even crack.
To achieve the ideal wick length, it is recommended to trim it to about 1/4 inch (6mm) before each lighting. Trimming the wick not only helps prevent issues related to flame height, smoking, and sooting but also ensures a cleaner and more controlled burn. Use a pair of sharp scissors or a wick trimmer to trim the wick, careful not to cut it too short or too close to the wax surface.
By maintaining the appropriate wick length, you promote a steady and controlled flame, which is essential for an efficient and safe burn. A well-trimmed wick will result in a more even burn, improved fragrance distribution, and a longer lifespan for the candle.
Regularly inspecting and trimming the wick before each lighting is a simple yet effective practice to enhance your candle-burning experience. By keeping the wick at the optimal length, you’ll enjoy a more consistent and enjoyable burn, and ensure that your candles last longer, giving you many hours of delightful ambiance and fragrance.
When the candle starts to emit smoke
While the flickering flame of a candle adds to the cozy ambiance, the presence of smoke can quickly put a damper on the experience. While a little bit of smoke when initially lighting a candle is normal, excessive smoke during burning can be a cause for concern. Not only is it unpleasant to inhale, but it can also indicate potential issues with the candle or its surroundings.
There are a few common causes for a candle to emit smoke:
-
Wick length: If the wick is too long, it can lead to excessive smoke. The longer the wick, the more fuel it draws up from the candle, causing the flame to become larger and produce more smoke. Ensure that the wick is trimmed to around 1/4 inch (6mm) before each lighting to prevent excessive smoke.
-
Burning in a drafty area: Burning a candle in a drafty area, such as near an open window or a fan, can cause the flame to flicker and produce smoke. The draft disrupts the airflow around the flame, making it burn unevenly and emitting smoke. Move the candle to a more sheltered area to eliminate the draft and reduce smoke.
-
Debris on the wick: Occasionally, debris such as dust, burnt match heads, or previously burnt wick fragments can accumulate on the wick, causing it to smoke. Extinguish the candle, allow it to cool, and carefully remove any debris from the wick before relighting to reduce smoke.
If you notice excessive smoke coming from a candle, it is vital to address the issue promptly. Excessive smoke can not only affect the ambiance but also result in a significant build-up of soot on the candle container, walls, or surrounding surfaces. To minimize smoke and ensure a clean burn:
-
Trim the wick: Keep the wick trimmed to a proper length of around 1/4 inch (6mm) before each lighting to promote a controlled flame and minimize smoke production.
-
Eliminate drafts: Burn the candle in a draft-free area to ensure consistent airflow around the flame, which reduces the likelihood of smoke.
-
Keep the candle clean: Regularly inspect the candle to ensure there is no debris or foreign objects on the wick. If necessary, use a wick trimmer or carefully remove any accumulations before lighting the candle.
By addressing these factors, you can minimize smoke production and enjoy a cleaner and more enjoyable candle-burning experience. Additionally, remember to burn candles responsibly and in well-ventilated areas to ensure optimal air quality.
When the flame becomes too weak or flickers excessively
A healthy flame is essential for a pleasant and effective candle-burning experience. When the flame of a candle becomes too weak or flickers excessively, it can impact the quality of the burn and hinder your enjoyment. Several factors can cause these issues, but there are steps you can take to remedy the situation.
If you notice that the flame of your candle has become weak or diminished, it is often an indication of an underlying issue. Here are some possible reasons for a weak flame:
-
Insufficient oxygen supply: Adequate airflow is crucial for a candle flame to burn brightly. If the candle is placed in an area with poor ventilation or is obstructed by objects, it may not receive enough oxygen, causing the flame to weaken. Ensure that the candle is in a well-ventilated area to allow for proper oxygen circulation around the flame.
-
Wick length: If the wick is too short, it may struggle to draw up an adequate amount of fuel, resulting in a weak flame. Likewise, if the wick is too long, it can cause the flame to flicker excessively and become unstable. Trim the wick to a recommended length of about 1/4 inch (6mm) before each lighting to maintain a steady and controlled flame.
-
Low-quality candle wax: The quality of the candle wax can also affect the flame. Lower quality wax may not burn as efficiently as higher quality wax, causing the flame to weaken or become unstable. Opt for candles made with high-quality wax to ensure a robust and consistent flame.
Excessive flickering is another issue that can arise when burning a candle. While it’s normal for the flame to dance and flicker slightly, excessive flickering can be a sign of a problem. Here are some possible causes:
-
Wick length: If the wick is too long, it can cause the flame to flicker excessively. The longer wick draws up more fuel, resulting in a larger flame that may flicker and dance erratically. Trim the wick to the appropriate length before lighting to minimize excessive flickering.
-
Drafty environment: Drafts or gusts of air can disrupt the airflow around the flame, causing it to flicker excessively. Ensure that the candle is placed in a draft-free area to minimize the effect of airflow on the flame.
-
Uneven candle wax: If the wax has not melted evenly or pools unevenly around the wick, it can lead to an unstable flame. This can occur when the candle is not burning in a level position or if the wick is not properly centered. Ensure that the candle is on a stable surface and the wick is centered to promote a consistent flame.
If you notice a weak flame or excessive flickering, take the following steps to address the issue:
-
Trim the wick: Ensure that the wick is trimmed to the appropriate length before each lighting. This will help promote a steady and controlled flame.
-
Adjust the location: Move the candle to a well-ventilated area and away from drafts or objects that may obstruct the flame to ensure adequate oxygen supply and minimize flickering.
-
Level the candle: Ensure that the candle is placed on a level surface to encourage an even burn and prevent an unstable flame.
By addressing these factors, you can help restore a healthy and vibrant flame to your candle, enhancing both the visual appeal and fragrance throw. Remember to always monitor burning candles and follow safety guidelines to ensure a pleasant and worry-free candle-burning experience.
When the candle wax starts to discolor or blacken
When you burn a candle, it’s normal for the wax to melt and change its state. However, if you notice that the candle wax is starting to discolor or blacken, it may indicate a potential issue with the candle itself. Discoloration or blackening of the wax can impact both the aesthetic appeal of the candle and the overall burning experience. Here are some possible reasons for this occurrence:
-
Quality of the candle: The quality of the candle plays a significant role in how it burns. Lower-quality candles may contain impurities or additives that contribute to discoloration or blackening of the wax. Opting for candles made with high-quality ingredients can minimize the likelihood of such issues.
-
Wick-related factors: The wick of a candle can also affect the appearance of the wax. If the wick is too long, it may produce excessive smoke and soot, which can settle on the surface of the wax and cause discoloration or blackening. Additionally, if the wick is not centered or trimmed properly, it can lead to an uneven burn, resulting in wax discoloration.
-
Burning in a drafty area: Burning a candle in a drafty area can disrupt the combustion process and cause the flame to produce more soot. The soot particles can land on the wax and cause it to discolor or blacken. Ensure that you burn your candles in a draft-free environment to reduce this potential issue.
-
Excessive burn time: If you burn a candle for an extended period or beyond the recommended burn time, the excessive heat can cause the wax to discolor or blacken. It’s important to follow the manufacturer’s instructions regarding the appropriate burn time for your candle.
If you notice discoloration or blackening of the candle wax, there are steps you can take to address the issue:
-
Trim the wick: Trim the wick to the appropriate length before each lighting. This helps prevent excessive smoke and soot production, reducing the chances of wax discoloration.
-
Burn in a draft-free area: Ensure that you burn the candle in a location free from drafts or gusts of air. This minimizes the amount of soot that can land on the wax, preserving its appearance.
-
Regularly clean the candle: If you notice any soot buildup on the candle wax, gently wipe it off with a soft cloth or tissue. Regularly cleaning the wax can help maintain its original color and prevent further discoloration.
-
Choose high-quality candles: Opt for candles made with high-quality ingredients and without added impurities to minimize the chances of wax discoloration.
By addressing these factors, you can help preserve the appearance of the candle wax and ensure a more visually pleasing and enjoyable burn. Remember to always follow safety guidelines and monitor candles while lit to prevent any potential issues.
When the candle scent starts to fade or change
The scent of a burning candle is one of its most enticing features, creating a warm and inviting ambiance in any space. However, over time, you may notice that the candle scent starts to fade or even change. There are a few factors that can contribute to this occurrence, and understanding them can help you maintain the optimal scent experience.
Here are some possible reasons why the candle scent may fade or change:
-
Burn time and exposure: The fragrance of a candle is designed to be released as the wax melts. If a candle is not burned for a sufficient amount of time during each lighting, the fragrance may not fully disperse, leading to a weaker scent. Additionally, factors such as excessive heat or prolonged exposure to sunlight can also affect the scent and cause it to fade over time.
-
Candle quality: The quality of the candle itself can impact the longevity and consistency of the scent. Lower-quality candles may have a weaker scent throw or use lower-quality fragrance oils, resulting in a faster fade or inconsistent scent. Opting for candles from reputable brands or those made with high-quality ingredients can help maintain a stronger and longer-lasting scent.
-
Personal scent sensitivity: Each person’s sensitivity to scents can vary. Over time, you may become accustomed to the scent of a particular candle, causing it to appear less noticeable or fade in intensity. Taking breaks from burning scented candles or switching to different fragrances can help reset your olfactory senses and make the scent experience more pronounced again.
-
Storage conditions: The way you store your candles can also impact their scent longevity. Candles that are improperly stored, such as being exposed to strong odors or in high humidity environments, may have their fragrance affected. Always store your candles in a cool, dry place away from direct sunlight and other strong odors to help preserve their scent.
If you notice that the candle scent is fading or changing, there are steps you can take to help prolong its fragrance:
-
Proper burn time: Ensure that you allow the candle to burn for a sufficient amount of time during each lighting. This allows the wax to fully melt and the fragrance to disperse, maximizing the scent throw.
-
Rotate your candle collection: Instead of burning the same candle continuously, consider rotating different scents to avoid olfactory fatigue. This gives your senses a break and allows you to appreciate the scent of each candle more fully.
-
Choose high-quality candles: Select candles from reputable brands or those made with high-quality ingredients and fragrance oils. These candles are more likely to maintain their scent integrity and provide a longer-lasting fragrance experience.
-
Store candles properly: Store your candles in a cool, dry place away from direct sunlight and strong odors. This helps preserve their scent and prevents unwanted changes.
By taking these steps, you can help maintain the desired scent experience when burning your candles. Remember to always follow safety guidelines and enjoy the wonderful aroma that candles can bring to your home or any space.
When the candle wax begins to pool unevenly
One of the visual indicators of a well-burning candle is an even wax pool. However, there are times when the candle wax can begin to pool unevenly, leaving large amounts of unmelted wax along the sides of the container. Uneven wax pooling not only affects the aesthetic appeal of the candle but can also impact its overall burn performance. Several factors can contribute to this issue, and understanding them can help you address it effectively.
Here are some possible reasons why the candle wax may pool unevenly:
-
Wick positioning: The positioning of the wick in the center of the candle is crucial for an even wax pool. If the wick is off-center or leaning towards one side, it can cause the wax to melt unevenly and create an uneven pool. When lighting a candle, ensure that the wick is centered and standing upright.
-
Burning time: Burning a candle for too short a period can contribute to uneven wax pooling. If the candle is extinguished before a full melt pool has formed across the surface, a memory ring can develop, where the wax only melts up to a certain point and remains solid along the edges. To avoid this issue, make sure to allow the candle to burn long enough for the entire top layer of wax to become liquid.
-
Container shape or size: The shape and size of the candle container can also play a role in uneven wax pooling. Wide and shallow containers might encourage the wax to melt more quickly and may result in an uneven pool. Conversely, narrow and deep containers may take a longer time to achieve a full melt pool. Choosing candles with a container size and shape that best suits your desired burn time can help promote a more even wax pool.
-
Burning environment: Burning a candle in a drafty area or near air vents can disrupt the airflow around the flame, causing an uneven burn. Ensure that you place the candle in a stable and wind-free location to allow for consistent burning and an even wax pool.
If you notice that the candle wax is pooling unevenly, here are some steps you can take to address the issue:
-
Reposition the wick: If the wax pool is uneven due to an off-center or leaning wick, carefully reposition it to the center of the candle while the wax is still liquid. Use a wick centering tool or a pair of tweezers to gently adjust the position of the wick.
-
Allow for sufficient burning time: Ensure that you allow the candle to burn long enough for a full wax pool to form across the surface. This often requires burning the candle for at least one hour per inch in diameter to achieve optimal results.
-
Choose appropriate container sizes: Consider the size and shape of the candle container when purchasing candles. Opt for containers that allow for sufficient burn time and promote even wax pooling.
-
Create a draft-free environment: Place the candle in an area free from drafts or air vents to ensure consistent airflow around the flame, promoting an even burn and wax pooling.
By addressing these factors, you can help promote a more even and aesthetically pleasing wax pool. Remember to always follow safety guidelines and enjoy the warm and ambient glow that candles provide.
When the candle becomes a fire hazard
Candles are a source of warmth, comfort, and beauty, but it is essential to be mindful of their potential fire hazards. The open flame of a burning candle can pose risks if not properly managed. It’s crucial to be aware of the signs that indicate a candle has become a fire hazard to ensure your safety and the safety of your surroundings.
Here are some warning signs to watch for when a candle becomes a fire hazard:
-
Large or erratic flame: If a candle flame suddenly becomes larger than usual or starts to flicker wildly, it could indicate a fire hazard. This increased flame size and erratic behavior may be caused by a too-long wick, drafty conditions, or an issue with the candle itself. Extinguish the candle immediately if you observe this warning sign.
-
Excessive smoke: While a small amount of smoke when initially lighting a candle is normal, excessive smoke during burning is a cause for concern. It may indicate that the wick is too long, the candle is in a drafty area, or there is debris on the wick. Smoking candles can generate soot, which is a potential fire hazard. Extinguish the candle, trim the wick, and ensure there are no obstructions before relighting.
-
Container overheating: If the container housing the candle becomes excessively hot to the touch, it could be a sign of a fire hazard. The intense heat can cause the wax or container to melt or even catch fire. In such cases, it is essential to extinguish the candle and discontinue using it. Heat-resistant and properly sized candle containers can help mitigate this risk.
-
Sparks or popping sounds: If you notice sparks or popping sounds coming from the flame, it may indicate the presence of foreign objects, such as debris or impurities, in the wax or on the wick. These objects can ignite and create a fire hazard. It’s crucial to extinguish the candle immediately and remove any debris or impurities before relighting.
If you encounter signs of a potential fire hazard with a candle, follow these steps to mitigate the risk:
-
Extinguish the candle: If you notice any signs of a fire hazard, including an oversized flame, excessive smoke, overheating container, or sparks/popping sounds, extinguish the candle immediately. Do not leave it unattended until the issue is resolved.
-
Trim the wick: If the wick is too long, it can contribute to a fire hazard. Trim the wick to the recommended length of around 1/4 inch (6mm) to ensure a controlled and safe burn.
-
Ensure a draft-free environment: Burn the candle in an area free from drafts or air vents to maintain consistent airflow around the flame and reduce the risk of a fire hazard.
-
Remove debris or impurities: If there are sparks or popping sounds coming from the flame, carefully extinguish the candle and remove any debris or impurities found on the wick or in the wax before relighting.
Always prioritize safety when using candles. Avoid placing them near flammable items, never leave them unattended, and keep them out of reach of children and pets. By remaining vigilant and taking necessary precautions, you can enjoy the beauty and warmth of candles while minimizing the risk of a fire hazard.