
Best Time to Plant Summer Squash
When it comes to planting summer squash, timing is crucial for a successful harvest. Summer squash, which includes varieties such as zucchini, yellow crookneck, and pattypan, is a warm-season vegetable that thrives in long, hot summers. To ensure optimal growth and yield, it’s important to plant summer squash at the right time.
The ideal time to plant summer squash is after the last frost date in your area. This varies depending on your location and climate zone. Generally, it is safe to plant summer squash when the soil has warmed up to a consistent temperature of at least 60°F (15°C). Planting too early, when the soil is still cool, can result in poor germination and stunted plant growth.
In warmer regions, where the growing season is longer and frost is less of a concern, summer squash can be planted as early as mid to late spring. However, in colder regions with shorter growing seasons, it is best to wait until all threat of frost has passed, typically mid to late May or early June.
It’s important to note that summer squash is a warm-loving plant that does not tolerate frost. Even a light frost can cause damage to the plants, so make sure to protect them if there is a risk of frost in your area.
Another factor to consider when planting summer squash is the days to maturity of the desired variety. This information can usually be found on the seed packet. Depending on the variety, summer squash can take anywhere from 45 to 60 days to reach maturity. Plan your planting accordingly, taking into account the estimated date of your region’s first fall frost. This will ensure that you can harvest your summer squash crop before the frost hits.
Climate and Temperature Requirements for Summer Squash
Summer squash thrives in warm climates and requires specific temperature conditions for optimal growth. Understanding the climate and temperature requirements of summer squash is essential for successful cultivation of this popular vegetable.
Summer squash is classified as a warm-season crop, preferring temperatures between 70°F (21°C) and 95°F (35°C). It is important to note, however, that different varieties of summer squash may have slightly different temperature preferences. Overall, they prefer hot and sunny conditions.
Ambient temperature is not the only factor to consider when it comes to planting summer squash. Soil temperature is equally important for germination and healthy growth. The soil temperature should be at least 60°F (15°C) before planting seeds or transplanting seedlings.
If you live in an area with a short growing season, you can start your summer squash seeds indoors 2 to 4 weeks before the last frost date. This will give the plants a head start and allow you to take advantage of the full growing season. Later, when the soil has warmed up sufficiently, you can transplant the seedlings outdoors.
It’s important to note that summer squash plants are sensitive to frost. They should not be exposed to temperatures below 50°F (10°C), as this can lead to significant damage or even death of the plants. If an unexpected cold snap is forecasted, covering the plants with a frost blanket or using other protective measures can help prevent damage.
In terms of climate, summer squash prefers a sunny location with at least 6 to 8 hours of direct sunlight per day. Adequate sunlight ensures proper growth, flowering, and fruit development. The plants also benefit from well-drained soil that retains moisture but does not become waterlogged.
By providing the right climate and temperature conditions, you can create an ideal environment for your summer squash plants to thrive and produce a bountiful harvest.
Soil Preparation for Summer Squash
Preparing the soil properly is crucial for the successful growth of summer squash. A well-prepared soil provides the necessary nutrients, drainage, and fertility needed for the plants to thrive. Here are some key steps to ensure your soil is ready for planting summer squash.
First, choose a sunny location in your garden for planting summer squash. These plants require full sun to produce an abundant harvest. Clear any weeds or debris from the area and ensure there is sufficient space for the plants to spread out and grow.
Next, test your soil’s pH level. Summer squash prefers slightly acidic to neutral soil with a pH range of 6.0 to 7.0. You can use a soil testing kit available at your local garden center or send a soil sample to a laboratory for more accurate results. If your soil pH is outside the desired range, you can adjust it by adding amendments such as lime to raise the pH or sulfur to lower it.
Adequate drainage is essential for summer squash plants as they are prone to rot if the soil becomes waterlogged. To improve drainage, amend the soil with organic matter such as compost or well-rotted manure. It will enhance the soil structure, promote good water infiltration, and provide essential nutrients for healthy plant growth.
Before planting, it’s important to loosen the soil to a depth of at least 12 inches (30 cm). This allows the roots to penetrate easily and encourages strong growth. You can use a garden fork or tiller to loosen the soil and remove any large clumps or rocks.
Once the soil is prepared, consider adding a balanced fertilizer to provide essential nutrients for the plants. Look for a fertilizer with an NPK ratio (nitrogen, phosphorus, and potassium) specifically formulated for vegetables. Follow the recommended application rates on the fertilizer package, and mix it into the soil before planting.
Lastly, applying a layer of organic mulch around the base of the plants can help conserve moisture, control weeds, and regulate soil temperature. Straw, shredded leaves, or wood chips are all excellent choices for mulching summer squash.
By taking the time to properly prepare your soil, you are setting the stage for healthy and productive summer squash plants. The effort you put into soil preparation will pay off with a rewarding harvest.
Seed Selection for Summer Squash
Choosing the right seeds is the first step towards a successful summer squash harvest. With a wide array of varieties available, selecting seeds that suit your preferences and growing conditions is essential. Here are some factors to consider when selecting seeds for summer squash.
One of the primary considerations when choosing seeds is the type of summer squash you prefer. There are various types to choose from, including zucchini, yellow crookneck, pattypan, and more. Each type has its unique flavor, texture, and appearance. Consider your personal preferences and intended use for the squash, whether it’s for grilling, baking, or fresh eating, when making your selection.
Additionally, take into account your local climate and growing conditions. Some summer squash varieties are more tolerant of heat, while others perform better in cooler climates. Reading the package labels or researching online can provide insights into the preferred growing conditions for specific varieties.
Another important factor is the disease resistance of the variety. Certain summer squash varieties are bred to be more resistant to common diseases such as powdery mildew or cucumber mosaic virus. Choosing disease-resistant varieties can help minimize the risk of crop loss and provide a higher chance of a successful harvest.
Consider the maturity date of the variety as well. Depending on your region’s growing season and the specific variety, summer squash can take anywhere from 45 to 60 days to reach maturity. If you have a shorter growing season, opt for varieties with a shorter maturity time, ensuring that you can harvest your squash before the first fall frost.
When purchasing seeds, look for reputable seed companies that offer high-quality, non-GMO seeds. It’s important to choose seeds from a reliable source to increase the chances of germination and healthy plant development.
Lastly, consider the yield of the variety. Some summer squash varieties are known to be prolific producers, providing you with a continuous harvest throughout the growing season. If you’re looking to maximize your yield, look for varieties that are known for their productivity.
By taking into account factors such as type, climate suitability, disease resistance, maturity date, seed quality, and yield, you can select the best seeds for your summer squash crop. This thoughtful selection process sets the stage for a successful and bountiful harvest.
Starting Seeds Indoors for Summer Squash
Starting summer squash seeds indoors is a great option, especially if you live in an area with a short growing season or want to get a head start on your harvest. By starting seeds indoors, you can provide an optimal environment for germination and early seedling development. Here is a step-by-step guide to successfully start summer squash seeds indoors.
Begin by selecting the appropriate containers for starting your seeds. Use seed trays, peat pots, or small pots with drainage holes at the bottom to avoid waterlogging. Fill the containers with a high-quality seed-starting mix that is well-draining and sterile.
Once the containers are filled, plant the seeds according to the instructions on the seed packet. Typically, you’ll want to plant the seeds about one inch deep. Space them adequately, allowing room for seedling growth and proper airflow.
After planting, lightly moisten the soil by gently watering it from above. Avoid overwatering, as soggy conditions can lead to rot. Place a clear plastic cover or plastic wrap over the containers to create a greenhouse-like environment that provides warmth and retains moisture.
Find a warm location for the containers, such as near a sunny window or on top of a seedling heat mat. The ideal temperature for germinating summer squash seeds is between 75°F (24°C) and 85°F (29°C). Check the soil moisture regularly and mist it as needed to keep it consistently moist but not overly wet.
Once the seeds have germinated and the seedlings have developed their first true leaves, remove the plastic cover and relocate the containers to a well-lit area. Provide the seedlings with at least six to eight hours of direct sunlight each day or supplement with fluorescent grow lights placed a few inches above the seedlings.
Continue to water the seedlings as needed, ensuring that the soil remains evenly moist. Avoid overwatering, as it can lead to damping-off disease or root rot.
As the seedlings grow, thin them out if necessary to maintain spacing and prevent overcrowding. Choose the strongest and healthiest seedlings for transplanting outdoors.
Approximately two to four weeks before the last frost date, begin acclimating the seedlings to outdoor conditions. This process, known as hardening off, involves gradually exposing the seedlings to outdoor temperatures and sunlight over a period of several days to a week.
By starting your summer squash seeds indoors, you can give your plants a head start and ensure a successful transition to the outdoor garden. With proper care and attention, your seedlings will grow strong and healthy, ready to be transplanted in the garden for a fruitful summer squash harvest.
Direct Sowing Summer Squash Seeds
Direct sowing summer squash seeds is a convenient and straightforward method of planting. It involves planting the seeds directly into the garden soil, eliminating the need for starting seeds indoors. Direct sowing is ideal for regions with a long growing season and warm soil temperatures. Here’s how to successfully sow summer squash seeds directly in your garden.
The first step is to choose a suitable location in your garden for sowing the seeds. Summer squash plants require full sun, so select an area that receives at least six to eight hours of direct sunlight per day. Ensure the soil is well-draining to prevent waterlogging.
Prepare the soil by removing any weeds, rocks, or debris. Use a garden fork or tiller to loosen the soil to a depth of at least 12 inches (30 cm). Incorporate compost or well-rotted manure into the soil to improve fertility and enhance drainage.
Before sowing the seeds, it’s essential to take note of the recommended planting depth. Typically, summer squash seeds should be sown about one inch deep. Refer to the instructions on the seed packet for specific guidelines.
Space the seeds according to the recommended spacing for the variety you are planting. Typically, summer squash plants require about three to four feet (90-120 cm) of spacing between each plant to allow for adequate air circulation and growth.
Once you have placed the seeds in the soil, cover them with loose soil or compost, gently pressing down to ensure good seed-to-soil contact. Water the area thoroughly to provide moisture for germination.
Keep the soil consistently moist, but avoid overwatering as this can lead to rot and other issues. Mulching around the base of the seedlings can help to retain moisture and prevent weed growth.
As the seedlings emerge, thin them out if necessary to maintain the recommended spacing between plants. Remove the weaker or extra seedlings, leaving the strongest to grow and mature.
Monitor the young seedlings closely for pests or diseases and take appropriate measures if any issues arise. Regularly inspect the plants for signs of pests, such as aphids or cucumber beetles, and apply insecticidal soap or natural pest control methods as needed.
Continue to water the plants regularly, ensuring they receive about one inch of water per week. However, adjust watering frequency based on weather conditions and soil moisture levels.
With proper care and attention, the direct-sown summer squash seeds will germinate and grow into healthy plants. By providing the right growing conditions and following recommended spacing, you can enjoy a bountiful harvest of fresh summer squash.
Transplanting Seedlings for Summer Squash
Transplanting seedlings is a common method of growing summer squash, especially when starting seeds indoors or purchasing already established plants. Transplanting allows for controlled and precise placement of the seedlings, ensuring optimal spacing and growth. Here’s a step-by-step guide to successfully transplant summer squash seedlings into your garden.
Before transplanting, select a suitable location in your garden for the summer squash plants. Choose an area that receives at least six to eight hours of direct sunlight per day and has well-draining soil. Prepare the soil by removing any weeds, rocks, or debris and incorporating compost or organic matter to improve fertility and drainage.
If you started the seedlings indoors, it’s essential to acclimate or harden them off before transplanting them into the garden. Gradually expose the seedlings to outdoor conditions by placing them outside for a few hours each day, gradually increasing the duration over a period of one to two weeks. This process helps the seedlings adjust to the different environmental factors they’ll encounter in the garden.
When the seedlings are ready for transplanting, dig a hole in the prepared soil that is slightly larger than the size of the root ball of each seedling. Maintain the same spacing between plants as recommended for the specific variety, typically around three to four feet (90-120 cm) apart to allow for proper growth and airflow.
Carefully remove the seedlings from their containers, ensuring that the root ball remains intact. Gently loosen the roots if they are tightly bound together. Place each seedling in the prepared hole, making sure it is at the same depth it was previously growing. Firmly press the soil around the base of the seedling to secure it in place.
Water the transplanted seedlings thoroughly after planting to settle the soil and provide moisture for the roots. Watering deeply immediately after transplanting promotes root development and helps the seedlings establish themselves in their new environment.
Maintain adequate soil moisture by watering the plants regularly, aiming to keep the soil consistently moist but not waterlogged. Mulching around the base of the plants can help retain moisture, prevent weed growth, and regulate soil temperature.
Monitor the transplanted seedlings closely for the first few weeks after transplanting. Look for any signs of stress, such as wilting or yellowing leaves, and address any issues promptly. Watch out for pests and diseases and take appropriate measures to protect your plants if necessary.
Continue to provide the summer squash plants with proper care, including regular watering, fertilizing as needed, and addressing any pests or diseases promptly. With time, the transplanted seedlings will establish themselves and grow into healthy and productive summer squash plants in your garden.
Thinning Seedlings for Summer Squash
Thinning seedlings is an important step in growing summer squash. Thinning helps create adequate spacing between plants, allowing each seedling room to grow and preventing overcrowding. This process ensures that the remaining plants have sufficient access to light, nutrients, and water. Here’s a guide on how to properly thin seedlings for summer squash.
Once the summer squash seedlings have emerged and developed their first set of true leaves, it’s time to evaluate their spacing. Overcrowded seedlings can lead to competition for resources, weak growth, and increased susceptibility to diseases and pests.
Start by assessing the recommended spacing for the specific variety you are growing. Generally, summer squash plants should be spaced about three to four feet (90-120 cm) apart, allowing ample room for the plants to spread out and receive adequate airflow.
Identify the weaker or less robust seedlings that are growing close together or in clusters. These are the seedlings that should be thinned out to create proper spacing. Choose the healthiest and most vigorous seedlings to keep, ensuring they have enough space to grow and thrive.
To thin the seedlings, gently grasp the chosen seedling near the base, avoiding any unnecessary disturbance to the surrounding soil. Carefully remove the less desirable seedlings by gently pulling them straight out of the soil. Minimize any root disturbance to the remaining seedlings.
It’s important to note that thinning seedlings can be difficult, as it requires removing healthy plants. However, overcrowding can lead to reduced yields and increased vulnerability to diseases and pests. Remember that thinning improves the overall health and productivity of the remaining plants.
After thinning, water the remaining seedlings to help them recover from any disturbance and to ensure they are adequately hydrated. Continue to monitor the thinned seedlings for any signs of stress and address any issues promptly.
Thinned seedlings can be composted or discarded, depending on local guidelines and practices. Do not leave thinned seedlings on the soil surface as they can attract pests or become a breeding ground for diseases.
Throughout the growing season, regularly inspect the remaining plants for any signs of overcrowding. Additional thinning may be necessary if the plants continue to grow closely together or if they are competing for resources.
By properly thinning seedlings for summer squash, you allow the remaining plants to grow to their full potential. Adequate spacing ensures optimal sunlight exposure, airflow, and nutrient availability, leading to stronger and healthier summer squash plants.
Caring for Summer Squash Seedlings
Providing proper care for your summer squash seedlings is crucial for their healthy development and future productivity. By following these essential care guidelines, you can help ensure the success of your summer squash plants.
Watering is a critical aspect of caring for summer squash seedlings. Seedlings have delicate root systems and require consistent moisture for optimal growth. Water the seedlings deeply, ensuring the soil is evenly moist, but be cautious not to overwater. Avoid letting the soil become waterlogged, as this can lead to root rot.
As the seedlings grow, it’s important to monitor their water needs. Check the soil moisture regularly and adjust watering frequency based on the weather conditions. During periods of hot, dry weather, you may need to increase the frequency of watering.
Mulching is beneficial for summer squash seedlings as it helps conserve soil moisture, regulate soil temperature, and suppress weed growth. Apply a layer of organic mulch, such as straw or wood chips, around the base of the seedlings. Keep the mulch a few inches away from the stem to prevent moisture-related issues.
Fertilizing the seedlings is important for their growth and overall health. Prior to planting, incorporate organic matter, such as compost or well-rotted manure, into the soil to provide essential nutrients. As the seedlings grow, you can supplement with additional fertilizers as needed. Use a balanced fertilizer formulated for vegetables and follow the recommended application rates.
Proper support is essential for certain summer squash varieties, such as vining types. Install trellises, cages, or stakes to support the plants as they grow. Training the plants to climb will maximize space, improve airflow, and make harvesting easier.
Weeding is crucial to ensure that summer squash seedlings have limited competition for nutrients and water. Regularly remove weeds from around the seedlings, taking care not to disturb the delicate roots. Weeding by hand or using tools specifically designed for weed removal is recommended.
Monitor your seedlings closely for signs of pests or diseases. Early detection is key to preventing major infestations or outbreaks. Inspect the plants regularly, checking for any signs of insect damage, disease symptoms, or unusual growth patterns. If a problem is detected, consider using organic pest control methods or consult with a gardening expert for appropriate solutions.
Pruning may be necessary as the seedlings develop and grow. Trim off any damaged or diseased leaves or stems promptly to prevent the spread of disease and to promote overall plant health. Proper airflow and light penetration are essential for preventing fungal diseases.
By following these care guidelines, you will provide the necessary support and attention that your summer squash seedlings need to thrive. With proper watering, fertilizing, support, weeding, and monitoring for pests and diseases, your seedlings will grow into healthy and productive summer squash plants.
Choosing the Right Location for Summer Squash
Choosing the right location for growing summer squash is essential for the success of your plants. Selecting an appropriate spot in your garden will provide the optimal conditions needed for healthy growth and a bountiful harvest. Consider the following factors when choosing the location for your summer squash.
Sunlight is a crucial requirement for summer squash plants. Choose a location that receives full sun, which means at least six to eight hours of direct sunlight per day. Adequate sunlight ensures proper plant growth, flowering, and fruit development. Avoid areas shaded by buildings, large trees, or other structures that can obstruct sunlight.
Soil quality is another important consideration. Summer squash prefers well-draining soil that is rich in organic matter. The soil should be loose and crumbly, allowing for proper root growth and development. Test your soil’s pH level to ensure it falls within the ideal range of 6.0 to 7.0 for summer squash. If needed, amend the soil with compost or other organic matter to improve its fertility and texture.
Proper spacing is crucial for summer squash plants. Since they tend to spread their vines, ensure that you have enough space for the plants to grow. Leave a distance of three to four feet (90-120 cm) between each plant to provide adequate airflow and prevent overcrowding. Crowded plants are more susceptible to diseases and can have reduced yields.
Adequate drainage is necessary for the success of summer squash plants. Waterlogged soil can lead to root rot and other issues. Avoid low-lying areas or places where water tends to pool after rain. If your garden has heavy clay soil, consider amending it with organic matter to improve drainage and soil structure.
Accessibility is an important consideration for ease of maintenance and harvest. Choose a location that allows you to easily access the plants for watering, weeding, and harvesting. Having a nearby water source can make it more convenient to provide regular irrigation to the plants.
Consider your garden’s microclimate, including wind patterns. Summer squash plants can be vulnerable to strong winds, which can damage the plants and hinder their growth. Planting in a sheltered spot or using windbreaks can help protect the plants from strong gusts.
Companion planting can be an additional consideration when choosing the location for your summer squash. Planting compatible companion plants nearby can help deter pests, attract beneficial insects, and enhance the overall health of the garden ecosystem. Good companions for summer squash include herbs like basil and dill.
By carefully considering these factors and selecting the right location, you can create the ideal environment for your summer squash plants to thrive. With adequate sunlight, well-draining soil, proper spacing, and accessibility, your summer squash will have the best chance of producing a bountiful harvest.
Watering Summer Squash Plants
Proper watering is essential for the health and productivity of summer squash plants. Consistent and adequate moisture is crucial for the plants to develop strong roots, lush foliage, and abundant fruit. Understanding the watering needs of summer squash will help you provide optimal conditions for their growth. Here are some guidelines for watering summer squash plants:
When it comes to watering summer squash, it’s important to maintain a balance. The goal is to keep the soil consistently moist, but not waterlogged. Overwatering can lead to root rot and other diseases, while underwatering can result in stunted growth and reduced yields.
Monitor the moisture level of the soil regularly by using your fingers or a moisture meter. Ideally, the soil should feel moist when you touch it, but not overly saturated or muddy. Adjust your watering schedule as needed based on the moisture level of the soil.
The frequency of watering will depend on factors such as the weather, soil type, and stage of plant growth. In general, summer squash plants benefit from about one inch of water per week, including rainfall. However, this can vary depending on the specific needs of your plants and local conditions.
During hot, dry weather, pay close attention to the soil moisture and increase watering frequency as necessary to prevent the plants from becoming stressed. Watering early in the morning or late in the afternoon is ideal, as it allows time for the foliage to dry before evening, reducing the risk of fungal diseases.
Avoid overhead watering, if possible, as wet foliage can promote the growth of certain diseases. Instead, focus your watering efforts directly towards the base of the plants to ensure the water reaches the root zone where it is needed most.
Mulching is a helpful practice for conserving soil moisture and reducing the need for frequent watering. Apply a layer of organic mulch, such as straw or wood chips, around the base of the plants. This helps to retain soil moisture, regulate soil temperature, and suppress weed growth.
Regularly monitor the leaves of your summer squash plants for signs of wilting. Wilting can be an indication that the plants need water, but it can also be caused by other factors such as pests or diseases. It’s important to investigate the cause and address it accordingly.
It’s worth noting that young summer squash plants are generally more susceptible to water stress than mature plants. Therefore, it’s crucial to provide consistent irrigation during their early growth stages to establish strong root systems.
By paying attention to the moisture level of the soil, adjusting watering frequency based on weather conditions, and using proper watering techniques, you can provide the summer squash plants with the consistent moisture they need to thrive. Maintaining a balance will promote healthy growth, maximize yields, and ensure a successful harvest.
Fertilizing Summer Squash Plants
Fertilizing summer squash plants is essential to ensure healthy growth, strong yields, and optimal fruit development. By providing the right nutrients, you can promote vigorous plant growth and increase the chances of a successful harvest. Here’s what you need to know about fertilizing summer squash plants:
Start by preparing the soil before planting. Incorporate organic matter such as compost or well-rotted manure into the soil to improve its fertility and structure. This provides a good foundation of nutrients for the plants.
Before applying any additional fertilizers, it’s important to understand the nutritional needs of your summer squash plants. Nitrogen (N), phosphorus (P), and potassium (K) are three key nutrients required by plants. Nitrogen promotes leafy growth, phosphorus enhances root development, and potassium aids in flower and fruit production.
Choose a balanced fertilizer with an equal or similar ratio of N-P-K, such as a 10-10-10 or 14-14-14, suitable for vegetable gardens. This ensures that the plants receive a well-rounded blend of nutrients. Alternatively, you can opt for organic fertilizers specifically formulated for vegetable plants.
Follow the instructions on the fertilizer package for application rates and timing. Generally, it is recommended to apply fertilizer when the plants are actively growing and have several true leaves. This is typically a few weeks after transplanting or when the seedlings are well-established.
Apply the fertilizer evenly around the base of the plants, taking care to avoid direct contact with the leaves or stems. Lightly work the fertilizer into the top layer of the soil and water thoroughly to aid in nutrient absorption.
Remember that it’s important not to over-fertilize, as this can lead to excessive foliage growth at the expense of fruit production. Follow the recommended application rates and monitor the plants for any signs of nutrient deficiencies or imbalances.
Regularly inspect the plants for any symptoms of nutrient deficiencies, such as yellowing leaves or poor growth. If deficiencies are observed, you may consider applying a targeted organic fertilizer or soil amendment to address the specific nutrient needs.
In addition to regular fertilization, practicing crop rotation and adding organic matter to the soil annually can help maintain long-term soil fertility and nutrient balance.
Take note that soil pH can also affect the availability of nutrients to the plants. Summer squash prefers a slightly acidic to neutral soil with a pH range of 6.0 to 7.0. If necessary, you can adjust the pH by incorporating lime to raise it or sulfur to lower it.
By providing the proper fertilization to your summer squash plants, you can ensure they have the necessary nutrients to thrive and produce a healthy and abundant harvest. Regular monitoring and adjustments based on plant performance will help maintain optimal nutrient levels and promote successful growth throughout the growing season.
Pest Control for Summer Squash
Protecting your summer squash plants from pests is crucial for a successful harvest. Common pests that can affect summer squash include aphids, cucumber beetles, squash bugs, and powdery mildew. Implementing effective pest control measures can help prevent damage to your plants and ensure healthy growth. Here are some methods for controlling pests in your summer squash garden:
1. Regular monitoring: Regularly inspect your plants for signs of pest infestation. Check the leaves, stems, flowers, and undersides of the foliage for any visible pests or eggs. Early detection allows for prompt action and minimizes potential damage.
2. Handpicking: If you spot pests on your plants, handpicking them off can be an effective method, especially for larger pests such as cucumber beetles and squash bugs. Drop them into a bucket of soapy water to prevent them from returning to your plants.
3. Beneficial insects: Encouraging beneficial insects such as ladybugs, lacewings, and parasitic wasps can help control aphids and other harmful pests. You can attract them by planting companion flowers like marigolds or creating insectary areas in your garden.
4. Row covers: Use floating row covers to physically protect your plants from pests like cucumber beetles and squash bugs. This lightweight fabric allows sunlight and water to penetrate while keeping pests out. Remember to remove the covers when plants need insect pollination.
5. Neem oil: Neem oil is an organic insecticide that can help control a variety of pests without harming beneficial insects. Dilute and spray it on your plants, paying close attention to the foliage and undersides of leaves where pests are commonly found.
6. Integrated Pest Management (IPM): Implementing an IPM approach involves a combination of strategies, including cultural practices, biological controls, and if necessary, targeted pesticide applications. By using multiple methods, you can manage pest populations while minimizing the use of chemical treatments.
7. Proper sanitation: Maintain good garden hygiene by removing plant debris and fallen leaves, as they can harbor pests and diseases. Keep the surrounding areas clean to reduce pest populations and minimize potential infestations.
8. Powdery mildew prevention: Prevent powdery mildew by providing proper airflow around the plants. Avoid overhead watering and water your plants at the base to keep the foliage dry. Prune or trellis your plants to improve air circulation.
9. Organic insecticides: If pest populations are significant and other methods have been unsuccessful, consider using organic insecticides as a last resort. Always follow the instructions on the product label and apply them selectively to minimize harm to beneficial insects and reduce environmental impact.
It’s important to note that prevention and early intervention are key in pest control. By implementing these practices and being vigilant in monitoring your summer squash plants, you can effectively manage pests and safeguard your crop, ensuring a healthy and productive harvest.
Harvesting Summer Squash
Knowing when and how to harvest summer squash is crucial to enjoy the best flavor, texture, and yield from your plants. Summer squash is typically ready for harvest when the fruits are young and tender. Here are some guidelines to help you determine the right time to harvest your summer squash:
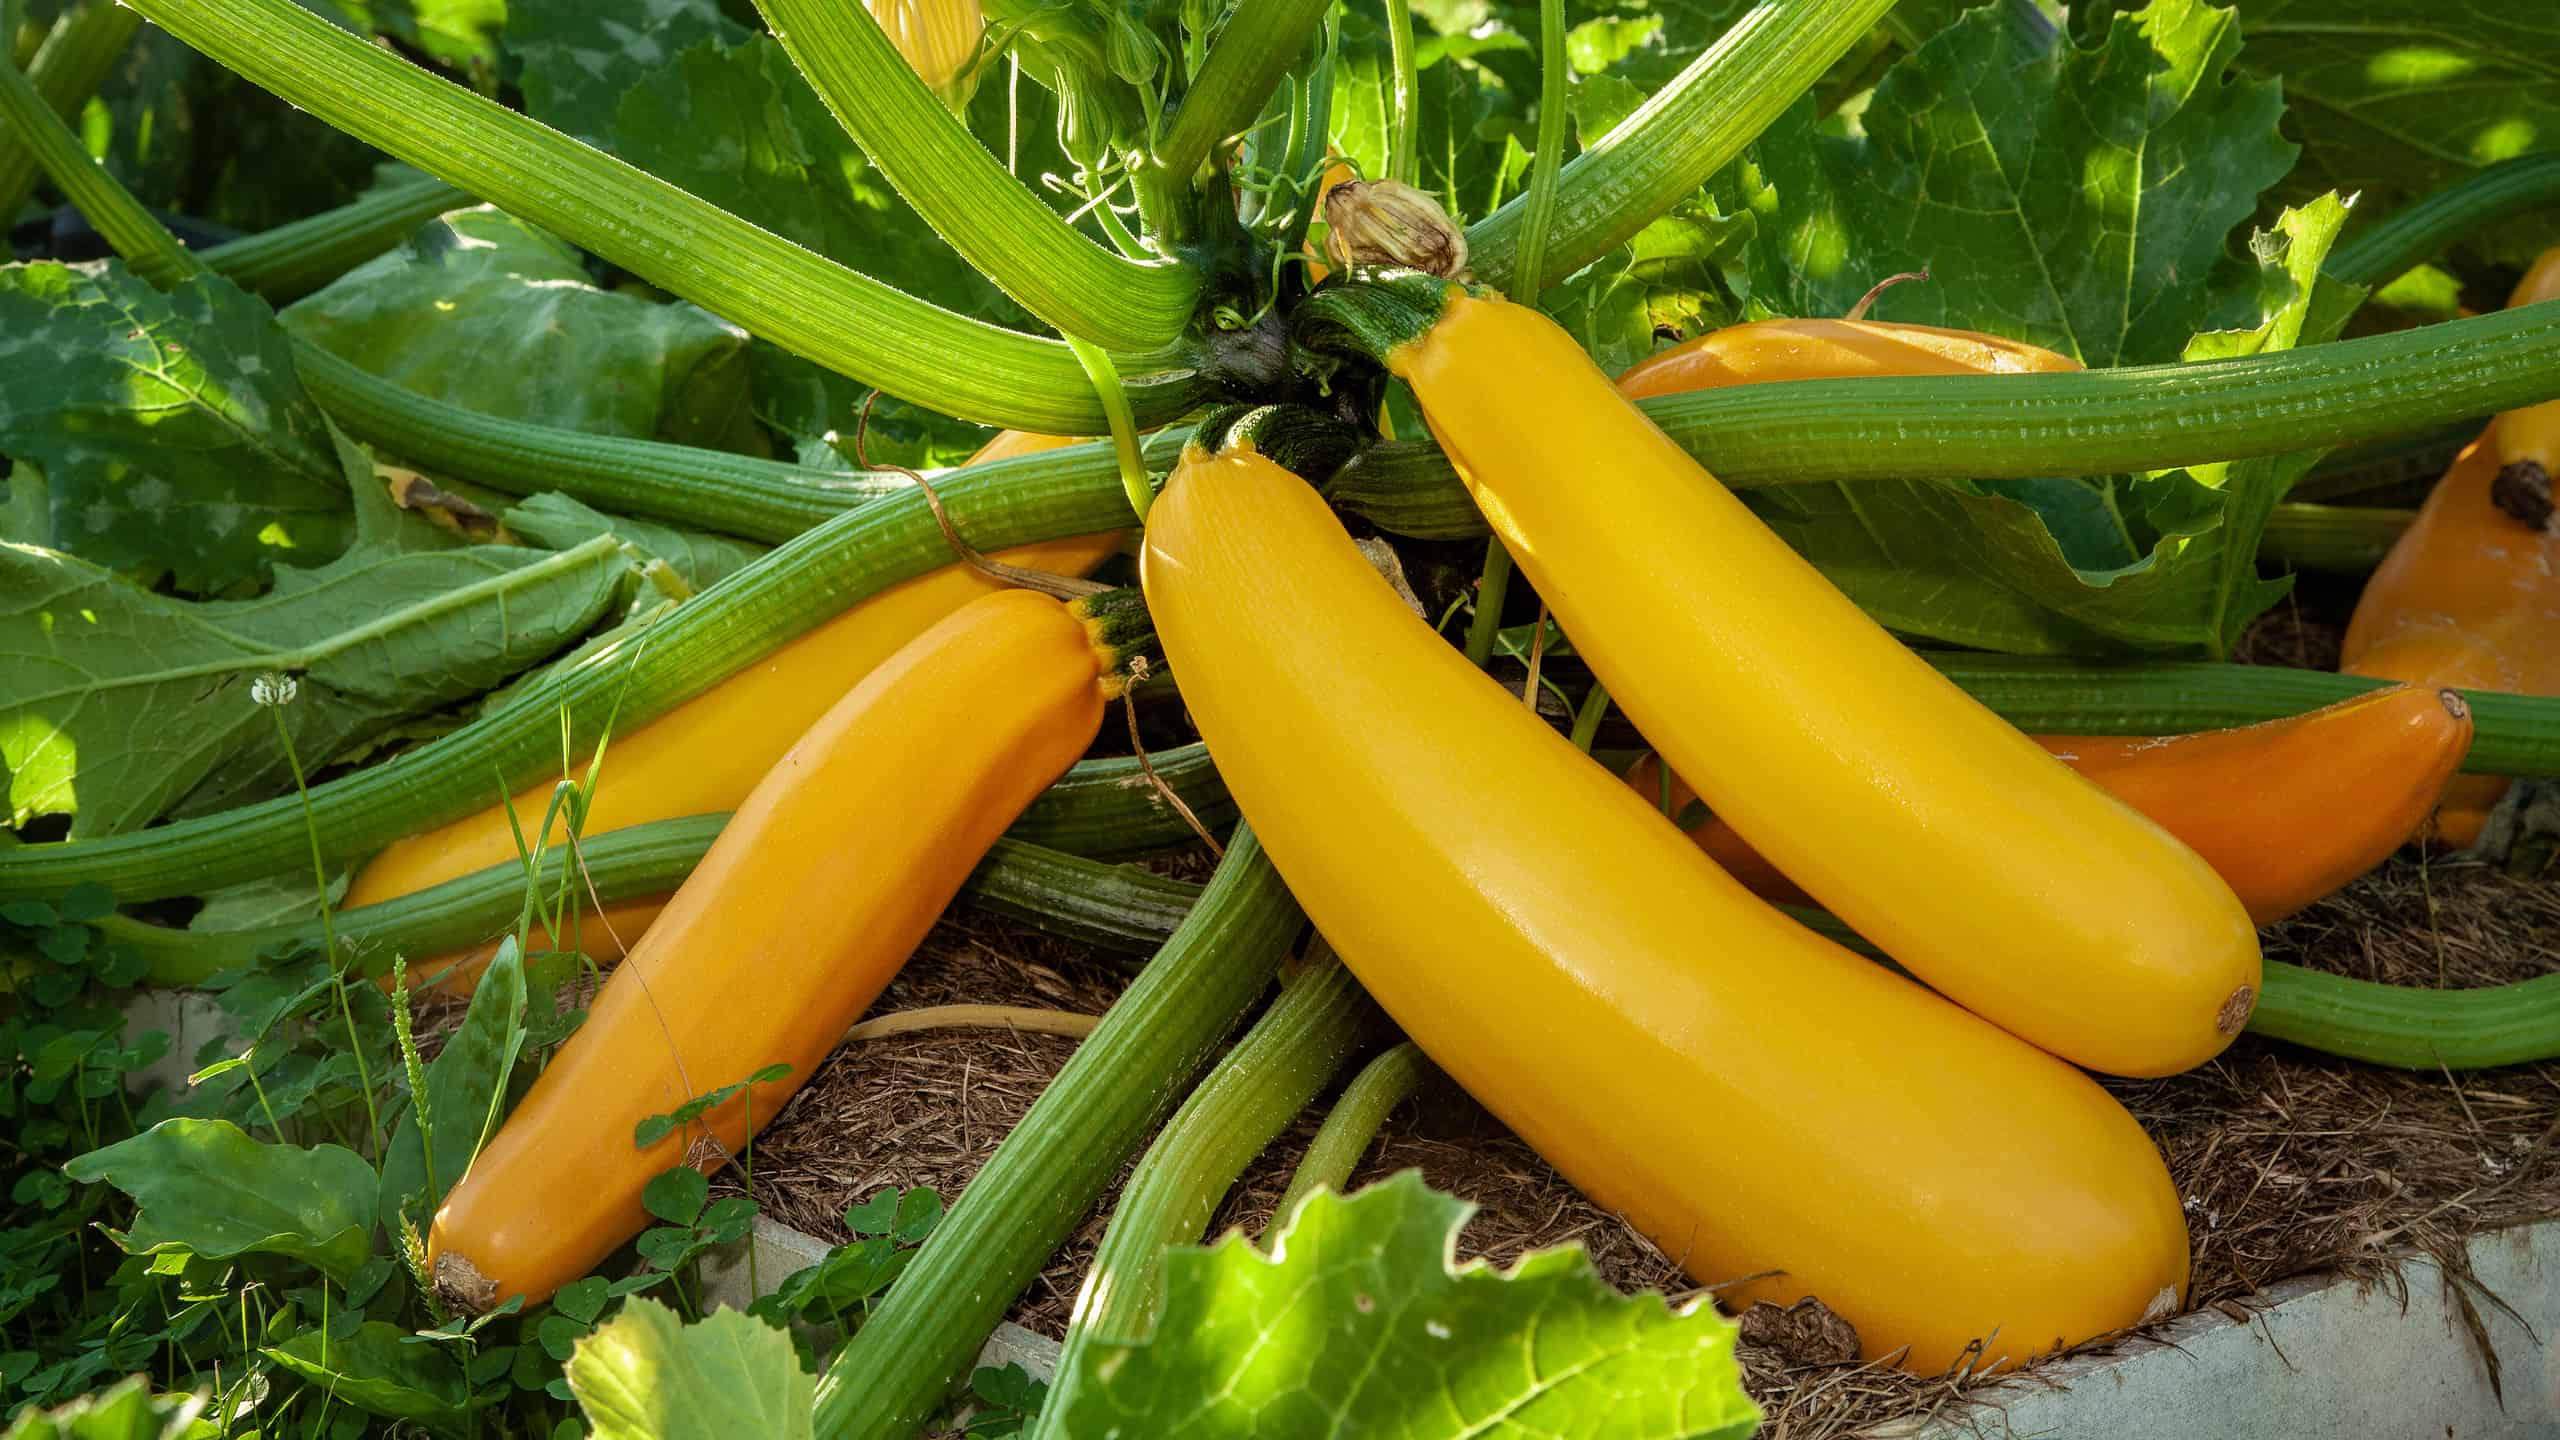
1. Size and appearance: Harvest summer squash when the fruits are still small and tender. Depending on the variety, this typically means harvesting when the fruits are around 4-8 inches (10-20 cm) in length. The skin should be glossy and the fruits should feel firm to the touch. Avoid waiting too long to harvest, as overripe squash can become tough and less flavorful.
2. Regular harvesting: Check your plants regularly for mature fruits. Summer squash grows rapidly, and regular harvesting encourages continuous production. Harvest the mature fruits every 2-3 days to prevent them from becoming oversized and woody. Regular harvesting also promotes new growth and encourages the development of more fruits.
3. Harvesting techniques: To harvest summer squash, hold the fruit with one hand and use a sharp knife or garden shears to cut the stem just above the fruit, leaving a small portion of stem attached. Avoid twisting or pulling the fruits, as this can damage the plant. Be careful not to injure neighboring fruits or the plant itself during the harvesting process.
4. Harvesting winter squash varieties: If you’re growing winter squash varieties, such as butternut squash or acorn squash, leave the fruits on the vine until they reach full maturity. Unlike summer squash, winter squash is typically harvested when the skin has hardened and cannot be easily punctured with a fingernail. This usually occurs in late summer or early fall.
5. Post-harvest storage: After harvesting, handle the summer squash with care to avoid any bruising or injury. Store the harvested squash in a cool, dry place with good ventilation. They can be stored at room temperature for a few days, but for longer storage, it is best to refrigerate them. Properly stored summer squash can typically last for up to a week in the refrigerator.
6. Harvesting male flowers: Male flowers can also be harvested for culinary purposes. These flowers do not produce fruit and are typically larger than female flowers. Harvest male flowers in the morning when they are fully open. Remove the petals and use the flavorful male flower to add a unique touch to salads, stuffed dishes, or as a garnish.
Remember, different varieties of summer squash may have slightly different harvesting times and characteristics, so refer to the specific instructions on the seed packet or consult gardening resources for variety-specific information.
By harvesting summer squash at the right time and using proper techniques, you can enjoy the best flavor and texture from your homegrown crop. Regular harvesting promotes continuous production and ensures a bountiful supply of fresh, delicious summer squash throughout the growing season.
Storing Summer Squash
After harvesting a bountiful crop of summer squash, proper storage techniques can help you extend their shelf life and enjoy their fresh flavor for longer. Storing summer squash correctly prevents spoilage and maintains their quality. Here are some guidelines for storing summer squash:
1. Cleaning: Before storing summer squash, gently brush off any soil or debris from the skin. Avoid washing the squash until you are ready to use it, as excess moisture can promote spoilage.
2. Ripeness: Choose only ripe, unblemished summer squash for storage. Avoid storing squash that is overripe or has any signs of decay or damage. Properly matured squash tends to have a firm texture and vibrant color.
3. Room temperature: Summer squash can be stored at room temperature for short periods, generally up to one week. Find a cool, well-ventilated area away from direct sunlight and heat sources, such as the countertop or pantry shelf.
4. Refrigeration: For longer storage, move the summer squash to the refrigerator. Place the squash in a loosely sealed plastic bag or wrap it in a damp cloth or paper towel to help retain moisture. Properly stored summer squash can last for up to one to two weeks in the refrigerator.
5. Avoiding moisture: To prevent moisture build-up, check the stored squash regularly and discard any that show signs of decay or mold. If condensation forms inside the storage container, wipe it dry with a clean cloth to maintain the proper moisture balance.
6. Freezing: If you find yourself with an abundance of summer squash, consider freezing it for long-term storage. Wash the squash, slice, and blanch it in boiling water for a few minutes. Plunge the blanched slices into an ice bath to cool them down quickly. Drain well and pack the squash into freezer-safe containers or bags labeled with the date. Frozen summer squash can retain its quality for up to ten months.
Remember, summer squash does not have a long shelf life, so it is best to consume or preserve it as soon as possible after harvest. Always inspect each squash before consuming or storing, and use the ones showing signs of spoilage promptly.
By following these storage guidelines, you can maximize the freshness and flavor of your summer squash, allowing you to enjoy them in a variety of dishes throughout the season.
Common Problems and Solutions for Summer Squash Plants
Summer squash plants are susceptible to various issues and pests that can affect their growth and productivity. Understanding and addressing these common problems early can help ensure healthy plants and a successful harvest. Here are some common problems you may encounter when growing summer squash and their respective solutions:
1. Powdery Mildew: Powdery mildew is a fungal disease characterized by a powdery white coating on the leaves. To prevent powdery mildew, provide proper airflow by spacing plants adequately and avoiding overhead watering. If powdery mildew appears, remove infected leaves, apply organic fungicides, or use a mixture of milk and water to slow its progression.
2. Blossom End Rot: Blossom end rot is a condition where the ends of the squash develop dark, sunken spots. It is often caused by calcium deficiency or irregular watering. Maintain consistent soil moisture by watering evenly, and ensure plants receive sufficient calcium by amending the soil with calcium-rich fertilizers or adding crushed eggshells.
3. Squash Vine Borer: Squash vine borers can cause significant damage to summer squash plants by burrowing into the stems, which leads to wilting and eventual plant death. Protect plants by covering them with row covers until they begin to flower. If infestation occurs, make a small incision in the stem to remove the borer larvae and mound soil over the wounded area to encourage root formation.
4. Cucumber Beetles: Cucumber beetles feed on squash plants, transmit diseases, and can significantly damage fruit. Apply floating row covers to prevent beetle access, attract beneficial insects to control their population, or use insecticidal soaps or neem oil to deter them.
5. Squash Bugs: Squash bugs can cause wilting, yellowing leaves, and stunted growth. Handpick and remove the bugs or their eggs from the underside of leaves. Regularly monitor for signs of infestation and take action promptly to prevent population growth.
6. Poor Pollination: Inadequate pollination can result in misshapen or underdeveloped fruit. To promote successful pollination, attract pollinators by planting flowers near your squash plants and avoid using pesticides harmful to bees. Hand-pollinate by transferring pollen from male to female blossoms using a small brush or cotton swab.
7. Overcrowding: Overcrowding can lead to poor airflow, increased humidity, and disease problems. Ensure proper spacing between plants to allow for good air circulation, light penetration, and healthy growth. Regularly thin seedlings to maintain optimal spacing.
8. Weed Competition: Weeds can compete with summer squash plants for nutrients, water, and sunlight. Regularly remove weeds from around the plants, using hand-pulling or mulching to suppress weed growth. Weed control helps reduce pest habitats and improves overall plant health.
By identifying and promptly addressing these common problems in summer squash plants, you can take the necessary steps to maintain healthy plants and increase your chances of a bountiful harvest. Regular monitoring, proactive measures, and timely intervention will help ensure the success of your summer squash crop.