
Best Time of Year to Plant Spinach Seeds
Planting spinach at the right time is crucial for a successful harvest. Spinach is a cool-season crop that thrives in temperatures between 50°F (10°C) and 70°F (21°C). It is important to choose the ideal time to sow the seeds to ensure optimal growth and avoid bolting, which occurs when the plant prematurely goes to seed.
The best time to plant spinach seeds depends on your location and climate. In most regions, early spring and fall are the ideal seasons for spinach cultivation. In early spring, sow the seeds as soon as the soil can be worked and temperatures are consistently above freezing. This ensures that spinach can grow and mature before the arrival of hot summer temperatures.
In the fall, sow spinach seeds about six to eight weeks before the first expected frost. The cooler temperatures of fall provide the perfect growing conditions for spinach. The plant will develop sturdy leaves and produce a bountiful harvest. It is important to monitor the weather and adjust the planting time accordingly to avoid extreme heat or cold that could negatively affect germination and growth.
In some milder climates, spinach can also be grown during the winter months. With the protection of a cold frame or row covers, spinach can continue to grow and provide fresh greens even during colder temperatures. However, it is essential to provide adequate insulation and protect the plants from freezing.
When planning the timing of your spinach plantings, consider the average first and last frost dates in your area. This information will help you determine the appropriate planting window. To ensure a longer harvest period, you can also plant successive crops of spinach every few weeks throughout the growing season.
Factors to Consider Before Planting Spinach Seeds
Before you rush to plant spinach seeds, it’s important to consider a few factors that can greatly influence the success of your crop. By taking these factors into account, you can create the optimal growing conditions for your spinach plants and increase the chances of a bountiful harvest.
1. Soil Quality: Spinach thrives in well-draining soil that is rich in organic matter. Prior to planting, prepare the soil by incorporating compost or aged manure to improve its texture and fertility. Avoid heavy clay soils that retain too much moisture, as this can lead to root rot or other diseases.
2. Sunlight: While spinach can tolerate some shade, it performs best in full sunlight. Ensure that your chosen planting location receives at least 6-8 hours of direct sunlight per day for optimal growth and leaf development.
3. Temperature: As a cool-season crop, spinach prefers temperatures between 50°F (10°C) and 70°F (21°C). Avoid planting spinach seeds in excessively hot weather, as high temperatures can cause the plants to bolt and go to seed prematurely.
4. Watering: Spinach requires consistent moisture to thrive, but overwatering can lead to root diseases. Water the plants regularly, aiming for about 1 inch of water per week. Use mulch to conserve moisture and prevent weeds from competing with the spinach plants.
5. Companion Planting: Consider planting spinach alongside crops that are beneficial to one another. Compatible companion plants for spinach include radishes, lettuce, carrots, and onions. These companion crops can help deter pests and provide shade for the spinach leaves during hot weather.
6. Pest Control: Be aware of common pests that can affect spinach, such as aphids, leaf miners, and slugs. Implement proactive measures to control these pests, such as regular inspection, handpicking, and using organic pest control methods if necessary.
By considering these important factors, you can create an optimal environment for your spinach plants to thrive. With proper preparation and care, you’ll be rewarded with a nutritious and delicious harvest of homegrown spinach.
Germination Conditions for Spinach Seeds
Germination is a critical stage in the life cycle of spinach plants. Providing the right conditions for seed germination ensures a strong start for your spinach crop. Here are the key factors to consider when creating optimal germination conditions for spinach seeds.
1. Temperature: Spinach seeds germinate best in cool soil temperatures ranging from 50°F (10°C) to 65°F (18°C). If the soil is too warm, germination may be slow or sporadic. Consider planting spinach seeds in early spring or late summer when the soil is cooler to maximize germination rates.
2. Moisture: Adequate moisture is crucial for spinach seed germination. Before sowing the seeds, ensure that the soil is moist but not waterlogged. Keep the soil consistently moist during the germination period to provide the necessary hydration for the seeds to sprout. Regular watering or using a misting bottle can help maintain proper moisture levels.
3. Light: Unlike some other seeds, spinach seeds do not require light for germination. In fact, darkness can even promote better germination rates. Cover the seeds with a thin layer of soil or vermiculite to provide the darkness they need to sprout successfully.
4. Air Circulation: Good air circulation is important for preventing fungal diseases and promoting healthy germination. Avoid overcrowding the seeds and provide adequate spacing to ensure proper airflow around the young seedlings.
5. Seed Depth: Plant spinach seeds at a depth of approximately ½ to 1 inch (1.25 to 2.5 cm) in the soil. Planting them too shallow may result in the seeds drying out, while planting them too deep can delay or inhibit germination.
6. Germination Time: Spinach seeds typically germinate within 7 to 14 days under ideal conditions. However, germination can vary depending on factors such as temperature, moisture levels, and seed quality. Be patient and continue to provide the necessary conditions for germination until the seedlings emerge.
By providing the right temperature, moisture, darkness, airflow, and seed depth, you can create optimal germination conditions for your spinach seeds. With proper care during this crucial stage, you’ll be on your way to a successful spinach harvest.
Tips for Preparing the Soil for Spinach Seeds
Preparing the soil properly before planting spinach seeds is essential for ensuring the best conditions for growth and a successful harvest. Here are some crucial tips to help you prepare the soil for your spinach crop.
1. Clear the Area: Start by clearing any weeds, rocks, or debris from the planting area. Weeds compete with the young spinach seedlings for nutrients and water, so removing them beforehand is important for optimal growth.
2. Loosen the Soil: Spinach prefers a well-draining soil with good structure. Loosen the soil with a garden fork or tiller to improve its texture and allow the roots to penetrate easily. Avoid compacted soil, as it can hinder root growth and lead to poor plant development.
3. Add Organic Matter: Incorporating organic matter into the soil enhances its fertility and improves moisture retention. Mix in compost, well-rotted manure, or leaf mold to provide a nutrient-rich environment for your spinach plants. This also helps improve soil structure and drainage.
4. Test the pH: Spinach thrives in slightly acidic to neutral soil with a pH range of 6.0 to 7.0. Test the pH of your soil using a soil testing kit or by sending a sample to a local extension office or laboratory. Adjust the pH if necessary by adding amendments like lime to raise the pH or sulfur to lower it.
5. Apply Fertilizer: Spinach has moderate nutrient requirements. Before planting, apply a balanced slow-release fertilizer to provide essential nutrients throughout the growing season. Follow the instructions on the fertilizer package for the appropriate application rates.
6. Consider Soil Amendments: If your soil lacks essential nutrients, consider adding specific amendments to address deficiencies. For example, if your soil is deficient in nitrogen, apply a nitrogen-rich fertilizer or use amendments like blood meal or fish emulsion.
7. Mulch the Soil: Once the soil is prepared and the seeds are planted, apply a layer of organic mulch like straw or compost to retain moisture, suppress weeds, and regulate soil temperature.
By following these tips, you can create a well-prepared soil environment for your spinach seeds to thrive. With proper soil preparation, your spinach plants will have the best opportunity for healthy growth and abundant yields.
Step-by-Step Guide to Planting Spinach Seeds
Planting spinach seeds is a straightforward process that can be done by following a few simple steps. Here is a step-by-step guide to help you successfully plant your spinach seeds and start a thriving crop.
1. Choose the Right Location: Select a planting location that receives at least 6-8 hours of direct sunlight per day. Ensure that the soil is well-draining and rich in organic matter.
2. Prepare the Soil: Clear the area of any weeds or debris. Loosen the soil with a garden fork or tiller and incorporate organic matter, such as compost or well-rotted manure, to improve its fertility and structure.
3. Sow the Seeds: Make shallow furrows in the soil, approximately ½ to 1 inch (1.25 to 2.5 cm) deep. Space the furrows about 12 inches (30 cm) apart to allow for proper airflow and growth. Sow the spinach seeds evenly along the furrows, leaving a gap of about 2-3 inches (5-7.5 cm) between each seed.
4. Cover and Water: Gently cover the seeds with soil, ensuring they are adequately covered but not too deep. Water the area thoroughly but gently using a fine mist or a watering can with a rose attachment to avoid washing away the seeds.
5. Maintain Moisture: Keep the soil consistently moist during the germination period. Water regularly, aiming for about 1 inch (2.5 cm) of water per week. Be careful not to overwater, as excessive moisture can lead to rotting or disease.
6. Thin the Seedlings: Once the seedlings emerge and have developed their first true leaves, thin them out to create proper spacing. Space the seedlings 4-6 inches (10-15 cm) apart to allow ample room for growth and airflow. Use scissors or gardening shears to snip off the excess seedlings at the soil level rather than pulling them out, as this can disturb the roots of the remaining plants.
7. Provide Care: Monitor the plants regularly and water as needed to maintain consistent moisture. Apply mulch around the plants to conserve moisture, suppress weeds, and regulate soil temperature. Fertilize the spinach plants once a month with a balanced fertilizer to provide essential nutrients throughout the growing season.
By following these step-by-step instructions, you can successfully plant spinach seeds and set the stage for a healthy and productive spinach crop. With proper care and maintenance, you’ll soon be enjoying the delicious and nutritious harvest of your homegrown spinach.
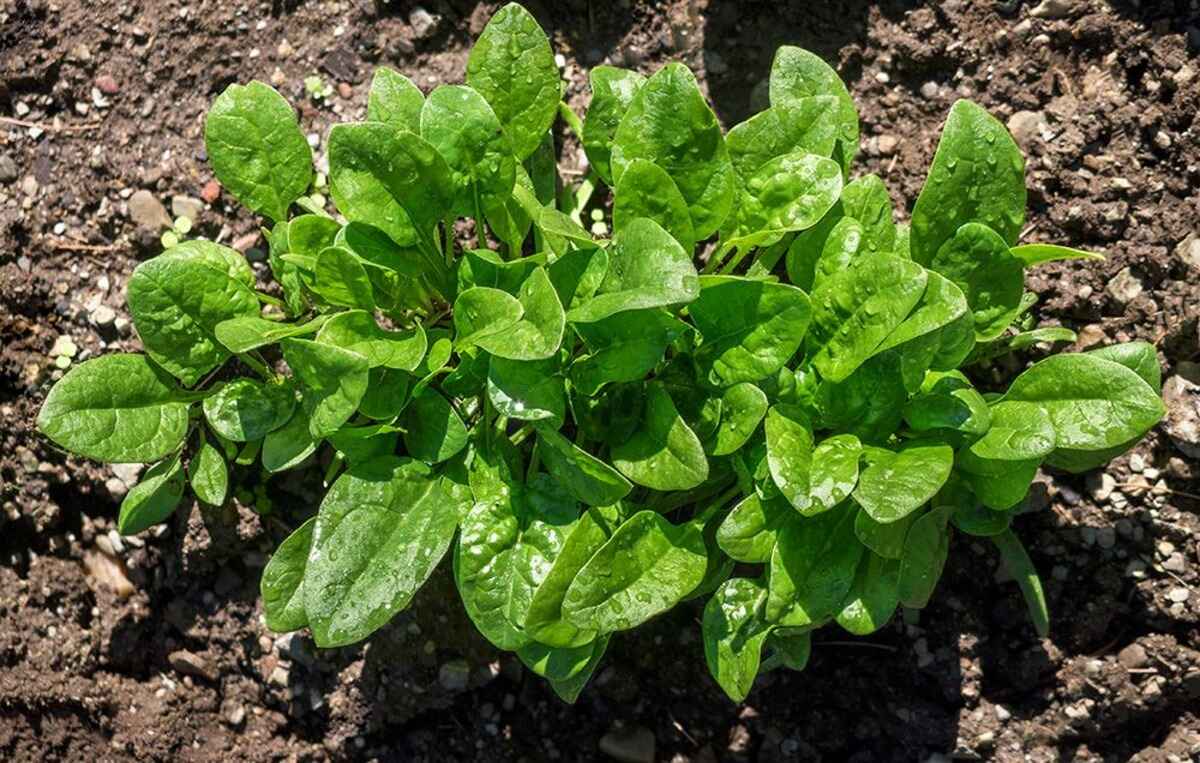
How to Care for Spinach Seedlings
Once your spinach seedlings have emerged, proper care is essential to ensure their healthy growth and development. Taking the right steps and providing the necessary care will help your seedlings flourish into robust spinach plants. Here are some important tips on how to care for your spinach seedlings.
1. Watering: Spinach seedlings require consistent moisture to thrive. Water the plants regularly, aiming to keep the soil evenly moist but not waterlogged. Avoid overwatering, as it can lead to root rot or other diseases. It’s best to water at the base of the plants to keep the foliage dry and prevent fungal infections.
2. Thinning: If you’ve planted multiple seeds in each hole or row, once the seedlings have developed their first true leaves, thin them out. This involves removing the weaker or excess seedlings to provide adequate space for the remaining plants. Space the seedlings about 4-6 inches (10-15 cm) apart to ensure proper airflow and prevent overcrowding.
3. Fertilizing: Spinach plants benefit from regular feeding to ensure healthy growth. Apply a balanced fertilizer once a month throughout the growing season. Choose a fertilizer specifically formulated for vegetables and follow the package instructions for proper application rates.
4. Weed Control: Keep the area around the spinach seedlings free from weeds. Weeds can compete with the young plants for nutrients, water, and sunlight. Regularly inspect the area and remove any weeds by hand, taking care not to disturb the delicate roots of the spinach seedlings.
5. Protecting from Pests: Monitor the spinach seedlings for any signs of pests like aphids, slugs, or leaf miners. If pest infestation occurs, take immediate action to prevent damage. Use organic pest control methods such as handpicking pests, applying natural insecticidal soaps, or using physical barriers like row covers.
6. Mulching: Apply a layer of organic mulch around the seedlings to help retain moisture, suppress weeds, and regulate soil temperature. Mulching also protects the shallow root system of the seedlings from extreme temperature fluctuations.
By following these care tips, your spinach seedlings will receive the necessary attention and conditions for healthy growth. With proper watering, thinning, feeding, weed control, pest management, and mulching, your spinach seedlings will develop into robust and productive plants that will provide you with a bountiful harvest of fresh, nutritious spinach leaves.
Common Pests and Diseases that Affect Spinach Plants
While spinach is generally a hardy and resilient crop, it can still fall prey to various pests and diseases that can hinder its growth and reduce yields. Being aware of these common issues and taking proactive measures can help you prevent or mitigate their impact on your spinach plants. Here are some of the common pests and diseases that affect spinach plants.
1. Aphids: Aphids are small, sap-sucking insects that can infest spinach plants. They feed on the plant’s sap, causing distorted, yellow leaves and stunted growth. To control aphids, you can spray the affected plants with a mixture of mild soap and water or use organic insecticidal sprays.
2. Leaf Miners: Leaf miners are fly larvae that burrow into the spinach leaves, creating distinctive trails or tunnels. These tunnels disrupt the flow of nutrients in the leaves and can lead to leaf damage and reduced plant vigor. To control leaf miners, remove and destroy infested leaves and use row covers to prevent adult flies from laying eggs on the plants.
3. Slugs and Snails: Slugs and snails are nocturnal pests that feed on the leaves of spinach plants, leaving behind large irregular holes. To control slugs and snails, reduce moisture levels by watering in the morning instead of evening, handpick them off the plants in the evening, use barriers like copper tape or diatomaceous earth, or set up beer traps to lure and drown them.
4. Powdery Mildew: Powdery mildew is a fungal disease that appears as a white or gray powdery coating on the leaves of spinach plants. It can inhibit photosynthesis, leading to reduced growth and yield. To prevent powdery mildew, provide adequate spacing between plants for good airflow, water at the base of the plants, and remove and destroy infected leaves.
5. Downy Mildew: Downy mildew is another fungal disease that attacks spinach plants, causing yellowing, wilting, and eventual death of the leaves. It thrives in cool and humid conditions. To manage downy mildew, avoid overhead watering, thin the plantings for better air circulation, and apply copper-based fungicides as a preventive measure.
6. Root Rot: Root rot is a fungal disease that affects the roots of spinach plants, leading to wilting, yellowing, and stunted growth. To prevent root rot, ensure proper soil drainage by amending heavy clay soils with organic matter and avoid overwatering the plants.
Regular monitoring, early detection, and implementing appropriate control methods can help manage these common pests and diseases that affect spinach plants. By providing optimal growing conditions and taking proactive measures, you can keep your spinach plants healthy and thriving throughout the growing season.
Harvesting Spinach: When to Pick the Leaves
Knowing the perfect time to harvest your spinach leaves is crucial to ensure their optimal flavor, texture, and nutritional value. Harvesting spinach at the right stage allows you to enjoy tender, crisp leaves while encouraging the plant to continue producing throughout the growing season. Here are some guidelines to help you determine when to pick spinach leaves for harvest.
1. Leaf Size: Spinach leaves can be harvested at any stage of growth, but the size of the leaves is a good indicator of readiness. Baby spinach leaves are typically ready for harvest when they reach about 2-3 inches (5-7.5 cm) in length. For mature spinach, the leaves should be around 4-6 inches (10-15 cm) long.
2. Leaf Appearance: Harvest spinach leaves when they are dark green and vibrant. They should have a smooth, glossy texture without any yellowing or browning. Avoid leaves that have begun to bolt (produce flowers) or show signs of disease or damage.
3. Plant Growth: Harvest spinach leaves from the outer part of the plant, allowing the inner leaves to continue growing. This method, known as “cut and come again,” allows you to harvest multiple leaves from the same plant over time. Start harvesting when the plant has developed enough mature leaves.
4. Timing: Harvest spinach leaves in the morning when the leaves are hydrated and at their freshest. Avoid harvesting during the heat of the day when the leaves may wilt quickly.
5. Regular Harvesting: To encourage continuous growth and maximize your spinach harvest, regularly pick outer leaves as they reach the desired size. Leave the younger inner leaves to mature. Harvesting regularly also prevents the plant from bolting too quickly.
6. Full Plant Harvest: If you prefer to harvest the entire plant at once, wait until the majority of the leaves have reached the desired size. Cut the entire plant off at ground level, leaving about an inch (2.5 cm) of stem intact. This method is ideal when you need a large quantity of spinach at once.
It’s important to note that spinach leaves are highly perishable, so it’s best to harvest just before you plan to use them. If needed, spinach leaves can be stored in a plastic bag or container in the refrigerator for up to a week. However, for the best taste and texture, it’s recommended to consume them as fresh as possible.
By following these guidelines for harvesting spinach leaves, you can enjoy a continuous supply of fresh, nutritious greens throughout the growing season, straight from your garden to your plate.
Best Practices for Storing Spinach Leaves
Storing spinach properly after harvest is essential to maintain its freshness and nutritional value. Whether you have harvested spinach from your garden or purchased it from the store, following these best practices will help you store spinach leaves effectively and prolong their shelf life. Here are some tips for storing spinach leaves:
1. Washing: It’s best to wash spinach leaves just before you plan to use them. Rinse the leaves under cold running water to remove any dirt or debris. Gently pat them dry with a clean kitchen towel or salad spinner to remove excess moisture.
2. Remove Excess Moisture: Excess moisture can lead to spoilage, so ensure that the leaves are thoroughly dry before storage. Excess moisture can also cause the leaves to wilt quickly. Blot the leaves with a paper towel if needed to remove any remaining moisture.
3. Refrigeration: Store spinach leaves in a perforated plastic bag or airtight container in the refrigerator’s vegetable drawer. The perforations allow air circulation, preventing moisture buildup, which can cause the leaves to become slimy. Ensure the storage container is clean and free from any contaminants.
4. Optimal Temperature: Spinach leaves should be stored at a cool temperature, ideally around 32°F to 40°F (0°C to 4°C). However, avoid storing spinach leaves for an extended period at temperatures near or below freezing, as this can cause damage and spoilage.
5. Avoid Compression: Handle and store spinach leaves gently to avoid bruising or compressing them. Compression can accelerate decay, so ensure the leaves are not overcrowded or tightly packed together.
6. Proper Timing: It’s best to consume spinach leaves as soon as possible after harvesting or purchasing. Fresh spinach leaves can typically be stored for up to a week if properly stored. However, the longer the storage period, the greater the chance of nutrient loss and deterioration of quality.
7. Freezing: If you have an abundance of spinach leaves, consider blanching and freezing them for long-term storage. Blanch the leaves in boiling water for a few seconds and then plunge them into ice water to halt the cooking process. Pat them dry, pack them into freezer-safe containers or bags, and store them in the freezer for up to 12 months. Frozen spinach leaves are best used in cooked dishes like soups, stews, and smoothies.
By following these best practices for storing spinach leaves, you can prolong their freshness and enjoy their vibrant flavor and nutritional benefits for an extended period. Proper storage ensures that you can use this nutritious leafy green in your favorite recipes whenever you desire.
How to Save Spinach Seeds for Future Planting
Saving spinach seeds allows you to preserve the genetics of specific spinach varieties and ensures a sustainable and cost-effective way to grow spinach in future seasons. While spinach is typically grown as an annual crop, it is possible to save the seeds for replanting. Follow these steps to successfully save spinach seeds for future planting.
1. Selection of Plants: Choose healthy and vigorous spinach plants for seed saving. Look for plants with desirable traits such as disease resistance, flavor, or leaf texture. Avoid selecting plants that have bolted early or displayed poor characteristics.
2. Allow Bolting: Spinach plants need to bolt and go to seed for seed-saving purposes. Allow a few of your best plants to bolt by withholding water or exposing them to higher temperatures. This encourages the formation and maturation of seeds.
3. Seed Maturation: Allow the seed pods, known as “siliques,” to mature fully on the plant. The siliques will turn brown or yellow, and the seeds inside will become hard and dark. This usually takes several weeks after the plants have bolted.
4. Harvesting Seeds: Once the seed pods have fully ripened, cut or gently pull the seed heads from the plants. Place them in a paper bag or a clean, dry container. Label the container with the variety and the date of harvest to keep track of the seeds.
5. Drying: Allow the seed heads to dry completely in a well-ventilated and dry space. This can take several weeks, depending on the humidity levels in your area. Make sure the seeds are completely dry before removing them from the seed heads.
6. Separating Seeds: Once the seed heads are dry, gently crush or rub them between your hands to separate the seeds from the pods. Alternatively, you can use a sieve or a strainer to separate the seeds from the chaff.
7. Storage: Store the spinach seeds in a cool, dry, and dark place. Use airtight containers, such as glass jars or seed envelopes, to keep the seeds protected from moisture and pests. Properly stored spinach seeds can remain viable for several years.
8. Germination Testing: Before using the saved seeds for planting, conduct a germination test to assess their viability. Place a few seeds on a damp paper towel and keep them in a warm location. If the majority of the seeds sprout within the expected time frame, they are viable for planting.
By following these steps, you can successfully save spinach seeds for future planting. Remember to choose healthy parent plants, allow them to bolt and mature, properly dry the seeds, and store them carefully. This practice allows you to maintain the qualities of your favorite spinach varieties while ensuring a sustainable supply of seeds for future seasons.