
Factors to Consider Before Planting Peony Roots
Planting peony roots is an exciting prospect for any gardener. These beautiful flowers, known for their large and vibrant blooms, bring elegance and charm to any garden. However, before getting your hands dirty, there are a few important factors to consider.
1. Climate and weather conditions: Peonies thrive in cooler climates, with temperature ranges between 40°F (4°C) to 85°F (29°C). They require a period of winter dormancy and a certain number of chilling hours to bloom successfully. Before planting, ensure that your climate is suitable for peonies.
2. Sunlight requirements: Peonies love sunlight and need at least six hours of direct sunlight each day to grow and bloom optimally. Choose a location in your garden that receives ample sunlight and is not blocked by trees or buildings.
3. Soil conditions: Peonies prefer well-draining soil that is rich in organic matter. Conduct a soil test to determine the pH level and make necessary amendments to adjust it to the preferred range of 6.5 to 7.5. Ensure the soil has good drainage to prevent waterlogging, which can lead to root rot.
4. Space availability: Peonies require adequate space to grow and spread. Avoid planting them too close to other plants or structures as they need room for their roots and foliage to develop. Give them about three to four feet of space in all directions.
5. Companion planting: Consider companion plants that can enhance the beauty of your peonies while providing benefits such as attracting beneficial insects and deterring pests. Good companion plants for peonies include iris, lavender, catmint, and salvia.
6. Time commitment: Peonies are perennial plants that can live for decades if cared for properly. Keep in mind that planting peony roots requires a long-term commitment. These plants can take a few years to establish and start flowering prolifically, so be patient and prepared to nurture them over time.
Remember: Peony roots are dormant when you first plant them, so don’t be discouraged if you don’t see any growth initially. With proper care and patience, they will reward you with stunning blooms that will brighten up your garden year after year.
By considering these factors before planting peony roots, you can create an optimal environment for these beloved flowers to thrive and bring joy to your garden.
Weather Conditions for Peony Planting
When it comes to planting peony roots, selecting the right weather conditions is crucial for the success of your garden. Proper timing ensures that the peonies have the best chance of establishing themselves and growing into beautiful, blooming plants. Here are some important weather conditions to consider before planting peony roots:
1. Spring temperatures: Peonies thrive when planted in cool spring temperatures. Wait until the soil temperature reaches around 50°F (10°C) during the day. If the soil is too cold, the roots may have difficulty establishing and could rot. However, avoid planting when temperatures are below freezing, as this can cause damage to the roots.
2. Seasonal rainfall: Peonies prefer well-drained soil, so it’s important to consider the rainfall patterns in your area. If you experience heavy and constant rainfall during the spring season, it’s advisable to amend the soil with organic matter or create raised beds to improve drainage.
3. Frost risk: Peonies are usually resilient to light frosts, but it’s best to avoid planting when a heavy frost is expected. Frost can damage the tender growth and delay the blooming process. Keep an eye on the weather forecast and plant your peony roots when the risk of frost has passed.
4. Wind exposure: Peonies are delicate flowers, and strong winds can damage the young shoots and cause the plants to bend or break. Consider planting peonies in a location that is protected from strong winds or provide support, such as staking or using peony cages, to protect them during windy conditions.
5. Consistency in weather: Peony roots benefit from a stable climate during their initial growth period. Avoid planting during a time with unpredictable weather patterns, such as excessively hot or cold spells. Consistency in weather conditions will allow the peonies to transition smoothly and establish themselves effectively.
6. Climatic requirements: Different peony varieties have specific climatic requirements. Some are more tolerant of warm temperatures, while others thrive in cooler climates. Research the specific variety you plan to plant and ensure that your location’s climate meets its requirements. This will give your peonies the best chance of flourishing.
By taking into account these weather conditions before planting peony roots, you can optimize the growing conditions and set the stage for healthy, vibrant peony plants in your garden. Remember to stay informed about local weather trends and make adjustments accordingly to provide the best possible environment for your peonies to thrive.
Choosing the Right Time to Plant Peony Roots
Timing is crucial when it comes to planting peony roots. Choosing the right time ensures that the plants have the best chance of establishing themselves and thriving in your garden. Here are some factors to consider when determining the perfect time to plant your peony roots:
1. Spring or fall planting: Peonies can be planted either in the spring or fall, but the timing varies based on your location and climate. In most regions, early fall (September to October) is often considered the best time for planting. The soil is still warm, which facilitates root development before the winter sets in. Spring planting is also feasible, but it’s best to avoid late spring to prevent the plants from suffering in the heat.
2. Frost danger: Peony roots should be planted when the risk of frost has passed. Frost can damage the delicate young shoots and hinder growth. For spring planting, wait until the soil has thawed and is workable. In fall, aim to plant at least 4-6 weeks before the first expected frost to give the roots ample time to establish before winter sets in.
3. Risk of extreme temperatures: It’s essential to avoid planting peony roots during periods of extreme temperature fluctuations. Avoid planting during the hottest part of summer or when the temperatures drop dramatically in winter. The plants need a stable climate to settle in and establish themselves.
4. Availability of dormant peony roots: If you prefer bare root plants, they are usually available for purchase in early spring or fall. You can plant them as soon as they become available, ensuring they have time to settle in before the heat of summer or the harsh cold of winter arrives.
5. Your planting schedule: Consider your own availability and gardening schedule when deciding when to plant peony roots. Choose a time when you can dedicate attention to properly preparing the soil, planting, and providing necessary care as the plants establish themselves. Adequate time and effort during planting will set the foundation for healthy peony plants in the long run.
Remember, every garden is unique, and your local conditions will influence the ideal planting time for peony roots. Consult with local gardening experts or nurseries for guidance specific to your region.
By choosing the right time to plant your peony roots, you give them the best chance of thriving and creating a stunning display of vibrant blooms in your garden. Take into account the climate, frost risk, extreme temperatures, and your own schedule to determine the optimal time for planting this beautiful perennial flower.
Planting Peony Roots in Spring
Spring is a wonderful time to plant peony roots, as the soil begins to warm up and the weather becomes more favorable for plant growth. Here are some important steps to follow when planting peony roots in spring:
1. Choose a suitable location: Select a location in your garden that receives at least six hours of direct sunlight each day. Peonies thrive in full sun, which helps promote healthy growth and abundant blooms. Ensure the area has well-draining soil to prevent waterlogging, as peonies do not tolerate excessive moisture around their roots.
2. Prepare the soil: Before planting, prepare the soil by loosening it with a garden fork or tiller. Remove any weeds or grass from the area and incorporate organic matter, such as compost or well-rotted manure, to improve soil fertility and drainage.
3. Soak the peony roots: Prior to planting, soak the peony roots in water for a couple of hours. This helps hydrate the roots and prepares them for planting.
4. Dig the planting hole: Dig a hole that is wide and deep enough to accommodate the peony roots comfortably. The hole should be approximately 18 to 24 inches wide and 12 to 18 inches deep. Leave enough space between each plant, about three to four feet, to allow for proper growth and airflow.
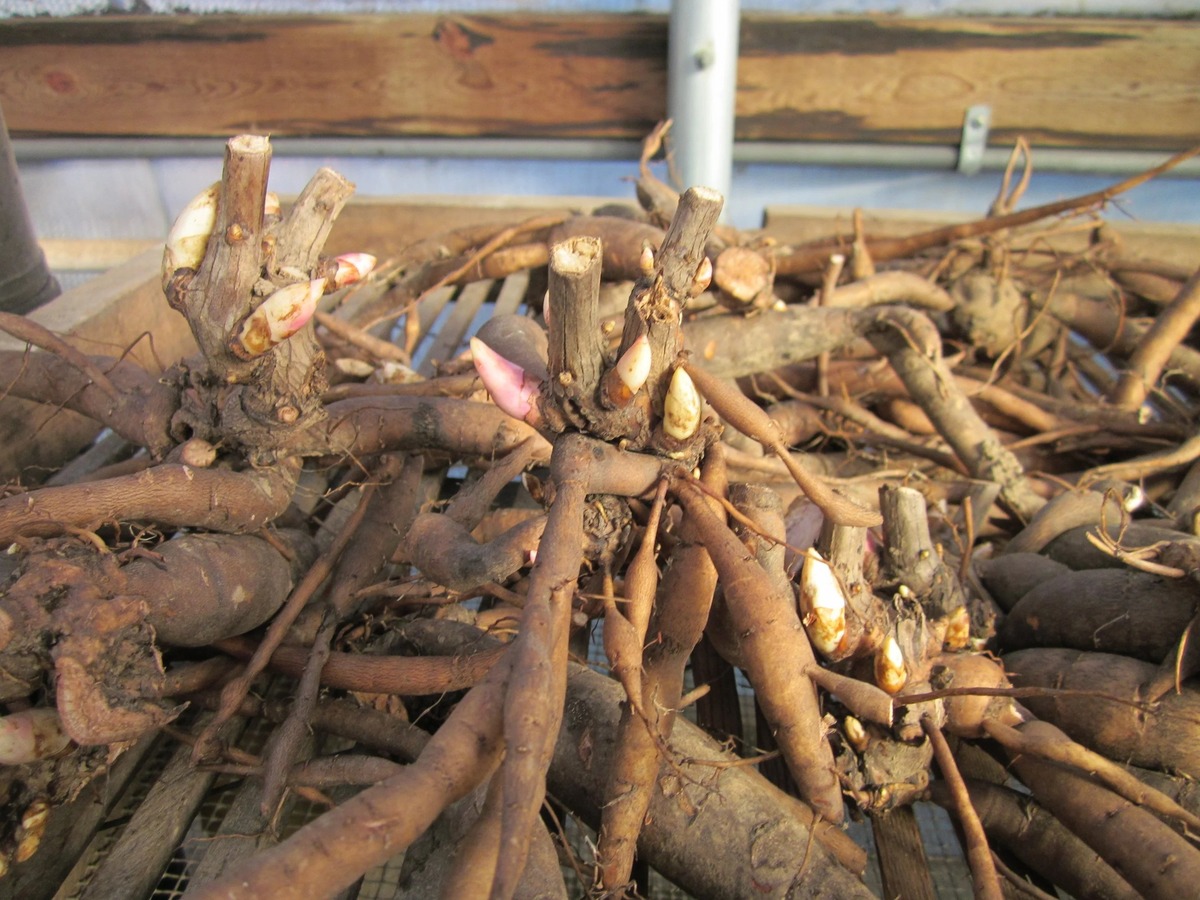
5. Place the peony roots: Gently place the soaked peony roots in the planting hole, making sure the bud eyes, which are small reddish or pinkish buds, are facing upward. The bud eyes should be positioned just two inches below the soil surface for optimal growth. Adjust the depth of the hole if necessary.
6. Backfill and firm the soil: Fill the hole with soil around the peony roots, ensuring that the roots are completely covered but the bud eyes remain slightly above the soil surface. Gently firm the soil around the roots to eliminate any air pockets, taking care not to compact the soil too tightly.
7. Water and mulch: After planting, thoroughly water the peony roots to help settle the soil around them. Apply a layer of organic mulch, such as wood chips or straw, around the base of the plant. Mulching helps retain moisture, suppresses weed growth, and regulates soil temperature.
8. Provide ongoing care: Water newly planted peony roots regularly, especially during dry spells, to ensure they are adequately hydrated as they establish themselves. Keep an eye out for any signs of pests or diseases and take appropriate action to prevent any issues from becoming severe.
By following these steps, you can successfully plant peony roots in spring and give them the best start for healthy growth and abundant blooms. With proper care and maintenance, you can enjoy the colorful and captivating beauty of peonies in your garden for many years to come.
Planting Peony Roots in Fall
Fall is an excellent time to plant peony roots, as the cooler temperatures and moist soil create ideal conditions for root establishment. Follow these important steps to plant peony roots in the fall and ensure a successful growing season:
1. Choose the right timing: Aim to plant peony roots in early fall, ideally in September or October, before the first frost arrives. This allows the roots to establish themselves before the onset of winter and ensures a strong start to the growing season.
2. Select a suitable location: Look for a spot in your garden that receives at least six hours of direct sunlight each day. Peonies thrive in full sun, which promotes strong plant growth and vibrant blooms. Ensure the soil has good drainage, as peonies do not tolerate waterlogged conditions.
3. Prepare the planting area: Clear away any weeds, grass, or debris from the planting area. Loosen the soil using a garden fork or tiller, and incorporate organic matter, such as compost or well-rotted manure, to improve soil fertility and structure. This will provide a good foundation for the peony roots to grow.
4. Soak the peony roots: Before planting, soak the peony roots in water for a few hours. This hydrates the roots and prepares them for planting, ensuring they are properly hydrated and ready to establish themselves in the soil.
5. Dig the planting hole: Dig a hole that is wide and deep enough to comfortably accommodate the peony roots. The hole should be approximately 18 to 24 inches wide and 12 to 18 inches deep. Ensure there is enough space between each plant, about three to four feet, to allow for proper growth and airflow.
6. Position the peony roots: Place the soaked peony roots in the planting hole, ensuring the bud eyes, small reddish or pinkish buds, are facing upward. The bud eyes should be positioned just two inches below the soil surface. Adjust the depth of the hole as needed.
7. Backfill and firm the soil: Fill the hole with soil around the peony roots, covering them completely but leaving the bud eyes slightly exposed. Gently firm the soil around the roots to eliminate air pockets, taking care not to compact the soil too tightly.
8. Water and mulch: After planting, water the peony roots thoroughly to help settle the soil around them. Apply a layer of organic mulch, such as wood chips or straw, around the base of the plant. Mulching helps retain moisture, suppress weed growth, and insulate the roots during winter.
9. Provide ongoing care: Although the plants will go dormant during winter, it’s important to monitor the soil moisture and water as needed. Protect the plants from extreme temperature fluctuations by adding a layer of mulch around the stems. Remove any fallen leaves or debris to prevent diseases.
By following these steps, you can successfully plant peony roots in the fall and give them the best chance for healthy growth and abundant blooms in the following spring and summer. With proper care, you’ll be rewarded with the captivating beauty of peonies gracing your garden year after year.
Preparing the Soil for Planting Peony Roots
Proper soil preparation is key to successful peony root planting. By providing the right foundation, you can ensure optimal growing conditions for your peonies. Follow these steps to prepare the soil before planting:
1. Choose the right location: Peonies prefer a sunny spot in your garden where they can receive at least six hours of direct sunlight each day. Select an area with well-draining soil to prevent waterlogging, as excessive moisture can cause root rot. Avoid areas with heavy clay soil, as this type of soil retains water and can lead to poor drainage.
2. Clear the area: Remove any weeds, grass, or debris from the planting area. These unwanted plants can compete with your peonies for nutrients and water. Use a garden fork or tiller to break up the soil and remove any large rocks or clumps.
3. Conduct a soil test: Consider conducting a soil test to determine the pH level and nutrient content of your soil. Peonies prefer slightly acidic to neutral soil, with a pH range of 6.5 to 7.5. If your soil is too acidic, you can add lime to raise the pH level. If it is too alkaline, you can amend it with organic matter or sulfur to lower the pH.
4. Improve soil structure: To improve the structure of your soil, incorporate organic matter into the planting area. Compost, well-rotted manure, or leaf mold are excellent choices. This will help loosen compacted soil, improve drainage, and provide essential nutrients to support root growth.
5. Add fertility: Peonies thrive in nutrient-rich soil. Prior to planting, add a balanced organic fertilizer to the soil, following the instructions on the package. This will provide a boost of nutrients to ensure healthy growth and robust blooms. Avoid using high-nitrogen fertilizers, as this can result in excessive foliage growth at the expense of flower production.
6. Amend heavy clay soil: If you have heavy clay soil that is prone to waterlogging, consider amending it with organic matter and coarse sand to improve drainage. Add a layer of organic matter and a sand layer to the top six inches of soil and mix it well. This will help create a more favorable environment for your peonies.
7. Level the soil: Once you have incorporated organic matter and amendments, use a rake or garden tool to level the soil. This will provide a smooth surface for planting and ensure even moisture distribution.
By following these steps to prepare the soil before planting, you create an optimal environment for your peony roots to establish and thrive. The rich, well-draining soil will provide the necessary nutrients for healthy growth and vibrant blooms. Take the time to prepare your soil properly, and you’ll be rewarded with the beauty and longevity of your peony plants.
How to Plant Peony Roots Correctly
Planting peony roots correctly is essential to ensure their successful establishment and long-term growth. Here are the steps to follow for proper peony root planting:
1. Choose the right timing: If you’re planting bare-root peonies, do so in the early spring or fall when the roots are dormant. This allows them to settle in before the growing season begins. For container-grown peonies, they can be planted throughout the growing season, but it’s best to avoid extreme hot or cold periods.
2. Prepare the planting hole: Dig a hole that is wide and deep enough to comfortably accommodate the peony roots. Make sure the hole is at least 18 to 24 inches wide and 12 to 18 inches deep. Loosen the soil at the bottom of the hole to ensure good drainage.
3. Soak the peony roots: Before planting, soak the peony roots in water for a few hours to rehydrate them. This helps prevent dehydration and promotes healthy root growth.
4. Position the roots: Place the peony roots in the hole, ensuring the eyes (small bud-like growths) are facing upward. The eyes should be positioned about two inches below the soil surface. Adjust the depth of the hole if necessary.
5. Backfill the hole: Gradually backfill the hole with soil, gently firming it around the roots. Ensure that the soil is evenly distributed and there are no air pockets. Be cautious not to compact the soil too tightly, as this can hinder root growth.
6. Water thoroughly: After planting, water the peony roots thoroughly to settle the soil around them. This helps eliminate air pockets and provides initial hydration for the roots.
7. Apply mulch: Apply a layer of organic mulch, such as wood chips or straw, around the base of the plant. Mulching helps retain moisture, suppress weed growth, and regulate soil temperature. Keep the mulch a few inches away from the stems to prevent moisture-related diseases.
8. Stake if needed: If your peony variety is tall or prone to leaning, consider staking the plant to provide support. Insert a stake near the plant and use soft ties to gently secure the stems. This helps prevent breakage and keeps the plant upright.
9. Maintain proper care: After planting, continue to provide regular water, especially during dry spells, to keep the soil evenly moist. Monitor for any signs of pests or diseases, and take appropriate action if necessary. Avoid overwatering, as peonies prefer slightly moist, well-drained soil.
By following these steps, you can ensure that your peony roots are planted correctly, giving them the best chance for healthy growth and flourishing blooms. Remember to provide ongoing care and maintenance to help your peonies thrive in your garden for years to come.
Caring for Peony Roots After Planting
Caring for peony roots after planting is essential to ensure their long-term health and vibrant blooms. Follow these guidelines to provide the proper care for your peonies:
1. Watering: Water newly planted peony roots thoroughly after planting to settle the soil around them. Afterward, water consistently to keep the soil evenly moist. Check the moisture level in the soil regularly, especially during dry spells, and adjust your watering accordingly. Avoid overwatering, as peonies prefer slightly moist, well-drained soil.
2. Fertilizing: Peonies benefit from annual fertilization to promote healthy growth and abundant blooms. Apply a balanced, slow-release fertilizer in early spring when new growth emerges. Follow the instructions on the fertilizer package for the correct application rate. Avoid overfertilization, as it can lead to excessive foliage growth at the expense of flower production.
3. Mulching: Apply a layer of organic mulch, such as wood chips or straw, around the base of the peony plant. Mulching helps retain moisture, regulate soil temperature, suppress weed growth, and improve soil fertility as it breaks down. Maintain a depth of 2 to 3 inches of mulch, keeping it a few inches away from the stems to prevent rotting and pest issues.
4. Support for tall varieties: If your peony variety is tall or prone to leaning, provide support to prevent the stems from bending or breaking. Insert a stake near the plant and use soft plant ties to gently secure the stems to the stake. This will help maintain upright growth and prevent damage from strong winds or heavy rain.
5. Pruning: Peony roots generally don’t require heavy pruning, especially during their early years. However, you can deadhead spent flowers by removing them just above a healthy leaf bud. Pruning can be done after the blooms have faded, but it’s important to leave the foliage intact until it naturally dies back in the late fall. This allows the plant to store energy for the next year’s growth.
6. Pest and disease control: Regularly monitor your peony plants for any signs of pests or diseases. Common issues include leaf blotch, powdery mildew, and botrytis blight. If detected, take appropriate action, such as removing affected foliage or using organic pest control methods. Proper sanitation practices, including the removal of fallen leaves and debris, help prevent the spread of diseases.
7. Winter care: Peonies are hardy and can withstand cold temperatures. However, in areas with extremely harsh winters, providing winter protection is beneficial. Once the foliage has died back in the fall, apply a layer of organic mulch around the base of the plant to insulate the roots and provide some protection from freezing temperatures. Remove the mulch in the spring before new growth emerges.
By providing proper care and attention to your peony roots after planting, you will ensure their continued health and robust growth. With the right watering, fertilizing, mulching, and pest management practices, your peonies will reward you with breathtaking blooms year after year.
Understanding Peony Dormancy and Growth Periods
Understanding the dormancy and growth periods of peonies is crucial for caring for these beautiful plants and ensuring their successful growth. Here’s an overview of the different stages and what you need to know:
1. Winter dormancy: Peonies are perennial plants that go through a period of dormancy during the winter months. The above-ground parts of the plant, including the foliage, die back, while the energy is stored in the underground roots. During this time, the plant rests and prepares for the next growing season. It is normal for peonies to appear dead or dormant during winter.
2. Spring emergence: As temperatures warm up in spring, the peony roots begin to awaken from dormancy. New shoots emerge from the ground, and the plants start their growth cycle for the season. The emergence of the new growth is an exciting moment as it signifies the start of the peonies’ growth period.
3. Growth and flowering: Once the new shoots emerge, the peonies enter their growth phase. During this time, the plant focuses on developing foliage, stems, and flower buds. The foliage expands, and the stems elongate, branching out to support the formation of flower buds. Peonies require a good amount of sunlight, water, and nutrients during this stage to ensure robust growth and abundant blooms.
4. Blooming: The climax of the growth period is the blooming stage. Depending on the variety and environmental conditions, peonies produce their stunning flowers in late spring to early summer. The colorful and fragrant blooms bring joy and beauty to the garden. The duration of the blooming period can vary, with some varieties blooming for just a few weeks and others for a month or longer.
5. Foliage maturation: After the blooming period, the plant focuses on maturing its foliage to prepare for the next dormancy period. It continues to photosynthesize and gather energy to replenish the storage in the roots. The foliage remains green and healthy during this time, contributing to the overall vigor and health of the plant.
6. Fall dormancy: As temperatures cool down in the fall, peonies enter their dormancy period again. The foliage gradually dies back, signaling the plant’s transition into its resting stage. The roots store energy once again, preparing for the following year’s growth cycle.
Understanding the dormancy and growth stages of peonies helps in implementing proper care practices. During the dormancy periods, focus on protecting the roots and providing minimal care, such as removing debris and applying mulch for insulation. During the growth and flowering periods, provide adequate sunlight, water, and nutrients to support healthy growth, robust blooms, and overall plant vigor.
By understanding and respecting the natural dormancy and growth cycles of peonies, you can provide the optimal care that allows these stunning flowers to thrive and bring beauty to your garden year after year.
Troubleshooting Common Peony Planting Problems
While peonies are generally hardy and resilient plants, they can sometimes encounter issues during the planting process. Understanding and troubleshooting these common problems can help ensure the success of your peony plants. Here are some common problems you may encounter when planting peonies and how to address them:
1. Delayed or no blooming: If your peony plants are not blooming or the blooms are delayed, several factors could be at play. Insufficient sunlight, overcrowding, or planting the roots too deep may affect blooming. Ensure your peonies receive at least six hours of direct sunlight daily, provide adequate spacing between plants, and ensure the eyes are only two inches below the soil surface.
2. Poor soil drainage: Peonies require well-draining soil to thrive. If the soil does not drain well, water may accumulate around the roots, leading to rot and other issues. To improve drainage, amend the soil with organic matter, such as compost, and create raised beds or mounds to elevate the planting area.
3. Pest infestations: Peonies can be susceptible to various pests, such as aphids, nematodes, and scale insects. Regularly inspect your plants for signs of pests, such as distorted growth, yellowing leaves, or sticky residue. Use organic pest control methods, such as spraying with a mild soapy water solution or introducing beneficial insects, to manage pest infestations.
4. Fungal diseases: Peonies can be prone to fungal diseases, including botrytis blight and powdery mildew. These diseases manifest as gray mold or white powdery spots on the leaves and flowers. Ensure proper air circulation around the plants by providing adequate spacing and removing fallen leaves and debris. If necessary, apply organic fungicides according to the product instructions to control the diseases.
5. Overwatering: While peonies require adequate moisture, overwatering can lead to root rot and other issues. Ensure the soil is moist but not waterlogged. Water deeply but infrequently, allowing the top few inches of soil to dry out between waterings. Adjust your watering based on local weather conditions and the specific needs of your peonies.
6. Improper planting depth: Planting peony roots too deep or too shallow can impact their growth and blooming. Ensure the eyes of the root are positioned just two inches below the soil surface. Planting too deep can lead to poor growth, while planting too shallow can result in exposed roots and lack of stability. Adjust the planting depth accordingly during the initial planting process or when transplanting.
By addressing these common peony planting problems promptly and taking necessary corrective actions, you can ensure the health and longevity of your peony plants. Implement proper cultural practices, such as providing adequate sunlight, well-draining soil, and appropriate spacing, to prevent or mitigate these issues. With proper care and attention, your peonies will thrive and reward you with their stunning blooms year after year.