
Benefits of Planting Liatris Bulbs in Spring
Planting Liatris bulbs in spring offers a myriad of benefits for gardeners. Springtime is an ideal season to start growing Liatris, also known as blazing star or gayfeather, due to the favorable weather conditions and optimal growing conditions. Here are some of the key benefits of planting Liatris bulbs in spring:
- Early establishment: By planting Liatris bulbs in spring, you give them an early start to establish their roots. The mild temperatures and increasing sunlight provide an ideal environment for the bulbs to settle in and develop strong root systems. This early establishment allows the plants to grow and flourish throughout the growing season.
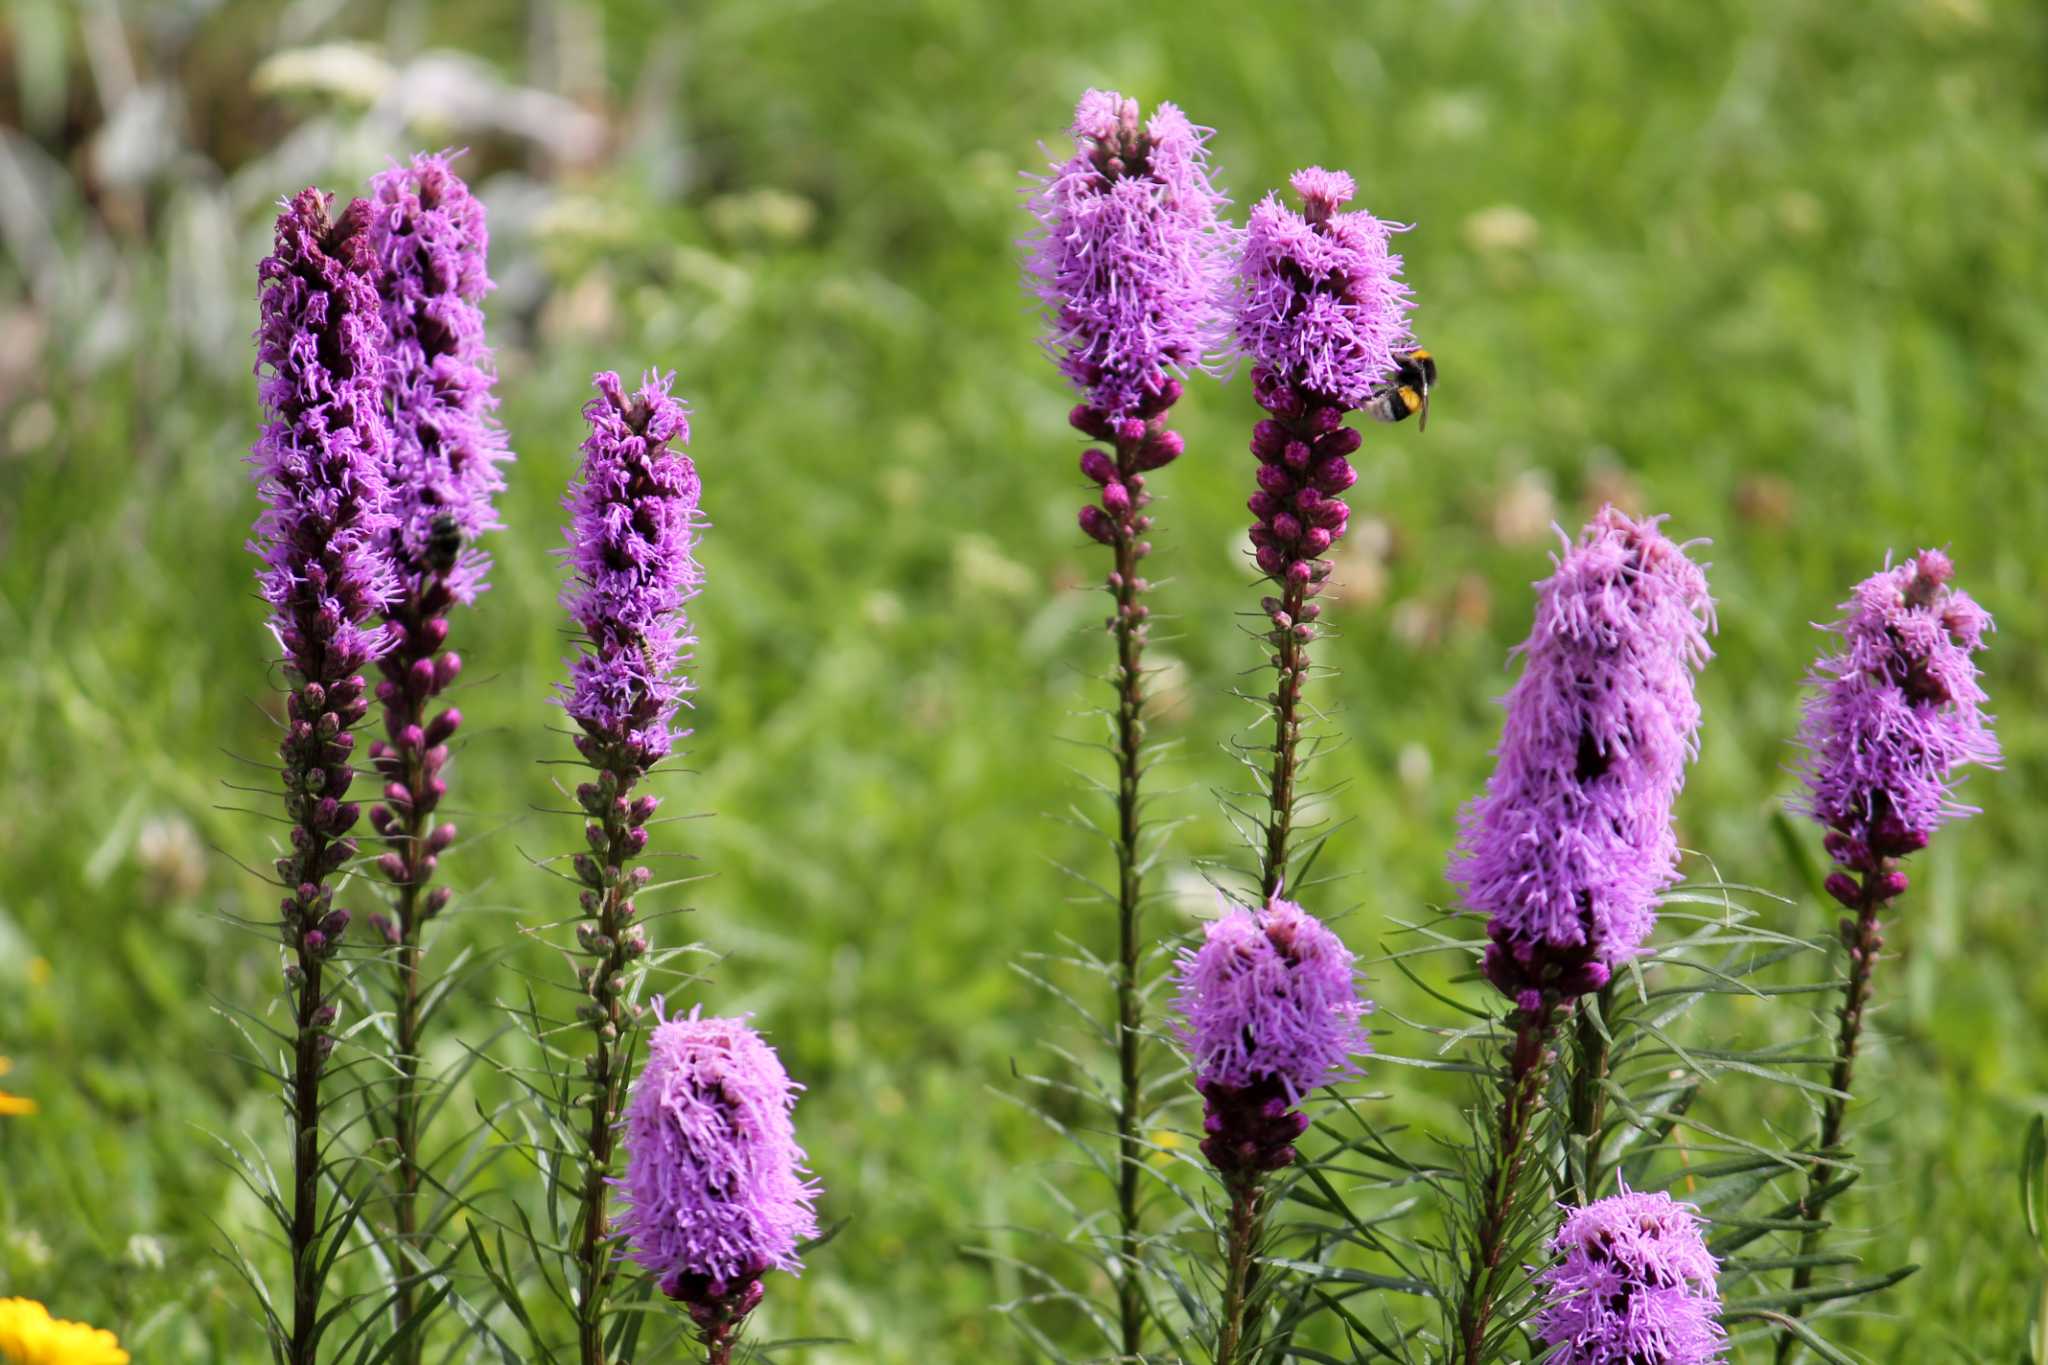
- Abundance of flowers: Liatris bulbs planted in spring have ample time to develop and produce a profusion of stunning flowers. Liatris flowers are known for their tall, slender spikes of vibrant blooms, which attract pollinators like bees and butterflies to your garden. The infusion of color and movement adds a beautiful touch to your outdoor space.
- Extended blooming period: When you plant Liatris bulbs in spring, you can enjoy an extended blooming period. Depending on the variety, Liatris flowers can bloom for several weeks to a couple of months. This prolonged display of blooms adds a dynamic element to your garden and ensures a steady flow of nectar for pollinators.
- Compatibility with other spring-blooming plants: Liatris bulbs complement the beauty of other spring-blooming plants, such as tulips, daffodils, and hyacinths. By incorporating Liatris bulb planting into your spring garden design, you can create a visually appealing and diverse landscape. The contrasting colors, heights, and textures of these plants make for a captivating display.
- Opportunity for division: Spring planting allows you to easily divide established Liatris clumps. As the bulbs start to emerge from the ground, you can carefully lift and separate the clumps into multiple plants. This division not only rejuvenates the existing plants but also provides you with additional Liatris plants to expand your garden or share with fellow gardening enthusiasts.
Benefits of Planting Liatris Bulbs in Fall
Planting Liatris bulbs in the fall offers numerous advantages for gardeners. Fall is an opportune time to get Liatris bulbs in the ground, allowing them to establish healthy root systems before the onset of winter. Here are some of the key benefits of planting Liatris bulbs in fall:
- Ample root development: By planting Liatris bulbs in fall, you give them several months to develop strong root systems. The cool soil temperatures in autumn encourage root growth, enabling the bulbs to establish themselves before the winter frost sets in. This robust root system provides the plants with a solid foundation to support their growth and ensures their survival during the dormant winter period.
- Extra protection against pests and diseases: When you plant Liatris bulbs in fall, they have a better chance of avoiding certain pests and diseases. Many insect pests and pathogens are less active during the fall season, decreasing the risk of infestation or infection. Additionally, the drier conditions of fall help prevent the development of root rot or other fungal diseases that may affect Liatris plants.
- Early spring growth: Liatris bulbs planted in the fall have a head start in the spring. While other garden plants are just starting to emerge, Liatris bulbs that were planted in the fall will already be actively growing. This early growth gives them an advantage in terms of size and maturity, resulting in earlier blooming and a longer flowering period in the spring.
- Less maintenance: Planting Liatris bulbs in the fall can alleviate some of the maintenance tasks in the spring. By establishing their roots before winter, these bulbs require less attention in terms of watering and fertilization during the spring planting season. This allows you to focus on other gardening tasks and enjoy the beauty of the Liatris flowers without the added maintenance burden.
- Availability and savings: Liatris bulbs are more readily available in the fall, as they are in season and stocked in garden centers and nurseries. Fall sales and discounts are common, making it a cost-effective time to purchase and plant Liatris bulbs. By taking advantage of these savings, you can acquire more bulbs and expand your Liatris collection without breaking the bank.
Ideal Temperature and Soil Conditions for Planting Liatris Bulbs
For successful growth and blooming, Liatris bulbs require specific temperature and soil conditions. Understanding these ideal conditions is essential to ensure the health and vitality of your Liatris plants. Here are the key factors to consider when planting Liatris bulbs:
- Temperature: Liatris bulbs thrive in climates with a moderate temperature range. Ideally, the soil temperature should be between 60°F and 70°F (15°C to 21°C) when planting. This temperature range allows for proper root development and helps prevent the bulbs from rotting. Avoid planting the bulbs when the soil temperature is excessively hot or cold, as this can hinder their growth and survival.
- Soil type: Liatris bulbs prefer well-draining soil with a slightly acidic to neutral pH level (around 6.0 to 7.0). Sandy or loamy soils are ideal for Liatris, as they provide good drainage and prevent waterlogging, which can lead to root rot. Heavy clay soils should be amended with organic matter, such as compost or peat moss, to improve drainage and create a more favorable environment for the bulbs.
- Moisture level: Liatris bulbs require slightly moist soil during their growth period. While they do not tolerate excessive moisture, it is important to ensure they receive adequate water. Aim for a consistently moist soil, but avoid overwatering, as this can cause bulb rot. Monitor the soil moisture level by regularly checking the top inch of soil and adjusting watering accordingly.
- Sun exposure: Liatris bulbs thrive in full sun to partial shade. To maximize blooming and growth, select a planting site that receives at least 6 to 8 hours of direct sunlight per day. Full sun exposure ensures that the plants receive the necessary energy for photosynthesis and promotes robust flowering. However, Liatris can tolerate light shade, making it a versatile plant for various garden conditions.
- Additional considerations: When planting Liatris bulbs, it is important to clear the area of weeds and other competing vegetation. This ensures that the bulbs have access to water and nutrients without competing with other plants. Additionally, consider the spacing requirements of Liatris bulbs, as they need adequate room to spread and grow. Follow the recommended spacing instructions for the specific Liatris variety you are planting.
How to Prepare the Planting Site for Liatris Bulbs
Proper preparation of the planting site is crucial for the successful growth and development of Liatris bulbs. Taking the time to prepare the soil and create an optimal environment for the bulbs will greatly enhance their chances of thriving. Here are the steps to prepare the planting site for Liatris bulbs:
- Choose the right location: Select a planting site that receives full sun to partial shade. Ensure that the site has well-draining soil and adequate space for the Liatris bulbs to spread and grow.
- Clear the area: Remove any weeds, grass, or other vegetation from the planting site. These can compete with the Liatris bulbs for nutrients and moisture. Use a garden fork or hand tools to loosen the soil and remove any debris.
- Improve soil drainage: Liatris bulbs prefer well-draining soil. If your soil is heavy clay or retains too much water, amend it with organic matter, such as compost or peat moss, to improve drainage. Spread a layer of organic matter over the planting area and use a garden fork or tiller to mix it into the soil thoroughly.
- Test and adjust soil pH: Liatris bulbs prefer slightly acidic to neutral pH levels. Test the soil pH using a soil testing kit available at garden centers. If the pH is too acidic (below 6.0) or too alkaline (above 7.0), adjust it by adding soil amendments like lime or sulfur. Follow the manufacturer’s instructions for the appropriate amount to add based on your soil test results.
- Loosen the soil: Prior to planting, loosen the soil in the planting area using a garden fork. This will improve aeration and root penetration. Loosen the soil to a depth of about 8 to 10 inches (20 to 25 cm).
- Dig the planting holes: Dig holes for each Liatris bulb, spacing them according to the recommended distance for the specific variety. The holes should be approximately 2 to 3 times the diameter of the bulb and deep enough to accommodate the bulb with a few inches of soil above it.
- Plant the bulbs: Place each Liatris bulb in its respective hole, with the pointed end facing upwards. Gently backfill the hole with soil, ensuring that the bulb is covered with a few inches of soil. Press the soil lightly to secure the bulb in place.
- Water the planting area: After planting, thoroughly water the area to settle the soil and provide moisture to the newly planted bulbs. Keep the soil consistently moist but not waterlogged throughout the growing season.
- Apply mulch: Mulching the planting area helps conserve soil moisture and suppress weed growth. Apply a layer of organic mulch, such as wood chips or straw, around the planted bulbs, leaving a small space around each bulb to allow for proper air circulation.
- Provide support if necessary: Depending on the height and variety of Liatris, some plants may require support to prevent wilting or bending. Consider installing stakes or other supports around the planting area to ensure the plants grow upright.
Planting Liatris Bulbs Indoors vs. Outdoors
When it comes to planting Liatris bulbs, you have the option of starting them indoors or planting them directly in your garden outdoors. Both methods have their advantages and considerations. Here’s a comparison between planting Liatris bulbs indoors and outdoors:
- Indoor Planting: Planting Liatris bulbs indoors allows you to get a head start on the growing season and provides more control over the plants’ early development. You can start the bulbs indoors 6 to 8 weeks before the last frost date in your region.
- Suitable for regions with shorter growing seasons or colder climates, as it allows for an extended growing period.
- Provides protection from unfavorable weather conditions, such as frost or heavy rain, which can hinder outdoor planting.
- Offers more control over temperature, light, and moisture levels, resulting in better germination rates and early growth.
- Liatris bulbs can be started in pots or seed trays filled with well-draining potting mix, placed in a sunny location or under grow lights.
- Transplanting Liatris seedlings outdoors once the threat of frost has passed requires acclimatization to prevent shock.
- Outdoor Planting: Planting Liatris bulbs directly in your garden outdoors is a more traditional and straightforward approach.
- Suitable for regions with milder climates and longer growing seasons, as it takes advantage of the natural conditions.
- Eliminates the need for indoor space, pots, or additional equipment.
- Liatris bulbs can be planted directly in prepared garden beds or containers outdoors, following the recommended planting depth and spacing.
- Ensures that the plants adapt to outdoor conditions right from the start, minimizing the risk of transplant shock.
- Requires protection from adverse weather conditions, such as frost or heavy rains, during the initial stages of growth.
- May experience slower growth compared to indoor planting due to cooler temperatures and less-controlled conditions.
Choosing whether to plant Liatris bulbs indoors or outdoors depends on your specific climate, growing preferences, and available resources. Both methods can be successful as long as you provide the bulbs with the appropriate care and conditions for their growth and development.
Step-by-Step Guide to Planting Liatris Bulbs
Planting Liatris bulbs is a straightforward process that can be done by following a few simple steps. Whether you’re planting them indoors or outdoors, here is a step-by-step guide to help you successfully plant Liatris bulbs:
- Choose the right time: Determine the appropriate planting time based on your climate. In general, Liatris bulbs can be planted in spring after the last frost date or in fall, allowing them time to establish before winter dormancy.
- Prepare the planting site: Select a sunny location with well-draining soil. Clear the area of weeds, grass, and debris. If needed, amend the soil with organic matter to improve drainage and fertility.
- Dig the holes: Dig holes for each Liatris bulb, spacing them according to the recommended distance for the specific variety. The holes should be approximately 2 to 3 times the diameter of the bulb and deep enough to accommodate the bulb with a few inches of soil above it.
- Plant the bulbs: Place each Liatris bulb in its respective hole, with the pointed end facing upwards. Gently backfill the hole with soil, ensuring that the bulb is covered with a few inches of soil. Press the soil lightly to secure the bulb in place.
- Water the bulbs: After planting, thoroughly water the area to settle the soil and provide moisture to the newly planted bulbs. Keep the soil consistently moist but not waterlogged throughout the growing season.
- Apply mulch: Mulch the planting area with a layer of organic mulch, such as wood chips or straw. This helps conserve soil moisture, regulate soil temperature, and suppress weed growth. Leave a small space around each bulb to allow for proper air circulation.
- Provide support (optional): Depending on the Liatris variety, some plants may require support to prevent wilting or bending. Consider installing stakes or other supports around the planting area to ensure the plants grow upright.
- Maintain care and monitoring: Water the Liatris plants regularly, ensuring the soil remains moist but not soggy. Monitor for signs of pests or diseases and take appropriate action if necessary. Remove any weeds or competing vegetation near the plants to prevent nutrient and water competition.
- Enjoy the blooms: With proper care and maintenance, your Liatris bulbs will grow and eventually bloom. Enjoy the beautiful spikes of vibrant flowers that will attract pollinators to your garden.
By following these step-by-step instructions, you can successfully plant Liatris bulbs and look forward to a stunning display of colorful blooms in your garden.
Watering and Fertilizing Tips for Liatris Bulbs
Proper watering and fertilization are crucial for the healthy growth and blooming of Liatris bulbs. These tips will help you ensure that your Liatris bulbs receive the right amount of water and nutrients for optimal growth:
- Watering: Liatris bulbs require regular watering, especially during their active growing period. Here are some watering tips to keep in mind:
- Water the bulbs deeply once a week, providing enough moisture to saturate the soil to the root depth.
- Monitor the soil moisture levels regularly, especially during hot and dry periods, and adjust the watering frequency accordingly.
- Avoid overwatering, as Liatris bulbs are susceptible to root rot. Ensure that the soil is well-draining and does not become waterlogged.
- If your area experiences heavy rainfall, provide additional drainage, such as raised beds or adding organic matter to the soil, to prevent waterlogging.
- Fertilizing: Liatris bulbs benefit from moderate fertilization to support their growth. Consider the following fertilizing tips:
- Before planting, incorporate organic matter, such as compost or well-rotted manure, into the soil to improve its fertility and provide a slow-release source of nutrients.
- Apply a balanced granular fertilizer with an NPK ratio of 10-10-10 or similar in early spring, once the bulbs have emerged from the ground.
- Follow the recommended dosage and application instructions on the fertilizer packaging, as excessive fertilization can lead to lush foliage but fewer blooms.
- Avoid applying fertilizer directly onto the bulbs, as it may cause burn or damage. Instead, spread the fertilizer evenly around the base of the plants, keeping it away from the stems.
- Water the area well after fertilization to dissolve the granules and help the plants absorb the nutrients.
- Reapply fertilizer every 4-6 weeks during the growing season, but discontinue fertilization as the plants approach their dormant period in late summer or fall.
- Additional Tips:
- Consider using natural or organic fertilizers to reduce the risk of chemical buildup in the soil over time.
- Regularly monitor the plants for signs of nutrient deficiencies, such as yellowing leaves or stunted growth. Adjust your fertilization program accordingly.
- Avoid excessive use of nitrogen-rich fertilizers, as they can promote excessive foliage growth at the expense of flower production.
- If your Liatris plants are growing and blooming well without the need for additional fertilization, you can rely on the nutrient content provided by organic matter incorporated into the soil before planting.
By following these watering and fertilizing tips, you will give your Liatris bulbs the best chance to grow vigorously, produce abundant blooms, and thrive in your garden.
Common Pests and Diseases That Affect Liatris Bulbs
Liatris bulbs are usually hardy and resistant to many pests and diseases. However, they can occasionally fall victim to certain insects and diseases. Being aware of these common pests and diseases will help you identify and address any issues promptly, ensuring the health and vigor of your Liatris plants. Here are some of the main pests and diseases that can affect Liatris bulbs:
- Aphids: Aphids are small, soft-bodied insects that feed on the sap of the Liatris plants, causing leaves to wilt and turn yellow. Regularly inspect the plants for clusters of these pests and spray them with a strong stream of water or use insecticidal soap to control the infestation.
- Caterpillars: Certain caterpillar species, such as the Liatris borer moth larvae, can feed on the foliage and stems of Liatris plants. Handpicking the caterpillars or using organic insecticides can help eradicate the pests and protect the plants.
- Spider Mites: Spider mites are tiny pests that can create fine webbing on the Liatris leaves and cause them to turn yellow or develop small holes. To control spider mites, regularly spray the plants with water to dislodge the pests, increase humidity, and use insecticidal soap if necessary.
- Fungal Diseases: Liatris bulbs are susceptible to various fungal diseases, including root rot, stem rot, and powdery mildew. To prevent these diseases, ensure proper soil drainage, avoid overwatering, and water at the base of the plant rather than overhead. If symptoms occur, remove affected plant parts and apply fungicide as recommended.
- Viruses: Liatris plants can also be affected by viral diseases, such as aster yellows. Infected plants may display yellowed or distorted growth. Unfortunately, there is no cure for viral infections, so it is best to remove and destroy affected plants to prevent the spread to healthy nearby plants.
- Deer and Rodents: Deer may browse on Liatris plants, especially in areas with high deer populations. To deter deer, consider using fencing or repellents around the plants. Additionally, rodents like voles and gophers can damage Liatris bulbs by feeding on them or tunneling near the roots. Use physical barriers or traps to protect your bulbs from these pests.
- Preventive Measures: To minimize the risk of pests and diseases, consider implementing the following preventive measures:
- Maintain good garden hygiene by removing debris, fallen leaves, and weeds, which can harbor pests and diseases.
- Avoid overcrowding Liatris plants, as proper air circulation can help deter fungal diseases.
- Monitor your Liatris plants regularly for any signs of pests or diseases, and take appropriate action if necessary.
- When purchasing new Liatris bulbs or plants, ensure they come from reputable sources to reduce the risk of introducing pests and diseases into your garden.
- Water the plants properly and avoid overwatering, as excessive moisture can contribute to the development of fungal diseases.
By being vigilant and taking proactive measures, you can minimize the impact of pests and diseases on your Liatris bulbs, ensuring healthy and vibrant plants in your garden.
When and How to Harvest Liatris Flowers
Harvesting Liatris flowers at the right time ensures the best quality and longevity of the blooms. These tall, vibrant flowers make excellent cut flowers and can also be dried for decorative purposes. Here are some guidelines on when and how to harvest Liatris flowers:
- Timing: The timing for harvesting Liatris flowers depends on the stage of bloom and personal preference. Typically, it is best to harvest the flowers when they are in the early to mid-bloom stage. At this stage, the flowers are fully open, showing their vibrant color, while the individual florets are still fresh and not fully faded.
- Inspecting the flowers: Before cutting the stems, inspect the flowers for any signs of damage or pest infestation. Select flowers that are healthy, free from blemishes, and have sturdy stems. Avoid harvesting flowers that are wilted, discolored, or show signs of disease or pest damage.
- Tools: Use sharp, clean garden scissors or pruners to harvest the Liatris flowers. Clean the blades with rubbing alcohol before and after use to prevent the spread of disease and ensure a clean cut for the stems.
- Harvesting technique: Cut the Liatris stems at an angle, about 12 to 18 inches (30 to 45 cm) long, just above a set of leaves or nodes. This will encourage new growth on the Liatris plant. Cut the stems in the morning or evening when the plants are well-hydrated and the temperatures are cooler.
- Water immediately: As soon as you have harvested the Liatris flowers, place the cut stems in a bucket of clean water. This helps to prevent wilting and allows the flowers to rehydrate. Leave the stems in the water for a few hours before arranging them or working with them further.
- Arranging and drying: After the flowers have rehydrated, you can arrange them in vases or use them in floral designs. Liatris flowers can also be dried for use in dried flower arrangements. To dry the flowers, hang them upside down in a dark, well-ventilated area. Allow the flowers to dry completely for a couple of weeks before using them in dried arrangements.
- Care and maintenance: Change the water in the vase every few days and trim the stems to maintain their freshness. Keep the vase in a cool location away from direct sunlight and drafts to prolong the vase life of the Liatris flowers.
- Storing dried flowers: If you have dried Liatris flowers, store them in a dry, cool place, such as a sealed container or airtight bag. Properly stored dried flowers can maintain their color and form for an extended period.
By following these guidelines for harvesting Liatris flowers, you can enjoy their beauty both fresh and dried, adding a touch of nature to floral arrangements and home decor.
Tips for Storing Liatris Bulbs Over Winter
Storing Liatris bulbs properly during the winter months ensures their survival and allows you to enjoy their blooms year after year. Although Liatris bulbs are relatively hardy, they can benefit from some extra care during the dormant period. Here are some tips to help you store Liatris bulbs over winter:
- Timing: Once the foliage of your Liatris plants has died back naturally in the fall, it’s time to dig up the bulbs for storage. This is typically after the first frost or when the leaves turn yellow and dry.
- Preparing the bulbs: Gently dig up the Liatris bulbs using a garden fork or spade, going wide and deep to avoid damaging the bulbs. Pop or shake off any excess soil from the bulbs, but avoid washing them, as dampness can promote rot. Leave the foliage attached to the bulbs as it helps with nourishment during storage.
- Drying: Allow the bulbs to dry in a warm and well-ventilated area for a few days. This drying period helps to harden the outer layer of the bulbs and reduces the risk of rot during storage.
- Removing foliage: Once the bulbs are dry, gently separate any remaining foliage from the bulbs. Trim the foliage down to about an inch above the bulb without cutting into the bulb itself.
- Inspecting for damage: Before storing, carefully examine each bulb for signs of disease, damage, or rot. Discard any bulbs that show signs of infection or are soft or mushy.
- Storage location: Choose a cool, dry, and dark location for storing your Liatris bulbs for the winter. Ideal storage temperatures range from 40°F to 50°F (4°C to 10°C), such as a basement, garage, or cellar. Ensure that the storage area is not prone to extreme temperature fluctuations.
- Storage containers: Place the bulbs in mesh bags, paper bags, or shallow containers filled with dry peat moss, vermiculite, or sawdust. These materials help maintain a consistent level of moisture around the bulbs and prevent them from drying out or becoming too moist.
- Avoiding moisture: It is crucial to keep the bulbs dry during storage. Check the bulbs regularly throughout the winter and remove any that show signs of rot or excess moisture. If necessary, adjust the storage medium to ensure the bulbs remain dry.
- Monitoring: Periodically inspect the stored bulbs for signs of sprouting, mold, or pests. If any issues are detected, take appropriate action, such as adjusting the storage medium, removing affected bulbs, or using organic pest control methods.
- Spring planting preparation: As spring approaches, begin preparing for the next planting season. About 4 to 6 weeks before the last frost, start acclimating the Liatris bulbs to room temperature to encourage sprouting. This can be done by gradually bringing them into a warmer location and providing adequate light.
By following these tips for storing Liatris bulbs over winter, you can ensure their health and vitality, ready to be planted again in the spring for another season of beautiful blooms.