
Choosing the Right Bulb
When it comes to planting bulbs, selecting the right type is crucial for a successful and vibrant garden. Here are some essential factors to consider when choosing bulbs:
- Climate: Different bulbs thrive in different climates. Before purchasing bulbs, research which varieties are suitable for your specific climate zone. If you live in an area with harsh winters, consider bulbs that are cold-hardy.
- Bloom Time: Bulbs come in various bloom times, ranging from early spring to late summer. Think about when you want your garden to be in full bloom and choose bulbs accordingly. This will help you create a well-planned and visually appealing garden throughout the year.
- Size: Consider the mature size of the bulb and how it will fit into your garden space. Some bulbs produce large, showy flowers, while others have smaller blooms. Plan accordingly to ensure that the bulbs you choose will complement the surrounding plants and contribute to the desired aesthetic.
- Color and Aesthetic: Bulbs come in a wide range of colors, allowing you to add variety and visual interest to your garden. Think about the color scheme you want to achieve and choose bulbs that will complement the existing plants and overall design of your garden.
- Soil and Sun Requirements: Some bulbs prefer well-drained soil, while others thrive in moist or sandy soil. Additionally, consider the amount of sunlight your garden receives. Some bulbs require full sun, while others can tolerate partial shade. Understanding the specific soil and sun requirements of the bulbs will help you create an optimal growing environment.
- Reputable Suppliers: Purchase bulbs from reputable suppliers to ensure quality and the best chance of success. Look for suppliers that guarantee healthy bulbs and offer planting instructions and care tips.
By considering these factors and doing a little research, you can choose the right bulbs that will thrive in your garden and provide stunning blooms year after year. Remember, each bulb variety has its own unique charm and requirements, so take the time to find the ones that best suit your garden’s needs.
Deciding on the Location
The location of your bulb planting is a crucial aspect that can greatly impact the success and overall aesthetics of your garden. Here are some important considerations when deciding on the location for your bulbs:
- Sunlight: Most flowering bulbs require ample sunlight to thrive and produce vibrant blooms. Choose a location in your garden that receives at least 6 hours of direct sunlight each day. If you have areas with shade, opt for shade-tolerant bulbs that can still add color to those spots.
- Soil Type: Before planting bulbs, assess the soil type in the chosen location. Bulbs generally prefer well-drained soil that is rich in organic matter. If your soil is heavy clay or tends to retain water, consider improving the drainage by adding compost or organic matter to the planting area. This will help create a favorable environment for the bulbs to establish and flourish.
- Visibility: Choose a location where you can easily view and appreciate the blooming bulbs. Consider areas near walkways, patios, or windows to enjoy the vibrant colors and fragrances up close. Planting bulbs in areas with high visibility will enhance the overall beauty and impact of your garden.
- Complementary Plants: Take into account the existing plants and landscaping in the surrounding area. Consider how the colors, heights, and textures of the bulbs will complement the neighboring plants. Create a cohesive and harmonious design by selecting bulbs that will enhance the overall aesthetic appeal of your garden.
- Size and Spacing: Consider the mature size of the bulbs and the spacing requirements. Plant taller bulbs towards the back of the garden bed or against walls or fences, while shorter varieties can be placed towards the front. Be mindful of the space between bulbs to allow for proper growth and airflow.
- Accessibility: Keep in mind that bulbs will need occasional maintenance, such as watering, fertilizing, and deadheading. Choose a location that is easily accessible to facilitate these tasks and ensure the long-term health and vitality of your plants.
By carefully considering these factors, you can select a suitable location for your bulbs that will provide the optimal growing conditions and enhance the overall beauty of your garden. Take your time to assess your garden’s unique characteristics and create a plan that will result in a stunning display of colors and blooms.
Preparing the Soil
Preparing the soil before planting bulbs is essential to ensure their successful growth and development. By taking the time to prepare the soil properly, you will provide a fertile and nutrient-rich environment for the bulbs to establish themselves. Follow these steps to prepare the soil:
- Clear the Area: Begin by clearing the planting area of any weeds, rocks, or debris. This will give the bulbs a clean and unobstructed space to grow.
- Loosen the Soil: Use a garden fork or a tiller to loosen the soil to a depth of about 8-10 inches. This will help improve the soil’s texture and allow the bulbs’ roots to penetrate easily.
- Remove Impurities: Remove any large clumps or stones from the soil as you work. These can hinder the bulb’s growth or cause deformities.
- Amend the Soil: If your soil is sandy or heavy clay, it can benefit from the addition of organic matter. Incorporate well-rotted compost, aged manure, or peat moss into the soil to improve its texture and fertility. This will help with water retention and nutrient availability for the bulbs.
- Test the pH Level: Bulbs generally prefer a slightly acidic to neutral soil pH. You can test the pH level using a soil testing kit available at garden centers. If necessary, adjust the pH by adding lime to raise it or sulfur to lower it.
- Apply Fertilizer: Depending on the quality of your soil, you may need to add a balanced bulb fertilizer. Look for a fertilizer specifically formulated for bulbs and follow the package instructions for application rates. This will provide the necessary nutrients for the bulbs’ growth and development.
- Mix the Amendments: Once you have amended the soil and applied fertilizer, thoroughly mix everything together to ensure a uniform distribution of nutrients throughout the planting area.
By following these steps and ensuring that the soil is well-prepared, you will create an ideal environment for your bulbs to thrive. Good soil preparation will promote healthy root development, vigorous growth, and abundant blooming, resulting in a stunning display of flowers in your garden.
Digging the Hole
Properly digging the hole for your bulb planting is crucial to provide the right conditions for the bulbs to establish and grow. By following the correct digging technique, you will ensure that the bulbs are placed at the correct depth and have enough space for root development. Here’s how to dig the hole for your bulbs:
- Measure the Depth: Each type of bulb has a specific recommended planting depth. Check the packaging or research the specific bulb variety to determine the appropriate depth. As a general rule, bulbs should be planted at a depth that is two to three times their diameter.
- Mark the Planting Site: Use a gardening marker or stake to mark the planting spots where the holes will be dug. This will help ensure accurate placement and proper spacing between the bulbs.
- Prepare the Garden Tools: Use a hand trowel, bulb planter, or gardening shovel to dig the holes. Ensure that the tools are clean and sharp for efficient digging.
- Start Digging: Dig individual holes for each bulb, making sure to follow the marked spots. The holes should be deep enough to accommodate the bulb at the recommended planting depth.
- Remove Excess Soil: As you dig the holes, place the excess soil in a wheelbarrow or on a tarp to keep the planting area clean and organized. Removing excess soil will help avoid overcompacting the soil around the bulbs.
- Space the Holes: Ensure that the holes are spaced at the appropriate distance to allow for proper growth and airflow between the bulbs. Refer to the packaging or research the specific bulb variety for recommended spacing guidelines.
- Refine the Hole: Before placing the bulb, use your hands or the edge of the garden tool to loosen and refine the soil at the bottom of the hole. This will create a loose and friable bed for the bulb.
- Plant the Bulb: Place the bulb into the hole with the pointed side facing upward. Gently press the bulb into the soil, ensuring that it is positioned at the appropriate depth as recommended.
- Backfill the Hole: Carefully fill the hole with the reserved soil. Avoid compacting the soil too firmly, as this can restrict root growth.
- Water the Planting Area: After planting the bulbs, give the planting area a thorough watering. This will help settle the soil around the bulbs and provide much-needed moisture for their initial growth.
By following these steps and taking care to dig the holes properly, you will provide the bulbs with an optimal environment to establish and grow. Remember to handle the bulbs gently and avoid damaging their delicate roots during the planting process.
Planting the Bulb
Planting the bulb correctly is crucial for ensuring its successful growth and development. By following the proper planting technique, you will provide the bulb with the ideal conditions to establish roots and produce beautiful blooms. Here are the steps to plant your bulbs:
- Choose the Right Time: Plant bulbs at the appropriate time, considering their specific flowering season. Most bulbs are planted in the fall before the ground freezes, while some can be planted in the spring. Refer to the packaging or research the specific bulb variety for the recommended planting time.
- Prepare the Soil: Ensure that the soil has been prepared as mentioned earlier (refer to the “Preparing the Soil” section). This will provide a fertile and well-drained environment for the bulb to thrive.
- Locate the Planting Spot: Locate the marked planting spots where you dug the holes. This will help ensure accurate bulb placement and proper spacing.
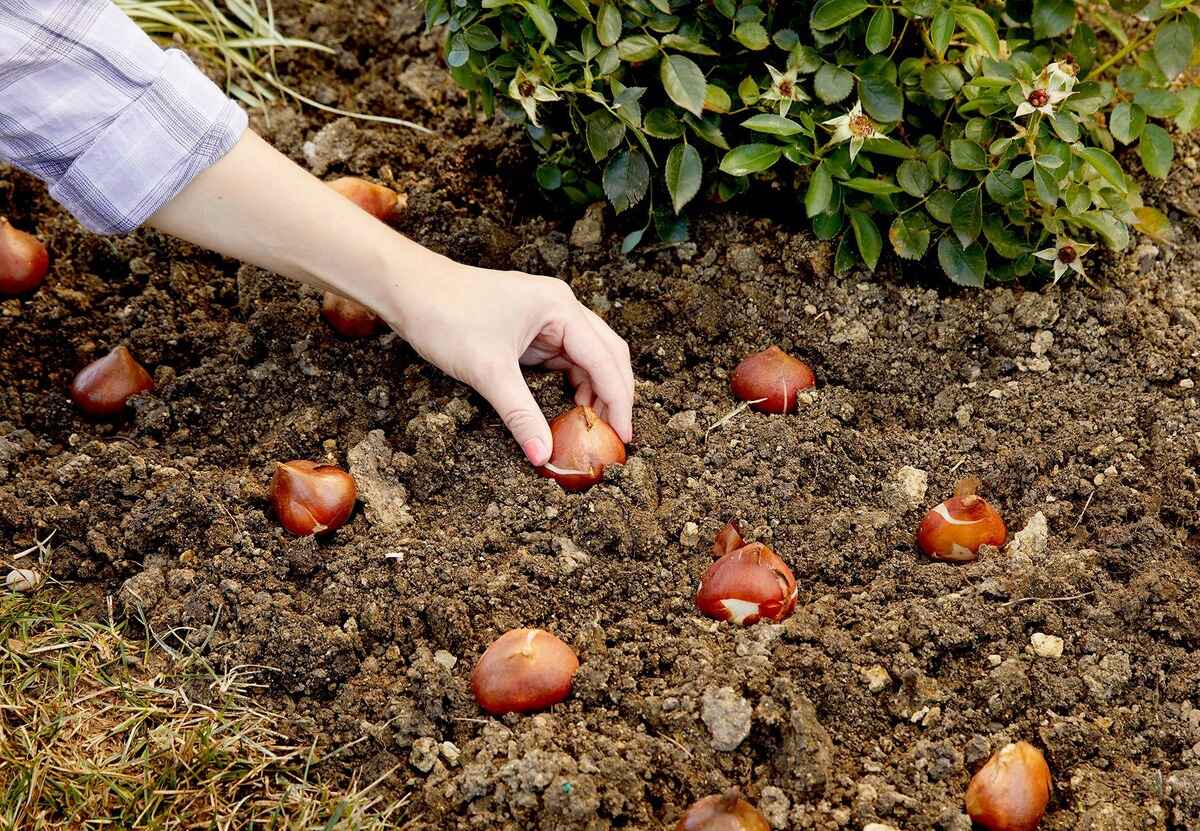
- Place the Bulb: Gently place the bulb into the hole with the pointed end facing upward. The pointed end is where the new shoot will emerge. If the bulb is round and doesn’t have a clear point, plant it with the flat side facing down.
- Positioning and Spacing: Position the bulb at the appropriate depth, ensuring that it is planted according to the recommended planting instructions for that specific bulb variety. Refer to the packaging or research the specific bulb for the correct depth. Space the bulbs according to the recommended distance to allow for proper growth and airflow.
- Backfill and Firm the Soil: Use the reserved soil to carefully backfill the hole, ensuring that the bulb is covered with soil. Gently firm the soil around the bulb to eliminate any air pockets, but be careful not to compact it too tightly.
- Water the Planting Area: Give the planting area a thorough watering to settle the soil and provide necessary moisture for the bulb. This will help initiate the growth process and encourage root development.
- Label and Mulch (Optional): Consider labeling the planted area to keep track of the bulb types and their locations. You may also choose to apply a layer of organic mulch around the bulbs to help retain moisture, suppress weeds, and regulate soil temperature.
- Monitor and Maintain: Keep an eye on the newly planted bulbs and monitor their growth. Ensure they receive adequate water, especially during dry periods. Follow the specific care guidelines for the bulb variety, including fertilizing and deadheading when necessary.
By following these steps and ensuring that the bulb is planted correctly, you provide it with the best chance of establishing and thriving in your garden. Pay attention to the specific requirements of the bulb variety and continue proper care to enjoy beautiful blooms in the future.
Watering and Mulching
Proper watering and mulching are essential for maintaining the health and vitality of your bulbs. These practices help to retain moisture, regulate soil temperature, suppress weeds, and promote healthy root development. Here’s what you need to know about watering and mulching your bulbs:
Watering:
Adequate moisture is crucial for the success of your bulbs, especially during their active growth and blooming periods. Here are some tips for watering your bulbs effectively:
- Consistency: Water bulbs consistently and evenly throughout their growing season. Aim to provide about 1 inch of water per week, either through rainfall or supplemental watering.
- Timing: Water early in the morning or late in the evening to minimize evaporation and allow foliage to dry out before nighttime, which reduces the risk of fungal diseases.
- Deep Watering: Water deeply rather than shallowly. This encourages the roots to grow deeper into the soil and helps the bulbs withstand periods of drought.
- Avoid Overwatering: Be cautious not to overwater your bulbs, as excessive moisture can lead to rot or fungal diseases. Ensure proper drainage in the planting area.
- Monitor the Soil: Regularly check the soil moisture level by inserting your finger into the soil. If it feels dry at a depth of 2-3 inches, it’s time to water. Adjust watering frequency based on weather conditions and the needs of the specific bulb variety.
Mulching:
Mulching provides numerous benefits for your bulbs and the overall garden. Here’s how to effectively apply mulch around your bulbs:
- Select the Right Mulch: Choose an organic mulch, such as shredded bark, straw, or compost, that will provide insulation, retain moisture, and slowly decompose to improve the soil fertility over time.
- Apply the Mulch: After planting your bulbs and the soil has settled, apply a layer of mulch around them. The layer should be about 2-3 inches thick, taking care not to pile it directly against the stems or crowns of the bulbs.
- Avoid Overmulching: Do not apply excessive mulch, as it can restrict air circulation, promote rot, or attract pests. Maintain a proper balance to allow for adequate airflow and water penetration.
- Mulch Maintenance: Regularly check the mulch layer and replenish it as needed. Over time, organic mulch will break down and need to be refreshed. Remove any weeds that may emerge through the mulch to prevent competition with the bulbs.
By following these guidelines for watering and mulching, you will provide your bulbs with the necessary moisture and insulation, promoting healthy growth and vibrant blooms. Remember to adjust your watering and mulching practices based on the specific needs of your bulb variety and the prevailing weather conditions.
Caring for the Plant
Proper care is vital for the continued health and well-being of your bulbs as they grow and develop. By providing the right maintenance and attention, you will ensure that your plants thrive and reward you with beautiful blooms year after year. Here are some important care tips for your bulb plants:
- Regular Watering: Continue to water your bulbs consistently, especially during dry periods. Check the soil moisture regularly and adjust watering as needed, ensuring that the soil remains moist but not waterlogged.
- Fertilizing: Feed your bulb plants with a balanced fertilizer specifically formulated for bulbs. Apply the fertilizer according to the package instructions, usually in the spring when new growth appears and again after flowering. This will provide the necessary nutrients for healthy growth and blooming.
- Deadheading: Remove faded flowers by snipping or pinching off the spent blooms. Deadheading promotes the plant’s energy towards foliage and bulb development, rather than seed production. It also helps to maintain the aesthetic appeal of your garden.
- Supporting: Some tall or top-heavy bulb plants may require staking or support to prevent them from bending or breaking under their own weight. Use plant stakes or cages to provide support and maintain an upright appearance.
- Dividing Bulbs: Over time, some bulb plants may become crowded and produce fewer blooms. Dividing the bulbs every few years can rejuvenate the plants and promote healthier growth. Dig up the bulbs after the foliage has died back, separate them, and replant them in different locations or share them with fellow gardeners.
- Protecting from Frost: If your bulbs are susceptible to frost, provide protection during cold weather. Cover the plants with a layer of mulch, straw, or a frost blanket to insulate them and prevent damage from freezing temperatures.
- Pruning: For bulb plants that have foliage that becomes unsightly or brown after flowering, wait until the foliage has completely withered and yellowed before pruning it back to ground level. This allows the plant to absorb nutrients and store energy in the bulb for future growth.
- Observing for Pests and Diseases: Monitor your bulb plants regularly for signs of pests or diseases, such as aphids, slugs, or fungal infections. Take prompt action, such as using natural pest control methods or applying appropriate treatments, to prevent further damage and maintain the health of your plants.
By providing proper care to your bulb plants, you will ensure their longevity and ongoing beauty in your garden. With regular attention, your plants will thrive, multiply, and provide you with stunning displays of vibrant blooms for years to come.
Dealing with Pests and Diseases
Pests and diseases can pose a threat to the health and vitality of your bulb plants. By promptly addressing and effectively managing these issues, you can protect your plants and maintain their optimal growth and blooming. Here are some common pests and diseases that affect bulb plants and how to deal with them:
- Aphids: These small, soft-bodied insects feed on the sap of plants and can cause distorted growth and yellowing leaves. Use a strong stream of water or insecticidal soap to wash them off the plants, or introduce natural predators like ladybugs or lacewings to control their population.
- Slugs and Snails: These pests feed on the foliage, leaving behind ragged holes. Encourage natural predators like frogs or birds, and set up beer traps or copper barriers around the plants to deter them. You can also handpick slugs and snails and dispose of them.
- Botrytis (Gray Mold): This fungal disease causes brown spots or gray fuzz on leaves, stems, and flowers. Improve air circulation around the plants by proper spacing, pruning, and avoiding overhead watering. Remove and dispose of infected plant parts, and apply fungicides if necessary.
- Root Rot: Overwatering or poorly drained soil can lead to root rot, causing the roots to become mushy and discolored. Ensure proper soil drainage and avoid overwatering. If root rot occurs, dig up affected bulbs, remove the decayed portions, and replant them in fresh, well-drained soil.
- Tulip Fire: This fungal disease affects tulips, causing distorted or discolored flowers, brown blotches on leaves, and eventually, plant decline. Remove and destroy infected plants immediately. Avoid overcrowding and provide proper air circulation. Apply fungicides as a preventive measure.
- Bulb Mites: These microscopic pests attack bulbs, causing stunted growth and rot. Inspect bulbs before planting and discard any that show signs of infestation. If detected, treat bulbs with appropriate insecticides or hot water treatment before planting.
- Viruses: Viral infections can cause stunted growth, mottled leaves, and distorted flowers. There is no cure for viral infections, so prevention is key. Plant disease-free bulbs from reputable sources, practice good sanitation, and remove and destroy infected plants to prevent the spread of viruses.
It’s important to monitor your bulb plants regularly and take immediate action at the first sign of pest infestation or disease. Prevention is often the most effective approach, so maintain good plant care practices, provide proper growing conditions, and avoid stress factors that can weaken the plants’ defenses. By staying vigilant and implementing appropriate pest and disease control measures, you can help ensure the health and longevity of your bulb plants.