
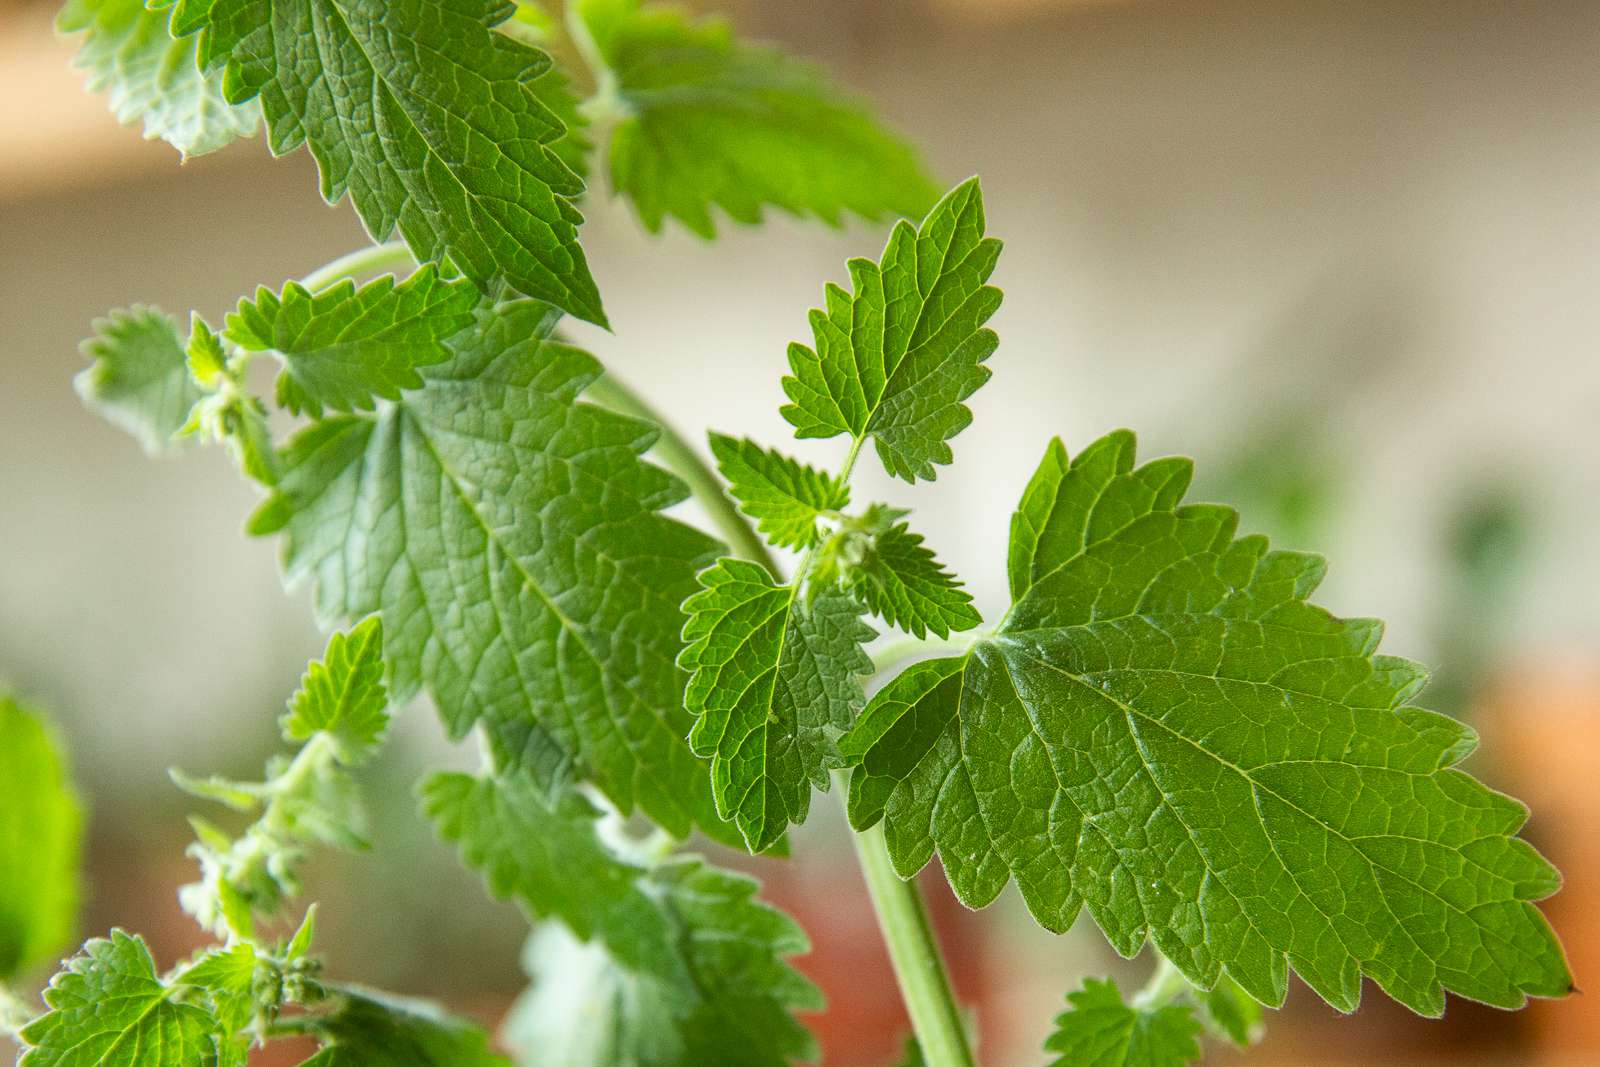
Benefits of Catnip
Catnip, also known as Nepeta cataria, is not only a favorite among our feline friends, but it also offers a range of benefits for humans and the environment. Here are some of the key benefits of catnip:
- Natural Insect Repellent: Catnip contains a compound called nepetalactone, which is known for its ability to repel insects such as mosquitoes, flies, and cockroaches. By planting catnip in your garden, you can naturally deter these pests without the need for harmful chemicals.
- Medicinal Properties: Catnip has long been used in traditional medicine for its therapeutic properties. It is known for its calming effect, making it effective in treating anxiety, insomnia, and even digestive issues. Catnip tea is often consumed to promote relaxation and relieve stress.
- Attracts Beneficial Pollinators: The fragrant flowers of catnip are highly attractive to bees, butterflies, and other beneficial pollinators. By planting catnip in your garden, you can help support the local ecosystem by providing a food source and habitat for these important creatures.
- A Natural Cat Stimulant: Catnip is well-known for its effect on cats. When ingested or smelled, catnip can trigger a euphoric response in cats, providing them with mental and physical stimulation. This can be a great way to entertain and enrich the lives of our beloved pets.
- Culinary Uses: Catnip leaves can also be used in culinary applications. They can be infused into oils, added to teas, or used as a flavorful addition to salads or sauces. Catnip has a mild minty flavor that adds a unique twist to various dishes.
With its versatile benefits, catnip is undoubtedly a plant worth considering for your garden. Whether you want to create a peaceful and insect-free outdoor space or provide some feline entertainment, catnip can fulfill various roles while adding a touch of natural beauty to your surroundings.
Understanding Catnip Requirements
To successfully grow catnip, it’s essential to understand its requirements and provide the ideal conditions for its growth. Here are a few key factors to consider:
- Climate and Temperature: Catnip is a hardy perennial that thrives in temperate climates. It prefers full sun exposure but can tolerate partial shade. While catnip can endure a range of temperatures, it grows best in regions with moderate summers and cool winters.
- Choosing the Right Location: Select a location in your garden that receives at least six hours of sunlight daily. Ensure the area has well-draining soil to prevent waterlogging, as catnip does not thrive in overly moist conditions.
- Soil Preparation: Catnip prefers well-draining, loamy soil with a pH range between 6.1 and 7.8. Before planting, amend the soil with organic matter, such as compost or aged manure, to improve soil fertility and drainage.
- Methods of Propagation: Catnip can be propagated through direct seeding, transplanting seedlings, cuttings, or division. Each method has its advantages, so choose the one that best suits your preferences and resources.
- Watering: Catnip has moderate water requirements. Water the plants regularly, keeping the soil evenly moist but not overly saturated. Avoid overwatering, as this can lead to root rot.
- Fertilizing: Catnip is a relatively low-maintenance plant and does not require heavy fertilization. However, you can give it a light dose of organic fertilizer in early spring to encourage healthy growth. Avoid excessive nutrient-rich fertilizers, as this can lead to excessive foliage growth at the expense of essential oils in the plant.
- Pruning and Harvesting: Regularly prune catnip plants to promote bushier and healthier growth. Harvest the leaves just before the plants start to flower, as this is when the essential oils are at their peak concentration.
By understanding and meeting these requirements, you can ensure that your catnip plants thrive and provide you with an abundant harvest of aromatic leaves. Whether you’re growing catnip for its benefits to wildlife, medicinal properties, or recreational purposes for your feline friends, providing the ideal conditions will set you on the path to success.
Climate and Temperature Considerations
When it comes to growing catnip, understanding the climate and temperature requirements is crucial for the plant’s success. Here are some important considerations:
1. Temperature Range: Catnip thrives in temperate climates with moderate summers and cool winters. It can tolerate a wide range of temperatures, from as low as 20°F (-7°C) in winter to as high as 90°F (32°C) in summer. However, extreme heat or prolonged exposure to freezing temperatures can stress the plant.
2. Frost Tolerance: Catnip is a hardy perennial that can withstand mild frosts and freezing temperatures. Established plants can generally survive temperatures as low as 20°F (-7°C) without significant damage. However, it’s advisable to protect young and tender plants from harsh frosts by covering them with a frost cloth or bringing them indoors.
3. Sunlight Requirements: Catnip thrives in full sun but can tolerate partial shade, especially in regions with hot summers. It is important to provide your catnip plants with at least six hours of direct sunlight a day to ensure optimal growth.
4. Microclimates: Consider the microclimates in your garden when choosing a location for catnip. Different areas within your garden may have varying temperatures, exposure to wind, or sun/shade patterns due to nearby structures or vegetation. Select a spot that provides the best balance of sunlight, protection from harsh winds, and suitable temperatures for your catnip plants.
5. Regional Considerations: Catnip can thrive in various regions, but it’s always beneficial to know the recommendations for your specific area. Consult local gardening resources, extension offices, or experienced gardeners in your region to gain insights into the ideal planting times and specific considerations for growing catnip in your climate.
By understanding the climate and temperature requirements of catnip, you can provide the optimal conditions for its growth and ensure a bountiful harvest. Whether you live in a region with mild temperatures year-round or experience more extreme weather fluctuations, with proper care and attention, you can successfully cultivate catnip and enjoy its many benefits.
Choosing the Right Location
When it comes to growing catnip, selecting the right location is key to ensuring the plant’s health and productivity. Here are some important factors to consider when choosing the ideal spot for your catnip:
1. Sunlight Exposure: Catnip thrives in full sun but can tolerate partial shade, especially in regions with hot summers. Look for a location that receives at least six hours of direct sunlight each day. South-facing areas are often ideal for maximizing sunlight exposure.
2. Soil Drainage: Catnip requires well-draining soil to prevent root rot. Therefore, avoid areas with heavy clay soil or those prone to waterlogging. If you have heavy soil, you can improve drainage by amending it with organic matter, such as compost or aged manure.
3. Protection from Wind: While catnip can tolerate some wind, excessive exposure to strong winds can lead to physical damage and stress the plant. If your location is prone to strong gusts, consider planting catnip near windbreaks, such as fences, taller plants, or buildings, to provide some protection.
4. Away from Competing Plants: Catnip can be quite aggressive in spreading and has the potential to crowd out other nearby plants. To prevent it from becoming invasive, give your catnip plants enough space away from other plants, allowing them to have room for healthy growth without overpowering their neighbors.
5. Accessibility: Choose a location that is easily accessible for routine care, such as watering, pruning, and harvesting. Having your catnip plants in a convenient location will make it easier for you to enjoy the benefits of the plant and keep a close eye on their growth and health.
6. Consider Container Planting: If you have limited space or challenging soil conditions, consider growing catnip in containers. This will allow you to control the soil quality, easily move the plants to sunny spots, and prevent them from spreading uncontrollably.
By considering these factors and selecting the right location for your catnip, you can create an optimal growing environment. This will ensure that your catnip plants thrive, providing you with aromatic leaves and attracting beneficial insects to your garden.
Soil Preparation for Catnip
Proper soil preparation is essential for the successful growth of catnip plants. Catnip prefers well-draining soil with adequate fertility to support healthy growth and abundant foliage. Here are the necessary steps for preparing the soil for catnip:
1. Soil Testing: Before planting catnip, it’s beneficial to conduct a soil test to determine its nutrient levels and pH. Catnip thrives in slightly alkaline to neutral soil with a pH range between 6.1 and 7.8. The soil test results will guide you in amending the soil accordingly.
2. Clear the Area: Start by clearing the area of any weeds or vegetation. Remove existing grass, weeds, and debris to create a clean and weed-free planting bed for your catnip plants.
3. Loosen the Soil: Use a garden fork or tiller to loosen the soil to a depth of about 8-10 inches (20-25 cm). This helps improve soil aeration, drainage, and root penetration. Break up any compacted soil to create a loose and friable texture.
4. Organic Matter: Incorporate organic matter into the soil to improve fertility and drainage. Add well-rotted compost, aged manure, or other organic amendments to enrich the soil. Organic matter helps retain moisture, provides essential nutrients, and enhances microbial activity in the soil.
5. Soil Amendments: Based on the results of your soil test, add specific amendments to adjust the pH and nutrient levels if necessary. For instance, if the soil is too acidic, you can add lime to raise the pH. Conversely, if the soil is too alkaline, sulfur can be added to lower the pH. Follow the recommended rates and guidelines for the specific amendments used.
6. Rake and Level: After incorporating organic matter and amendments, use a rake to level the soil surface and remove any large clumps or stones. Smooth the surface to provide an even and gentle planting bed for your catnip seedlings or seeds.
By following these soil preparation steps, you create an optimal growing environment for your catnip plants. The improved soil fertility, drainage, and pH will promote healthy root development, vigorous growth, and maximize essential oil production in the plants. This sets the stage for successful catnip cultivation and ensures a bountiful harvest of aromatic leaves for your enjoyment.
Methods of Propagation
There are several methods of propagating catnip, allowing you to expand your catnip garden and ensure a continuous supply of this delightful herb. Here are the most common methods of catnip propagation:
1. Direct Seeding Catnip: Direct seeding is a simple and cost-effective method of growing catnip. Start by preparing the soil by removing weeds and loosening it with a rake or garden fork. Sow the catnip seeds about ¼ inch (6 mm) deep and lightly cover them with soil. Water gently to keep the soil moist until the seeds germinate. Direct seeding is best done in early spring or fall when the soil temperature reaches around 70°F (21°C).
2. Transplanting Catnip Seedlings: Growing catnip from seedlings can provide faster and more reliable results, especially if you live in a region with a short growing season. Start catnip seeds indoors around 6-8 weeks before the last frost date in your area. Once the seedlings have grown to a height of 3-4 inches (7-10 cm) and the threat of frost has passed, transplant them into the garden. Choose a location with full sun and well-draining soil, and space the seedlings 12-18 inches (30-45 cm) apart to allow for their mature size and spread.
3. Propagating Catnip from Cuttings: Another method to propagate catnip is through stem cuttings. Take 3-4 inch (7-10 cm) stem cuttings from a healthy catnip plant, ensuring there are at least two sets of leaves on each cutting. Remove the lower leaves and dip the cut end into rooting hormone powder. Plant the cuttings in a well-draining potting mix or soil, and keep them in a warm and humid environment. Mist the cuttings regularly and keep the soil consistently moist. The cuttings should root within a few weeks, and once rooted, they can be transplanted into the garden.
4. Dividing Catnip Plants: Catnip plants can be divided every few years to maintain their vigor and promote healthy growth. Dig up an established catnip plant and carefully divide it into sections, ensuring each division has a portion of the root system attached. Replant the divisions in well-prepared soil, spacing them at least 18-24 inches (45-60 cm) apart. Dividing catnip plants not only allows you to expand your catnip garden but also helps rejuvenate older plants and promote better flower and foliage production.
5. Harvesting Catnip Seeds: Catnip plants produce small, brown seeds that can be harvested for future propagation. Allow the catnip flowers to dry on the plant until they turn brown and start to wither. Cut the flowering stems and place them in a paper bag or container. Rub the flowers gently to release the seeds from the dried flowers. Store the seeds in a cool and dry place until you’re ready to plant them.
By utilizing these different propagation methods, you can easily expand your catnip garden and enjoy the benefits of this versatile herb. Whether you prefer starting from seeds, cuttings, or divisions, each method has its advantages and allows you to propagate catnip in a way that suits your gardening preferences and resources.
Direct Seeding Catnip
Direct seeding is a simple and effective method for growing catnip. By directly sowing catnip seeds in the garden, you can save time and ensure that the plants establish themselves right where you want them. Here’s how to go about direct seeding catnip:
1. Soil Preparation: Prepare the soil by removing any weeds or debris and loosening it with a garden fork or rake. Catnip prefers well-draining soil, so make sure the soil is loose and crumbly.
2. Seed Selection: Choose high-quality catnip seeds from a reputable source. Fresh seeds with a high germination rate will give you the best chance of successful growth.
3. Planting Time: It’s best to sow catnip seeds in early spring or fall when the soil temperature is around 70°F (21°C). The cooler temperatures during these seasons promote successful germination and establishment of the plants.
4. Sowing the Seeds: Create shallow furrows in the soil, about ¼ inch (6 mm) deep. Space the furrows 12-18 inches (30-45 cm) apart to allow for the mature size and spread of the catnip plants. Drop the catnip seeds into the furrows, spacing them evenly. It’s recommended to sow a few extra seeds to account for any potential loss or low germination rates.
5. Covering and Watering: Gently cover the seeds with soil and lightly tamp it down to ensure good seed-to-soil contact. Water the area thoroughly, keeping the soil consistently moist but not waterlogged. Be careful not to wash away the seeds with heavy watering.
6. Germination and Growth: Catnip seeds usually germinate within 7-14 days, depending on the temperature and growing conditions. Once the seedlings emerge, thin them out by removing the weaker ones, leaving the strongest plants spaced properly according to their mature size.
7. Care and Maintenance: Keep an eye on the catnip seedlings and ensure they receive adequate water to establish their root systems. Mulching around the plants can help retain moisture and suppress weed growth. As the catnip grows, it’s important to provide proper spacing, good air circulation, and regular weeding to keep the plants healthy and thriving.
Direct seeding catnip allows you to establish the plants in their permanent location from the beginning. It may require some patience and care as the seedlings emerge and establish themselves, but with the right conditions and maintenance, you will soon have a beautiful and aromatic catnip garden to enjoy.
Transplanting Catnip Seedlings
Transplanting catnip seedlings is a reliable method to establish healthy plants quickly and ensure a successful catnip garden. By starting catnip seeds indoors and later transplanting the seedlings outdoors, you can extend the growing season and have more control over the plants’ development. Here’s a step-by-step guide on transplanting catnip seedlings:
1. Indoor Seed Starting: Start catnip seeds indoors about 6-8 weeks before the last frost date in your area. Sow the seeds in small containers with well-draining soil mix, covering them with a light layer of soil. Place the containers in a warm location with ample sunlight or under grow lights.
2. Providing Optimal Conditions: Maintain a temperature of around 70°F (21°C) and provide consistent moisture for the soil. Ensure good airflow and provide supplemental light if needed to prevent leggy growth.
3. Hardening Off: About one to two weeks before the last frost date, gradually expose the catnip seedlings to the outdoor conditions. Begin by placing them outside in a shaded area for a few hours each day, gradually increasing the exposure to sunlight and wind. This helps the seedlings acclimate to the outdoor environment.
4. Selecting the Planting Area: Choose a sunny location with well-draining soil for transplanting the catnip seedlings. Prepare the soil by removing weeds, loosening it with a garden fork, and working in compost or organic matter for added fertility.
5. Digging the Planting Holes: Dig holes in the prepared soil that are slightly larger than the root system of the seedlings. Space the holes 12-18 inches (30-45 cm) apart to allow for the mature size of the catnip plants.
6. Transplanting: Carefully remove the catnip seedlings from their containers, being cautious not to damage the roots. Place each seedling in a planting hole and gently backfill with soil, firming it around the roots. Ensure that the seedlings are at the same depth as they were in their containers.
7. Watering and Mulching: After transplanting, give the seedlings a thorough watering to settle the soil around the roots. Maintain consistent moisture in the soil by watering as needed. Mulching around the plants with organic matter can help retain moisture, suppress weed growth, and moderate soil temperature.
8. Caring for Transplanted Seedlings: Keep an eye on the transplanted catnip seedlings and provide regular care. Water them deeply when the top inch of soil is dry, but avoid overwatering. Maintain good air circulation by spacing the seedlings properly and removing any competing weeds. Apply a balanced, organic fertilizer according to the manufacturer’s instructions to promote healthy growth.
By following these steps, you can successfully transplant catnip seedlings and establish robust plants that will thrive in your garden. With proper care and maintenance, you’ll soon be able to enjoy the aromatic leaves and attractive blooms of your catnip plants.
Caring for Catnip Plants
To ensure healthy growth and maximize the benefits of your catnip plants, it’s important to provide them with proper care and maintenance. Here are some essential steps for caring for catnip plants:
Watering Catnip: Catnip plants require regular watering to maintain proper moisture levels in the soil. Water deeply, allowing the soil to dry slightly between waterings. Avoid overwatering, as catnip plants can be sensitive to waterlogged conditions, which can lead to root rot. Providing approximately 1 inch (2.5 cm) of water each week, either from rainfall or manual watering, is typically sufficient.
Fertilizing Catnip: Catnip is a relatively low-maintenance plant and doesn’t require heavy fertilization. However, you can give the plants a light application of balanced organic fertilizer in early spring to provide essential nutrients. Avoid excessive use of nitrogen-rich fertilizers, as this can lead to excessive foliage growth at the expense of the aromatic oils in the plant.
Pruning and Harvesting: Regularly pruning catnip plants helps promote bushier growth and prevents legginess. Pinch or trim back the stems regularly to encourage branching and improve overall plant shape. Additionally, harvest the leaves just before the plants begin to flower to enjoy the highest concentration of essential oils. Cut the stems above a set of healthy leaves to encourage new growth.
Controlling Weeds: Keep the area around your catnip plants free from weeds. Weeds can compete for nutrients, water, and sunlight, negatively impacting the growth and health of catnip. Regularly remove any weeds by hand or with appropriate tools to prevent them from overtaking your catnip plants.
Dealing with Pests: Catnip is generally resistant to pest issues, but it can attract some insects, such as aphids or spider mites. Monitor your plants regularly and take action at the first sign of pest infestation. Use organic pest control methods, like spraying the affected plants with a mixture of water and mild soap, or introduce beneficial insects, such as ladybugs, to naturally control the pest population.
Supporting Catnip: As catnip plants grow, they may become top-heavy and benefit from support. Install stakes or small trellises near the plants to help keep them upright and prevent them from sprawling. Secure the stems to the supports using soft garden twine or plant ties, being careful not to damage the stems.
Caring for catnip plants doesn’t require complicated or time-consuming techniques. By providing the right amount of water, occasional organic fertilization, regular pruning, weed control, pest management, and support as needed, you’ll ensure that your catnip plants thrive and provide you with a bountiful harvest of aromatic leaves.
Watering Catnip
Proper watering is crucial for the health and vitality of catnip plants. While catnip is relatively drought-tolerant, consistent and appropriate watering ensures optimal growth and essential oil production. Here are some guidelines for watering catnip:
1. Monitor Soil Moisture: Catnip plants prefer well-draining soil that retains moisture without becoming waterlogged. Check the moisture level of the soil by inserting your finger about 1-2 inches (2.5-5 cm) deep. Water the plants when the top inch (2.5 cm) of soil feels dry to the touch.
2. Deep Watering: When watering catnip, aim for deep and thorough watering rather than frequent shallow watering. This encourages the roots to grow deeper into the soil, promoting a stronger and more resilient plant. Apply water at the base of the plant, allowing it to soak into the root zone.
3. Timing of Watering: Water catnip plants in the early morning or late evening to minimize water loss through evaporation during hot daytime temperatures. Avoid watering during the hottest part of the day, as the water may evaporate before reaching the roots.
4. Avoid Overwatering: While catnip requires consistent moisture, it is important to avoid overwatering, as excessive soil moisture can lead to root rot and other fungal diseases. Allow the soil to dry out slightly between waterings to prevent waterlogged conditions.
5. Adjust based on Weather: Take into account the weather conditions and adjust the watering accordingly. During periods of hot weather or prolonged dry spells, catnip may require more frequent watering to prevent dehydration. On the other hand, during cooler and rainy periods, reduce the frequency of watering to prevent the soil from becoming overly saturated.
6. Mulching: Apply a layer of organic mulch, such as straw or wood chips, around the base of the catnip plants. This helps conserve moisture by preventing evaporation and reducing weed competition. Mulching also helps to maintain a more consistent soil temperature, especially in hotter climates.
7. Observe the Plants: Pay attention to the appearance of your catnip plants as an indicator of their watering needs. If the leaves start to wilt or droop, it may be a sign of insufficient moisture. Adjust the watering regimen accordingly to prevent stress and promote healthy plant growth.
Proper watering is essential for the overall health and productivity of catnip plants. By monitoring soil moisture, providing deep and consistent watering, and adjusting based on weather conditions, you’ll help your catnip plants thrive and provide you with aromatic leaves for various purposes, whether it’s for your feline friends or for culinary or medicinal uses.
Fertilizing Catnip
Fertilizing catnip plants can help support their growth and enhance their overall health and vitality. While catnip is generally a low-maintenance herb, providing appropriate nutrients can promote prolific foliage growth, robust essential oil production, and ultimately, a flourishing catnip garden. Here are some key considerations for fertilizing catnip:
1. Organic Fertilizers: Opt for organic fertilizers, such as compost, well-rotted manure, or organic granular fertilizers specifically formulated for herbs. Organic fertilizers gradually release nutrients into the soil, promoting long-term soil health without the risk of chemical buildup or harm to the environment.
2. Timing: Fertilize catnip plants in early spring, just as new growth begins. This provides a nutrient boost for the plant’s initial development and helps support its growth throughout the growing season. Avoid fertilizing late in the season, as it may stimulate excessive foliage growth at the expense of essential oil concentration.
3. Balanced NPK Ratio: Look for a balanced fertilizer with an equal or near-equal ratio of nitrogen (N), phosphorus (P), and potassium (K), represented as NPK on fertilizer labels. A balanced NPK ratio, such as 10-10-10 or 12-12-12, provides a well-rounded nutrient profile that catnip plants require for healthy growth.
4. Dilution Rates: Follow the manufacturer’s instructions for dilution rates to avoid over-fertilizing the plants. Applying too much fertilizer can lead to nitrogen burn or excessive foliage growth, which can reduce the concentration of aromatic oils in the leaves.
5. Application Method: Apply the fertilizer according to the package instructions, usually by lightly scattering it around the base of the catnip plants. Avoid direct contact with the leaves, as this may cause fertilization burn. Alternatively, you can incorporate granular fertilizer into the soil during the planting stage or use liquid fertilizers by diluting them in water and applying them to the soil around the plants.
6. Supplemental Organic Matter: In addition to using granular or liquid fertilizers, enriching the soil with organic matter can provide a natural source of nutrients. Add compost or well-rotted manure to the planting area or use them as a topdressing around the base of the catnip plants. Organic matter improves soil structure, enhances moisture retention, and provides slow-release nutrients as it breaks down over time.
7. Observation and Adjustment: Keep an eye on your catnip plants’ growth and appearance. If they exhibit signs of nutrient deficiency, such as pale leaves or stunted growth, consider adjusting the fertilization regimen. Monitor your soil nutrient levels with periodic soil testing to ensure that the nutrient needs of the catnip plants are adequately met.
Remember, while catnip benefits from proper fertilization, excessive use of fertilizers can lead to nutrient runoff and environmental pollution. Always follow the instructions provided by the fertilizer manufacturer and opt for organic options whenever possible to support both the health of your catnip plants and the environment.
Pruning and Harvesting Catnip
Pruning and harvesting are important tasks when it comes to caring for catnip plants. Regular pruning helps maintain a compact and bushy growth habit, while proper harvesting ensures the best flavor and aroma. Here are some guidelines for pruning and harvesting catnip:
Pruning Catnip: Regular pruning encourages bushier growth and helps prevent catnip from becoming leggy. To prune catnip, use clean and sharp pruning shears or scissors. Pinch or trim back the stems just above a set of healthy leaves. This stimulates branching and promotes denser foliage growth. Pruning can be done throughout the growing season, as needed, to maintain the plant’s shape and vitality.
Harvesting Catnip Leaves: The best time to harvest catnip leaves is just before the plant starts to flower. At this stage, the leaves contain the highest concentration of essential oils, giving them the most potent aroma. To harvest catnip leaves, use scissors or pruning shears to cut the stems above a set of healthy leaves. Avoid cutting into the woody parts of the stems as they are less aromatic. The harvested leaves can be used fresh, dried, or frozen for later use.
Drying Catnip: If you plan to preserve catnip leaves for a longer duration, drying them is a common method. Gather the harvested stems into small bundles and hang them upside down in a cool, dry, and well-ventilated area. Ensure that the bundles are not too tightly packed, as this can create a humid environment and lead to mold. Once the leaves are completely dry and crumble easily, remove them from the stems and store them in airtight containers away from direct sunlight.
Using Pruned Leaves: Don’t let the pruned leaves go to waste. They can be used fresh as a treat for cats or added to homemade cat toys. Pruned leaves can also be infused into oils or used to flavor teas, culinary dishes, or even cocktails. The aromatic and minty flavor of catnip leaves adds a unique twist to various recipes.
Deadheading Flowers: To maintain the appearance of catnip plants and prolong their blooming period, consider deadheading the flowers. This involves removing the faded or spent flowers by pinching them off at the base. Deadheading prevents the plant from diverting energy into seed production and encourages more flower production throughout the growing season.
Pruning and harvesting catnip not only keeps the plants looking neat and tidy but also promotes healthier growth and enhances the concentration of essential oils in the leaves. By incorporating these tasks into your catnip care routine, you’ll ensure a thriving and aromatic catnip garden that you and your feline friends can enjoy to the fullest.
Storing Catnip Leaves
Properly storing catnip leaves ensures that they retain their potency and aroma for later use. Whether you have harvested fresh catnip leaves or dried them, taking the right steps for storage will help preserve their flavor and medicinal properties. Here are some guidelines for storing catnip leaves:
Fresh Catnip Leaves: If you have freshly harvested catnip leaves that you plan to store for later use, it’s important to dry them first. Spread the leaves out in a single layer on a clean and dry surface, such as a mesh drying rack or a clean kitchen towel. Allow them to air dry in a dark, well-ventilated area for about 1-2 weeks, until they are completely dry and crumbly.
Dried Catnip Leaves: Once the catnip leaves are completely dry, store them in airtight containers to maintain their flavor and potency. Glass jars with tight-fitting lids or resealable bags work well for this purpose. Place the dried leaves into the containers, ensuring there is minimal air space. Label the containers with the date of harvest to keep track of freshness.
Optimal Storage Conditions: Store the catnip containers in a cool, dark, and dry place away from direct sunlight and moisture. Excessive heat, light, and humidity can degrade the quality of the catnip leaves and reduce their flavor and aroma. A pantry, cupboard, or a dedicated herb storage area are suitable locations for storing dried catnip leaves.
Expiration and Freshness: While properly stored dried catnip leaves can remain flavorful for up to a year, it’s ideal to use them within 6-12 months for the best flavor and potency. Over time, the essential oils in the catnip leaves may gradually diminish, resulting in less potent flavor and aroma.
Freezing Catnip: If you want to extend the shelf life of your catnip leaves, you can also freeze them. Place the dried leaves into airtight freezer bags or containers and store them in the freezer. Frozen catnip leaves can retain their flavor and potency for up to two years. Freezing is a great option for preserving larger quantities of catnip or if you prefer to have a longer-term supply on hand.
Proper Labeling: When storing catnip leaves, it’s essential to label the containers with the name and date of harvest. This will allow you to keep track of freshness and ensure that you use the oldest catnip leaves first.
By following these storage guidelines, you can maintain the flavor, potency, and aroma of your catnip leaves for an extended period. Whether for culinary, medicinal, or recreational purposes, properly stored catnip leaves will continue to provide the desired effects and add a delightful touch to your recipes and homemade remedies.
Common Pests and Diseases of Catnip
While catnip plants are generally resilient and resistant to most pests and diseases, they can still be susceptible to certain issues. Being aware of the common pests and diseases that can affect catnip can help you identify and address them promptly. Here are some of the most common pests and diseases to watch out for when growing catnip:
1. Aphids: Aphids are small, soft-bodied insects that feed on the sap of catnip plants. They can cause distorted growth, yellowing leaves, and the secretion of a sticky substance known as honeydew. Use insecticidal soap or a strong blast of water to remove aphids from the plant. Introducing beneficial insects like ladybugs can also help control aphid populations naturally.
2. Spider Mites: Spider mites are tiny arachnids that can cause yellowing leaves and fine webbing on catnip plants. They suck plant sap, leading to leaf discoloration and a weakened appearance. Regularly misting the plants with water can help deter spider mites. If infestation occurs, treat the plants with an organic miticide or insecticidal soap.
3. Powdery Mildew: Powdery mildew is a fungal disease that manifests as a white powdery coating on the leaves and stems of catnip plants. It thrives in humid conditions and can hinder photosynthesis, leading to stunted growth. To prevent powdery mildew, ensure good air circulation around the plants by providing adequate spacing and pruning. If detected, remove and dispose of infected plant parts and apply organic fungicides as necessary.
4. Root Rot: Root rot is caused by overly saturated soil conditions, leading to the decay of the roots. This can occur when catnip plants are consistently overwatered or planted in poorly draining soil. To avoid root rot, ensure that the soil is well-draining and water catnip plants appropriately, allowing the soil to dry out slightly between waterings.
5. Leaf Spot: Various fungal pathogens can cause leaf spot disease in catnip. It appears as small, dark spots on the leaves, eventually leading to leaf drop and diminished health. To prevent leaf spot, avoid overhead watering and keep the foliage dry. If leaf spot occurs, remove and dispose of infected leaves and treat the plants with organic fungicides.
6. Slugs and Snails: Slugs and snails can feed on the leaves and stems of catnip plants, leaving behind irregular holes or ragged edges. To deter slugs and snails, use physical barriers like copper tape around the base of the plants or apply organic slug repellents around the garden area.
Regularly inspecting your catnip plants and practicing good cultivation practices, such as providing proper spacing, watering appropriately, ensuring good air circulation, and removing infected plant parts promptly, can help prevent and manage common pests and diseases. By taking proactive measures, you can ensure the health and vitality of your catnip plants and enjoy their benefits to the fullest.
Harvesting Catnip Seeds
Harvesting catnip seeds allows you to propagate new plants and continue enjoying the benefits of this herb in your garden. Catnip seeds can be collected from mature flowers, providing you with a steady supply of seeds for future planting. Here’s a guide on how to harvest catnip seeds:
1. Wait for Seed Maturity: Allow the catnip flowers to fully mature on the plant. The flowers will turn brown and dry out, indicating that the seeds are nearing maturity. It usually takes 2-4 weeks after flowering for the seeds to develop fully.
2. Harvesting Timing: Choose a dry and sunny day to harvest catnip seeds. This ensures that the flowers are completely dry and the seeds are fully mature. Harvesting too early may result in underdeveloped or non-viable seeds.
3. Cut Flower Stems: Using clean and sharp pruning shears or scissors, cut the flower stems just below the flowers. Leave some stem length to hold onto while processing the seed heads.
4. Seed Head Processing: Place the cut flower stems in a paper bag or a container. Gently rub or crush the flower heads inside the bag/container to release the seeds. This helps separate the seeds from the dried flowers.
5. Winnowing: After crushing the seed heads, transfer the contents of the bag/container to a clean, dry surface. Tilt the surface slightly and let the seeds and debris slide down. This technique, known as winnowing, allows the lighter debris to be blown away by a gentle breeze, leaving behind the heavier seeds.
6. Collecting the Seeds: Collect the seeds that have separated from the debris and discard any remaining plant material. Use a fine mesh sieve or your fingers to remove any large debris from the collected seeds.
7. Storage: Store the catnip seeds in a cool, dry, and dark place in airtight containers, such as glass jars or seed envelopes. Label the containers with the harvest date to keep track of freshness. Stored properly, catnip seeds can remain viable for several years.
By following these steps, you can successfully harvest catnip seeds and expand your catnip garden in subsequent seasons. Collecting seeds from your mature catnip plants allows you to propagate new plants and continue enjoying the beauty and benefits that catnip provides in your garden and for your feline companions.
Propagating Catnip from Cuttings
Propagating catnip from cuttings is a reliable method to produce new plants that are genetically identical to the parent plant. This method is particularly useful when you want to expand your catnip garden or share plants with others. Here’s a step-by-step guide on how to propagate catnip from cuttings:
1. Selecting the Cuttings: Choose healthy and disease-free stems from a mature catnip plant. Look for stems that are about 3-4 inches (7-10 cm) in length and have at least two sets of leaves. Avoid stems that are woody or brittle.
2. Taking the Cuttings: Using clean and sharp pruners, make a clean cut just below a node (the joint where the leaf meets the stem) at a 45-degree angle. This will provide a larger surface area for root development.
3. Removing Lower Leaves: Trim off the lower set of leaves from the cutting, leaving only the top set of leaves intact. This reduces moisture loss and directs the energy towards root production.
4. Applying Rooting Hormone (Optional): To enhance the root formation process, you may choose to dip the cut end of the stem in a rooting hormone powder or gel. This helps stimulate root growth and increases the chances of successful propagation.
5. Planting the Cuttings: Fill a small pot or container with a well-draining potting mix or vermiculite. Make a hole in the soil using a pencil or your finger and insert the cut end of the cutting into the hole. Gently press the soil around the stem to secure it in place.
6. Providing Ideal Conditions: Place the potted cuttings in a warm and humid environment with bright, indirect light. A temperature range of 65-75°F (18-24°C) is ideal for root development. You can use a humidity dome or cover the pot with a clear plastic bag to create a humid atmosphere.
7. Watering and Care: Keep the soil lightly moist but not overly saturated. Water the cuttings from the bottom to avoid disturbing the development of delicate roots. Mist the cuttings and the inside of the humidity dome or plastic bag regularly to maintain humidity.
8. Root Development: In about 3-4 weeks, the cuttings should develop a healthy root system. Gently tug on the stem to check for resistance, indicating that the roots have established. Once roots have formed, gradually acclimate the plants to normal indoor or outdoor conditions.
9. Transplanting: Once the new catnip plants are established with a well-developed root system, they can be transplanted into larger pots or directly into the garden. Choose a sunny location with well-draining soil and provide adequate spacing for proper growth.
By following these steps, you can successfully propagate catnip from cuttings and expand your catnip garden with genetically identical plants. Propagation through cuttings allows you to preserve the desirable traits of the parent catnip plant and ensure the continuity of its aromatic leaves and charming blooms.
Dividing Catnip Plants
Dividing catnip plants is an effective way to rejuvenate older plants, control their spread, and create new plants from an existing parent plant. This propagation method allows you to expand your catnip garden and maintain vibrant and healthy plants. Here is a step-by-step guide on how to divide catnip plants:
1. Timing: The best time to divide catnip plants is in early spring when new growth starts to emerge. This allows the divided plants to establish their root systems before the onset of hot summer temperatures.
2. Preparing the Plants: Water the catnip plants a day or two before dividing to ensure they are well-hydrated. This helps reduce stress on the plants during the division process.
3. Digging up the Root Ball: Carefully dig around the perimeter of the catnip plant, keeping a reasonable distance from the base to avoid damaging the roots. Gently lift the plant from the ground, preserving as much of the root ball as possible.
4. Dividing the Plant: Once the catnip plant is lifted, examine the root ball for natural divisions or areas with separate clumps of roots. Use clean and sharp garden tools, such as a spade or garden knife, to divide the root ball into multiple sections. Each section should have a portion of the root system and a few healthy shoots.
5. Separating the Divisions: Gently separate the divisions by teasing apart the clumps of roots, taking care not to damage the delicate root structures. If the roots are tightly tangled, use your fingers or a clean tool to loosen them without causing excessive damage.
6. Replanting the Divisions: Choose a sunny location in your garden with well-draining soil for replanting the catnip divisions. Dig holes slightly larger than the root system of each division, ensuring the crown of the plant is level with the soil surface. Place the divisions into the holes and backfill with soil, firming it gently around the roots to eliminate air pockets.
7. Watering and Care: After replanting, thoroughly water the divisions to settle the soil around the roots. In the following weeks, monitor the moisture level of the soil, keeping it consistently moist but not waterlogged. Apply a layer of organic mulch around the plants to help conserve moisture and suppress weed growth.
8. Continued Maintenance: Treat the divided catnip plants as you would newly planted ones. Provide regular care, including watering, weeding, and monitoring for pests or diseases. As the divisions establish themselves, they will regain vigor and produce healthy foliage and blooms.
By dividing catnip plants, you can revitalize older plants, control their spreading habits, and expand your catnip garden effortlessly. The process allows you to enjoy a continuous supply of catnip plants that will continue to thrive and provide aromatic leaves for your feline companions or other purposes.
Overwintering Catnip
Overwintering catnip is a common practice for gardeners who live in regions with cold winters. By providing the proper care and protection, you can ensure that your catnip plants survive the winter and continue to thrive in the following growing season. Here are some important considerations for overwintering catnip:
1. Preparing for Winter: Before the onset of winter, prepare your catnip plants by removing any dead or diseased foliage. Cut back the stems to about 2-3 inches (5-8 cm) above the soil level, leaving enough growth for the plant to rebound in the spring.
2. Mulching: Apply a layer of organic mulch, such as straw or wood chips, around the base of the catnip plants. This helps insulate the soil, regulate soil temperature, and protect the roots from freezing and thawing cycles.
3. Protection from Extreme Cold: In regions with particularly harsh winters, additional protection may be needed. Place a layer of burlap or a frost blanket over the catnip plants to shield them from cold winds and extreme temperatures. This helps create a microclimate that retains warmth and prevents desiccation.
4. Minimizing Moisture: During winter, catnip plants are susceptible to rot or fungal diseases caused by excessive moisture. Avoid overwatering and ensure that the soil is well-draining to prevent waterlogged conditions.
5. Indoor Cultivation: If you have limited outdoor space or experience extremely harsh winters, consider bringing catnip plants indoors for overwintering. Transplant them into pots and place them in a bright location with adequate sunlight. Adjust watering to accommodate indoor conditions. Be aware that catnip may lose some foliage during the transition but should rebound in the spring.
6. Monitoring: Periodically check on your catnip plants during the winter months. Ensure that the mulch is intact and that there are no signs of pests or diseases. If necessary, make adjustments to the protective measures in place.
7. Spring Care: As spring approaches and temperatures begin to rise, gradually remove the protective coverings and allow the catnip plants to acclimate to outdoor conditions. Resume regular watering and provide appropriate care for new growth.
8. Division and Propagation: Overwintered catnip plants often benefit from division to maintain plant health and vigor. Dividing the plants in early spring promotes new growth and prevents overcrowding.
By properly overwintering your catnip plants, you can ensure their survival and encourage their continued growth and productivity. With a little care and attention, you’ll be able to enjoy flourishing catnip plants year after year in your garden.