
Soil Temperature Requirements for Bush Beans
Bush beans, also known as snap beans or green beans, are warm-season vegetables that thrive in well-drained, loamy soil with a pH level between 6.0 and 7.0. The success of your bush bean crop greatly depends on the soil temperature during planting. Understanding the required soil temperature for bush beans is crucial for a bountiful harvest.
The optimal soil temperature for planting bush beans is between 70°F (21°C) and 85°F (29°C). At temperatures below 60°F (15°C), bush beans may struggle to germinate. If the soil is too cold, the seeds may rot before they even have a chance to sprout. On the other hand, extremely high temperatures above 85°F (29°C) can inhibit seed germination and cause poor plant growth.
It’s important to note that these temperature requirements apply to the soil temperature, not the air temperature. Soil temperature measurements can be obtained using a soil thermometer, inserted about 2 inches (5 cm) below the surface.
To ensure the soil reaches the ideal temperature range, it’s best to wait until after the last frost date in your area before planting bush beans. In most regions, this falls in the late spring or early summer. Planting too early when soil temperatures are still too cool can lead to poor growth and yield.
If you’re eager to start planting earlier, you can warm up the soil by using techniques like black plastic mulching or using row covers to trap heat. These methods can help raise the soil temperature and create a more favorable environment for bush bean seeds to germinate.
Best Time to Plant Bush Beans
The timing of planting bush beans is crucial to ensure a successful and productive harvest. While the specific planting window may vary depending on your location and climate, there are some general guidelines to help you determine the best time to plant bush beans.
In most regions, the ideal time to plant bush beans is after the last frost date in the spring. Bush beans are warm-season crops and require consistent warm temperatures to thrive. Planting too early, when the soil and air temperatures are still cold, can hinder germination and result in stunted growth.
A good rule of thumb is to wait until the soil temperature reaches a consistent 60°F (15°C) or higher before planting bush beans. You can use a soil thermometer to measure the temperature at a depth of 2 inches (5 cm) below the surface.
If you’re unsure about the last frost date in your area, you can consult local gardening resources or contact your county extension office for more specific information. They will have data and recommendations tailored to your region.
In areas with a short growing season, you can consider starting bush bean plants indoors 2 to 4 weeks before the last frost date. This will give the seedlings a head start and allow you to transplant them outdoors once the weather warms up.
Additionally, you can extend your harvest period by planting successive crops of bush beans every 2 to 3 weeks throughout the growing season. This staggered planting will ensure a continuous supply of fresh beans throughout the summer.
It’s important to note that bush beans prefer full sun exposure for optimal growth and yield. Make sure to choose a planting location that receives at least 6 to 8 hours of direct sunlight per day.
By planting bush beans at the right time and providing them with the ideal growing conditions, you can enjoy a plentiful harvest of delicious and nutritious beans.
How to Prepare Soil for Planting Bush Beans
Preparing the soil properly is essential for the successful growth of bush beans. Taking the time to adequately prepare the soil before planting will provide the plants with the necessary nutrients and optimal growing conditions. Here are the steps you can follow to prepare the soil for planting bush beans:
- Clear the area: Start by clearing the planting area of any weeds, rocks, or debris. Remove any existing vegetation that may compete with the beans for nutrients and space.
- Loosen the soil: Use a garden fork or tiller to loosen the soil. This will help improve drainage and aeration, allowing the roots to grow deep and healthy. Be careful not to overwork the soil, as excessive tilling can disrupt the soil structure.
- Amend the soil: Test the soil pH to ensure it falls within the ideal range of 6.0 to 7.0. If the pH is too high or too low, you can make adjustments by adding organic matter or soil amendments. Incorporate well-rotted compost or aged manure into the soil to improve its fertility and nutrient content.
- Provide adequate drainage: Bush beans prefer well-drained soil, so if your soil tends to retain moisture, consider adding sand or perlite to improve drainage. This will prevent waterlogged soil, which can lead to root rot and other issues.
- Fertilize: Before planting, apply a balanced fertilizer to provide the beans with the necessary nutrients. Look for a fertilizer with equal parts nitrogen, phosphorus, and potassium, such as a 10-10-10 or 20-20-20 blend. Follow the instructions on the fertilizer package for proper application rates.
- Level and smooth the soil: Rake the soil to create a level and smooth surface. This will make it easier to plant the seeds and promote uniform growth.
- Add organic mulch: Once the soil is prepared, you can apply a layer of organic mulch, such as straw or wood chips. Mulching helps retain soil moisture, suppress weed growth, and regulate soil temperature.
By following these steps and preparing the soil adequately, you will create an ideal growing environment for your bush beans. This will promote healthy root development, nutrient uptake, and ultimately lead to a successful and abundant harvest.
Steps to Planting Bush Beans
Planting bush beans is a straightforward process that can be accomplished by following a few simple steps. Whether you’re a beginner gardener or have some experience, these guidelines will help ensure a successful planting of bush beans:
- Select a planting location: Choose a spot in your garden that receives full sun and has well-drained soil. Avoid areas prone to waterlogging, as excessive moisture can lead to root rot.
- Prepare the soil: Clear the planting area of weeds, rocks, and debris. Loosen the soil using a garden fork or tiller, and add compost or aged manure to improve its fertility and texture.
- Determine the spacing: Bush beans should be planted with a spacing of 2 to 3 inches (5 to 7.5 cm) between seeds and 18 to 24 inches (45 to 60 cm) between rows. This spacing allows the plants to have adequate room to grow and enables proper air circulation.
- Sow the seeds: Dig small holes or create furrows with a trowel or your fingers. Plant the bush bean seeds about 1 to 1.5 inches (2.5 to 4 cm) deep, with the pointed end facing downwards. Space the seeds according to the recommended spacing mentioned earlier.
- Cover and water: Gently cover the seeds with soil and firm the soil around them. Water the newly planted seeds thoroughly to ensure good soil-to-seed contact and initiate germination. Keep the soil moist but not waterlogged as the seeds germinate and the plants establish.
- Maintain proper care: Once the seedlings emerge, thin them to maintain the desired spacing between plants. Remove any weak or overcrowded seedlings to encourage stronger growth. Regularly monitor the moisture levels in the soil, ensuring it remains consistently moist but not excessively wet.
- Weed and mulch: Regularly check for weeds in the area surrounding the bush bean plants. Remove any weeds promptly to prevent them from competing with the beans for nutrients and water. Apply a layer of organic mulch around the plants to suppress weed growth, conserve moisture, and maintain a stable soil temperature.
- Protect from pests and diseases: Monitor your bush bean plants for any signs of pests or diseases, such as aphids, bean beetles, or fungal infections. Take appropriate measures, such as applying organic insecticides or employing companion planting techniques, to prevent or control these issues.
By following these steps and providing proper care, you’ll ensure healthy growth and a bountiful harvest of bush beans. Enjoy the process and look forward to the satisfaction of freshly picked beans from your own garden.
How Far Apart to Plant Bush Beans
Plant spacing plays a crucial role in the growth and productivity of bush beans. Proper spacing ensures that each plant has enough room to receive adequate sunlight, nutrients, and air circulation. The recommended spacing for planting bush beans is as follows:
Space the bush bean seeds or seedlings 2 to 3 inches (5 to 7.5 cm) apart within rows. This close spacing allows the leaves of the mature plants to overlap slightly, creating a dense canopy that helps conserve soil moisture and suppress weed growth.
Rows of bush beans should be spaced 18 to 24 inches (45 to 60 cm) apart. This wider spacing provides enough room for the plants to spread out without overcrowding and ensures good air circulation, reducing the risk of disease development.
Alternatively, you can plant bush beans in raised beds or containers. In this case, maintain the same spacing between plants within the bed or container, allowing for proper growth and development.
It’s important to consider that these spacing recommendations are generalized, and you can adjust them based on the specific variety of bush beans you’re planting. Some dwarf or compact varieties may require slightly narrower spacing, while larger bush bean varieties may need more room to grow.
Additionally, if you plan to use trellises or stakes to support your bush beans, you can space the plants slightly closer together. The vertical support will allow the plants to grow upwards, optimizing space utilization and facilitating better airflow.
Proper spacing not only promotes healthy plant growth and development but also makes it easier to manage the plants. With adequate space, you can move around the garden beds or containers more freely, enabling activities such as weeding, watering, and harvesting with minimal disturbance to the plants.
Remember to monitor the growth of your bush bean plants throughout the growing season and make adjustments if needed. Thin out any overcrowded areas to maintain the recommended spacing and ensure optimum plant health and vitality.
By following the recommended spacing guidelines, you’ll provide your bush bean plants with the space they need to thrive and yield a plentiful harvest.
How Deep to Plant Bush Beans
Planting depth is an essential factor to consider when growing bush beans. Proper planting depth ensures that the seeds have adequate moisture, warmth, and access to nutrients for successful germination and healthy growth. The recommended planting depth for bush beans is around 1 to 1.5 inches (2.5 to 4 cm).
Planting bush bean seeds too shallow can result in poor germination and weak seedlings. On the other hand, planting them too deep may lead to delayed emergence or failed germination altogether. Striking the right balance is crucial for optimal results.
To plant bush beans at the proper depth, follow these steps:
- Prepare the soil: Ensure that the soil is well-prepared by removing any large rocks, weeds, or debris. Loosen the soil to a depth of 6 to 8 inches (15 to 20 cm) to provide a loose and friable bed for the seeds.
- Create furrows or holes: Use a garden trowel or your fingers to create furrows or small holes in the soil. The furrows or holes should be spaced according to the recommended spacing mentioned earlier.
- Plant the seeds: Place the bush bean seeds in the furrows or holes, about 1 to 1.5 inches (2.5 to 4 cm) deep. Drop the seeds into the holes, making sure the pointed end is facing downward. Space the seeds according to the recommended spacing to allow ample room for their growth and development.
- Cover and firm the soil: Gently cover the seeds with soil and lightly firm the soil around them. Avoid compacting the soil too much, as this can hinder seedling emergence. The soil should be firm enough to make good contact with the seeds, but loose enough for the emerging seedlings to push through.
- Water thoroughly: After planting, water the soil thoroughly. This will provide the moisture needed for proper germination and seedling establishment. Keep the soil consistently moist but not waterlogged as the seeds germinate and the young plants continue to grow.
It’s important to note that the planting depth may vary slightly depending on the specific variety of bush beans you’re planting. Some seeds may require slightly different planting depths, so be sure to consult the seed packet for any specific instructions.
By planting bush beans at the proper depth, you provide them with the best conditions for germination and healthy growth. This will ultimately result in strong, productive plants and a bountiful harvest of delicious beans.
How to Care for Bush Beans After Planting
After planting bush beans, providing proper care is vital to ensure their healthy growth and a productive harvest. Here are some important tips on how to care for your bush beans after planting:
- Watering: Adequate watering is crucial for the success of your bush beans. Keep the soil consistently moist, but avoid overwatering, as it can lead to root rot. Water deeply and evenly, focusing on the root zone rather than wetting the foliage. Watering in the early morning or late afternoon helps reduce evaporation and ensures the plants have enough moisture for the day.
- Mulching: Applying a layer of organic mulch, such as straw or wood chips, around the base of your bush bean plants can help conserve soil moisture and suppress weed growth. Mulching also helps regulate soil temperature, keeping it cool during hot summer days. Be sure to keep the mulch several inches away from the plant stems to prevent rot and fungal issues.
- Weeding: Regularly remove any weeds that compete with your bush bean plants for nutrients, water, and space. Weeds can also provide hiding places for pests or diseases. Take care not to disturb the plant roots while weeding, and be gentle near the base of the plants to avoid damaging the stems.
- Support if necessary: While bush beans are typically self-supporting, some varieties may benefit from extra support to prevent them from sprawling on the ground. You can use stakes, trellises, or cages to provide support, especially if you have a taller or heavier variety. Place the supports near the plants when they are young to avoid disrupting the roots later on.
- Protect from pests and diseases: Regularly inspect your bush bean plants for signs of pests or diseases, such as aphids, bean beetles, or fungal infections. Implement preventive measures, such as using organic insecticides or practicing companion planting, to deter pests and control disease development. Prompt action is crucial to minimize damage and ensure the health of your plants.
- Fertilizing: Bush beans are nitrogen-fixing plants, which means they can absorb nitrogen from the air with the help of beneficial bacteria in their root nodules. In general, bush beans do not require excessive fertilization. However, if your soil is poor in nutrients or you notice slow growth, you can apply a balanced fertilizer during the growing season. Follow the package instructions for the appropriate application rate.
- Harvesting: Regularly monitor your bush bean plants for mature pods that are ready for harvest. Harvest the beans once they reach the desired size and before they become overly mature and tough. Gently pull or twist the pods off the plants to avoid damaging the stems. Harvesting regularly encourages the plant to produce more beans.
- Cleanliness and sanitation: Maintain a clean growing area by removing any fallen debris or spent plants. This prevents the buildup of pests and diseases and helps maintain good overall plant health.
By following these care practices, you’ll provide ideal conditions for your bush bean plants, resulting in vigorous growth and a plentiful yield of delicious beans.
When to Water Bush Beans
Proper watering is crucial for the health and productivity of bush beans. Knowing when and how to water your bush bean plants can help ensure they receive adequate moisture without being waterlogged. Here are some guidelines to determine when to water your bush beans:
Early on, after planting bush bean seeds, it’s important to keep the soil consistently moist to aid in germination. Ensure the soil remains evenly moist during this initial stage, as dry soil can prevent the seeds from sprouting. Water gently to avoid dislodging the seeds or causing soil erosion.
Once the seedlings have emerged and established, you can adjust the watering schedule to suit their needs. As a general rule, water bush beans when the top inch (2.5 cm) of soil feels dry to the touch. Insert your finger into the soil near the base of the plants to check the moisture level.
While it’s important to keep the soil consistently moist, avoid overwatering bush beans. Waterlogged soil can lead to root rot and other fungal diseases. Inadequate drainage can also hinder nutrient uptake and growth. Strive for a balance by providing enough water to keep the soil moist but not saturated.
It’s best to water your bush beans deeply and infrequently rather than shallowly and frequently. Deep watering encourages deeper root growth and helps the plants withstand drought conditions better. Watering deeply ensures the roots reach down into the soil, accessing both moisture and nutrients more effectively.
Watering in the early morning or late afternoon is ideal. This timing allows the plants to absorb the moisture before the heat of the day, minimizing evaporation. Watering in the evening is not recommended as it can create a humid environment that promotes the growth of fungal pathogens.
If you’re unsure about the watering needs of your bush beans, remember that it’s better to slightly underwater than to overwater them. These plants are generally resilient and can tolerate short periods of dry soil. Monitoring the plants’ response to watering can help you fine-tune your watering schedule.
It’s important to note that environmental factors, such as temperature, sunlight exposure, and rainfall, can affect the watering needs of your bush beans. In hot and dry conditions, you may need to increase the frequency and amount of water provided. Conversely, during periods of heavy rainfall, you may need to reduce watering to prevent waterlogging.
By paying attention to the moisture levels in the soil and adjusting your watering routine accordingly, you’ll ensure that your bush bean plants receive the proper amount of water they need for healthy growth and abundant yields.
How to Fertilize Bush Beans
Fertilizing bush beans is an important aspect of their care. While these leguminous plants have the ability to fix nitrogen from the atmosphere, providing supplementary nutrients can help promote vigorous growth and maximize their yield. Here’s a guide on how to fertilize your bush beans effectively:
1. Soil Testing: Before applying any fertilizers, it’s helpful to perform a soil test to determine the nutrient levels and pH of your soil. This will provide insights into the specific deficiencies or imbalances that may exist, allowing you to tailor your fertilizer application accordingly.
2. Balanced Fertilizer: Choose a balanced fertilizer with equal parts of nitrogen (N), phosphorus (P), and potassium (K), such as a 10-10-10 or 20-20-20 blend. This ensures a well-rounded supply of nutrients for your bush beans. If the soil test indicates specific nutrient deficiencies, opt for a fertilizer formulation that addresses those deficiencies.
3. Pre-Planting Application: Before planting, incorporate the fertilizer into the soil according to the package instructions. Spread the fertilizer evenly over the planting area, and then mix it into the top few inches of soil. This provides a nutrient-rich environment for the roots of your bush beans.
4. Side-Dressing: As the bush bean plants grow, they may benefit from additional fertilization. Side-dressing is the process of applying fertilizer to the soil around the base of the plants. Around three to four weeks after planting, sprinkle a small amount of balanced fertilizer along both sides of the row, keeping it a few inches away from the plant stems. Lightly incorporate the fertilizer into the soil without disturbing the roots.
5. Organic Alternatives: If you prefer organic fertilizers, there are various options available. Well-rotted compost or aged manure can be applied before planting or used as a side-dressing during the growing season. They not only provide essential nutrients but also improve soil structure and microbial activity.
6. Watering: After applying fertilizers, make sure to water the plants thoroughly to allow the nutrients to penetrate the soil and reach the roots. Adequate moisture helps with nutrient absorption and prevents the risk of fertilizer burn.
7. Regular Monitoring: Keep a watchful eye on the growth and appearance of your bush beans. If you notice signs of nutrient deficiency, such as yellowing leaves or stunted growth, you may need to adjust your fertilization routine or administer targeted nutrient supplements.
8. Follow Package Instructions: Always refer to the package instructions for the specific fertilizer you’re using. It will provide guidelines on the recommended application rates, frequency, and any precautions or special instructions for appropriate usage.
Remember, it’s crucial not to over-fertilize your bush beans, as excessive nutrient levels can be detrimental to their growth and can even reduce the yield. By following proper fertilization practices, you can provide the necessary nutrients to support the health and productivity of your bush bean plants.
Common Pests and Diseases that Affect Bush Beans
While bush beans are generally easy to grow, they can be susceptible to certain pests and diseases. Being aware of these common issues can help you identify and manage them effectively, ensuring the health and vitality of your bush bean plants. Here are some pests and diseases that commonly affect bush beans:
1. Aphids: These small, soft-bodied insects feed on the sap of plants and can cluster on the undersides of leaves. They can cause curling or distorted growth and leave behind a sticky residue. Use insecticidal soap or a strong blast of water to control aphid populations.
2. Bean Leaf Beetles: These pests chew on bean foliage, causing irregular holes or notches. They can also transmit bean diseases. Hand-picking and applying insecticidal sprays are common control methods.
3. Mexican Bean Beetles: Similar in appearance to lady beetles, these pests feed on leaves and can rapidly defoliate bush bean plants. Inspect the undersides of leaves for yellow-orange eggs and handpick or apply insecticidal soap to control the beetles.
4. Bean Weevils: These small beetles attack the seeds of bush beans, causing damage and reducing yield. Using treated seed or applying diatomaceous earth around the base of plants can help manage bean weevils.
5. Fusarium Wilt: This fungal disease causes yellowing, wilting, and stunting of plants. It can survive in the soil for several years. Planting disease-resistant bean varieties and practicing proper crop rotation can help prevent the spread of Fusarium wilt.
6. Powdery Mildew: A common fungal disease, powdery mildew appears as a white powdery coating on leaves, stems, and pods. Adequate air circulation, avoiding overhead watering, and applying fungicidal sprays can help manage and prevent powdery mildew.
7. Rust: Rust appears as orange or rust-colored spots on leaves, stems, and pods. It can cause defoliation and weaken the plants. Removing and destroying infected plant parts and applying fungicidal sprays can help control rust.
8. Root Rot: Excessive moisture and poorly drained soil can lead to root rot, caused by various fungi. Avoid over-watering and improve soil drainage to prevent this disease. Fungicidal treatments may be needed in severe cases.
9. Bean Mosaic Virus: This viral disease causes mottled yellowing and distortion of leaves. It can stunt growth and reduce yields. Planting virus-resistant bean varieties and controlling aphids can help prevent the spread of the Bean Mosaic Virus.
10. Bean Common Mosaic Virus (BCMV): Another viral disease, BCMV causes mosaic patterns and yellowing of leaves. Aphids can transmit this virus. Planting virus-resistant bean varieties and controlling aphids are essential in managing BCMV.
Regular monitoring of your bush bean plants is crucial to detect signs of pests or diseases early on. Integrated pest management practices, such as hand-picking, crop rotation, and utilizing organic insecticides or fungicides when necessary, can help control these issues effectively. By implementing preventative measures and taking swift action, you can minimize the impact of pests and diseases, ensuring healthy and productive bush bean plants.
Harvesting Bush Beans
Harvesting bush beans at the right time is crucial to achieve optimal flavor, tenderness, and yield. Knowing when and how to harvest your bush beans will allow you to enjoy a bountiful harvest of fresh and flavorful beans. Here are some key points to consider when it comes to harvesting bush beans:
1. Harvesting timeline: Bush beans are typically ready for harvest around 50 to 55 days after planting, depending on the variety. Check the seed packet or plant label for the expected maturity date, as it can vary between different bean varieties.
2. Bean size: Harvest bush beans when they are young and tender, before the seeds inside the pods become fully developed. The ideal size for harvesting is when the pods are about 4 to 6 inches (10 to 15 cm) in length. Avoid waiting too long, as the pods can become tough and fibrous.
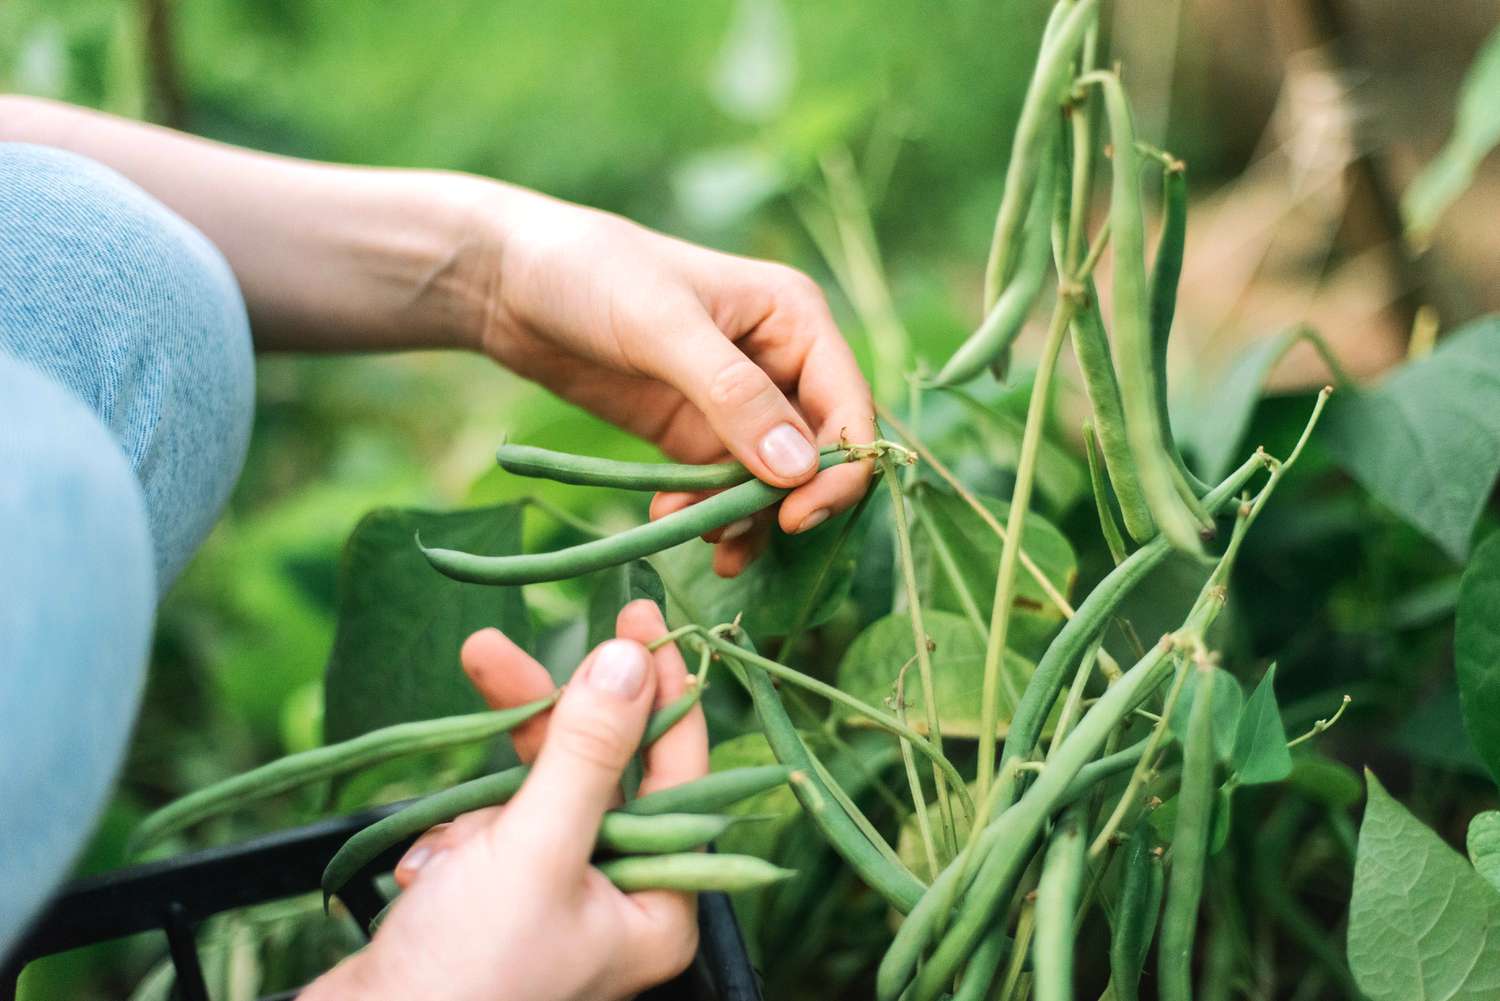
3. Harvesting technique: Gently hold the stem of the bean plant with one hand and use your other hand to snap or cut the pods just above the stem. Using a sharp pair of garden shears or scissors is recommended to prevent any damage to the plant. Be careful not to disturb the neighboring plants while harvesting.
4. Continuous harvesting: Harvest bush beans every few days or as soon as the pods reach the desired size. Regularly harvesting encourages the plant to produce more beans, extending the harvest period and ensuring a continuous supply of fresh beans throughout the growing season.
5. Harvesting dry beans: If you are growing bush beans specifically for dry beans, allow the pods to fully mature and dry on the plants. The pods will turn brown and become crisp. Harvest the dried pods and remove the beans from the pods once they are completely dry.
6. Careful handling: Handle harvested bush beans with care to avoid damaging the delicate pods. Rough handling can cause bruising or breakage, which can impact both the appearance and flavor of the beans.
7. Post-harvest storage: To maintain freshness, it’s best to use or store harvested bush beans as soon as possible. Store them in a cool, dry place and avoid exposing them to excess moisture or high temperatures, as this can accelerate spoilage.
It’s worth noting that bush beans are a versatile crop, and there are various ways to enjoy them. Freshly harvested bush beans can be cooked or steamed as a delicious side dish, added to stir-fries or salads, pickled, frozen, or canned for long-term storage.
By following these harvesting guidelines, you can enjoy the peak flavor and tenderness of your bush beans while ensuring a plentiful and rewarding harvest from your garden.
Tips for Maximizing Bush Bean Yields
Maximizing the yield of your bush beans not only ensures a plentiful harvest but also allows you to enjoy the abundant flavors and nutritional benefits of these versatile legumes. Here are some valuable tips to help you maximize the yield of your bush beans:
1. Choose the right variety: Select bush bean varieties that are known for their high productivity and disease resistance. Look for cultivars that are specifically bred for high yields to increase your chances of success.
2. Plant at the right time: Plant bush beans after the last frost date in your area when the soil has warmed up. This allows for optimal germination and growth. Planting at the appropriate time ensures the beans have a longer growing season to reach their full potential.
3. Provide ample sunlight: Bush beans thrive in full sun. Ensure they receive at least 6 to 8 hours of direct sunlight each day. Adequate sunlight promotes vigorous growth and optimized photosynthesis, leading to increased yields.
4. Proper spacing: Follow the recommended spacing guidelines when planting bush beans. Crowded plants can impede airflow, increase disease susceptibility, and hamper overall productivity. Giving each plant enough space to grow and develop ensures optimal nutrient absorption and access to sunlight.
5. Regular watering: Maintain consistent soil moisture throughout the growing season. Water deeply and evenly, ensuring the root zone receives adequate hydration without becoming waterlogged. Avoid drought stress, as it can adversely affect the yield and quality of the beans.
6. Mulch to conserve moisture: Apply a layer of organic mulch, such as straw or wood chips, around the base of the bush bean plants. Mulching helps retain soil moisture, suppress weed growth, and regulate soil temperature, which ultimately enhances the overall health and productivity of the plants.
7. Support if needed: While bush beans are generally self-supporting, some larger or heavy-yielding varieties may benefit from plant supports such as stakes or trellises. This helps to keep the plants upright and prevents sprawling, which in turn promotes improved air circulation and easier harvesting.
8. Regular nutrient replenishment: Bush beans are moderately heavy feeders, especially when it comes to nitrogen. Incorporate organic matter such as compost or well-rotted manure into the soil before planting to provide a nutrient-rich growing environment. Additionally, side-dress the plants with a balanced organic fertilizer during the growing season to ensure continuous nutrient supply.
9. Proper harvesting: Harvest bush beans regularly and at the right stage of maturity to encourage further production. Promptly remove mature beans to prevent the plants from diverting energy to mature seeds, which can reduce subsequent yields.
10. Practice crop rotation: Rotate the location of your bush bean plants each year to minimize the risk of pests and diseases building up in the soil. Avoid planting bush beans in the same spot more frequently than every three years to maintain healthy plants and high yields.
By implementing these tips, you can optimize the growth and productivity of your bush beans, leading to abundant harvests of delicious, nutrient-rich beans that you can enjoy fresh or preserve for later use.
When to Plant Successive Crops of Bush Beans
Planting successive crops of bush beans is a great way to extend your harvest and enjoy a continuous supply of fresh beans throughout the growing season. By staggering your plantings, you can ensure a steady yield and prolong the period of bean production. Here are some key considerations for determining when to plant successive crops of bush beans:
1. Length of Growing Season: Take into account the length of your growing season when planning successive plantings. Determine the average date of the first fall frost in your area, as this will help you calculate when you have enough time to plant additional crops and allow them to mature before the frost arrives.
2. Days to Maturity: Different bush bean varieties have varying maturity times. Check the seed packet or plant label for the days to maturity information. This will give you an idea of the approximate time it takes for a specific variety to reach harvesting stage. Plan your successive plantings based on this information to ensure a continuous supply of beans.
3. Plant and Harvest Intervals: Determine the desired interval between plantings and harvests. For a continuous harvest, you can successively plant bush beans every 2 to 3 weeks, starting from the first planting. This approach ensures that as one crop nears the end of its yield, the next crop is ready for harvest.
4. Soil and Weather Conditions: Successive plantings of bush beans are most successful in warm soil temperatures, usually above 60°F (15°C). Ensure that the soil is well-drained and has warmed up adequately before planting subsequent crops. Planting too early in cold or wet soil can lead to poor germination and stunted growth.
5. Crop Rotation: To maintain soil health and reduce the risk of diseases and pests, practice crop rotation when planning successive plantings. Avoid planting bush beans in the same location for consecutive years. Rotate them with crops from different families to help break pest and disease cycles.
6. Seed Saving: If you plan to save seeds for future plantings, ensure that you allow some of the beans from each successive crop to fully mature on the plants. Select healthy, fully formed beans for saving, and dry and store them properly for future use.
7. Weather Patterns: Keep an eye on weather patterns, particularly the likelihood of extreme heat or drought. Adjust your planting schedule accordingly to ensure the best growing conditions for your successive crops of bush beans.
8. Garden Space: Consider the available garden space when planning successive plantings. Ensure that you have enough room for the additional crops and that you maintain adequate spacing between plants to promote healthy growth and airflow.
By strategically planning and timing your successive plantings of bush beans, you can enjoy a continuous supply of fresh and flavorful beans throughout the growing season. Be mindful of the growing conditions, maturity times, and intervals between plantings to effectively manage your crops and maximize your harvest.