
Best Time to Plant Green Beans
Planting green beans at the right time is crucial for a successful harvest. The optimal planting time varies depending on your location, climate, and the specific type of green beans you’re growing. However, there are some general guidelines that can help you determine the best time to plant green beans.
1. Temperature: Green beans thrive in warm soil and air temperatures. It’s recommended to wait until the soil has warmed up to at least 60°F (15°C) before planting. Cold temperatures can stunt growth and lead to poor germination.
2. Frost: Green beans are sensitive to frost, so it’s important to avoid planting them too early in the spring or too late in the fall when frost is still a possibility. Wait until the danger of frost has passed before putting your green beans in the ground.
3. Spring Planting: In most regions, planting green beans in the spring is the most common practice. Depending on your climate, you can start planting as early as mid-spring. The soil should be well-drained and have a pH level between 6.0 and 7.0.
4. Summer Planting: If you live in an area with a short growing season or hot summers, you may need to wait until the soil and air temperatures have warmed up even more before planting green beans. Optimal temperatures for green beans range from 70°F to 80°F (21°C to 27°C).
5. Fall Planting: In some regions, you can also plant green beans in the fall for a second harvest. The timing will depend on when the first frost typically occurs in your area. It’s important to allow enough time for the plants to mature before the frost hits.
Remember that these guidelines are just general recommendations, and it’s essential to consider your specific growing conditions and the variety of green beans you’re planting. Consulting with local gardening or agricultural resources can provide valuable insights for your region.
Factors to Consider Before Planting Green Beans
Before you start planting green beans, there are several important factors to consider to ensure a successful and bountiful harvest. Taking these factors into account will help you plan and prepare for the best possible growing conditions for your green beans.
1. Soil Quality: Green beans thrive in well-draining soil that is rich in organic matter. Avoid heavy clay soils that retain too much moisture, as this can lead to root rot. Prepare your soil by amending it with compost or well-rotted manure to improve its texture and fertility.
2. Sunlight: Green beans require full sun to grow and produce an abundant yield. Choose a location in your garden that receives at least 6-8 hours of direct sunlight each day. Lack of sunlight can result in weak and leggy plants with poor bean production.
3. Watering: Proper watering is crucial for the healthy growth of green beans. They prefer consistent moisture but do not tolerate waterlogged conditions. Water your green beans regularly, aiming to keep the soil evenly moist but not soggy. Consider using drip irrigation or a soaker hose to ensure water reaches the roots without wetting the foliage.
4. Spacing: Green beans need adequate space to grow and spread. When planting, make sure to provide enough room between each plant to allow for good air circulation. This helps prevent diseases and allows the plants to receive ample sunlight. Typically, bush beans should be spaced 4-6 inches apart, while pole beans require about 6-8 inches between plants.
5. Support for Pole Beans: If you’re growing pole beans, you’ll need to provide a trellis, fence, or other supports for the vines to climb. Ensure that the support structure is sturdy enough to bear the weight of the plants and the developing beans. This not only saves space but also makes harvesting easier.
6. Companion Planting: Consider interplanting green beans with compatible companion plants. For instance, planting them alongside carrots, corn, or cucumbers can provide benefits like natural pest control and improved pollination.
By carefully considering these factors before planting your green beans, you can create an ideal growing environment and set the stage for a successful and rewarding harvest.
Planting Green Beans in the Spring
Spring is an excellent time to plant green beans, as they love the warmth and longer days that this season brings. Here are some key steps to follow when planting green beans in the spring:
1. Soil Preparation: Start by preparing the soil. Green beans prefer well-drained soil that is rich in organic matter. Remove any weeds or debris from the planting area, and loosen the soil to a depth of about 6-8 inches. Incorporate compost or well-rotted manure to enhance the soil’s fertility and structure.
2. Choosing the Right Variety: There are two main types of green beans: bush beans and pole beans. Bush beans are more compact and don’t require support, making them suitable for smaller gardens or containers. Pole beans, on the other hand, grow as climbing vines and need trellises or other supports to keep them upright. Select a variety that suits your gardening space and personal preference.
3. Planting Seeds: Sow the green bean seeds directly into the prepared soil. Plant the seeds about 1-2 inches deep and space them according to the instructions on the seed packet. For bush beans, provide about 4-6 inches of spacing between plants. If you’re planting pole beans, allow 6-8 inches of spacing between plants and set up a trellis or support structure for them to climb.
4. Watering: After planting, water the newly sown seeds gently but thoroughly. Keep the soil moist but not waterlogged throughout the germination and early growth stages. Avoid overhead watering if possible, as wet foliage increases the risk of fungal diseases. Consider using a soaker hose or drip irrigation system to deliver water directly to the soil.
5. Maintenance: As the green bean plants begin to grow, regularly monitor them for weeds and remove any that appear. Maintain consistent moisture levels by watering deeply whenever the top inch of soil feels dry. Mulching the soil around the plants can help conserve moisture and suppress weed growth.
6. Protection from Frost: While spring is generally a warmer season, there may still be occasional late frosts. Covering the young green bean plants with a frost blanket or similar protective covering can help shield them from any unexpected cold spells.
By following these steps, you can ensure that your green bean plants get off to a strong start in the spring, setting the stage for a productive and delicious harvest.
Planting Green Beans in the Summer
Planting green beans in the summer can be a bit challenging due to the hotter temperatures and potential dry spells. However, with proper planning and care, you can still enjoy a successful harvest. Here’s a guide to planting green beans in the summer:
1. Timing: Wait for the soil to warm up sufficiently before planting green beans in the summer. The soil temperature should ideally be around 70°F to 80°F (21°C to 27°C) for optimal seed germination and plant growth. Monitor the weather and aim to plant when there is a consistent pattern of warm temperatures.
2. Watering: Adequate moisture is crucial during the summer months when evaporation rates are high. Prepare the soil by incorporating organic matter such as compost or well-rotted manure to improve its water-retention capacity. After planting, water the seeds deeply and regularly, ensuring that the soil remains consistently moist but not waterlogged.
3. Shade: Green beans prefer full sun, but they can benefit from some shade during the hottest part of the day. Consider planting them near taller companion plants that can provide partial shade and help protect the beans from scorching heat.
4. Mulching: Apply a layer of organic mulch around the base of the green bean plants to help conserve moisture, regulate soil temperature, and suppress weed growth. Mulching can be particularly beneficial in the summer, reducing water evaporation and keeping the soil cooler.
5. Support for Pole Beans: If you’re growing pole beans, provide them with a trellis, fence, or other support structure to climb on. Ensure that the support is sturdy enough to withstand strong summer winds, as well as the weight of the beans and foliage.
6. Harvesting: Harvest green beans regularly to promote more continuous production. Pick the beans when they are firm, crisp, and at the desired size. Be vigilant in the summer because pods can mature and become overripe quickly in hot weather.
Remember to adapt your planting and care routine based on your specific climate and local growing conditions. By taking the necessary precautions and providing the right conditions, you can plant green beans in the summer and enjoy a delicious harvest despite the challenges that the season brings.
Planting Green Beans in the Fall
Planting green beans in the fall can be a great way to extend your growing season and enjoy a second harvest. While green beans prefer warm weather, they can still thrive in the cooler temperatures of autumn. Here are some considerations for planting green beans in the fall:
1. Timing: The timing for fall planting of green beans depends on the average date of the first frost in your area. Count backward from that date to determine when to sow the seeds. Aim to plant the green beans about 10-12 weeks before the first expected frost date to allow sufficient time for the plants to mature and produce a harvest.
2. Variety Selection: Choose green bean varieties that have shorter maturation times. Look for varieties labeled as “early” or “bush” that will have a better chance of reaching maturity before colder temperatures and frost arrive.
3. Soil Preparation: Prepare the soil in advance by removing any existing plant debris and weeds. Amend the soil with compost or well-rotted manure to improve its fertility and structure. Ensure that the soil drains well to prevent waterlogging, as excessive moisture can lead to rotting of the bean seeds or roots.
4. Planting Seeds: Sow the green bean seeds directly into the prepared soil. Plant them at the recommended depth specified on the seed packet, usually around 1-2 inches deep. Provide proper spacing between the seeds to allow for healthy plant growth and airflow.
5. Protection from Frost: As fall temperatures drop, it’s important to protect the young green bean plants from frost. Consider using protective covers such as row covers, cloches, or frost blankets to shield the plants during chilly nights. Remove the covers during the day to allow sunlight and airflow.
6. Maintenance: Monitor the moisture levels in the soil and provide regular watering as needed. While fall tends to bring more rainfall, make sure the soil remains consistently moist, but not overly saturated. Remove any weeds that may compete with the green bean plants for nutrients and water.
7. Harvesting: Green beans typically mature within 50-60 days, but this can vary depending on the variety. Harvest the beans when they reach the desired size and are tender. Regular harvesting will encourage the plants to continue producing throughout the fall season.
With proper planning, care, and protection from frost, planting green beans in the fall can be a rewarding experience, providing you with a fresh harvest even as the temperatures start to cool.
Tips for Planting Green Beans
Planting green beans can be a rewarding and enjoyable experience. To maximize your success and ensure a bountiful harvest, here are some helpful tips to keep in mind when planting green beans:
1. Choose the Right Location: Green beans thrive in full sun, so select a planting location that receives at least 6-8 hours of direct sunlight daily. Ensure that the soil is well-draining and rich in organic matter.
2. Pre-soak the Seeds: To help hasten germination, pre-soak the green bean seeds overnight before planting. This can soften the seed coat and promote quicker and more uniform sprouting.
3. Spacing: Proper spacing is crucial for healthy plant growth. Space the seeds according to the recommended guidelines on the seed packet. Give sufficient room between plants to allow for air circulation and future growth.
4. Watering: Green beans require consistent moisture for optimal growth. Water the plants deeply and regularly, especially during dry periods. Avoid overhead watering, as wet foliage can increase the risk of diseases. Consider drip irrigation or soaker hoses to deliver water directly to the soil.
5. Support for Pole Beans: If you’re growing pole beans, provide a trellis, fence, or other supports for the vines to climb. Install the support structure before planting to avoid damaging the roots later when the plants are more established.
6. Weed Control: Keep the area around your green bean plants clear of weeds, as they compete for nutrients, water, and sunlight. Regularly remove any weeds that may sprout and consider applying mulch to help suppress weed growth.
7. Fertilization: Prior to planting, incorporate compost or well-balanced organic fertilizer into the soil to improve its fertility. Avoid using high-nitrogen fertilizers, as they can lead to excessive foliage growth at the expense of bean production.
8. Pest Management: Monitor your green bean plants for common pests like aphids, bean beetles, and slugs. Consider using organic pest control methods such as hand-picking, companion planting, or applying natural insecticides if necessary.
9. Harvest Regularly: Harvest green beans regularly once they reach the desired size. This not only ensures the best flavor and texture but also stimulates the plants to continue producing more beans.
10. Rotate Crops: To prevent the buildup of pests and diseases, practice crop rotation by planting green beans in different areas of your garden each year. This helps maintain soil health and reduces the risk of recurring issues.
By following these tips, you’ll be on your way to a successful green bean harvest, filled with delicious and nutritious beans straight from your garden.
Caring for Green Bean Plants
Proper care of green bean plants is essential to ensure healthy growth and maximize their yield. By following these tips, you can provide the necessary care for your green bean plants throughout their growing season:
1. Watering: Green beans require consistent moisture, especially during dry spells. Water the plants deeply and regularly, aiming to keep the soil evenly moist. Avoid overwatering, as this can lead to root rot. Mulching around the plants can help retain moisture and reduce water evaporation.
2. Weed Control: Keep the area around your green bean plants free from weeds. Weeds compete for nutrients, water, and sunlight, which can hinder the growth of your green beans. Regularly remove weeds by hand or use mulch to suppress their growth.
3. Support for Pole Beans: If you’re growing pole beans, ensure that the support structure is sturdy enough to bear the weight of the plants and their foliage. Regularly check the trellis, fence, or other supports to make sure they remain secure and upright.
4. Pruning: While pruning is not necessary for green bean plants, removing any dead or diseased foliage can help improve air circulation and reduce the risk of fungal diseases. Prune sparingly to avoid unnecessary stress on the plants.
5. Fertilization: Green beans are generally low-maintenance and do not require heavy fertilization. However, if your soil is lacking in nutrients, you can apply a balanced, slow-release fertilizer or incorporate compost into the soil before planting. Avoid excessive nitrogen fertilizer, as it can promote more foliage growth than bean production.
6. Pest Management: Monitor your green bean plants for common pests such as aphids, bean beetles, and spider mites. Regularly inspect the leaves and stems and take immediate action if pests are detected. Consider using organic pest control methods like hand-picking, companion planting, or applying insecticidal soap if necessary.
7. Disease Prevention: Proper spacing, good air circulation, and avoiding excessive moisture can help prevent common fungal diseases such as powdery mildew and bean rust. Remove any infected plant material promptly and provide adequate ventilation around the plants.
8. Harvesting: Regular harvesting of green beans is crucial to maintain plant productivity. Pick the beans when they are young, tender, and at the desired size. Harvesting encourages the plants to continue producing more beans.
By providing proper care, attention, and addressing any issues promptly, you can promote the health and vitality of your green bean plants, resulting in a plentiful and delicious harvest.
Common Pests and Diseases of Green Beans
While growing green beans can be a rewarding experience, it’s important to be aware of the common pests and diseases that can affect your plants. By understanding these potential issues, you can take preventive measures and protect your green bean crop. Here are some of the most common pests and diseases of green beans:
1. Aphids: Aphids are small, soft-bodied insects that feed on the sap of green bean plants. They can cause stunted growth, distorted leaves, and the spread of viral diseases. Regularly inspect your plants for signs of aphid infestation, such as curled and sticky leaves. Consider using insecticidal soap or attracting natural predators like ladybugs to control aphids.
2. Bean Beetles: Bean beetles are small, yellowish-brown insects that feed on the leaves of green beans. They can skeletonize the leaves, leading to decreased plant growth and production. Hand-pick adult beetles from the plants and remove any eggs or larvae that you find. Applying organic insecticides or using row covers can also help prevent infestations.
3. Spider Mites: Spider mites are tiny pests that are difficult to see with the naked eye. They feed on the undersides of leaves and suck out plant juices, leading to yellowing, stippling, and webbing. Hose down the leaves with a strong stream of water to dislodge mites, and consider applying horticultural oil or insecticidal soap to control their population.
4. Powdery Mildew: Powdery mildew is a fungal disease that appears as a white, powdery coating on leaves and stems. It thrives in humid conditions, causing foliage to yellow, distort, and eventually die. Watering at the base of the plants and avoiding overhead watering can help prevent powdery mildew. Consider applying fungicidal sprays or using resistant green bean varieties.
5. Bean Rust: Bean rust is a fungal disease characterized by rusty, orange-brown spots on leaves, stems, and pods. It thrives in warm and humid conditions. To prevent bean rust, ensure good air circulation by providing adequate spacing between plants. Remove infected leaves and apply fungicides if necessary. Using resistant varieties can also help prevent the spread of rust.
6. Root Rot: Root rot is caused by fungal pathogens that attack the roots of green bean plants, resulting in stunted growth, wilting, and eventual plant death. To prevent root rot, ensure proper soil drainage and avoid overwatering. Practice crop rotation and remove infected plants to limit the spread of the disease.
Regular monitoring, proper cultural practices, and early intervention are key in managing pests and diseases in your green bean plants. By taking preventive measures and promptly addressing any issues, you can protect your crop and promote healthy growth and abundant harvests of delicious green beans.
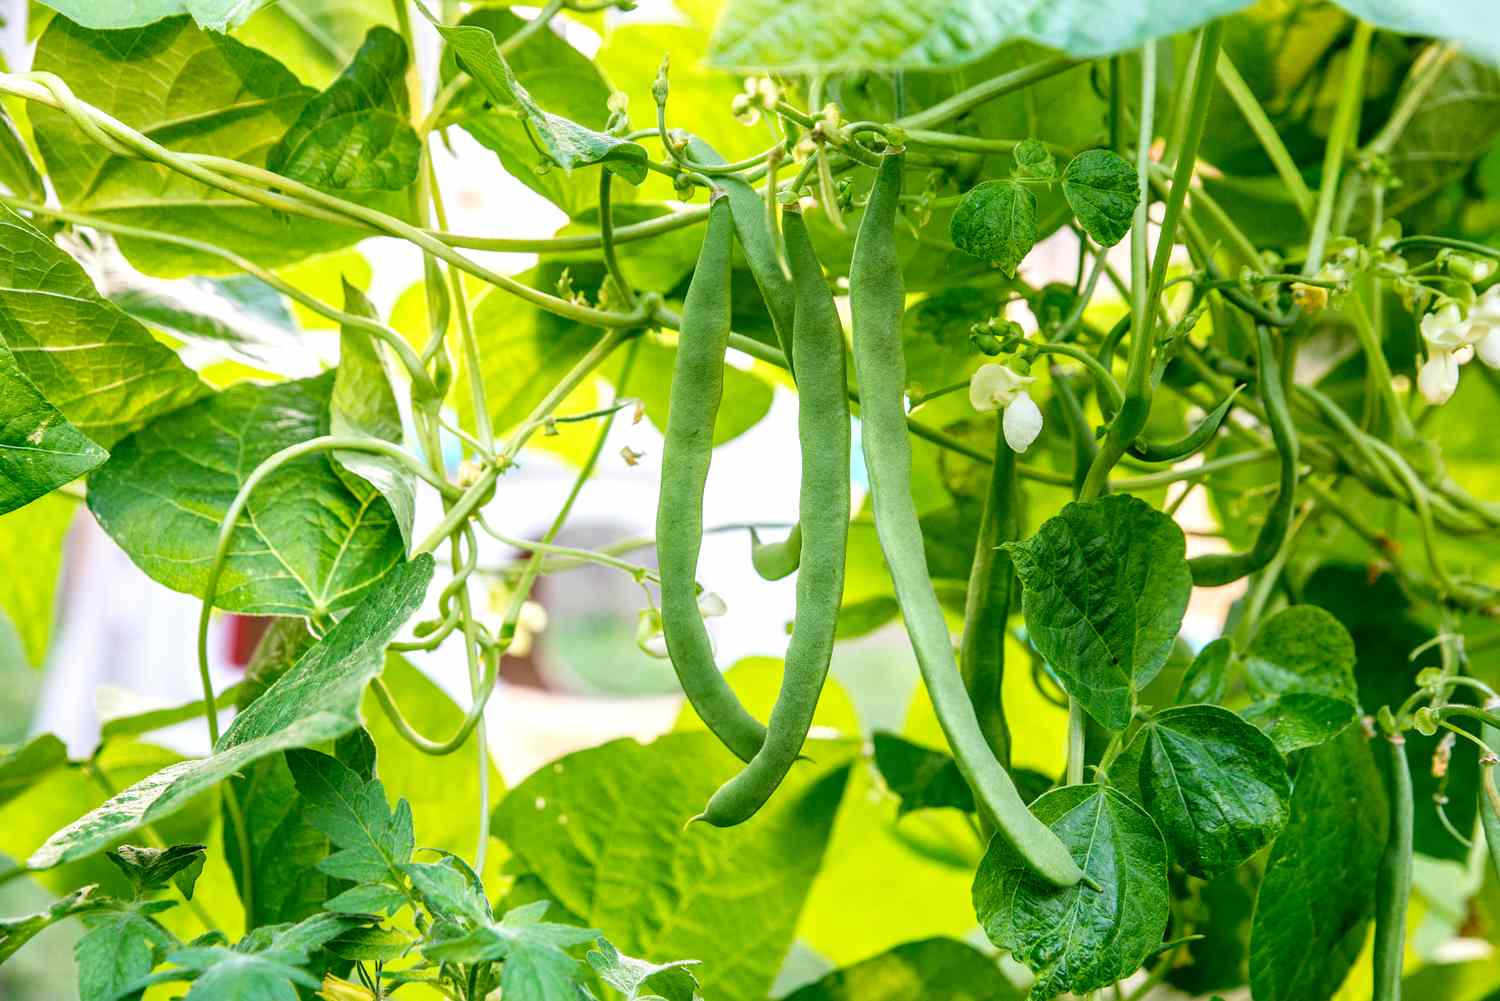
Harvesting Green Beans
Knowing when and how to harvest green beans is crucial to enjoy their fresh, tender texture and optimal flavor. Here are some guidelines to help you harvest your green beans at the right time:
1. Timing: Green beans are typically ready for harvest within 50-60 days after planting, but this can vary depending on the variety. The best time to harvest is when the beans are young and tender, before they become tough and fibrous.
2. Size: The size of the bean depends on the variety you are growing. Generally, green beans are best picked when they are about 4 to 6 inches long for bush beans and 6 to 8 inches long for pole beans. Pick them while they are still crisp and have not yet developed visible seeds inside.
3. Appearance: Look for beans that are smooth, firm, and brightly colored. Avoid harvesting beans that are overly mature or have a shriveled appearance, as this indicates that they are past their prime and may have a tougher texture.
4. Picking Technique: When harvesting green beans, hold the stem near the base of the plant with one hand and use the other hand to gently snap or cut the bean off the vine. Be careful not to damage the plant or nearby beans as you harvest.
5. Regular Harvesting: It’s important to harvest green beans regularly, especially during their peak production period. Regular harvesting stimulates the plants to continue producing and prevents the beans from becoming overripe or tough. Check your plants every 1-2 days to ensure you don’t miss any ready-to-pick beans.
6. Storage: Green beans are best consumed fresh, but they can be stored for a short period. After harvesting, store the beans in a perforated plastic bag or airtight container in the refrigerator. They should stay fresh for about 3-5 days. Avoid washing the beans until you are ready to use them, as excess moisture can lead to spoilage.
Harvesting green beans from your garden is a joyful experience that allows you to savor the fruits of your labor. By following these guidelines, you can enjoy the sweet and tender taste of freshly harvested green beans in your favorite dishes.
Storing Green Beans
Proper storage of green beans is essential to maintain their freshness and flavor for as long as possible. Here are some tips to help you store green beans to keep them crisp and delicious:
1. Preparation: Before storing green beans, inspect them and remove any damaged or moldy beans. Rinse the beans under cool running water to remove any dirt or debris. Allow them to dry completely before storing.
2. Refrigerator Storage: The best way to store green beans is in the refrigerator. Place dry green beans in a perforated plastic bag or wrap them loosely in a paper towel. This helps to maintain proper moisture levels and airflow, preventing spoilage. Store them in the vegetable crisper drawer or a separate section of the fridge, away from fruits or vegetables that produce ethylene gas, which can accelerate the ripening process of green beans.
3. Hydration: To help extend the shelf life of green beans, you can hydrate them by placing a damp paper towel or cloth inside the storage container. This helps to maintain the beans’ moisture levels and keep them crisp.
4. Optimal Temperature: The ideal temperature for storing green beans is around 40°F (4°C). Ensure that your refrigerator is set to this temperature or slightly above to keep the beans fresh and prevent them from freezing.
5. Length of Storage: Green beans are best consumed within a few days of harvesting or purchasing. However, when stored properly, they can remain fresh for up to 5-7 days. Keep in mind that the quality and freshness of green beans will gradually decline the longer they are stored.
6. Freezing: If you have an abundance of green beans and want to preserve them for longer-term storage, consider freezing them. Blanch the beans by briefly immersing them in boiling water, then transfer them to an ice bath to stop the cooking process. Pat them dry and place in freezer bags or containers. Label them with the date and store them in the freezer for up to 8-10 months. Frozen green beans can be used in soups, stews, stir-fries, or as a side dish after properly thawing them.
By following these storage tips, you can enjoy the freshness and flavors of green beans even beyond their harvest season. Proper storage ensures that you have a delicious supply of green beans to enjoy throughout the year.