
Choosing the Right Time
Growing artichokes requires careful consideration of the timing. Artichokes thrive in cool weather, preferring temperatures between 50°F and 75°F (10°C and 23°C). It’s important to choose the right time to plant to ensure the plants have enough time to establish strong roots before winter or the peak summer heat arrives.
When determining the ideal planting time for artichokes, there are a few key factors to consider:
- Climate: The climate in your region plays a crucial role in deciding when to plant artichokes. They tend to grow best in areas with mild winters and cool summers.
- Hardiness zone: Check your USDA hardiness zone to understand the typical weather conditions and frost dates in your area. Artichokes are hardy in zones 8-11, but can also be grown as annuals in cooler regions.
- First and last frost dates: Artichokes are frost-sensitive, so avoid planting them too early in the spring if there’s still a risk of frost. Similarly, make sure to give the plants enough time to mature before the first frost in the fall.
Considering these factors will help you determine the most suitable time to plant artichokes in your specific location. Whether you opt for spring or fall planting, or even starting indoors, ensuring optimal conditions will greatly improve your success rate.
Climate Considerations
Artichoke plants have specific climate requirements to thrive and produce healthy, flavorful buds. Understanding these considerations will help you create an ideal environment for your artichoke garden.
Here are some key climate considerations when growing artichokes:
- Temperature: Artichokes prefer cool temperatures between 50°F and 75°F (10°C and 23°C). They thrive in regions with mild winters and moderate summers. In hotter climates, it’s important to provide adequate shade and regular watering to prevent heat stress.
- Sunlight: Artichokes need at least 6 hours of direct sunlight each day. Choose a planting location that receives full sun, ideally in a spot protected from strong winds.
- Humidity: While artichokes prefer moderate humidity levels, they can tolerate slightly drier conditions. Proper watering is key to maintaining the right moisture level for your plants.
- Soil: Artichokes grow best in well-draining soil with a pH level between 6.5 and 8.0. They can tolerate a range of soil types, including sandy or loamy soil, but adequate drainage is crucial to prevent root rot.
Understanding your local climate and how it aligns with these considerations will guide you in providing the best conditions for your artichoke plants. Adapting your gardening practices to suit your climate will help ensure healthy growth and bountiful harvests.
Spring Planting
Spring is an optimal time to plant artichokes, especially in regions with mild winters. Planting in the spring allows the artichoke plants to establish strong roots and grow vigorously before the peak summer heat arrives.
Here are some steps to follow for successful spring planting:
- Prepare the soil: Before planting, prepare the soil by removing any weeds or debris and loosening it with a garden fork or tiller. Incorporate organic matter, such as compost or well-rotted manure, to improve soil fertility and drainage.
- Choose healthy seedlings or transplants: If you don’t plan on starting artichoke seeds indoors, purchase healthy seedlings or transplants from a reputable nursery. Look for plants with strong stems and healthy leaves.
- Find a suitable location: Select a planting location that receives full sun and provides protection from strong winds. Make sure there’s enough space between plants to allow for proper air circulation and growth.
- Plant the seedlings: Dig a hole that’s slightly larger than the root ball of the seedling. Place the seedling in the hole, ensuring it sits at the same depth as it was in its container. Backfill the hole with soil and gently firm it around the base of the plant.
- Water the plants: After planting, water the newly transplanted seedlings thoroughly to settle the soil and help with root establishment. Maintain consistent soil moisture throughout the growing season.
By following these steps and providing proper care and maintenance, your artichoke plants will flourish during the spring season and reward you with delicious artichoke buds later in the year.
Fall Planting
Fall is another suitable time for planting artichokes, particularly in regions with hot summers. By planting in the fall, you give artichokes a head start before the colder winter months and allow for earlier harvests in the following year.
Here are the steps to follow for successful fall planting:
- Prepare the soil: Clear the planting area of any debris or weeds and loosen the soil using a garden fork or tiller. Adding organic matter, such as compost or aged manure, will enhance the soil structure and fertility.
- Choose suitable varieties: When selecting artichoke varieties for fall planting, look for early-maturing types that can handle the shorter growing season. These varieties will have a better chance of producing usable buds before the onset of winter.
- Plant the artichoke crowns: Artichokes can be propagated from mature crowns, which are the dormant, mature root systems of the plants. Dig a hole deep enough to accommodate the crown, making sure the bud is facing upward. Cover the crown with soil, leaving the bud exposed above the surface.
- Mulch and protect: Apply a layer of organic mulch around the base of the artichoke plants to insulate the soil and protect the crown from winter frost. Additionally, consider using row covers or cloches to shield the plants from harsh weather conditions.
- Monitor watering: While artichokes generally require less water during the winter months, it’s important to provide adequate moisture to prevent the soil from completely drying out. Water deeply but infrequently to maintain soil moisture without saturating the roots.
By following these steps and providing proper care, your artichokes will have a better chance of establishing strong roots and producing a bountiful harvest in the coming year. Fall planting allows you to enjoy the benefits of artichokes earlier in the growing season.
Starting Indoors
If you live in an area with a short growing season or want to get a head start on your artichokes, starting them indoors is a great option. By starting artichoke seeds indoors, you can give the plants a longer growing period and transplant them outdoors when the weather is more favorable.
Here are the steps to successfully start artichokes indoors:
- Choose the right containers: Select containers that are at least 3-4 inches deep and have drainage holes at the bottom. Biodegradable pots or seed trays work well for starting artichoke seeds.
- Sow the seeds: Fill the containers with a well-draining seed starting mix. Place 1-2 artichoke seeds into each container, spacing them about 1 inch apart. Cover the seeds with a thin layer of planting mix and lightly water them.
- Provide the ideal environment: Place the containers in a warm location with temperatures between 70°F and 80°F (21°C and 27°C). Use a heating mat or place the containers on top of a refrigerator to maintain consistent warmth for better germination.
- Ensure proper lighting: Artichokes need ample light for healthy growth. Place the containers near a sunny window or use fluorescent grow lights to provide at least 12-16 hours of light each day. Adjust the lights to keep them a few inches above the seedlings as they grow.
- Transplanting outdoors: When the seedlings have developed a few sets of true leaves and the weather is mild, it’s time to transplant them outdoors. Harden off the seedlings by gradually exposing them to outdoor conditions over the course of a week before planting.
Starting artichokes indoors allows you to control the growing conditions and extend the growing season. With proper care and transplanting, your indoor-started seedlings will adapt well to the outdoor environment and produce healthy artichoke plants ready for harvest.
Preparing the Soil
Proper soil preparation is crucial for the success of your artichoke plants. Artichokes prefer well-draining soil with good fertility and a pH level between 6.5 and 8.0. Preparing the soil before planting will provide a nutrient-rich environment for the plants to thrive.
Follow these steps to prepare the soil for your artichoke garden:
- Clear the area: Begin by clearing the planting area of any weeds, rocks, or other debris. Remove any grass or vegetation, as they can compete with artichoke plants for nutrients and moisture.
- Loosen the soil: Use a garden fork or tiller to loosen the soil to a depth of about 12-18 inches. This will help improve drainage and allow the roots to penetrate the soil easily.
- Amend the soil: Incorporate organic matter, such as compost, well-rotted manure, or aged leaf mold, into the soil. This will enhance fertility, improve soil structure, and increase the moisture-holding capacity of the soil.
- Test the soil: Conduct a soil test to determine the pH level and nutrient content of the soil. Follow the recommendations from the soil test report to amend the soil accordingly. Adding lime or sulfur can help adjust the pH level if needed.
- Apply organic fertilizers: Before planting, apply a balanced organic fertilizer or a slow-release granular fertilizer following the recommended application rates. This will provide the necessary nutrients for healthy plant growth.
- Mulch the soil: Apply a layer of organic mulch, such as straw or wood chips, around the base of the artichoke plants. Mulching helps conserve soil moisture, suppress weed growth, and regulate soil temperature.
By taking the time to properly prepare the soil, you create an optimal growing environment for your artichoke plants. Well-drained, fertile soil will promote healthy root development and overall plant vigor, leading to robust artichoke plants and a successful harvest.
Planting Artichoke Seeds
Planting artichoke seeds is an exciting way to start your artichoke garden from scratch. By following the proper planting techniques, you can ensure successful germination and growth of the seeds into healthy artichoke plants.
Here are the steps to plant artichoke seeds:
- Timing: Artichoke seeds can be directly sown in the garden or started indoors about 8-12 weeks before the last expected frost date, depending on your region. Starting them indoors allows for longer growing seasons in areas with shorter summers.
- Seed starting containers: Use seed trays or small pots with drainage holes to sow the artichoke seeds. Fill the containers with a quality seed-starting mix that is well-draining and sterile to prevent disease.
- Sow the seeds: Plant artichoke seeds about ¼ inch deep in the soil. Space them about 2 inches apart to allow adequate room for seedling growth. Gently pat the soil to firm it over the seeds.
- Provide proper conditions: Place the seed trays or pots in a warm location with temperatures between 70°F and 80°F (21°C and 27°C). Keep the soil moist but avoid overwatering, as excess moisture can lead to fungal diseases.
- Ensure adequate light: Artichoke seeds require sufficient light to germinate. Place the containers near a sunny window or use fluorescent grow lights to provide 12-16 hours of light each day. Maintain a distance between the lights and the seedlings to prevent them from getting too hot.
- Seedling care: Once the seeds germinate and the seedlings have developed a few sets of true leaves, thin them out to ensure proper spacing. Choose the healthiest seedlings and transplant them into larger containers or into the garden when the weather allows.
By following these steps, you can successfully plant artichoke seeds and nurture them into strong, healthy seedlings. Whether you start them indoors or directly sow them in the garden, the right conditions and care will lead to the growth of thriving artichoke plants.
Caring for Artichoke Plants
Caring for artichoke plants is essential to ensure their growth, health, and productivity. By providing proper care, you can help your artichoke plants thrive and produce abundant harvests of delectable artichoke buds.
Here are some key aspects to consider when caring for artichoke plants:
- Watering: Artichokes require regular watering to maintain consistent soil moisture. Water deeply, especially during dry periods, and avoid letting the soil dry out completely. However, be cautious not to overwater, as soggy soil can lead to root rot.
- Fertilizing: Artichokes are heavy feeders and benefit from regular fertilization. Apply a balanced fertilizer every 4-6 weeks throughout the growing season. Incorporate organic matter, such as compost or well-rotted manure, into the soil annually to improve fertility.
- Weed control: Keep the area around the artichoke plants free from weeds, as they can compete for nutrients and water. Regularly cultivate the soil or mulch around the plants to suppress weed growth and maintain a clean growing environment.
- Pest management: Monitor your artichoke plants for common pests such as aphids, snails, or slugs. Use organic pest control methods, like handpicking or introducing beneficial insects, to manage pest infestations and protect the plants.
- Support and staking: As artichoke plants grow, their large leaves and heavy buds may require support. Use stakes or cages to prevent the plants from toppling over and to support the weight of the foliage and developing flowers.
- Pruning: Regularly remove damaged or dead leaves to maintain good airflow and prevent the spread of diseases. Prune back the foliage in late fall or early spring to promote new growth and increase bud production.
- Harvesting: Harvest the artichoke buds when they are firm, plump, and about 3-5 inches in diameter. Cut the stems about an inch below the base of the bud using sharp shears. Harvest regularly to encourage new bud development.
- Winter protection: In regions with harsh winters, mulch around the base of the plants with straw or leaves to insulate the roots. Consider covering the plants with frost blankets or row covers to protect them from freezing temperatures.
By providing proper care, attention, and maintenance, your artichoke plants will grow vigorously and reward you with a bountiful harvest of delicious artichoke buds year after year.
Harvesting Artichokes
Harvesting artichokes is an exciting and rewarding experience. Knowing the right time to harvest and the proper techniques for harvesting will ensure that you enjoy the freshest and most flavorful artichoke buds from your home garden.
Here are the key steps to harvesting artichokes:
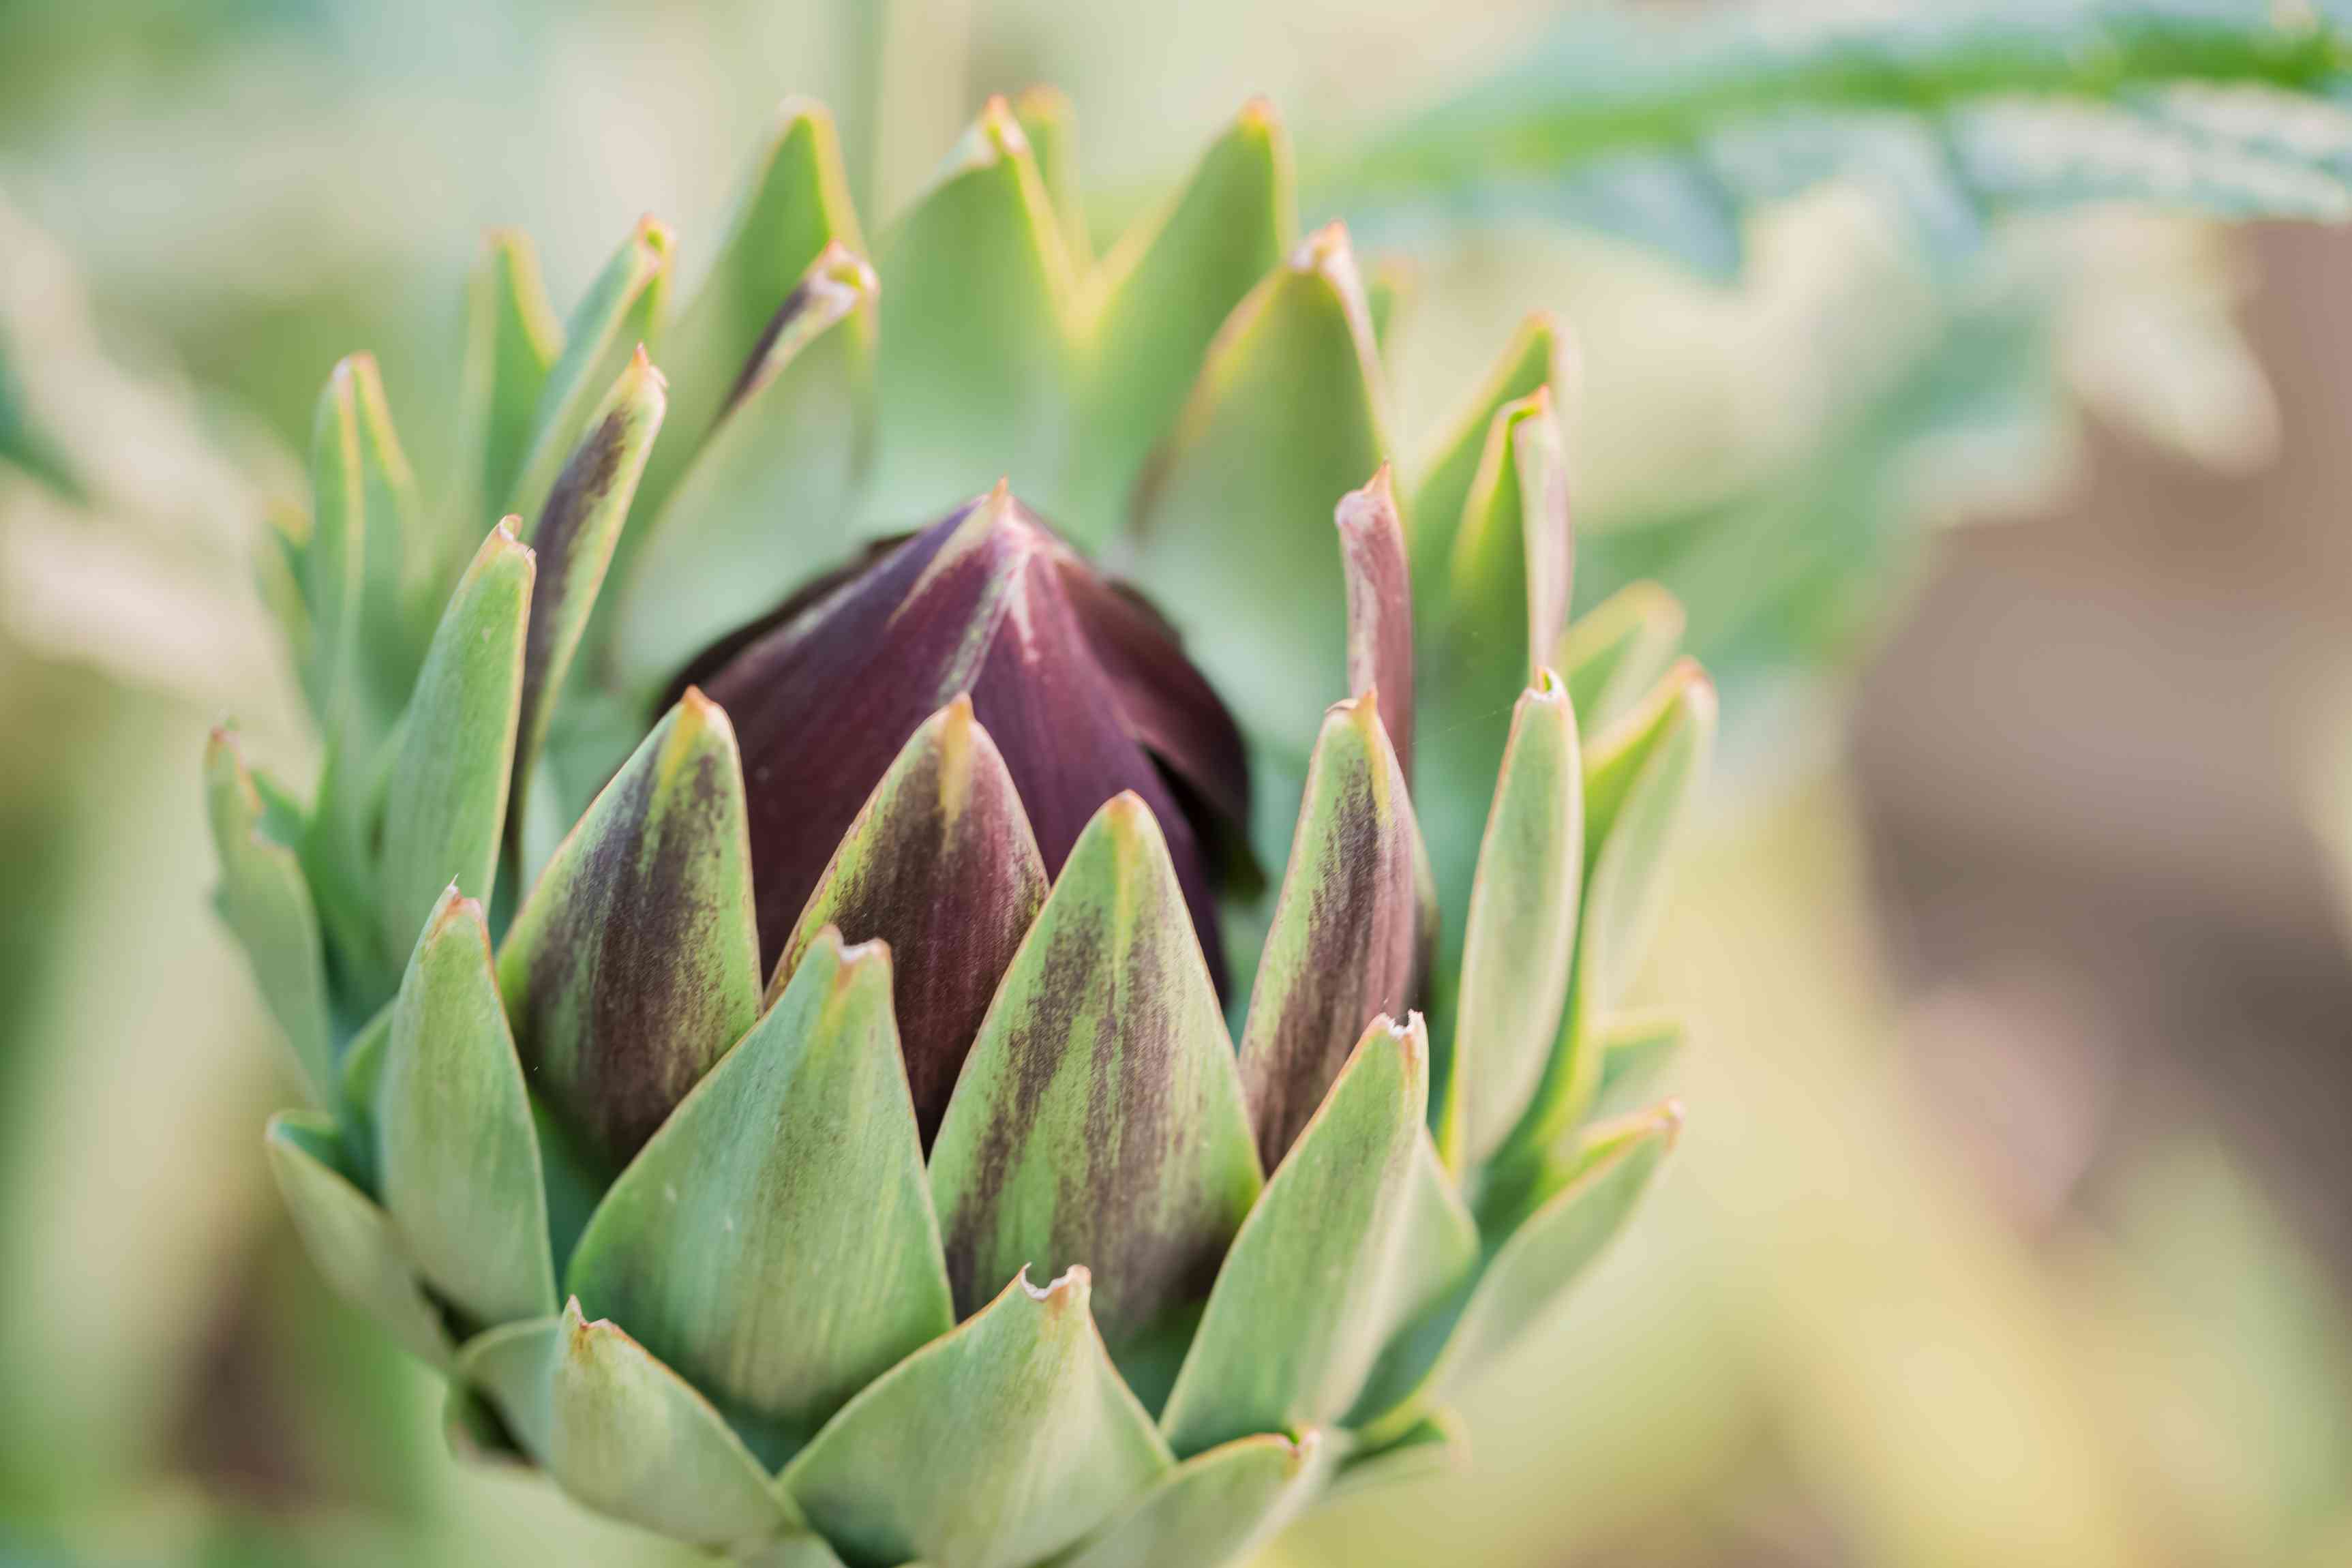
- Monitor bud development: Keep a close eye on the artichoke buds as they mature. Artichokes are ready for harvest before the bracts (the scales on the bud) start to open or separate.
- Choose the proper size: Harvest artichokes when they reach a suitable size for the variety you are growing. Typically, artichoke buds are harvested when they are 3-5 inches in diameter. The buds should feel firm and compact.
- Use sharp shears: Use a pair of sharp gardening shears or a knife to cut the artichoke stems. Cut the stem about an inch below the base of the artichoke bud. Make sure to avoid damaging the nearby foliage or other buds.
- Remove protective bracts: Once harvested, gently peel back and discard the tough outer bracts or leaves from the base of the bud. The remaining tender bracts and heart are the edible portion of the artichoke.
- Store or use immediately: Freshly harvested artichokes can be stored in the refrigerator for up to a week. To maintain freshness, place them in a plastic bag or an airtight container. Artichokes are best when used as soon as possible after harvest for the fullest flavor.
- Continue harvesting: Artichoke plants are known for their ability to produce multiple buds. After harvesting the main central bud, smaller side buds will continue to develop. Harvest these side buds as they reach a suitable size, following the same method as for the main bud.
Remember that the flavor and tenderness of artichoke buds are at their peak immediately after harvest. By following these steps and harvesting at the right time, you can enjoy the freshest artichokes and savor their unique flavor in a variety of culinary preparations.
Tips for Growing Artichokes
Growing artichokes can be a rewarding endeavor, but it requires some specific considerations to ensure success. Here are some helpful tips to help you grow healthy and productive artichoke plants:
- Choose the right variety: Select artichoke varieties that are well-suited to your climate and growing conditions. Some varieties are better suited for cooler climates, while others thrive in warmer regions. Research different varieties to find ones that will perform best in your area.
- Provide ample space: Artichoke plants are large and need adequate space to grow. Make sure to give each plant enough room to spread out, with a spacing of 3-4 feet between plants, to ensure proper air circulation and avoid competition for nutrients.
- Maintain consistent moisture: Artichokes prefer soil that is consistently moist but not waterlogged. Water deeply and regularly, especially during dry spells, to prevent the soil from drying out. Mulching can help retain moisture and reduce weed growth around the plants.
- Protect from extreme temperatures: Artichokes thrive in mild temperatures, so extreme heat or frost can impact their growth and productivity. Provide shade during hot summer days and protect the plants from freezing temperatures in winter with frost blankets or row covers.
- Practice proper pruning: Regularly remove dead or damaged leaves, as well as any side shoots or suckers that emerge from the base of the plant. Prune back spent flower stalks to redirect the plant’s energy towards producing more buds.
- Feed regularly: Artichokes are heavy feeders and benefit from regular fertilization. Apply a balanced fertilizer or compost every 4-6 weeks during the growing season to provide the plants with essential nutrients.
- Watch for pests and diseases: Keep an eye out for common pests such as aphids, snails, or slugs, and take appropriate measures to manage them. Monitor for signs of diseases like powdery mildew or fungal infections, and promptly address any issues to prevent their spread.
- Harvest promptly: Harvest artichoke buds promptly when they reach the desired size and have firm, compact bracts. Delaying harvest can result in tough or woody buds. Continually harvest the main buds and side shoots to encourage continued production throughout the growing season.
By following these tips and providing the necessary care, you can cultivate healthy and productive artichoke plants that will reward you with a bountiful harvest of tasty artichoke buds.