
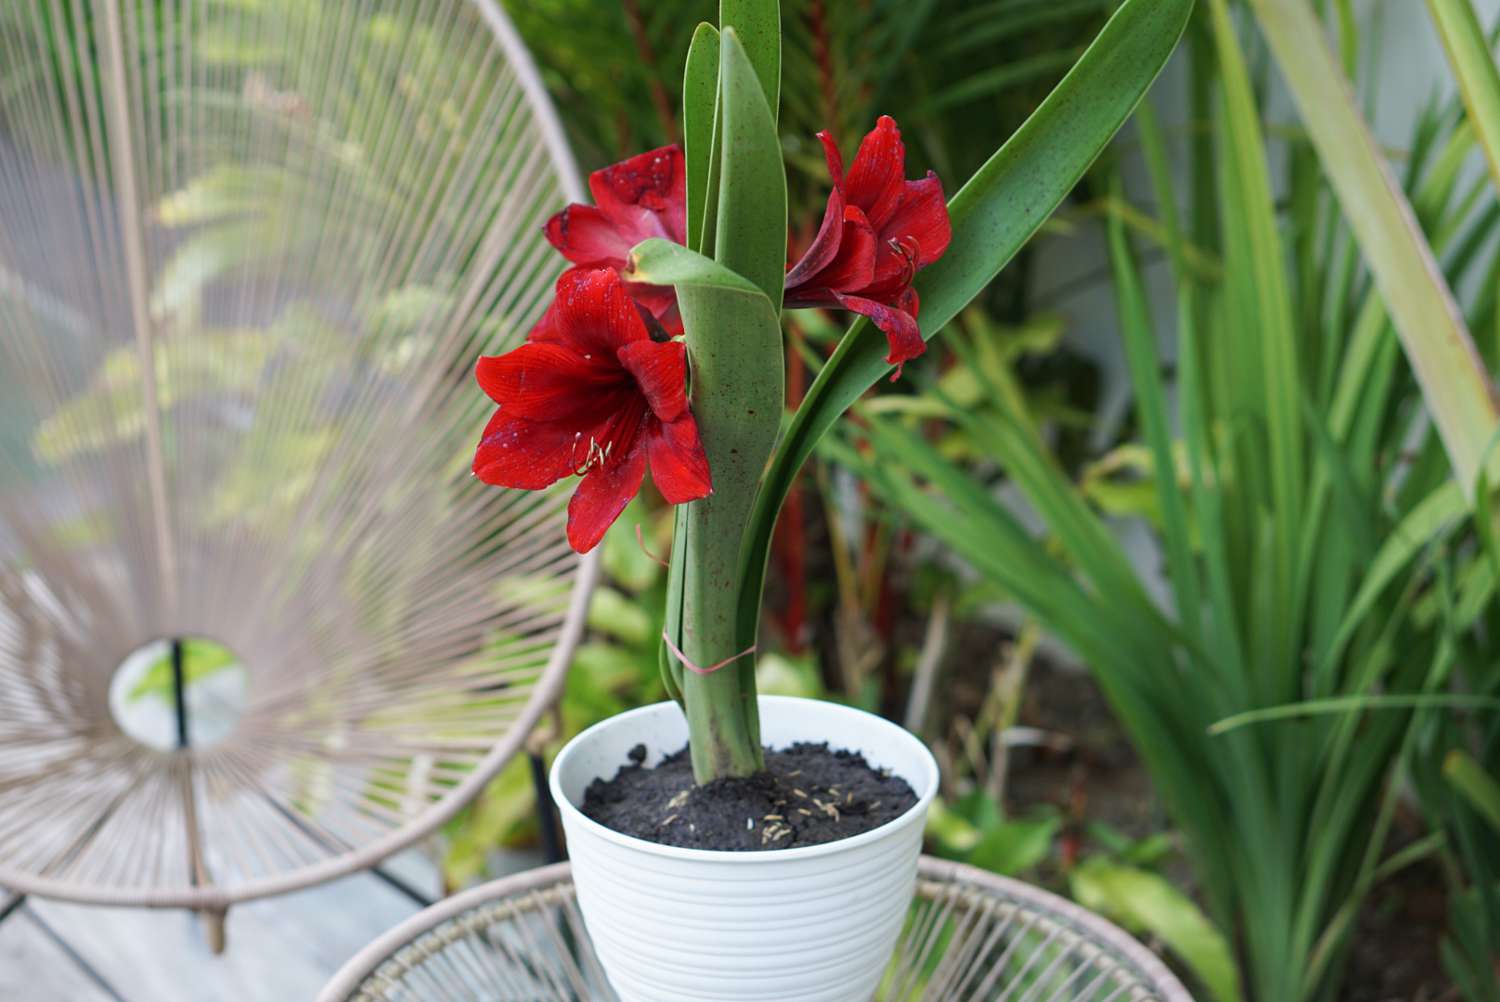
The Best Time to Plant Amaryllis Bulbs Outside
Planting amaryllis bulbs outside can bring a vibrant burst of color to your garden, but proper timing is crucial for their successful growth. The best time to plant amaryllis bulbs outside is in the spring, after the last frost has passed and the soil has started to warm up. This typically falls within the months of March to May, depending on your location.
By planting amaryllis bulbs during this time, you allow them to establish their root system before the hot summer months arrive. This gives them the best chance of survival and optimal growth. Planting too early, when the soil is still cold, can lead to rotting of the bulbs, while planting too late in the season may not allow enough time for the bulbs to establish themselves before the onset of winter.
It’s important to determine the specific planting time for amaryllis bulbs based on your geographical location and the climate in your area. If you live in a colder region, where the winters are harsh, you may need to wait until late spring to plant the bulbs outside. On the other hand, if you reside in a milder climate, you can plant them earlier in the spring, taking advantage of the longer growing season.
Before you start planting, it’s a good idea to check the local frost dates and consult with local gardening resources or experts to ensure that you choose the most suitable timing for your area.
Remember that amaryllis bulbs need a period of dormancy to prepare for their next blooming cycle. Planting them in the spring allows them to go through this natural dormancy period during the colder months, setting the stage for a beautiful display of flowers when the warmer weather returns.
Factors to Consider Before Planting Amaryllis Bulbs Outside
Before you dive into the process of planting amaryllis bulbs outside, there are a few important factors to consider. By taking these factors into account, you can ensure that your amaryllis bulbs thrive and produce stunning blooms in your garden.
1. Climate: Amaryllis bulbs prefer warmer climates and are typically hardy in USDA zones 8 to 11. If you live in a colder region, you can still grow amaryllis bulbs outdoors, but you need to dig them up and store them indoors over winter.
2. Sunlight: Amaryllis bulbs require plenty of sunlight to bloom successfully. Choose a location in your garden that receives at least 6-8 hours of direct sunlight each day. A southern or western exposure is ideal for these sun-loving bulbs.
3. Soil Drainage: Amaryllis bulbs do not perform well in waterlogged soil. Ensure that the planting area has good drainage to prevent root rot. If your soil is heavy and compacted, consider amending it with organic matter, such as compost, to improve drainage.
4. Frost Dates: Amaryllis bulbs are sensitive to frost and freezing temperatures. Make sure to plant them after the last frost date in your area. Planting too early can result in damage or death of the bulbs.
5. Space Availability: Amaryllis bulbs need sufficient space to grow and spread their roots. Plant them at least 6-8 inches apart to allow for proper development. Avoid overcrowding, as it can lead to poor airflow and increased risk of disease.
6. Companion Planting: Consider the plants that will be growing alongside your amaryllis bulbs. Choose companion plants that have similar requirements in terms of sunlight, water, and soil conditions. Good choices include daylilies, coneflowers, and salvia.
7. Pests and Diseases: While amaryllis bulbs are generally resistant to pests and diseases, it’s still important to be vigilant. Check regularly for signs of aphids, spider mites, or fungal infections. Promptly address any issues to prevent them from spreading.
By considering these factors before planting amaryllis bulbs outside, you can create an ideal environment for their growth. This will help ensure that your amaryllis bulbs flourish and reward you with dazzling blooms for seasons to come.
Choosing the Right Location for Amaryllis Bulbs
The right location plays a crucial role in the successful growth of amaryllis bulbs outside. By selecting the ideal spot, you can provide the necessary conditions for these beautiful flowers to thrive and create a stunning display in your garden.
Sunlight: Amaryllis bulbs require abundant sunlight to produce vibrant and healthy blooms. Choose a location that receives full sun or at least 6-8 hours of direct sunlight each day. A southern or western exposure is often the best choice for these sun-loving plants.
Soil Type: Amaryllis bulbs prefer well-drained soil that is rich in organic matter. They can tolerate different soil types, including loam, sandy, or clay soil, as long as it is loose and allows water to drain freely. If your soil is heavy and compacted, consider improving it by adding compost or well-rotted manure to enhance drainage and nutrient content.
Protection from Wind: Amaryllis bulbs have tall, sturdy stems that can be susceptible to wind damage. Choose a location that offers some protection from strong winds, such as near a fence, wall, or shrubbery. This can help prevent the stems from bending or breaking during gusty weather.
Space: Amaryllis bulbs need sufficient space to grow and spread their roots. Plant them at least 6-8 inches apart to allow for proper development. Avoid overcrowding, as it can lead to poor airflow and increased risk of disease. Adequate spacing also ensures that the plants have access to the required nutrients and moisture.
Accessibility: Consider the visibility and accessibility of the chosen location. Planting amaryllis bulbs in a location where you can easily appreciate their beauty will enhance your enjoyment of the flowers. Choose a spot that allows you to observe the majestic blooms up close, whether it’s near a patio, entrance, or along a garden pathway.
Microclimate: Take note of the microclimate within your garden. Certain areas may have slightly different temperature or moisture conditions due to nearby structures or vegetation. Choose a location that suits the specific needs of amaryllis bulbs, considering factors such as humidity, exposure to sunlight, and water drainage.
Companion Plants: Selecting suitable companion plants can enhance the visual appeal of your amaryllis bulbs. Choose plants that have similar sunlight and water requirements, as well as complementary colors and growth habits. The right companions can create a harmonious and eye-catching garden design.
By carefully considering these factors when choosing the location for your amaryllis bulbs, you can provide an optimal environment for their growth and ensure a breathtaking display of vibrant blooms in your garden.
Preparing the Soil for Amaryllis Bulbs
Preparing the soil is an essential step in ensuring the healthy growth and blooming of amaryllis bulbs in your garden. By providing the right soil conditions, you can give these stunning flowers the best chance to thrive and create a visually captivating display.
Soil Testing: Before planting amaryllis bulbs, it’s a good idea to test the soil pH and nutrient levels. A pH between 6.0 and 7.0 is ideal for amaryllis bulbs. Soil testing kits are readily available at local garden centers or online, and they can provide you with valuable information on the soil’s composition and any necessary amendments.
Loosening the Soil: Amaryllis bulbs appreciate loose soil that allows for good root development and proper drainage. Begin by removing any weeds or grass from the planting area. Then, gently loosen the soil with a garden fork or tiller, being careful not to damage the bulbs that may already be planted there.
Amending the Soil: If your soil is heavy and lacks organic matter, amending it will improve its texture and fertility. Incorporate well-rotted compost, aged manure, or peat moss into the soil to enhance its drainage and provide essential nutrients. Work the amendments into the top 8-10 inches of soil.
Fertilizer: Amaryllis bulbs benefit from a nutrient-rich environment. Before planting, incorporate a balanced slow-release fertilizer into the soil. Choose a fertilizer with equal amounts of nitrogen, phosphorus, and potassium (N-P-K), following the recommended application rates. This will provide a steady supply of nutrients to the bulbs throughout the growing season.
Organic Matter: Adding organic matter to the soil not only improves its structure but also provides essential nutrients that promote healthy growth. Compost, well-rotted manure, or leaf mold can enhance the soil’s fertility and moisture retention capabilities. Mix these organic materials into the soil thoroughly.
Soil Moisture: Amaryllis bulbs require well-drained soil, but they also need adequate moisture to thrive. Ensure that the soil is moist but not waterlogged at planting time. After planting, water the bulbs deeply but infrequently, allowing the soil to dry out slightly between waterings. This will encourage the bulbs to establish their roots and prevent rotting.
Mulching: Applying a layer of organic mulch around the planted amaryllis bulbs can help conserve soil moisture, suppress weeds, and regulate soil temperature. Use a 2-3 inch layer of mulch, such as straw, wood chips, or shredded bark, taking care not to cover the base of the bulbs.
By taking the time to prepare the soil properly for amaryllis bulbs, you create an ideal growing environment that supports their growth and ensures an impressive display of vibrant blooms.
How to Plant Amaryllis Bulbs Outside
Planting amaryllis bulbs outside is a straightforward process that can be accomplished with a few simple steps. By following these guidelines, you can ensure that your bulbs are planted correctly, giving them the best chance to thrive and produce beautiful blooms.
1. Selecting Healthy Bulbs: Choose plump and firm amaryllis bulbs without any signs of rot or damage. Larger bulbs often produce larger flowers, so opt for bulbs that are at least 2-3 inches in diameter.
2. Digging the Planting Hole: Dig a hole that is about 6-8 inches deep and wide enough to accommodate the bulb and its roots. If planting multiple bulbs, space them at least 6-8 inches apart to allow room for growth.
3. Preparing the Bulb: Before planting, remove any loose or dead scales from the bulb, but be careful not to damage the fleshy base. Leave intact any healthy, firm scales that cover the bulb.
4. Placing the Bulb: Place the bulb in the planting hole with the pointed end facing upward and the flat base at the bottom. Position the bulb so that the top third is exposed above the soil surface.
5. Backfilling the Hole: Fill the planting hole with the excavated soil, gently firming it around the bulb. Ensure that the bulb is secure in the soil but avoid compacting the soil too tightly, as this can hinder root growth.
6. Watering: After planting, water the bulbs thoroughly to settle the soil and initiate root growth. Provide enough water to moisten the soil but avoid waterlogging. Subsequent watering should be done when the top inch of soil feels dry.
7. Mulching: Apply a layer of organic mulch, such as straw or wood chips, around the planted bulbs. Mulch helps conserve moisture, suppresses weed growth, and regulates soil temperature.
8. Staking (if necessary): If your region experiences strong winds or if the planting area is exposed, consider staking the amaryllis plants to provide support for their tall stems. Use stakes or plant supports placed near the bulbs, being mindful not to damage the bulbs or roots.
9. Monitoring and Maintenance: Throughout the growing season, monitor the plants for any signs of pests, diseases, or nutrient deficiencies. Water as needed, ensuring that the soil remains slightly moist but not waterlogged. Remove spent flowers to encourage continuous blooming.
By following these planting steps and providing proper care, you can set the stage for the successful growth and stunning blooms of amaryllis bulbs in your outdoor garden.
Caring for Amaryllis Bulbs Throughout the Season
Proper care is vital to ensure the healthy growth and blooming of amaryllis bulbs throughout the growing season. By following a few essential care practices, you can help your amaryllis bulbs thrive and produce stunning flowers in your garden.
Watering: Amaryllis bulbs prefer moist but not waterlogged soil. Water the bulbs deeply when the top inch of soil feels dry, allowing the excess moisture to drain away. Avoid overwatering, as it can lead to rotting. During hot and dry periods, monitor the soil moisture more frequently and adjust your watering accordingly.
Fertilizing: To support healthy growth and prolific flowering, fertilize amaryllis bulbs with a balanced, slow-release fertilizer during the active growing season. Apply the fertilizer according to the package instructions, typically every 6-8 weeks. Avoid over-fertilizing, as it can result in excessive foliage growth and fewer flowers.
Deadheading: Removing spent flowers promptly not only keeps the plants looking tidy but also encourages continued blooming. Cut the faded flowers down to the base of the stem, taking care not to damage the emerging buds or leaves. This practice redirects the plant’s energy towards producing new blooms.
Supporting Tall Stems: Amaryllis stems can become top-heavy, especially when in full bloom. Provide support for the tall stems to prevent them from bending or breaking. Use stakes or plant supports placed near the bulbs, being careful not to damage the bulbs or roots. Secure the stems to the support using soft ties or twine, allowing them to grow upward without bending.
Pest and Disease Control: Monitor amaryllis bulbs regularly for signs of pests, such as aphids or spider mites, and promptly address any infestations. If fungal diseases are a concern, avoid overhead watering and ensure good ventilation to minimize high humidity. If necessary, apply organic or chemical treatments following label instructions to control pests or diseases.
Protecting from Extreme Weather: Amaryllis bulbs are sensitive to extreme weather conditions. During periods of intense heat, provide some shade or provide mulch to cool the soil. In regions with freezing winters, dig up the bulbs before the first frost and store them in a cool, dry location until spring. Return the bulbs to the garden once the danger of frost has passed.
Observing Growth Progress: Throughout the season, observe the growth progress of your amaryllis bulbs. Note the emergence of new leaves, the development of buds, and the lengthening of stems. This will give you a sense of how well your bulbs are performing and allow you to make any necessary adjustments to their care.
By providing proper care and attention to your amaryllis bulbs throughout the growing season, you can enjoy their vibrant and stunning blooms, adding beauty and elegance to your garden.
Protecting Amaryllis Bulbs from Extreme Weather
Amaryllis bulbs are susceptible to damage from extreme weather conditions, including intense heat and freezing temperatures. By taking precautions and implementing protective measures, you can safeguard your amaryllis bulbs and ensure their survival through challenging weather situations.
Hot Summers: In regions with scorching summers, provide some shade for your amaryllis bulbs. This can be achieved by planting them in a partially shaded area or providing temporary shade using umbrellas, shade cloth, or nearby larger plants. Shade helps to prevent the bulbs from overheating and reduces moisture loss through evaporation.
Cooling the Soil: Mulching the soil around the amaryllis bulbs can help cool the soil during hot summer months. Apply a layer of organic mulch, such as straw or wood chips, around the base of the plants. Mulch helps to regulate soil temperature, retain moisture, and protect the roots from the heat.
Freezing Winters: Amaryllis bulbs are not frost-tolerant and can sustain damage or die when exposed to freezing temperatures. In regions where winters are frosty, it is important to dig up the bulbs before the first frost. Use a garden fork to carefully lift the bulbs from the ground, taking care not to damage the roots.
Storing Bulbs: After lifting the bulbs, brush off any excess soil and trim back the foliage, leaving about an inch of the stem attached to the bulb. Allow the bulbs to dry in a cool, dry place for a few days. Once they are dry, store them in a well-ventilated container with dry peat moss, perlite, or vermiculite to prevent them from drying out completely. Store the bulbs in a cool, dark location with temperatures around 50-55°F (10-13°C).
Spring Planting: In early spring, typically after the risk of frost has passed, you can safely replant the stored amaryllis bulbs in the garden. Amend the soil if necessary, following proper planting guidelines, and provide them with the necessary care to jump-start their growth and flowering.
Winter Protection: If your region experiences mild winters, you may choose to leave the amaryllis bulbs planted in the ground. However, it is still important to protect them from severe cold snaps. Apply a thick layer of insulating mulch, such as straw or leaves, around the bulbs to help protect them from freezing temperatures. This extra layer of insulation will help regulate soil temperature and prevent root damage.
Monitoring: Throughout extreme weather conditions, monitor the condition of your amaryllis bulbs regularly. Pay attention to signs of stress, such as wilting, discoloration, or decay. Adjust your protective measures accordingly, providing additional shade or insulation as needed.
By being proactive and implementing protective measures, you can shield your amaryllis bulbs from extreme weather conditions and increase their chances of surviving and thriving in different climates.
When to Expect Blooms from Amaryllis Bulbs
Amaryllis bulbs are known for their stunning and vibrant blooms that can bring a burst of color to any garden or indoor space. If you’re wondering when to expect these breathtaking flowers to appear, there are a few key factors to consider.
Growth Rate: Amaryllis bulbs, once planted and properly cared for, have a relatively fast growth rate. Typically, you can expect to see blooms within 6-8 weeks after planting, although this can vary depending on various factors.
Planting Time: The time of year when you plant your amaryllis bulbs can affect when the flowers will appear. If you plant the bulbs in the spring, after the last frost has passed, you can expect blooms to start appearing in late spring to early summer. On the other hand, if you plant them indoors for winter bloom, they typically start flowering in late winter to early spring.
Variety and Cultivar: Different varieties and cultivars of amaryllis can have varying bloom times. Some may bloom earlier than others, while some may have a longer bloom period. When selecting your amaryllis bulbs, consider the specific variety and the expected bloom time for that particular type.
Environmental Conditions: The environmental conditions in which your amaryllis bulbs are grown can also impact the timing of the blooms. Factors such as sunlight exposure, temperature, and proper care, including watering and fertilizing, can influence the flower development and blooming time.
Indoor vs. Outdoor Growth: Amaryllis bulbs can be grown both indoors and outdoors. When grown indoors, under controlled conditions, the blooming time can be more predictable. Indoor-grown bulbs are often forced to bloom during specific times, such as during the holiday season. Outdoor-grown bulbs may bloom slightly later due to the influence of natural seasonal changes.
Repeat Blooming: Amaryllis bulbs have the ability to produce multiple blooms on a single stem or multiple stems. After the initial bloom, you may observe additional flowers appearing. This can extend the overall blooming period and provide ongoing beauty in your garden or home.
Growth Stage at Purchase: If you purchase amaryllis bulbs that are already in an advanced growth stage with a visible flower bud, you can expect blooms to appear sooner compared to bulbs in an earlier growth stage. Some bulbs sold as “pre-chilled” may also bloom more quickly.
While the exact timing of amaryllis blooms can vary, these general guidelines can give you an idea of when to expect the stunning flowers to grace your garden or indoor space. By providing the right conditions and proper care, you can maximize the chances of your amaryllis bulbs blooming beautifully and on schedule.
Harvesting and Storing Amaryllis Bulbs at the End of the Season
At the end of the growing season, it’s important to properly harvest and store amaryllis bulbs to ensure their continued health and successful blooming in the following year. Proper handling and storage practices will help maintain the bulbs’ vitality, allowing them to produce stunning blooms season after season.
Harvesting: Once the blooming period is over and the foliage begins to wither and turn yellow, it’s time to harvest the amaryllis bulbs. Use a clean, sharp knife or gardening shears to cut the foliage about 1-2 inches above the bulb. Be careful not to damage the bulb or its surrounding roots during this process.
Drying: After harvesting, allow the bulbs to dry for a few days in a cool, shaded area. This drying period helps the bulb gradually go into dormancy and prepares it for storage. Avoid exposing the bulbs to direct sunlight or extreme temperatures, as this can cause moisture loss or damage.
Removing Soil: Once the bulbs have dried, gently brush away any excess soil adhering to them. Be careful not to remove the outermost dry layers of the bulb, as these layers protect the inner tissues during storage.
Inspecting for Damage and Disease: Examine the bulbs closely for signs of damage or disease. Discard any bulbs that show signs of rot, injury, or extensive damage. This will help prevent the spread of diseases and ensure that only healthy bulbs are stored for future use.
Storage Conditions: Amaryllis bulbs require proper storage conditions to maintain their dormant state. Store the bulbs in a cool, dry, and well-ventilated area with temperatures between 50-55°F (10-13°C). The storage location should be free from excess moisture, direct sunlight, and extreme temperature fluctuations.
Storage Containers: Choose storage containers that allow proper air circulation and help maintain a consistent level of moisture. Perforated paper bags, mesh bags, or cardboard boxes with ventilation holes are good options. Avoid using sealed, airtight containers, as these can trap excess moisture and lead to bulb rotting.
Storage Medium: To help retain moisture around the bulbs without causing excess dampness, place the bulbs in a storage medium such as dry peat moss, perlite, or vermiculite. These materials help regulate moisture levels around the bulbs and prevent them from drying out or becoming too moist during storage.
Periodic Inspection: Regularly check the stored amaryllis bulbs during the dormant period to ensure they remain healthy. Discard any bulbs that show signs of decay or disease. If necessary, adjust the storage medium or conditions to maintain optimal bulb health.
Pre-Planting Preparation: About 6-8 weeks prior to the desired planting time, remove the stored bulbs from storage. Inspect them once more to ensure they are in good condition and free from any physical damage. Trim any dried or withered roots and prepare the bulbs for planting, following the appropriate planting guidelines.
By carefully harvesting and storing amaryllis bulbs at the end of the season, you can preserve their quality and ensure their successful growth and blooming in the next season. Proper storage practices contribute to the longevity of these beautiful flowers, providing you with enjoyment for years to come.