
Choosing a Healthy Amaryllis Bulb
When it comes to planting amaryllis bulbs, choosing a healthy bulb is essential for a successful outcome. Here are some tips to help you select the perfect bulb for your garden or indoor display.
1. Size Matters: Look for bulbs that are large and firm to the touch. Generally, the larger the bulb, the more flowers it will produce.
2. Inspection: Examine the bulb thoroughly for any signs of damage or disease. Avoid bulbs with soft spots, mold, or rot. It’s important to choose a bulb that is clean and free from any blemishes.
3. Bulb Neck: Check the base of the bulb, also known as the neck, to ensure it is intact and not dried out. A healthy bulb should have a smooth neck without any signs of shriveling or damage.
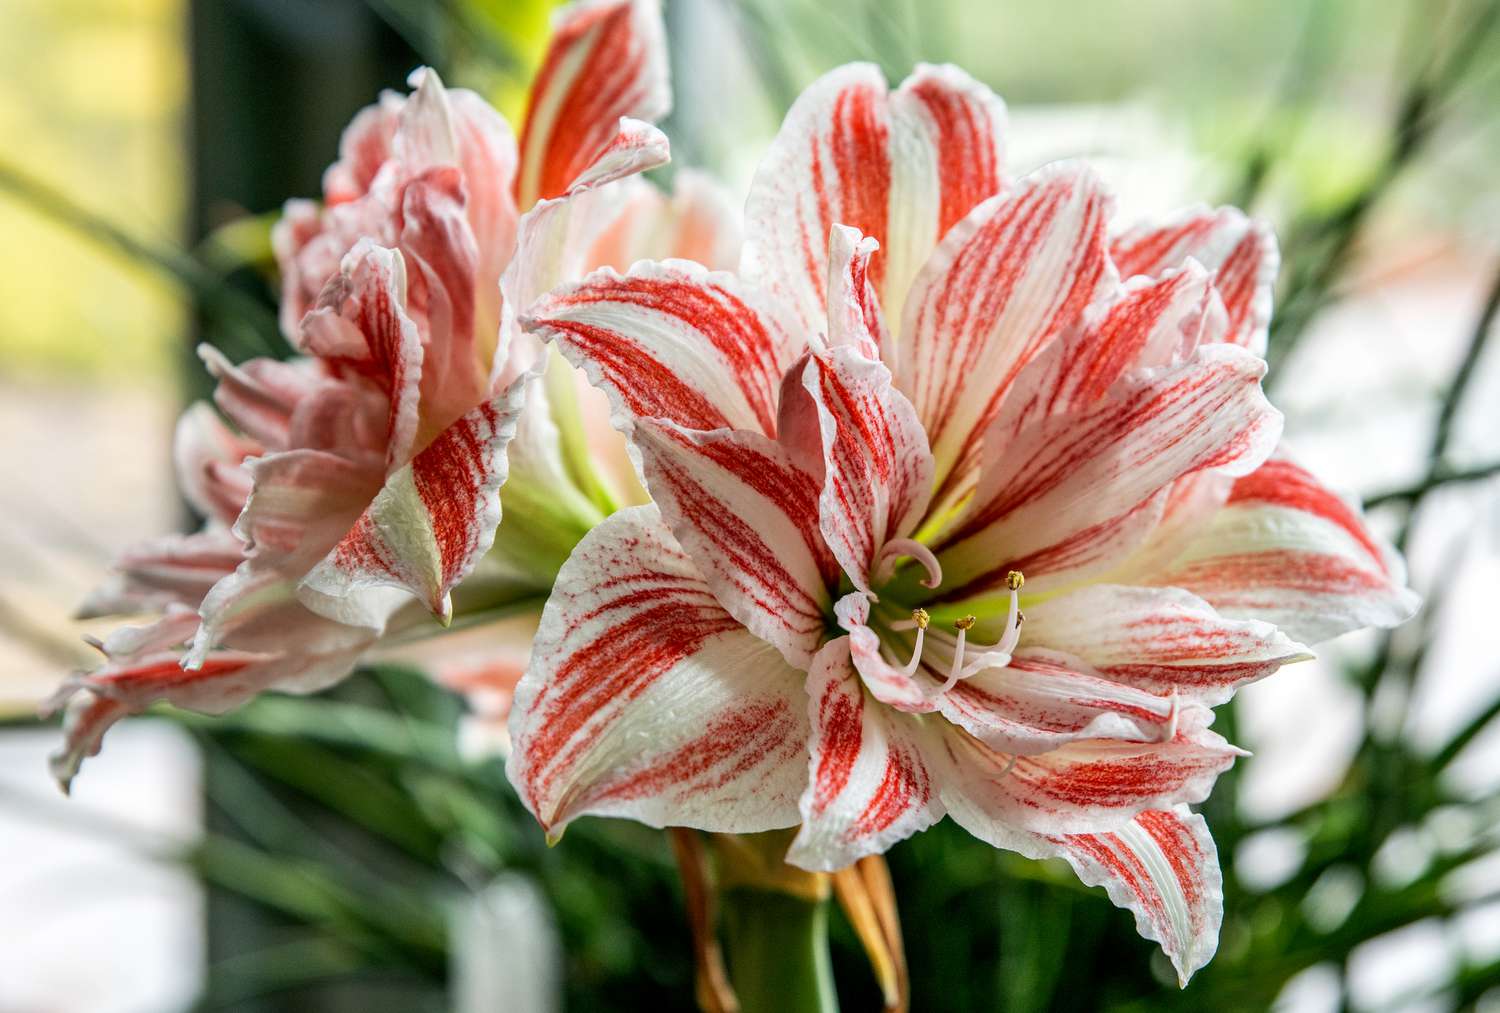
4. Variety Selection: Consider the variety of amaryllis you want to grow. There are numerous colors and patterns available, so choose a bulb that matches your desired aesthetic.
5. Supplier Reputation: Purchase bulbs from reputable nurseries or garden centers to ensure quality. Buying from a reliable source reduces the risk of obtaining inferior or diseased bulbs.
6. Time of Purchase: Amaryllis bulbs are typically available for purchase in the fall and early winter. Try to buy your bulbs during this time to ensure you get the best selection and freshest bulbs.
By following these guidelines, you can select a healthy amaryllis bulb that will provide you with beautiful blooms. Remember, a healthy start leads to a flourishing plant and an impressive display of vibrant flowers in the future.
Preparing the Soil and Container
Once you have chosen a healthy amaryllis bulb, the next step is to prepare the soil and container for optimal growth. Here’s how to ensure the perfect environment for your amaryllis:
1. Soil Selection: Amaryllis bulbs thrive in well-draining soil. Choose a potting mix that is specifically formulated for bulbs or create your own by combining equal parts of peat moss, perlite, and garden soil.
2. Container Choice: Select a container that has drainage holes at the bottom to prevent waterlogging. A deep and wide pot is ideal, allowing ample space for the bulb and root system to grow.
3. Potting Process: Fill the container with the prepared soil mix, leaving about two inches of space at the top for watering. Gently place the bulb in the center of the container, ensuring that the top third of the bulb remains above the soil surface.
4. Soil Compacting: Lightly press the soil around the bulb to eliminate any air pockets and provide stability. Avoid compacting the soil too much, as this can hinder root growth and water drainage.
5. Watering: Give the soil a thorough watering after planting to settle it around the bulb. However, make sure not to overwater, as excessive moisture can lead to bulb rot. Allow the soil to dry slightly between waterings.
6. Location: Place the container in a location with indirect sunlight. Amaryllis plants prefer bright, indirect light, so avoid placing them in direct sunlight, as it can cause leaf scorching.
By following these steps, you’ll provide the right conditions for your amaryllis bulb to sprout and thrive. Proper soil preparation and choosing the right container will give your amaryllis plant a solid foundation for healthy growth and stunning blooms in the future.
Planting the Amaryllis Bulb
Now that your soil and container are ready, it’s time to plant the amaryllis bulb. Follow these steps for successful planting:
1. Positioning: Place the bulb in the center of the container, with the pointed end facing upward. Ensure that the top third of the bulb remains above the soil surface.
2. Spacing: If planting multiple bulbs, space them at least a few inches apart to allow enough room for growth and prevent overcrowding.
3. Anchoring: Gently press the bulb into the soil, making sure it is stable and secure. Avoid applying excessive force, as this can damage the bulb.
4. Soil Coverage: Cover the bulb with the remaining soil, leaving the top portion exposed. The exposed part will develop the stem and flowers, while the covered part will form the roots.
5. Finishing Touch: Gently water the soil again to ensure proper moisture levels. Avoid splashing water directly onto the bulb, as it can lead to rot.
6. Labeling: It’s a good idea to label the container with the planting date and the variety of amaryllis. This way, you can keep track of your plants and have a clear reference for future care and maintenance.
With the amaryllis bulb now planted, it’s time to move on to the next steps of care, such as watering, providing sunlight, and fertilizing. By planting the bulb correctly, you’ll set the stage for healthy growth and the emergence of stunning amaryllis blooms.
Watering and Providing Proper Drainage
Watering plays a crucial role in the growth and development of your amaryllis plant. Proper moisture management and providing adequate drainage are essential to ensure the health of your bulb. Here are some tips to help you water your amaryllis effectively:
1. Watering Frequency: Amaryllis prefers a moist but not soggy environment. Water your plant when the top inch of soil feels dry to the touch. Be careful not to overwater, as excessive moisture can lead to root rot and bulb damage.
2. Watering Technique: When watering, thoroughly saturate the soil until water drains out of the bottom of the container. This helps ensure that the roots receive adequate moisture and prevents the buildup of excess water.
3. Drainage Holes: Ensure that your container has drainage holes at the bottom to allow excess water to escape. If your container doesn’t have drainage holes, consider creating some by drilling or using a liner with holes.
4. Removing Excess Water: After watering, check if there is any standing water in the saucer or tray beneath the container. Empty the excess water to prevent the roots from sitting in water, which can lead to root rot.
5. Avoiding Standing Water: Don’t let the amaryllis bulb sit in standing water. If water collects in the bottom of the container, use pebbles or a raised platform to lift the bulb above the water level.
6. Humidity Considerations: Amaryllis benefits from moderate humidity levels. If you live in a dry climate, consider placing a tray of water near the plant to increase humidity. Avoid misting the foliage directly, as it can promote fungal diseases.
By following these watering and drainage practices, you will provide the right amount of moisture for your amaryllis plant. Remember to monitor the soil moisture regularly and adjust your watering schedule accordingly to promote healthy growth and vibrant blooms.
Providing the Right Amount of Sunlight
Sunlight is vital for the growth and flowering of amaryllis plants. Providing the right amount of sunlight will ensure that your amaryllis receives the necessary energy to thrive. Here are some guidelines for optimal sun exposure:
1. Indirect Sunlight: Amaryllis plants prefer bright, indirect sunlight. Place your plant near a window where it will receive bright, filtered light throughout the day. Direct sunlight can scorch the leaves, so avoid placing your amaryllis in a location with intense sun exposure.
2. Morning Light: Morning sunlight is generally less intense and more beneficial to amaryllis plants. The soft, indirect morning light promotes healthy growth and helps to avoid leaf burn. If possible, place your amaryllis where it can enjoy the gentle morning sun.
3. Rotation: Amaryllis plants tend to grow towards the light source. To promote even growth, rotate the container every few days to ensure that all sides of the plant receive adequate sunlight. This will prevent the plant from leaning or becoming unbalanced.
4. Artificial Lighting: If you don’t have access to natural sunlight or your space lacks sufficient light, consider using artificial grow lights. LED or fluorescent lights specifically designed for plant growth can provide the necessary spectrum and intensity of light for your amaryllis.
5. Light Duration: Amaryllis plants require around 6-8 hours of light per day. To ensure the right balance, avoid keeping your amaryllis in complete darkness for prolonged periods. Similarly, excessive exposure to light, especially during the night, can disturb the plant’s natural growth cycle.
Remember to monitor the response of your amaryllis to its light conditions. If the leaves become pale or yellowish, it may indicate that the plant is receiving too much direct sunlight. On the other hand, if the leaves are elongated and stretching towards the light, it may indicate insufficient light exposure.
By providing the right amount and type of sunlight, you will help your amaryllis plant flourish and produce spectacular blooms. Paying attention to its light requirements throughout its growth cycle will ensure a stunning and healthy display of vibrant flowers.
Fertilizing the Amaryllis Plant
Fertilizing your amaryllis plant is crucial for providing the necessary nutrients to support healthy growth and vibrant blooms. Here are some tips for fertilizing your amaryllis effectively:
1. Timing: Start fertilizing your amaryllis plant a month after planting and repeat every two to four weeks throughout the active growth period. Typically, this is from spring to early fall.
2. Fertilizer Selection: Use a balanced water-soluble fertilizer specifically formulated for flowering plants. Look for a fertilizer with an N-P-K ratio of 10-10-10 or 14-14-14 to provide a good balance of essential nutrients.
3. Dilution: Follow the instructions on the fertilizer packaging for proper dilution. Over-fertilizing can cause damage to the plant, so be sure to mix the fertilizer according to the recommended ratio.
4. Application Method: When applying the fertilizer, pour it into the soil around the base of the plant. Avoid getting the fertilizer directly on the leaves, as this can cause burns.
5. Watering after Fertilizing: After applying the fertilizer, water the plant thoroughly to help the nutrients penetrate the soil and reach the roots. This will also prevent any fertilizer buildup in the soil.
6. Ceasing Fertilization: Stop fertilizing your amaryllis plant after it has finished blooming and enters its dormant phase. During dormancy, the plant does not require additional nutrients, and fertilizing can interfere with its natural cycle.
7. Organic Alternatives: If you prefer organic options, you can use compost or well-rotted manure to nourish your amaryllis plant. Apply them to the soil surface and lightly mix them in.
Fertilizing your amaryllis plant enhances its overall health and encourages robust growth. However, remember to follow the recommended guidelines and avoid excessive fertilizer application, as it can lead to nutrient imbalances and damage the plant. With proper fertilization, your amaryllis will reward you with beautiful, long-lasting blooms.
Supporting and Staking the Amaryllis Plant
As your amaryllis plant grows, it may require support to prevent it from toppling over or bending under its own weight. Supporting and staking your amaryllis plant will ensure that it remains upright and healthy. Follow these tips for providing proper support:
1. Timing: Install supports and stakes soon after planting or when the plant begins to show signs of growth. This will prevent damage to the stems and make it easier to position the supports without disturbing the roots.
2. Stake Selection: Choose stakes that are strong, sturdy, and tall enough to accommodate the ultimate height of your amaryllis plant. Bamboo stakes or metal plant stakes are popular choices.
3. Positioning: Place the stakes around the perimeter of the bulb, a few inches away from the base. Be careful not to damage the bulb or the roots while inserting the stakes into the soil.
4. Tying the Stems: Use soft plant ties, twine, or fabric strips to gently secure the stems of the amaryllis to the stakes. Avoid tying too tightly, as it can restrict growth and cause damage.
5. Multiple Stakes: If the amaryllis has multiple stems, provide individual support for each stem by using additional stakes. This will distribute the weight evenly and prevent leaning or bending.
6. Regular Adjustments: As the amaryllis grows taller, regularly check the ties and adjust them as necessary. Loosen or reposition the ties to avoid constriction and allow for proper growth.
7. Camouflaging Stakes: If desired, you can camouflage the stakes by placing decorative pebbles or small plants around the base of the amaryllis, covering the stakes. This will create a more natural and visually appealing display.
By providing proper support and staking, you will ensure that your amaryllis plant grows upright and remains stable throughout its growth cycle. Supporting the stems will prevent them from bending or breaking, allowing your amaryllis to showcase its beautiful flowers with grace and stability.
Caring for the Bulb After Blooming
After your amaryllis plant has finished blooming, it’s important to provide proper care to ensure the bulb remains healthy and ready for future blooms. Here are some essential steps to follow for post-blooming care:
1. Deadheading: Once the flowers have faded, remove the spent blooms by cutting them off at the base of the stem. This prevents seed production, allowing the plant to conserve energy for bulb growth.
2. Continued Watering: After blooming, continue to water the plant regularly, ensuring the soil remains slightly moist. This will support the bulb as it replenishes its energy reserves.
3. Fading Foliage: As the leaves of your amaryllis plant begin to yellow and wither, do not remove them. The leaves are still vital for the bulb to manufacture energy through photosynthesis.
4. Gradual Reduction: Over time, the leaves will naturally die back. As they yellow and wither, gradually reduce watering to allow the bulb to transition into its dormant phase.
5. Dormancy Period: Amaryllis bulbs require a period of dormancy to rest and recharge. During this phase, store the bulb in a cool, dry place for 8 to 10 weeks. Avoid exposure to extreme temperatures or direct sunlight.
6. Potted Bulbs: If your amaryllis is potted, you can simply remove the bulb from the soil after the leaves have withered. Gently clean any excess soil from the bulb and store it in a cool, dry location until it’s time to replant.
7. Bulb Inspection: While the bulb is dormant, periodically check it for signs of disease or damage. Discard any bulbs that show signs of rot, mold, or other abnormalities to prevent the spread of infection.
By providing proper care after blooming, you allow your amaryllis bulb to rest and rejuvenate, setting the stage for future growth and blooms. Remember to be patient during the dormant period and resume regular care once the bulb shows signs of new growth.
Replanting and Dividing Amaryllis Bulbs
Replanting and dividing your amaryllis bulbs is necessary to rejuvenate the plant and ensure continuous growth and blooming. Here’s a step-by-step guide on how to replant and divide your amaryllis bulbs:
1. Timing: Replanting and dividing should ideally be done when the amaryllis bulb is in its dormant phase. This is usually after the leaves have withered and the bulb has been stored for at least 8 to 10 weeks.
2. Removing from Pot: If your amaryllis is potted, gently remove the bulb from the soil, being careful not to damage the roots. Shake off any excess soil and inspect the bulb for any signs of disease or damage.
3. Dividing Bulbs: If the bulb has produced offsets or new bulblets, you can divide them. Gently detach the smaller bulbs from the main bulb, ensuring that each division has its own roots attached.
4. Cleaning and Inspecting: Clean the bulbs by gently removing any loose scales or dried foliage. Inspect each bulb for signs of rot, mold, or damage. Discard any bulbs that appear unhealthy.
5. Preparing New Pot: Select a new container that provides ample space for the bulb(s) to grow. Ensure the container has drainage holes at the bottom to prevent waterlogging.
6. Soil Mix: Use a well-draining potting mix or create a mixture of peat moss, perlite, and garden soil. Fill the pot with the soil mix, leaving enough space for the bulbs to be positioned comfortably.
7. Planting the Bulbs: Place the bulbs in the pot, ensuring that the top third of each bulb is above the soil surface. Gently press the soil around the bulbs, providing stability without compacting it too much.
8. Watering and Care: After planting, water the soil thoroughly to settle it around the bulbs. Place the pot in a location with bright, indirect light and resume regular watering and care.
By regularly replanting and dividing amaryllis bulbs, you promote better bulb health, prevent overcrowding, and encourage the production of more blooms. It’s important to provide the right conditions and care to help your amaryllis bulbs thrive and continue to beautify your space for years to come.
Common Problems and How to Fix Them
While amaryllis plants are generally easy to care for, they can sometimes encounter problems. Here are some common issues that may arise and tips on how to address them:
1. Yellowing Leaves: Yellowing leaves can be a sign of overwatering, underwatering, or nutrient deficiencies. Adjust your watering schedule, allowing the soil to dry out slightly between waterings. Ensure your plant is receiving proper sunlight and consider fertilizing with a balanced fertilizer to provide the necessary nutrients.
2. Bent Stems: Bent stems often occur due to poor light conditions or lack of support. Ensure your amaryllis plant is receiving enough light and provide proper staking and support to prevent bending. Rotate the pot regularly to encourage even growth.
3. No Blooms: If your amaryllis fails to produce blooms, it may be due to insufficient sunlight, improper dormancy period, or an aging bulb. Ensure your plant is receiving adequate light, provide a proper dormancy period of 8 to 10 weeks, and consider replacing or dividing the bulb if it’s older.
4. Bulb Rot: Bulb rot can occur due to overwatering, poor drainage, or fungal infections. Ensure your pot has drainage holes and avoid overwatering. If bulb rot is present, remove the affected portion and treat with a fungicide to prevent further spread.
5. Pest Infestations: Common pests that may affect amaryllis include aphids, mealybugs, and spider mites. Regularly inspect your plant for any signs of pests. If detected, treat with insecticidal soap or neem oil, following package instructions.
6. Floppy or Weak Growth: Floppy or weak growth may indicate inadequate light or insufficient nutrients. Adjust the light exposure to provide more direct or intense sunlight, and consider fertilizing with a balanced fertilizer to promote stronger growth.
7. Leaf Scorching: Leaf scorching occurs when your amaryllis plant is exposed to direct sunlight or intense heat. Move the plant to a location with indirect or filtered sunlight to prevent further damage.
By identifying and addressing these common problems promptly, you can ensure the health and vitality of your amaryllis plants. Regular monitoring, proper care, and prompt action are key to maintaining thriving and beautiful amaryllis plants in your home or garden.