
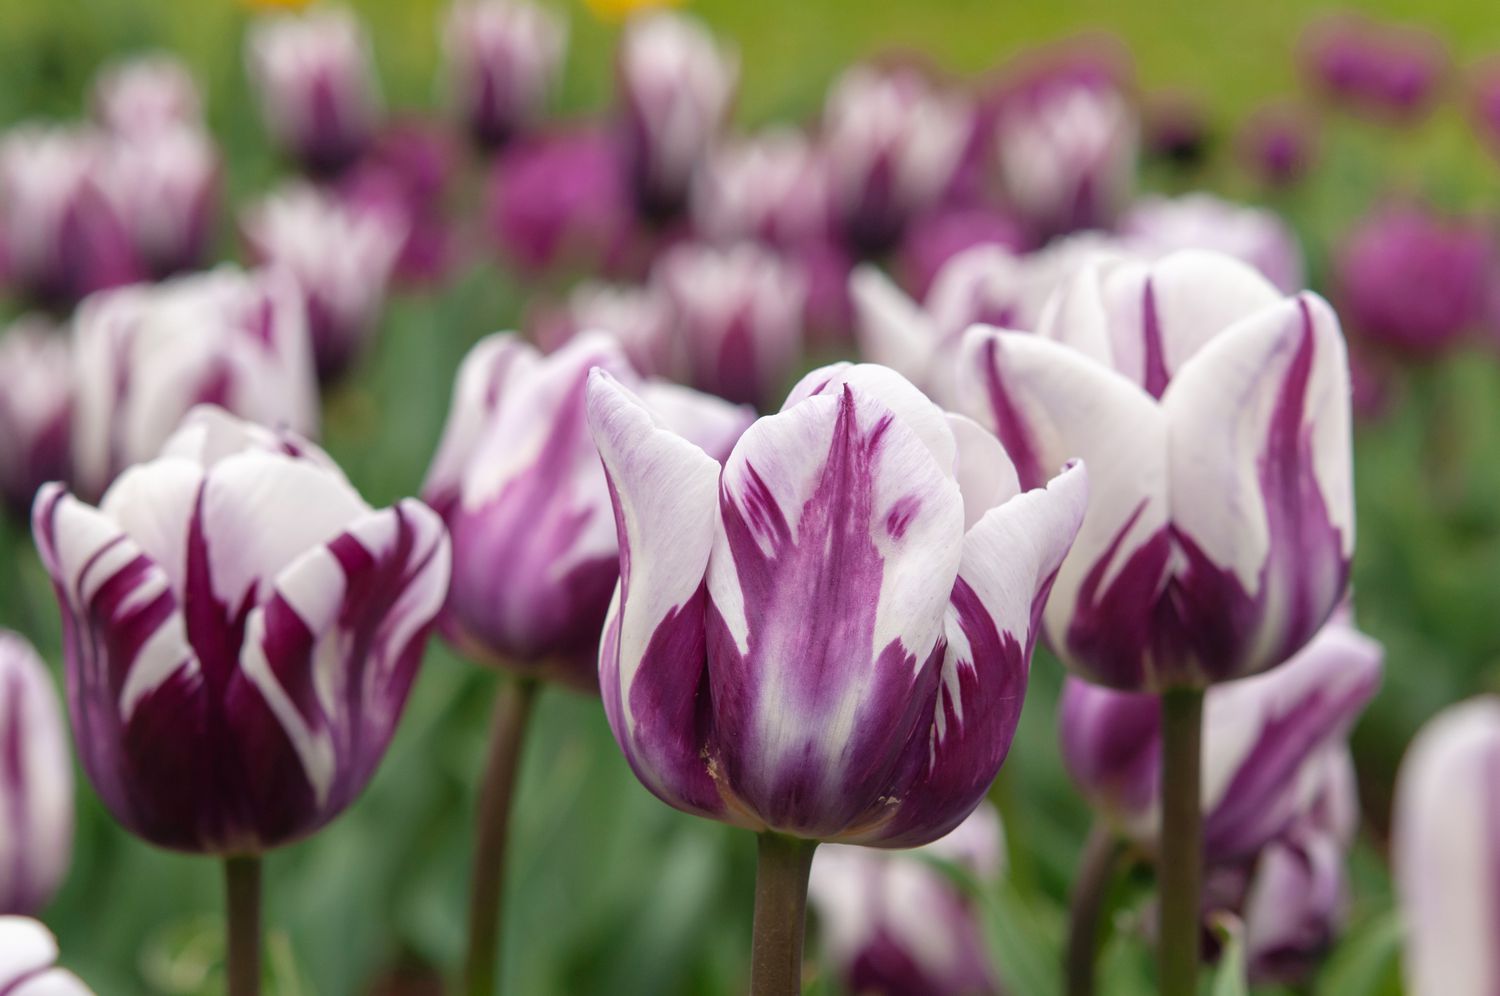
The Best Time to Plant Tulip Bulbs
Planting tulip bulbs at the right time is crucial for their successful growth and beautiful blooms. The best time to plant tulip bulbs is typically in the fall, before the ground freezes. This ensures that the bulbs have enough time to establish strong roots before winter sets in. However, the exact timing may vary depending on your climate and the specific type of tulips you plan to grow.
In general, you should aim to plant tulip bulbs about six to eight weeks before the ground freezes. This is usually around late September to early November in most regions. By planting at this time, you give the bulbs enough time to settle in and develop a strong root system, which is essential for their survival through the winter.
If you live in an area with mild winters, you may have more flexibility in planting tulip bulbs. In such regions, you can wait until late autumn or even early winter to plant the bulbs. However, keep in mind that tulips need a certain amount of cold exposure to break their dormancy and produce flowers in the spring. So, make sure to provide enough chill hours for your tulip bulbs if you choose to delay planting.
On the other hand, if you reside in an area with severe winters or heavy frost, you may need to plant your tulip bulbs earlier in the fall. This allows the bulbs to establish their roots before the ground becomes too cold and hard. If planted too late, the bulbs may not have enough time to grow and may not produce flowers in the following spring.
It’s worth noting that early spring can also be a suitable time to plant certain varieties of tulip bulbs. These types, often referred to as “late-flowering” or “mid-season” tulips, can be planted in early spring when the soil starts to thaw and the risk of frost has passed. This allows for a delayed blooming period, extending the tulip season in your garden.
Overall, the best time to plant tulip bulbs is in the fall, prior to the ground freezing. Adjust the exact timing based on your climate and the specific tulip varieties you’re growing to ensure optimal growth and vibrant blooms in the upcoming spring.
Factors to Consider Before Planting Tulip Bulbs
Planting tulip bulbs requires careful consideration of several factors to ensure successful growth and blooming. By understanding these factors, you can create an optimal environment for your tulips and enjoy a stunning display of flowers in the spring.
1. Soil Condition: Tulips thrive in well-draining soil. Before planting, assess your soil’s drainage by digging a small hole and filling it with water. If the water takes more than a few hours to drain, consider amending the soil with organic matter, like compost or peat moss, to improve drainage.
2. Sunlight Exposure: Tulips prefer full sun, which is at least six hours of direct sunlight per day. Ensure that the planting location receives adequate sunlight to promote healthy growth and vibrant blooms.
3. Climate Considerations: Different tulip varieties have varying temperature requirements for optimal growth. Some tulips are better suited for colder climates, while others thrive in milder regions. Research the specific tulip variety you plan to grow and choose accordingly to ensure they are well-suited to your climate.
4. Temperature Range: Tulips require a period of cold dormancy to stimulate growth and blooming. If you live in a warm climate, you may need to pre-chill the bulbs in a refrigerator for several weeks before planting. This mimics the cold winter conditions necessary for their development.
5. Companion Planting: Consider planting tulips alongside companion plants that share similar light and soil requirements. This not only enhances visual appeal but can also provide additional benefits, such as repelling pests or attracting pollinators.
6. Pest and Disease Management: Research common pests and diseases that affect tulips in your area. Take preventive measures, such as using organic pest control methods or selecting resistant tulip varieties, to protect your plants from potential damage.
7. Planting Depth: The depth at which you plant tulip bulbs is crucial. Generally, tulip bulbs should be planted at a depth that is two to three times their height. This ensures that they are properly anchored and protected against frost.
8. Timing and Spacing: Consider the spacing and timing of planting tulip bulbs. Proper spacing allows for good air circulation and prevents overcrowding. Plan to plant bulbs in clusters or rows, with a spacing of about 4-6 inches between bulbs. Additionally, staggering the planting time can provide a longer-lasting display of blooms.
By taking these factors into consideration before planting tulip bulbs, you can create an ideal growing environment that promotes healthy growth and abundant blooms. Careful planning and preparation will contribute to a spectacular tulip display in your garden that will bring joy and beauty for years to come.
Climate Considerations for Tulip Bulbs
When it comes to planting tulip bulbs, understanding the climate conditions of your region is essential for successful growth and blooming. Tulips have distinct temperature requirements and adaptability to different climates. By considering the climate factors, you can choose the right tulip varieties and ensure optimal growth in your garden.
1. Cold Hardiness: Tulips are typically considered cold-hardy plants and can tolerate freezing temperatures. However, different tulip varieties have varying levels of cold tolerance. Some varieties are more suited for colder climates with longer winters, while others can thrive in milder regions.
2. Chilling Requirements: Tulips require a period of cold dormancy to stimulate growth and blooming. This period of chilling is necessary for the bulbs to break their dormancy and initiate spring growth. If you live in a warm climate, where winter temperatures do not provide sufficient chilling hours, you may need to pre-chill the tulip bulbs in a refrigerator before planting.
3. Heat Tolerance: While tulips are adapted to cold climates, they have a limited tolerance for heat. In regions with hot summers, tulips may struggle to grow and bloom. In such climates, it’s important to choose tulip varieties that are specifically bred for heat tolerance or consider planting them as annuals, allowing for new bulbs to be planted each year.
4. Frost Conditions: Late spring frost can pose a threat to emerging tulips. Research the average last frost date in your area and choose tulip varieties that can withstand late frosts or plant them strategically in protected areas, such as near buildings or under large trees, to minimize frost damage.
5. Rainfall and Drainage: Adequate drainage is crucial for tulip bulbs as they do not tolerate excessive moisture. If you live in a region with heavy rainfall, ensure proper soil drainage to prevent the bulbs from rotting. Raised beds or amending the soil with organic matter can improve drainage in areas with poor natural drainage.
6. Microclimate Considerations: Microclimates are localized climate conditions within a larger region that are influenced by factors such as topography, buildings, or vegetation. Assess your garden for microclimates, as they can affect temperature, wind exposure, and moisture levels. Utilize these microclimates to your advantage by planting tulips in areas that provide the optimal conditions they require.
By understanding and considering the climate factors specific to your region, you can choose tulip varieties that are well-suited to your climate conditions. This will ensure that your tulips thrive and produce stunning blooms, irrespective of your climate’s temperature and weather patterns.
Soil Conditions for Tulip Bulbs
Creating the ideal soil conditions is crucial for the successful growth and blooming of tulip bulbs. Tulips thrive in well-draining soil that is rich in nutrients. By understanding and optimizing the soil conditions, you can provide the best environment for your tulips to flourish.
1. Soil Composition: Tulips prefer soil that is loamy and well-draining. Loamy soil contains a balanced mix of sand, silt, and clay, allowing for good drainage while retaining sufficient moisture and nutrients. Sandy soil tends to drain quickly, while heavy clay soil can become compacted and retain too much moisture, leading to bulb rot. If your soil is heavy clay or sandy, consider amending it with organic matter, such as compost or well-rotted manure, to improve its texture and drainage.
2. pH Level: The pH level of the soil, which indicates its acidity or alkalinity, can influence the availability of essential nutrients for plant growth. Tulips thrive in slightly acidic to neutral soil, with a pH range of 6.0 to 7.0. Test the pH of your soil using a soil testing kit and amend it with lime to increase alkalinity or sulfur to decrease acidity, if necessary.
3. Drainage: Tulip bulbs are susceptible to rotting in waterlogged soil. Ensure that the soil drains well to prevent excess moisture accumulation. If your soil has poor drainage, you can improve it by adding organic matter, like compost or peat moss, to promote better water movement and aeration. Planting tulips in raised beds or containers can also improve drainage in areas with naturally compacted or poorly drained soil.
4. Nutrient Content: Tulips require proper nutrition to grow and produce healthy blooms. Before planting, enrich the soil with a balanced fertilizer or organic matter to ensure an adequate supply of nutrients. Incorporate well-rotted compost or a slow-release granular fertilizer into the soil a few weeks before planting to provide a steady source of nutrients for the developing bulbs.
5. Soil Moisture: While it’s important to ensure good drainage, tulips also need consistent moisture to support their growth. Water the bulbs immediately after planting and monitor the soil moisture throughout the growing season. Avoid over-watering, as it can lead to bulb rot, but also prevent the soil from completely drying out. Mulching around the bulbs can help retain moisture and regulate soil temperature.
6. Soil Preparation: Prepare the planting area by removing weeds and loosening the soil to a depth of around 12 inches. Break up any compacted soil and remove rocks or debris that may impede bulb growth. Incorporate organic matter to improve soil structure and provide essential nutrients for the bulbs.
By providing the right soil conditions, you set the stage for the optimal growth and blooming of your tulip bulbs. Well-draining soil rich in nutrients will ensure that your tulips thrive and reward you with vibrant, beautiful blooms in the spring.
Optimal Planting Depth for Tulip Bulbs
Planting tulip bulbs at the correct depth is crucial for their successful growth and development. The optimal planting depth ensures that the bulbs are protected, properly anchored, and have the necessary conditions to emerge and bloom in the spring. Understanding the recommended planting depth will help you ensure the best results for your tulips.
1. General Rule: The general rule of thumb for planting tulip bulbs is to place them at a depth that is two to three times the height of the bulb itself. This means that larger tulip bulbs should be planted deeper and smaller bulbs should be planted more shallowly. This depth is ideal for allowing the roots to establish and the stem to reach the surface without difficulty.
2. Soil Type: The type of soil you have can also influence the planting depth for tulip bulbs. In heavy clay soils that retain more moisture, bulbs should be planted slightly shallower to prevent them from becoming waterlogged. In contrast, sandy or well-draining soils will benefit from planting bulbs slightly deeper to ensure they receive enough moisture.
3. Winter Temperature: The winter temperature in your region can also impact the planting depth. In colder climates, where the soil freezes deeply, planting bulbs slightly deeper can provide extra insulation and protect them from frost damage. Conversely, in milder climates, where the soil may not freeze as deeply, planting bulbs slightly shallower can help prevent them from drying out or becoming too warm.
4. Bulb Size: The size of the tulip bulb can also be a factor in determining the planting depth. Larger bulbs, such as those from the Darwin or Triumph tulip varieties, should be planted deeper than smaller bulbs, like those from the botanical or species tulip varieties. Larger bulbs have more energy stored and can tolerate a deeper planting depth, while smaller bulbs may benefit from being planted slightly shallower.
5. Water Drainage: It’s important to consider the drainage capabilities of your soil when deciding on the planting depth. Bulbs should be planted deep enough to ensure good contact with the soil, but not so deep that they sit in stagnant water. Proper drainage is essential for preventing bulb rot or fungal diseases.
6. Planting in Containers: If you are planting tulip bulbs in containers, the depth may differ slightly. In general, plant bulbs with their tips just below the surface and space them closely together. Keep in mind that containers may not insulate bulbs as well as the ground, so additional protection may be required in colder climates.
By considering the general guidelines for planting depth, as well as the specific factors mentioned above, you can determine the optimal planting depth for your tulip bulbs. This will ensure that the bulbs establish strong roots, properly emerge, and produce impressive blooms in the spring.
How to Plant Tulip Bulbs
Planting tulip bulbs is a straightforward process that can be done by following a few simple steps. By properly planting tulip bulbs, you set the stage for their successful growth and beautiful blooms. Here’s a step-by-step guide on how to plant tulip bulbs:
1. Choose the Right Spot: Select a planting location that receives full sun or at least six hours of direct sunlight per day. Ensure that the soil is well-draining, as tulips do not thrive in waterlogged soil.
2. Prepare the Soil: Remove any weeds or debris from the planting area. Loosen the soil using a garden fork or shovel, breaking up any clumps and ensuring it is well-aerated.
3. Determine the Planting Depth: Use the general rule of thumb for tulip bulbs, which is to plant them at a depth that is two to three times their height. Larger bulbs should be planted deeper, while smaller bulbs should be planted more shallowly.
4. Dig the Planting Holes: Use a garden trowel or bulb planter to dig individual holes or a larger trench, depending on the number of bulbs you are planting. Space the holes/trenches about 4-6 inches apart to allow for adequate air circulation and growth.
5. Place the Bulbs: Position each bulb with the pointed end facing up. Gently press the bulbs into the soil, ensuring that they are planted at the appropriate depth. Space multiple bulbs evenly in the planting hole or trench.
6. Cover and Water: Once the bulbs are in place, carefully backfill the soil, covering the bulbs completely. Gently firm the soil around each bulb to ensure good contact. Water the newly planted bulbs thoroughly to settle the soil and provide moisture for the bulbs to start growing.
7. Mulch (Optional): Applying a layer of mulch over the planting area can help conserve moisture, regulate soil temperature, and suppress weed growth. Mulching is especially beneficial in areas with fluctuating temperatures.
8. Mark the Planting Area: Place a marker or stake in the ground to indicate the planting area. This will help avoid accidental disturbances of the bulbs during other garden activities.
9. Monitor and Maintain: Keep an eye on the soil moisture levels throughout the growing season. Water the bulbs as needed, ensuring that the soil remains evenly moist but not waterlogged.
By following these steps, you can properly plant tulip bulbs and provide an optimal environment for their growth. With proper care and maintenance, your tulips will reward you with a vibrant show of color and beauty in the upcoming spring.
Caring for Tulip Bulbs After Planting
After planting tulip bulbs, proper care is essential to ensure their healthy growth and maximize the chances of beautiful blooms. Taking care of tulip bulbs involves providing the right conditions for their development, protecting them from pests and diseases, and performing necessary maintenance tasks. Here are some important care tips to follow:
1. Watering: After planting, water the bulbs thoroughly to settle the soil and provide moisture for their initial growth. Tulips generally prefer moist soil, so continue to water them regularly, especially during dry periods. However, make sure not to overwater, as excessive moisture can lead to bulb rot.
2. Mulching: Applying a layer of mulch around tulip bulbs can help conserve soil moisture, regulate temperature fluctuations, and suppress weed growth. Use organic materials, such as straw or shredded bark, to cover the soil surface around the bulbs. However, ensure that the mulch is not in direct contact with the bulbs to prevent excess moisture and potential rot.
3. Fertilization: Tulip bulbs benefit from a nutrient-rich soil. In early spring, when the shoots emerge, apply a balanced bulb fertilizer according to the package instructions. This will provide the necessary nutrients for healthy growth and vibrant blooms. Avoid excessive use of nitrogen-based fertilizers, as they can promote excessive leaf growth and reduce flower production.
4. Deadheading: Once the tulip flowers fade and petals start to drop, deadhead the spent blooms. This prevents seed production and directs the plant’s energy towards bulb development rather than seed formation. Use clean, sharp pruners or scissors to remove the faded flowers just above the foliage, taking care not to damage the stem or emerging leaves.
5. Pests and Diseases: Monitor your tulip plants for common pests such as aphids, slugs, or bulb flies. Remove any affected leaves or flowers and consider using organic pest control methods if necessary. Keep the planting area clean and free from debris to minimize pest infestation. Additionally, ensure proper air circulation and avoid overwatering to prevent fungal diseases like gray mold or bulb rot.
6. Dormancy Care: After blooming, tulip bulbs enter a period of dormancy. Allow the foliage to wither and turn yellow naturally. This process allows the bulbs to store energy for next year’s growth and blooming. Avoid cutting back or removing the foliage prematurely, as it helps nourish the bulb. Once the foliage has completely died back, you can gently remove it from the planting area.
7. Bulb Storage: If you lift tulip bulbs from the ground after they have finished flowering, allow them to dry naturally in a cool, well-ventilated space. Once dry, store the bulbs in a cool and dry location until the next planting season. Ensure the bulbs are kept in a breathable container, such as a mesh bag or paper bag, to prevent moisture build-up and rot.
By following these care tips, you can ensure the health and vitality of your tulip bulbs. With proper care, your tulip bulbs will reward you with a stunning display of colorful blooms year after year.
When to Expect Tulip Blooms
Tulips are known for their vibrant and show-stopping blooms, and knowing when to expect these blooms can help you plan and anticipate the beauty they will bring to your garden. While the exact timing can vary depending on factors such as climate, variety, and planting time, here are some general guidelines on when to expect tulip blooms:
1. Spring Blooming Season: Tulips are renowned for their spring blooms, which typically occur in the late winter to early spring months. The exact timing of tulip blooms depends on the region and local climate. Generally, tulips begin to bloom when the weather starts to warm up, and the soil temperature reaches a suitable level.
2. Early, Mid, and Late-Season Tulips: Tulips are classified into three main bloom time categories: early, mid, and late-season. Early-season tulips usually bloom in early to mid-spring, mid-season tulips bloom in mid to late spring, and late-season tulips bloom towards the end of the spring season. By selecting a combination of these different bloom time varieties, you can extend the tulip blooming period in your garden.
3. Days to Bloom: The time it takes for tulips to go from planting to blooming varies depending on the specific variety. Early-blooming tulips typically take around 10-45 days to bloom, while mid to late-season tulips can take anywhere from 50-120 days. Consider this factor when selecting tulip varieties to ensure a staggered and continuous blooming period in your garden.
4. Planting Time: The timing of tulip bulb planting can also influence when you can expect to see blooms. Fall-planted tulips generally result in spring blooms, following their period of winter dormancy. Depending on your region and climate, fall-planted tulips may start blooming as early as late winter or early spring. On the other hand, if you’re planting bulbs in the spring, expect blooms later in the season, typically in late spring or early summer.
5. Climate Variations: Keep in mind that climate variations can affect the bloom time of tulips. Warmer climates may experience earlier blooms, while cooler climates may see later blooms. Additionally, unexpected weather fluctuations, such as unseasonably warm or cold temperatures, can impact the blooming time. Be prepared for some variation in blooming dates based on your local climate conditions.
6. Observing Foliage: Monitoring the growth and condition of the foliage can provide clues about the upcoming bloom time. As the tulip plants grow, the foliage will develop and mature. Once the foliage starts to yellow and wither, it indicates that the blooming period is approaching. This usually occurs a few weeks before the anticipated bloom time, giving you a visual indicator of when to expect the tulip blooms.
By considering these factors and observing the growth stages of your tulip plants, you can have a general idea of when to expect tulip blooms in your garden. Enjoy the anticipation and excitement as your tulips prepare to showcase their captivating colors and bring joy to your outdoor space.
Common Issues with Tulip Bulbs
Tulips are generally reliable and easy to grow, but like any plant, they can experience certain issues that may affect their growth, health, and blooming. By being aware of these common issues, you can take proactive measures to prevent and address them, ensuring the best performance of your tulip bulbs. Here are some of the common issues you might encounter:
1. Bulb Rot: Excessive moisture or poorly drained soil can cause bulb rot. Overwatering, high humidity, or planting tulip bulbs in heavy clay soil can contribute to this issue. To prevent bulb rot, ensure proper soil drainage, avoid overwatering, and plant tulip bulbs in well-draining soil or raised beds. If bulb rot occurs, remove the affected bulbs to prevent the spread of the problem.
2. Pests: Tulip bulbs can fall victim to various pests, including aphids, slugs, and bulb flies. Aphids feed on the foliage, while slugs and bulb flies can damage the bulbs themselves. Regularly inspect your tulip plants for signs of pests, and if necessary, employ appropriate pest control methods such as handpicking, natural predators, or organic pesticides to manage the pest population.
3. Fungal Diseases: Tulips can be susceptible to fungal diseases such as gray mold (Botrytis) and root rot (Fusarium or Pythium). These diseases can lead to the wilting, browning, or death of tulip plants. Proper soil drainage, good air circulation, and avoiding overwatering can help prevent fungal diseases. If fungal issues occur, remove affected plants, improve drainage, and consider treating the remaining plants with appropriate fungicides.
4. Lack of Flowers: Insufficient or improper bulb storage, inadequate chilling period, and planting bulbs too shallow or deep can result in a lack of flowers. Ensure that bulbs are stored properly in a cool, dry place before planting, and adhere to the recommended planting depth. Additionally, provide adequate chilling hours if you live in a warm climate. Following these practices will help promote flower formation and ensure a beautiful tulip display.
5. Deer and Rodent Damage: Tulips are susceptible to browsing by deer and damage from rodents such as squirrels or mice. Deer can easily nibble on tulip flowers and foliage, while rodents may dig up or consume the bulbs. Utilize deterrents like fencing, netting, or sprays to protect your tulips from deer. To prevent rodent damage, consider placing wire mesh or bulb cages in the planting holes, or use repellents to deter them from your garden.
6. Lack of Perennialization: Some tulip varieties, particularly hybrid tulips, may not reliably return and bloom again year after year. This is known as a lack of perennialization. To encourage perennialization, focus on planting species or botanical tulips, which have a better tendency to naturalize and come back year after year. Additionally, allow the foliage to wither and die back naturally before removing it, as this helps the bulbs store energy for future growth.
7. Environmental Factors: Extreme weather conditions like unseasonal frosts, heatwaves, or prolonged periods of rain can negatively impact tulip bulbs. While you can’t control the weather, you can protect your tulips by planting them in sheltered locations, providing mulch for insulation, and selecting varieties that are better adapted to your climate.
By being aware of these common issues and implementing preventive measures, you can ensure that your tulip bulbs have the best chance at thriving and producing stunning blooms. Regular monitoring and taking steps to address any problems promptly will help you maintain healthy and beautiful tulip plants in your garden.
Storing Tulip Bulbs for Future Planting
If you have tulip bulbs that you want to save for planting in the future, proper storage is crucial to ensure their viability and success. Whether you want to preserve bulbs after they have finished blooming or store newly purchased bulbs for the next planting season, following the right storage techniques will help maintain the bulbs’ quality. Here are some guidelines for storing tulip bulbs:
1. Post-Blooming Care: After tulips have finished blooming, it’s important to leave the foliage intact until it turns yellow and withers. During this time, the foliage continues to gather energy and nutrients for the bulb. Once the foliage has completely died back, you can gently remove it, taking care not to damage the bulb.
2. Drying: Allow the bulbs to dry naturally after removing the foliage. Place them in a cool, dry, and well-ventilated location, spread out on a tray or in a container with good airflow. It’s crucial to ensure that the bulbs are completely dry before storage to prevent rot or mold.
3. Cleaning: Before storing, gently remove any loose dirt or debris from the bulbs, taking care not to remove the protective papery outer layer. Do not wash the bulbs, as excess moisture can contribute to deterioration during storage.
4. Storage Containers: Choose breathable storage containers for the bulbs to prevent moisture buildup and rot. Mesh bags, paper bags, or wooden crates are suitable options. Avoid using airtight plastic bags or containers, as they can trap moisture and promote mold growth.
5. Storage Environment: Tulip bulbs require specific storage conditions to maintain their viability. Store the bulbs in a cool, dry place with a consistent temperature between 50°F (10°C) and 60°F (15.5°C). Avoid areas with extreme temperature fluctuations, high humidity, or direct sunlight, as these conditions can negatively affect bulb quality.
6. Location Selection: Choose a storage location that is away from potential hazards such as rodents or pests. A basement, garage, or shed can provide suitable storage spaces as long as they meet the temperature and humidity requirements.
7. Check Periodically: Periodically check the stored bulbs for any signs of rot, mold, or damage. Remove any bulbs showing signs of deterioration to prevent the spread of issues to other bulbs.
8. Duration of Storage: Tulip bulbs can be successfully stored for several months, up to a year, if the correct storage conditions are maintained. However, keep in mind that the longer the bulbs are stored, the lower their viability may become, and the chances of successful growth and blooming may decrease over time.
9. Replanting: When it’s time to replant the stored bulbs, inspect them again for any signs of damage or drying out. Discard any bulbs that appear shriveled, moldy, or soft. Prior to planting, consider pre-chilling the stored bulbs in the refrigerator for several weeks to mimic the winter chilling they need for proper growth and blooming.
By following these storage guidelines, you can preserve the quality and viability of your tulip bulbs for future planting. Proper storage ensures that the bulbs remain in optimal condition and increases the likelihood of successful growth and blooming when they are replanted in the next season.