
Benefits of Planting Zinnia Seeds
Zinnias are vibrant, colorful flowers that are a staple in many gardens. These easy-to-grow annuals offer numerous benefits that make them a popular choice among both novice and experienced gardeners. From attracting beneficial pollinators to providing long-lasting blooms, here are some of the top reasons why you should consider planting zinnia seeds in your garden:
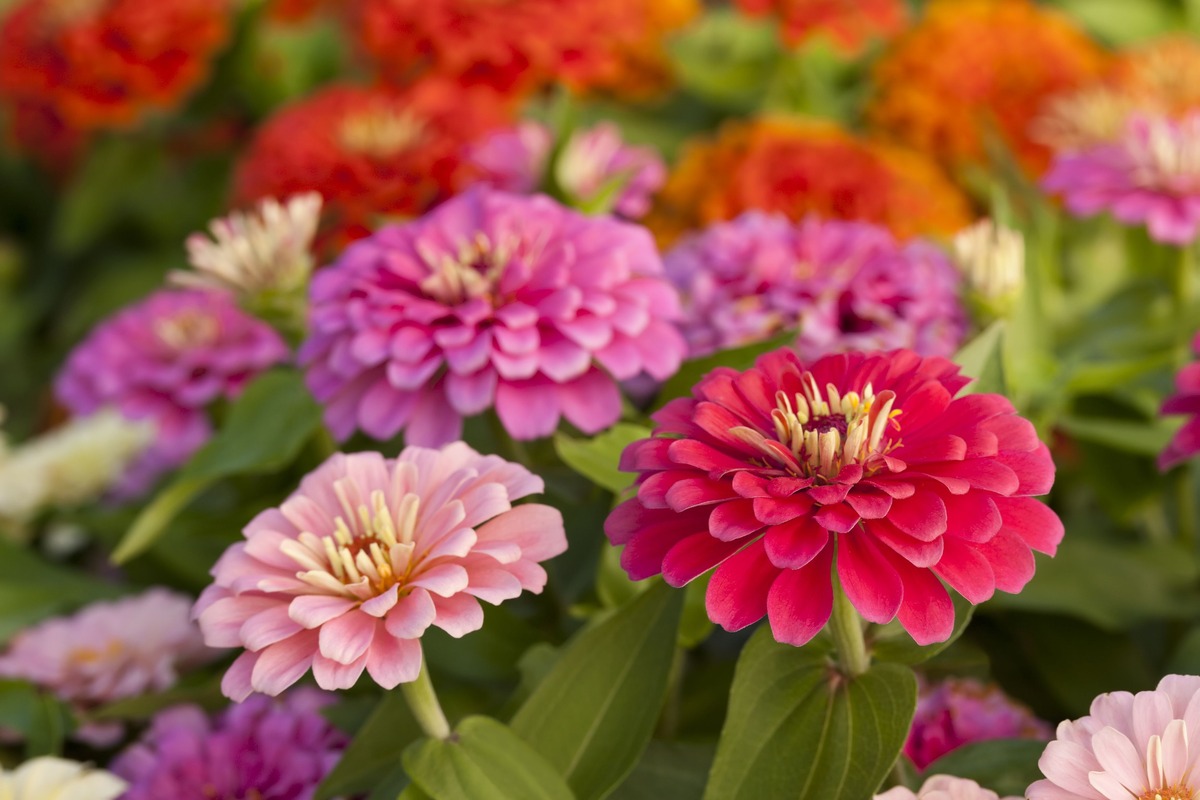
1. Abundance of Colors: Zinnias are known for their wide array of vivid colors, ranging from bright yellows and oranges to deep purples and pinks. Their vibrant blooms add life and beauty to any garden, making them a perfect choice for adding a pop of color to your landscape.
2. Easy to Grow: Zinnias are excellent choices for beginner gardeners because they are incredibly easy to grow from seed. Simply plant the seeds in the appropriate growing conditions and watch them thrive. With their fast germination rate and low maintenance requirements, zinnias offer a rewarding gardening experience even for those with limited time or experience.
3. Attract Beneficial Pollinators: Zinnias are a magnet for butterflies, bees, and other pollinators. Their bright, nectar-rich blooms provide an abundant food source for these essential creatures, helping to support and promote a healthy ecosystem in your garden.
4. Long-Lasting Blooms: Zinnias are known for their long-lasting blooms, which can brighten up your garden for months on end. With regular deadheading, where spent flowers are removed, zinnias will continue to produce new blooms, ensuring a continuous display of color throughout the growing season.
5. Versatile in the Garden: Zinnias are versatile plants that can be used in various ways within your garden. They can be grown in garden beds, borders, containers, or even as cut flowers for floral arrangements. Their compact size makes them suitable for smaller spaces, while their vertical height adds structure and visual interest in larger gardens.
6. Low Maintenance: Once established, zinnias require minimal attention. They are drought-tolerant and can withstand heat, making them ideal for gardens in hot and arid climates. Additionally, zinnias are resistant to many common garden pests and diseases, reducing the need for chemical interventions.
With their stunning colors, ease of care, and ability to attract beneficial pollinators, zinnias are an excellent addition to any garden. Whether you are a novice gardener or an experienced enthusiast, planting zinnia seeds will reward you with an abundance of beautiful blooms and a flourishing garden.
Choosing the Right Time to Plant Zinnia Seeds
Choosing the right time to plant zinnia seeds is crucial for their successful germination and growth. Zinnias thrive in warm weather, so it’s important to take into consideration your local climate and the average last frost date in your area.
Average Last Frost Dates: Zinnia seeds should be planted after the threat of frost has passed. The average last frost date varies depending on your location, so it’s important to check with your local agricultural extension office or refer to online resources to determine the right timing for your area. Planting too early can result in seedling damage or death due to cold temperatures, while planting too late may result in a shorter growing season.
Understanding Soil Temperatures: In addition to the last frost date, it’s important to consider soil temperatures when planting zinnia seeds. Zinnias thrive in warm soil, with an ideal temperature range of 70-80 degrees Fahrenheit (21-27 degrees Celsius). If the soil is too cold, the seeds may not germinate properly or may experience stunted growth. Using a soil thermometer can help you determine if the conditions are suitable for planting.
Starting Indoors vs. Direct Sowing: Zinnia seeds can be started indoors or sown directly into the garden soil. Starting seeds indoors allows for earlier planting and gives you more control over the growing conditions. Start seeds indoors about 4-6 weeks before the last frost date, using seed trays or pots filled with a well-draining soil mix. Transplant the seedlings outdoors once they have grown a few sets of true leaves and all danger of frost has passed.
Preparing the Soil for Zinnias: Whether you choose to start seeds indoors or sow them directly outdoors, preparing the soil is important for optimal growth. Zinnias prefer well-draining soil that is rich in organic matter. Till the soil and amend it with compost or well-rotted manure to improve its fertility and drainage. Remove any weeds or debris from the planting area to prevent competition for resources and ensure healthy zinnia growth.
Planting Zinnia Seeds Outdoors: If you prefer to sow zinnia seeds directly outdoors, wait until the soil has warmed up to at least 60 degrees Fahrenheit (15 degrees Celsius). Sow the seeds at a depth of ¼ to ½ inch (0.6 to 1.3 cm) and space them according to the variety’s specific requirements, usually about 6-12 inches (15-30 cm) apart. Gently water the soil after planting to ensure good seed-to-soil contact.
By choosing the right time to plant zinnia seeds and providing them with the optimal growing conditions, you can set the stage for healthy germination and vigorous growth. Take into account your local climate, average last frost date, and soil temperatures to ensure a successful zinnia gardening experience.
Average Last Frost Dates
Knowing the average last frost dates in your area is essential for successful gardening, as it helps determine the appropriate time to plant frost-sensitive plants such as zinnias. The last frost date refers to the final day in spring when the temperature dips below freezing, which can pose a threat to tender plants.
Understanding Frost: Frost occurs when the temperature drops to or below 32 degrees Fahrenheit (0 degrees Celsius), causing moisture in the air to freeze onto plants and other surfaces. Frost can damage or kill the cells of plants, resulting in wilting, browning, and even death.
Regional Variations: Average last frost dates vary depending on your geographic location and local climate conditions. They are typically influenced by factors such as proximity to bodies of water, elevation, and latitude. It’s important to note that these dates are averages, and there can be variations from year to year due to weather patterns.
Obtaining Last Frost Dates: To determine the average last frost date in your area, consult reliable sources such as the local agricultural extension office, gardening websites, or climate databases. These sources provide historical data and can help you make informed decisions about when to plant your zinnia seeds.
Significance for Zinnias: Zinnias are frost-sensitive plants that thrive in warm weather. Planting them too early, before the average last frost date, can expose them to potentially damaging cold temperatures. If a late frost occurs after planting, it can harm or kill the young seedlings or stunt their growth. On the other hand, if zinnias are planted too late, their growing season may be shorter, limiting their potential for blooming and full development.
Consider Microclimates: It’s important to consider any microclimates in your garden that may deviate from the general average last frost dates in your area. Certain factors, such as the presence of buildings, trees, or slopes in your garden, can create microclimates that affect temperatures. These microclimates may experience earlier or later frosts compared to the general surrounding area, so it’s important to observe and adapt your planting schedule accordingly.
By understanding the average last frost dates in your area, you can ensure that your zinnias have a favorable start to their growing season. Planting these vibrant flowers after the threat of frost has passed will minimize the risk of damage and help set them up for healthy growth and abundant blooms.
Understanding Soil Temperatures
Soil temperature plays a crucial role in the successful germination and growth of plants, including zinnias. Understanding soil temperatures is essential for determining the optimal time to plant zinnia seeds and ensuring their healthy development.
Germination and Root Growth: Soil temperature directly affects the germination process of zinnia seeds. Seeds require specific temperature ranges to initiate germination and start developing roots. For zinnias, the ideal soil temperature for germination ranges from 70 to 80 degrees Fahrenheit (21 to 27 degrees Celsius). If the soil is too cold, the seeds may remain dormant and fail to sprout.
Thermophilic Plants: Zinnias are considered thermophilic plants, meaning they thrive in warm soil temperatures. Warmer soil allows for faster root development, nutrient absorption, and overall plant growth. When the soil temperature is in the optimal range, zinnia seeds germinate more quickly and produce stronger, healthier seedlings.
Measuring Soil Temperature: To determine the soil temperature, you can use a soil thermometer. Insert the thermometer into the soil at the depth where you plan to sow the zinnia seeds. Take the temperature reading and monitor it to ensure it falls within the appropriate range for zinnia germination.
Factors Affecting Soil Temperature: Several factors can influence soil temperature. The most significant factors include sunlight exposure, air temperature, moisture content, and soil type. Soil heats up and cools down more slowly than the air, so it is important to take into account both daily and long-term temperature trends when deciding when to plant zinnia seeds.
Warming Up the Soil: If the soil temperature is too cold for zinnia seed germination, there are several techniques you can employ to warm up the soil. Covering the planting area with black plastic can help absorb and retain heat from the sun, raising the soil temperature. Additionally, using row covers or cold frames can create a microclimate that traps heat and warms the soil for earlier planting.
Planting at the Right Time: By monitoring and understanding soil temperatures, you can determine the ideal time to plant zinnia seeds. Wait until the soil has warmed up to at least 70 degrees Fahrenheit (21 degrees Celsius) before sowing the seeds. This ensures optimal germination and provides the seedlings with the best conditions for robust root development.
Understanding soil temperatures is crucial for successful zinnia seed germination. By planting zinnia seeds in soil that has reached the ideal temperature range, you can maximize their growth and increase the chances of vibrant blooms in your garden.
Starting Indoors vs. Direct Sowing
When it comes to planting zinnia seeds, you have two options: starting them indoors or sowing them directly into the garden soil. Each method has its advantages and considerations, and the choice depends on factors such as your local climate, available space, and personal preferences.
Starting Indoors: Starting zinnia seeds indoors allows for earlier planting and gives you more control over the growing conditions. Here are some key points to consider:
- Timing: Start zinnia seeds indoors about 4-6 weeks before the average last frost date in your area. This allows the seedlings to develop into sturdy plants before they are transplanted outdoors.
- Equipment: Use seed trays, peat pots, or small containers filled with a well-draining soil mix. Ensure adequate spacing between seeds to prevent overcrowding.
- Light: Provide the seedlings with sufficient light by placing them near a sunny window or using grow lights. Zinnias require at least 6-8 hours of direct sunlight daily for optimal growth.
- Temperature: Zinnia seeds germinate well in warm temperatures, around 70-80 degrees Fahrenheit (21-27 degrees Celsius). Ensure a warm and consistent environment for the seedlings.
- Transplanting: When the seedlings have grown a few sets of true leaves and all danger of frost has passed, carefully transplant them into your garden beds or containers. Harden off the seedlings by gradually exposing them to outdoor conditions before transplanting.
Direct Sowing: Sowing zinnia seeds directly into the garden soil is a straightforward and convenient method. Here are some important considerations:
- Timing: Wait until after the average last frost date and when the soil has warmed up to at least 60 degrees Fahrenheit (15 degrees Celsius) for successful direct sowing.
- Preparing the Soil: Ensure your garden soil is well-drained, fertile, and free from weeds or debris. Loosen the soil and amend with compost or organic matter for improved moisture retention and nutrient content.
- Spacing: Follow the recommended spacing guidelines for your specific zinnia variety, usually 6-12 inches (15-30 cm) apart. This provides enough room for the plants to grow and prevents overcrowding.
- Watering: After sowing the seeds, gently water the soil to ensure good seed-to-soil contact. Keep the soil consistently moist but not waterlogged during the germination period.
- Thinning: Once the seedlings emerge, thin them out by removing weaker or overcrowded plants. This allows for better air circulation and ensures healthier growth for the remaining zinnias.
The decision to start zinnia seeds indoors or sow them directly outdoors depends on your resources, preferences, and local conditions. Both methods can lead to successful zinnia cultivation, as long as you provide the seeds with the proper care, space, and growing conditions they need.
Preparing the Soil for Zinnias
Proper soil preparation is essential for the healthy growth and overall success of zinnias. These vibrant flowers thrive in well-draining soil rich in organic matter. By taking the time to prepare the soil before planting zinnia seeds, you can provide them with the optimal conditions for robust growth and abundant blooms.
Soil Testing: Before preparing the soil, consider conducting a soil test to determine its pH and nutrient content. This information will help you gauge if any amendments or adjustments are necessary for optimal zinnia growth. Soil testing kits are readily available at garden centers or through local agricultural extension offices.
Loosening the Soil: Start by loosening the soil in the planting area using a garden fork or tiller. This will help improve aeration, drainage, and root penetration. Aim for a depth of 8-10 inches (20-25 cm) to provide ample room for root development.
Removing Weeds and Debris: Remove any weeds, grass, or debris from the planting area, as they can compete for nutrients, sunlight, and water. Clearing the space ensures that zinnias have the best conditions to establish themselves without unnecessary competition.
Amending the Soil: Zinnias prefer well-draining soil that is rich in organic matter. Incorporating compost, well-rotted manure, or other organic amendments into the soil enhances its fertility, improves moisture retention, and promotes a healthy soil ecosystem. Spread a layer of organic matter over the planting area and mix it into the soil using a garden fork or tiller.
Improving Drainage: If the soil in your garden retains too much moisture, you can take steps to improve drainage. Adding coarse sand or perlite to the soil mix can help create air spaces and facilitate water drainage. Avoid adding excessive amounts of sand, as it can lead to overly fast drainage and nutrient leaching.
Applying Fertilizer: Although zinnias are not heavy feeders, a balanced fertilizer application can provide them with essential nutrients for healthy growth. Use a slow-release granular fertilizer or incorporate a balanced organic fertilizer into the soil during soil preparation.
Leveling and Raking: After incorporating amendments and loosening the soil, level the planting area using a rake. This ensures a smooth and even surface for planting zinnia seeds and promotes consistent water distribution across the area.
Watering: Water the prepared soil thoroughly before planting zinnia seeds. Moist soil helps seeds make good contact with the soil particles, promoting germination. Avoid overwatering, as excessive moisture can lead to dampening-off disease or root rot.
By properly preparing the soil for zinnias, you are setting them up for success. Providing a well-draining and nutrient-rich environment allows the roots to establish quickly and efficiently access the resources they need for healthy growth and prolific flowering.
Planting Zinnia Seeds Outdoors
Planting zinnia seeds directly outdoors is a straightforward process that allows you to enjoy these vibrant flowers in your garden. By following a few key steps, you can ensure successful germination and establish healthy zinnia plants that will reward you with stunning blooms throughout the season.
Timing: Wait to plant zinnia seeds outdoors until after the average last frost date and when the soil has warmed up to at least 60 degrees Fahrenheit (15 degrees Celsius). This ensures that the seeds won’t be exposed to any potential frost damage and that they will have the optimal conditions for germination.
Preparing the Soil: Choose a location that receives full sun or at least 6-8 hours of direct sunlight daily. Zinnias thrive in well-draining soil, so ensure that the soil is loose and amended with compost or well-rotted organic matter to improve moisture retention and nutrient availability. Remove any weeds or debris from the planting area to minimize competition for resources.
Spacing: When planting zinnia seeds, follow the specific spacing recommendations for the variety you are growing. Typically, zinnias should be spaced about 6-12 inches (15-30 cm) apart to allow adequate air circulation and room for the plants to spread as they grow. Proper spacing helps prevent overcrowding and promotes healthy growth.
Sowing the Seeds: Sow zinnia seeds at a depth of ¼ to ½ inch (0.6 to 1.3 cm) in the prepared soil. Space the seeds according to the recommended spacing for the variety. If you prefer a more organized look, you can create rows or patterns for a neat planting arrangement. Gently cover the seeds with soil and lightly press the surface to ensure good seed-to-soil contact. Avoid compacting the soil excessively.
Watering: After sowing the seeds, water the planting area gently. Be careful not to overwater, as excessive moisture can lead to seed rot or fungal diseases. Keep the soil consistently moist but not waterlogged during the germination period. As the seeds sprout, adjust your watering frequency to keep the soil evenly moist.
Providing Support (Optional): Depending on the variety and size of zinnias you are growing, some taller varieties may benefit from staking or providing support. Use bamboo stakes or plant supports to prevent tall zinnias from toppling over or bending under their weight. Install the supports when the plants are still young to avoid damaging the roots later on.
Thinning: Once the zinnia seedlings emerge, thin them out if necessary. This involves removing excess seedlings, allowing the remaining plants to have enough space and resources for proper growth. Space the seedlings according to the recommended spacing guidelines to ensure optimal development and prevent overcrowding.
Zinnias are beautiful and resilient flowers that can be easily grown from seed outdoors. By following the proper planting techniques and providing the necessary care, you will soon be rewarded with a garden filled with colorful zinnias that brighten your landscape and attract pollinators.
Watering and Caring for Zinnias
Proper watering and care are essential for the health and vitality of zinnias. These colorful flowers require consistent moisture and attention to thrive and produce abundant blooms throughout the growing season. Here are some key tips to help you ensure the best care for your zinnias:
Watering: Zinnias prefer evenly moist soil, so regular watering is crucial, especially during dry periods. Water the plants at the base, aiming to deliver water directly to the roots. Avoid wetting the foliage to minimize the risk of fungal diseases. Check the soil moisture regularly by inserting your finger into the soil about an inch deep. If it feels dry, it’s time to water. Aim for about one inch of water per week, adjusting as necessary based on weather conditions.
Mulching: Applying a layer of organic mulch around the base of zinnias can help conserve moisture, suppress weed growth, and regulate soil temperature. Use materials like straw, wood chips, or compost. Apply a layer about 2-3 inches thick, ensuring that the mulch does not touch the stems to prevent moisture-related diseases.
Fertilization: While zinnias are not heavy feeders, they can benefit from occasional fertilization to support healthy growth and vibrant blooms. Apply a balanced, water-soluble fertilizer or use a slow-release granular fertilizer according to the product instructions. Avoid over-fertilizing, as excessive nutrients can result in lush foliage but fewer blooms. Follow a regular fertilization schedule to maintain proper nourishment throughout the growing season.
Deadheading: Regular deadheading, or the removal of spent blooms, is essential to keep zinnias blooming for a longer period. Snip off faded flowers just above a pair of healthy leaves or nodes. Deadheading redirects the plant’s energy toward producing new blooms rather than seed production. It also improves the aesthetic appeal of the plants by maintaining a tidy and well-groomed appearance.
Pest and Disease Control: Zinnias are generally resilient plants, but they can still be susceptible to some pests and diseases. Monitor your plants regularly for common issues such as aphids, spider mites, powdery mildew, or leaf spot. If necessary, treat affected areas using organic pest control methods or approved chemical treatments. Maintaining good airflow around the plants, proper spacing, and avoiding overhead watering can help prevent fungal diseases.
Support and Pruning (if necessary): Some zinnia varieties, particularly the taller ones, may need support to prevent them from flopping over under their weight. Install plant stakes or plant supports when the plants are still young, being careful not to damage the roots. Additionally, pruning any overly long or leggy stems can promote bushier growth and more compact plants.
Continued Care: Regularly monitor your zinnias for signs of stress, pests, or diseases. Remove any damaged or diseased leaves or flowers promptly. Weeds also compete for resources, so keep the planting area well-weeded. Provide adequate air circulation by spacing the plants correctly, as good airflow helps prevent fungal diseases.
With proper watering and care, your zinnias will thrive and reward you with a vibrant display of colorful blooms. Regular attention and maintenance will help ensure healthy growth, prolonged flowering, and a stunning garden filled with these beautiful flowers.
Common Problems and Troubleshooting
While zinnias are generally easy to grow and relatively trouble-free, they can encounter a few common problems. Understanding these issues and knowing how to troubleshoot them will help you maintain the health and beauty of your zinnia plants. Here are some of the most common problems that you may encounter and their potential solutions:
Powdery Mildew: Powdery mildew is a fungal disease that leaves a whitish, powdery coating on the leaves and stems of zinnias. To prevent powdery mildew, provide good air circulation by spacing the plants adequately. Avoid overhead watering and water the plants at the base to keep the foliage dry. If powdery mildew does occur, treat it with organic fungicides or horticultural oils, following the product instructions carefully.
Aphids: Aphids are small green, brown, or black pests that cluster on the undersides of leaves, sucking sap and causing deformities to the foliage and buds. To control aphids, try using a strong jet of water to dislodge them from the plants. You can also introduce natural predators like ladybugs or use insecticidal soaps or neem oil, following the label instructions. Regularly inspect your plants and remove heavily infested leaves or stems.
Spider Mites: Spider mites are tiny pests that feed on the undersides of leaves, causing yellowing, stippling, and webbing. To control spider mites, regularly spraying the plants with a strong jet of water can help dislodge them. Introducing predatory mites or using insecticidal soaps or horticultural oils can also be effective. Ensure the plants receive adequate moisture and humidity to discourage spider mite infestations.
Wilting: Wilting can occur due to underwatering or overwatering. Monitor soil moisture regularly and water when the top inch of soil feels dry. Avoid waterlogged soil, which can lead to root rot. If the soil is consistently wet and the plants are still wilting, improve drainage by amending the soil or adjust watering practices.
Lack of Blooming: If zinnias are not producing blooms, it could be due to insufficient sunlight, over-fertilization with nitrogen-rich fertilizers, or overcrowding. Ensure that the plants receive at least 6-8 hours of direct sunlight daily. Avoid excessive nitrogen fertilizers, as they can promote lush foliage at the expense of blooms. Thinning overcrowded plants can improve air circulation and promote better flowering.
Yellowing Leaves: Yellowing leaves can indicate various issues, including nutrient deficiencies, overwatering, or pests. Check the soil moisture to ensure it’s appropriate for the plants’ needs. Use a balanced fertilizer to address any nutrient deficiencies. Inspect the plants for pests or diseases and take appropriate action if necessary.
Transplant Shock: Transplanted zinnias may experience transplant shock, resulting in wilting or stunted growth. To minimize transplant shock, handle the plants gently during the transplanting process. Ensure the plants are well-watered before and after transplanting to reduce stress. Shield newly transplanted seedlings from intense sunlight or winds until they have acclimated to their new environment.
By being aware of these common problems and knowing how to troubleshoot them, you can address issues promptly and help ensure the continued health and vitality of your zinnias. Regular monitoring, proper care, and timely intervention will help your zinnias thrive and provide you with an abundance of beautiful blooms.
Harvesting Zinnia Seeds
Harvesting zinnia seeds allows you to save and propagate these colorful flowers for future plantings. The process of harvesting zinnia seeds is relatively simple, and it’s a rewarding way to continue enjoying zinnias in your garden. Here are the steps to effectively harvest zinnia seeds:
Allow the Flowers to Fully Mature: To harvest zinnia seeds, you need to wait until the flowers have fully matured and dried on the plants. The petals will wither, and the center of the flower, known as the seed head, will become dry and brittle. This process can take several weeks after the flowers have faded.
Remove the Seed Heads: Once the seed heads are completely dry, gently remove them from the plant. You can do this by carefully cutting or snapping the stem just below the seed head. Place a container, such as a paper bag or a clean, dry envelope, beneath the seed head to catch any seeds that may fall during the harvesting process.
Separating the Seeds: Once you have collected the seed heads, it’s time to separate the seeds from the seed heads. Hold the seed head over a clean surface or container and gently rub or roll it between your fingers. As you do this, the dry seed heads will break apart, releasing the seeds. Remove any remaining plant material or debris from the seeds.
Drying the Seeds: After separating the seeds, spread them out in a single layer on a clean, dry surface such as a paper towel or a fine mesh screen. Allow the seeds to air dry in a well-ventilated area for about one to two weeks. Make sure the seeds are completely dry before storing them to prevent mold or moisture-related issues.
Storing the Seeds: Once the seeds are fully dry, transfer them to a clean and dry container such as an airtight glass jar, envelope, or a seed storage envelope. Label the container with the zinnia variety and the date of harvest for future reference. Store the seeds in a cool, dry, and dark place, ideally at a temperature of around 40-50 degrees Fahrenheit (4-10 degrees Celsius).
Viability and Shelf Life: Zinnia seeds can remain viable for several years if stored properly. However, their germination rates may gradually decline over time. To maintain higher germination rates, it is recommended to use zinnia seeds within 1-2 years of harvest.
Sharing or Trading Seeds: If you have an abundance of zinnia seeds, consider sharing or trading them with other gardening enthusiasts. This not only allows you to connect with fellow gardeners but also helps promote biodiversity and the exchange of different zinnia varieties.
Harvesting zinnia seeds is a satisfying way to continue the legacy of these beautiful flowers in your garden. By following these simple steps, you can save and store zinnia seeds for future plantings or share them with others, ensuring the ongoing beauty and enjoyment of these vibrant blooms.
Storing and Saving Zinnia Seeds for Future Plantings
Properly storing and saving zinnia seeds ensures their viability and allows you to enjoy these vibrant flowers for future plantings. With a few simple steps, you can keep your zinnia seeds in optimal condition, ready to be sown in the seasons to come. Here’s how to store and save zinnia seeds:
Drying the Seeds: Before storing zinnia seeds, it’s important to ensure they are fully dry. Spread the seeds out in a single layer on a clean and dry surface. Allow them to air dry in a well-ventilated area for about one to two weeks. Make sure they are completely dry before proceeding to the next step.
Removing Excess Plant Material: After drying, remove any remaining plant material or debris from the seeds. Gently rub or roll the seeds between your fingers to separate them from any remaining bits of the seed heads or chaff.
Choosing an Appropriate Storage Container: Select a clean and dry container for storing the zinnia seeds. Airtight glass jars, seed storage envelopes, or small airtight plastic bags work well for this purpose. Make sure the container is labeled with the zinnia variety and the date of harvest for easy reference.
Ensuring Optimal Storage Conditions: Store zinnia seeds in a cool, dry, and dark place. Ideally, maintain a storage temperature of around 40-50 degrees Fahrenheit (4-10 degrees Celsius). Too much heat or humidity can reduce the seeds’ viability. Choose a storage location where the seeds will be protected from fluctuations in temperature and moisture.
Avoiding Exposure to Light: Light can reduce the shelf life of zinnia seeds. To maintain their viability, store the seeds in a dark location or use opaque containers that prevent light from reaching the seeds.
Checking for Moisture: Moisture can cause seeds to degrade or develop mold. Regularly inspect the stored seeds for any signs of moisture or condensation in the storage container. If you discover moisture, remove the affected seeds, thoroughly dry them, and consider using moisture-absorbing agents, such as silica gel packets, to help maintain a dry environment.
Periodically Testing Germination Rates: To ensure the seeds’ viability for future plantings, it’s helpful to periodically test their germination rates. Take a small sample of seeds and germinate them in a controlled environment. This will give you an idea of how well the seeds are still performing. If germination rates have significantly declined, it may be time to consider harvesting fresh seeds or replenishing your supply through trading or purchasing.
Sharing or Trading Seeds: If you have an excess of zinnia seeds or want to expand the variety in your garden, consider sharing or trading seeds with other gardeners. This not only promotes diversity but also allows you to access new zinnia varieties, enriching your gardening experience.
By properly storing and saving zinnia seeds, you can ensure their longevity and enjoy the beauty of these vibrant flowers year after year. With a little care and attention, your zinnia seeds will be ready to sprout new plants and delight your garden for seasons to come.