
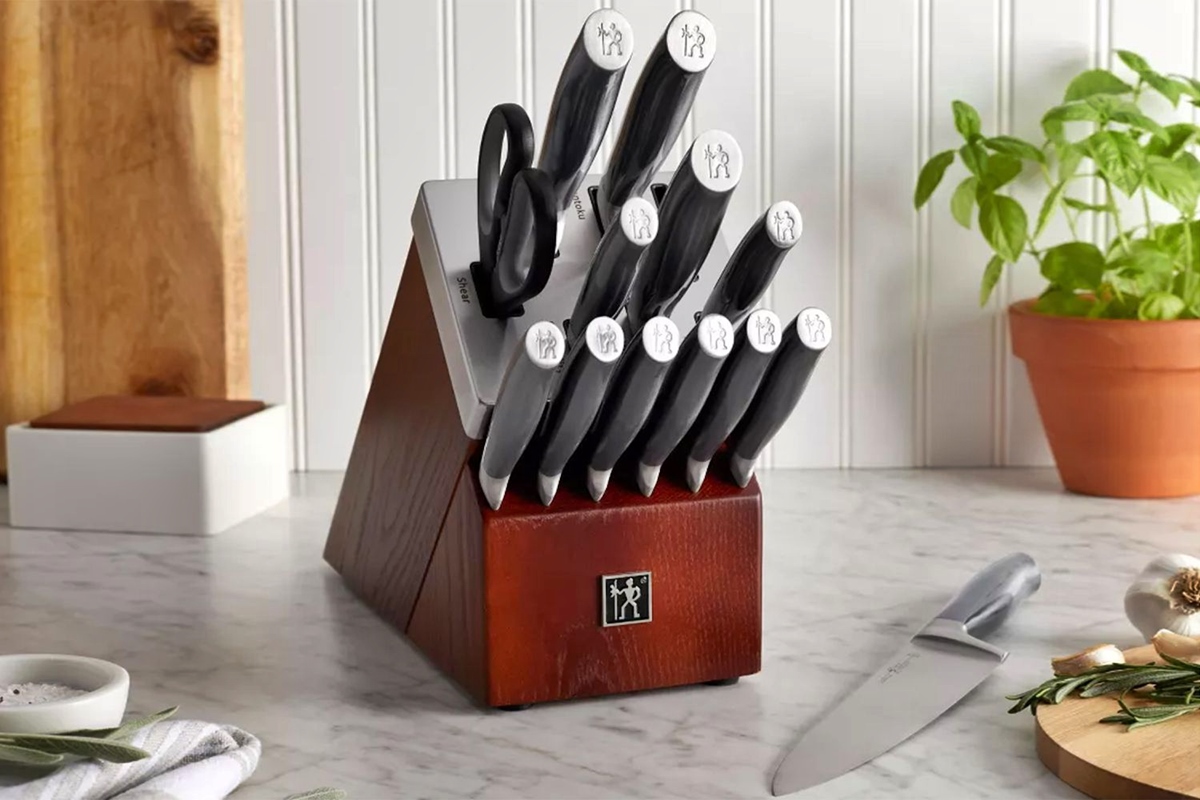
How to Choose the Right Sharpening Tool
When it comes to maintaining the sharpness of your knives, having the right sharpening tool is essential. With the numerous options available in the market, it can be overwhelming to choose the one that best suits your needs. To help you make an informed decision, here are some factors to consider when selecting a sharpening tool:
- Type of Blade: Different sharpening tools are designed for specific types of blades. For example, a honing rod is ideal for straight-edged blades, while a whetstone is better suited for serrated knives. Consider the types of knives you own and ensure that the sharpening tool you choose is compatible.
- Sharpening Method: There are various ways to sharpen a blade, including manual sharpening tools, electric sharpeners, and sharpening systems. Determine your preferred method and choose a tool that aligns with it.
- Level of Experience: Consider your skill level in knife sharpening. If you are a beginner, it’s advisable to go for a user-friendly tool that doesn’t require advanced techniques.
- Budget: Sharpening tools come in a wide range of prices. Set a budget and look for tools that offer good quality within your price range. Keep in mind that a higher price doesn’t always guarantee better performance.
- Durability and Maintenance: Look for a sharpening tool that is built to withstand regular use and requires minimal maintenance. A tool with replaceable parts or easy-to-clean surfaces can save you time and money in the long run.
By considering these factors, you can narrow down your options and find a sharpening tool that fits your specific requirements. Remember, choosing the right tool is the first step towards achieving optimal knife sharpness and prolonging the lifespan of your blades.
Understanding the Types of Sharpening Stones
When it comes to sharpening your knives, using the right type of sharpening stone is crucial. Sharpening stones, also known as whetstones or oil stones, come in different materials, each with its own unique properties and benefits. Let’s take a closer look at the most common types of sharpening stones:
- Arkansas Stones: Arkansas stones are natural stones known for their hardness and fine grit. They are available in various grades, from coarse to fine, making them suitable for different stages of knife sharpening. Arkansas stones are popular for their ability to produce a razor-sharp edge and are a favorite among experienced sharpening enthusiasts.
- Diamond Stones: Diamond stones are synthetic stones embedded with industrial-grade diamonds. They are known for their exceptional hardness, which allows for fast and efficient sharpening. Diamond stones are ideal for sharpening tough blades and restoring severely dull knives. They are available in different grit levels, giving you the flexibility to choose the appropriate coarseness for your needs.
- Water Stones: Water stones, also called Japanese stones or whetstones, are known for their excellent sharpening performance. They are made from natural or synthetic materials and require water for lubrication during sharpening. Water stones are available in various grit levels, ranging from coarse to extra fine, making them suitable for both shaping and refining edges. They are widely used by professional chefs and woodworking enthusiasts for their versatility and ability to produce highly polished edges.
- Ceramic Stones: Ceramic stones are synthetic stones that offer consistent and precise sharpening results. They are known for their durability, making them an excellent long-term investment for knife sharpening. Ceramic stones are available in different grit levels and are renowned for their ability to maintain their shape over time, ensuring consistent sharpening performance.
Understanding the types of sharpening stones is crucial for selecting the right stone for your specific needs. Consider factors such as the type of blades you have, the level of sharpening required, and your personal preference in terms of sharpening experience. By choosing the appropriate sharpening stone, you can ensure optimal blade sharpness and prolong the lifespan of your knives.
Preparing the Sharpening Stone
Before you begin sharpening your knives, it’s important to properly prepare the sharpening stone. This preparation step ensures optimal sharpening results and helps maintain the longevity of the stone. Here are some essential steps to follow when preparing your sharpening stone:
- Clean the Stone: Start by cleaning the sharpening stone to remove any dust, debris, or previous sharpening residue. You can use a soft brush or a cloth dampened with water to gently scrub the surface of the stone. Make sure to rinse and dry the stone thoroughly before proceeding.
- Soak or Lubricate the Stone: Depending on the type of sharpening stone you have, you may need to soak it in water or lubricate it with honing oil before use. Water stones usually require soaking in water for a specified period to ensure proper lubrication during sharpening. On the other hand, oil stones require a few drops of honing oil to be applied on the surface. Refer to the manufacturer’s instructions or consult reliable sources to determine the appropriate soaking or lubrication method for your particular stone.
- Place the Stone on a Stable Surface: Place the sharpening stone on a stable and non-slip surface. This will prevent the stone from moving around during sharpening and ensure a consistent sharpening angle.
- Secure the Stone (Optional): If you have a larger sharpening stone or if you feel more comfortable with added stability, you can secure the stone onto a dedicated sharpening stone holder or a non-slip mat. This will ensure that the stone remains in place while you sharpen your knives.
By taking the time to properly prepare your sharpening stone, you are setting the foundation for effective and safe knife sharpening. The cleaning process removes any impurities that can interfere with the sharpening process, while the soaking or lubrication step ensures proper lubrication for smooth sharpening. Remember to always refer to the specific instructions provided with your sharpening stone to ensure you are following the appropriate preparation method for that particular stone.
Proper Technique for Using the Sharpening Stone
Using the correct technique when sharpening your knives on a sharpening stone is crucial for achieving optimal sharpening results. Here is a step-by-step guide on the proper technique:
- Identify the Correct Angle: Determine the angle at which your knife should be sharpened. This angle is often specified by the manufacturer or can be determined based on the type of knife and its intended use. Most kitchen knives are sharpened at a 20-degree angle, but this may vary. Once you have identified the correct angle, it is important to maintain a consistent angle throughout the sharpening process.
- Hold the Knife Properly: Hold the knife with a firm grip, ensuring that your fingers are safely away from the edge. Place your hand on the handle and use your other hand to grip the blade near the base.
- Position the Blade on the Stone: Place the edge of the knife blade against the sharpening stone at the desired angle. Start with the base of the blade and apply gentle pressure as you move the blade across the stone.
- Move the Knife in a Controlled Motion: Using a smooth and controlled motion, move the knife in an arc or back-and-forth motion across the stone. This ensures even contact between the blade and the stone, resulting in consistent sharpening.
- Apply Even Pressure: Maintain even pressure on the blade during each pass. Avoid using excessive force, as this can damage the blade or cause inconsistent sharpening. Let the sharpening stone do the work.
- Repeat on Both Sides: Sharpen one side of the knife blade for a consistent number of passes, then switch to the other side and repeat the same number of passes. This ensures that both sides of the blade receive equal sharpening.
- Check the Sharpness: After sharpening, carefully wipe off any residue from the blade and test the sharpness. You can do this by gently running your finger across the edge to feel for any burrs or imperfections. If needed, make additional passes on the sharpening stone until the desired sharpness is achieved.
Remember, practice makes perfect when it comes to sharpening your knives. It may take some time to master the technique, but with patience and consistent practice, you will be able to sharpen your knives with confidence and precision.
Maintaining the Correct Angle
Maintaining the correct angle while sharpening your knives is essential for achieving consistent and effective results. The angle at which you hold the knife against the sharpening stone determines the sharpness and longevity of the blade. Here are some tips for maintaining the correct angle:
- Consistency is Key: It is crucial to maintain a consistent angle throughout the sharpening process. This ensures that the entire cutting edge of the knife receives uniform sharpening. Practice holding the knife at the desired angle, and be mindful of any adjustments or deviations as you sharpen.
- Use a Guide: If you are a beginner or find it challenging to maintain a steady angle by hand, consider using an angle guide or a sharpening system. These tools provide a fixed angle and help you maintain consistency without much effort.
- Angle Reference Points: Train your eye to identify reference points on the knife or the sharpening stone that can help you maintain the correct angle. This may include aligning the spine of the knife parallel to the stone or watching the reflection of the blade’s bevel while sharpening.
- Light Pressure: Applying too much pressure can cause the knife to tilt or wobble, leading to an incorrect angle. Use light to moderate pressure to ensure better control and minimize any angle deviations.
- Practice Proper Movements: Pay attention to your sharpening motion. Whether you choose a circular motion or a back-and-forth motion, ensure the knife is moving consistently along the entire length of the stone. Avoid lifting the blade off the stone or tilting it during sharpening.
- Take Breaks: Sharpening for extended periods without breaks can lead to fatigue and affect your ability to maintain the correct angle. Take short breaks as needed to rest your hand and reset your focus before continuing.
- Visualize the Edge: As you sharpen, visualize the cutting edge coming in contact with the stone at the desired angle. This mental image can help you adjust and maintain the correct angle throughout the sharpening process.
Remember, practice is essential when it comes to maintaining the correct angle. Regularly sharpening your knives and paying attention to your technique will improve your skill and ability to consistently maintain the correct angle. With time and experience, you will develop a feel for the proper angle, resulting in sharper and more durable knife edges.
How Many Times to Pass the Knife over the Stone
The number of times you pass the knife over the sharpening stone is an important factor to consider when sharpening your blades. While there is no definitive answer that applies to all situations, here are some guidelines to help you determine how many passes are needed:
- Assess the Blade Condition: The initial condition of the blade plays a role in determining the number of passes required. If your knife is only slightly dull, a few passes on the sharpening stone may be sufficient to restore its sharpness. However, if the blade is significantly dull or damaged, it may require more passes to achieve the desired results.
- Be Consistent: Consistency is key when determining the number of passes. Try to maintain the same number of passes on each side of the blade to ensure even sharpening. Counting the passes or using a guide can help you keep track of the progress and maintain consistency.
- Test for Sharpness: After a few passes, test the sharpness of the blade by gently running your finger along the edge (with caution!) or performing a paper test. If the blade still feels dull or fails to slice through paper smoothly, continue with more passes on the sharpening stone.
- Consider the Grit Level: The grit level of the sharpening stone also affects the number of passes required. Coarser stones remove more material with each pass and may require fewer passes to achieve the desired sharpness. Finer stones, on the other hand, may require more passes to refine and polish the edge.
- Balance Sharpening Time: Avoid spending too much time on one side of the blade while neglecting the other. Aim for an equal number of passes on both sides to ensure even sharpening and maintain the blade’s balance.
- Experience and Skill: Over time, as you gain experience and sharpening skills, you will develop a better sense of the number of passes needed to achieve the desired sharpness. Pay attention to the feedback from the blade and adjust the number of passes accordingly.
Remember that each knife and sharpening session can be different, so it may require some trial and error to find the right number of passes for optimal results. Keep track of your sharpening technique, and with practice, you will refine your approach and be able to gauge the number of passes needed to achieve your desired level of sharpness.
Understanding the Different Grit Levels
When it comes to sharpening stones, understanding the different grit levels is crucial for achieving the desired level of sharpness and refinement. Each grit level corresponds to a specific coarseness or fineness of the abrasive material on the stone’s surface. Here’s an overview of the common grit levels and their functions:
- Coarse Grit (Low Grit): Coarse grit stones, typically ranging from 200 to 400 grit, are used for initial sharpening or repairing heavily damaged blades. The coarse grit quickly removes material from the blade, making it useful for reprofiling a bevel or removing nicks and chips. It is not ideal for achieving a fine, polished edge, but rather for establishing a good foundation for further sharpening.
- Medium Grit: Medium grit stones, ranging from 800 to 1200 grit, are used for sharpening blades that are moderately dull or slightly damaged. They provide a balance between material removal and creating a sharper edge. Medium grit stones are suitable for general purpose sharpening and achieving a good cutting edge.
- Fine Grit: Fine grit stones, typically ranging from 2000 to 3000 grit, refine the sharpened edge further and improve its cutting performance. They remove the scratches left by coarser stones, creating a smoother and more polished edge. Fine grit stones are ideal for maintenance sharpening and regular edge refinement.
- Extra Fine Grit (High Grit): Extra fine grit stones, often above 4000 grit and sometimes up to 8000 grit or higher, are used for achieving a highly polished and razor-sharp edge. These stones refine the edge even further, removing finer scratches left by previous grit levels. Extra fine grit stones are common in the final stage of sharpening to achieve exceptional sharpness and smooth cutting performance.
It’s important to note that some sharpening stone sets include multiple stones with different grit levels, allowing you to progress from coarse to fine grits for a complete sharpening process. The choice of grit level depends on the condition of the blade, desired sharpness, and personal preference.
Remember that coarse grit stones are primarily for repairing and reshaping while finer grit stones are for refining and polishing. It’s essential to progress gradually from coarser to finer grits to achieve the desired sharpness and to maintain the integrity of the blade.
By understanding the different grit levels, you can choose the appropriate sharpening stone and sequence of grits to achieve the level of sharpness, precision, and refinement you desire for your knives.
Proper Maintenance and Cleaning of the Sharpening Stone
Maintaining and cleaning your sharpening stone is essential for its longevity and optimal performance. Regular maintenance ensures that the stone remains flat, free from debris, and ready for use. Here are some important tips for proper maintenance and cleaning of your sharpening stone:
- Remove Residue: After each sharpening session, use a clean cloth or brush to remove any residue or metal particles that may have accumulated on the surface of the stone. This prevents the build-up of debris that can affect the sharpening process.
- Clean with Water and Mild Soap: Periodically clean the sharpening stone with water and a mild soap. Gently scrub the stone’s surface using a soft brush or sponge. Rinse thoroughly to remove any soap residue. This helps remove oil, grease, and other contaminants that can accumulate over time.
- Use Honing Oil (if applicable): If your sharpening stone requires honing oil for lubrication, periodically apply a few drops of honing oil to the surface. This helps prevent the stone from drying out and helps maintain its effectiveness.
- Avoid Harsh Chemicals: Avoid using harsh chemicals or abrasive cleaners on the sharpening stone, as this can damage the stone’s surface and affect its sharpening capabilities.
- Flatten the Stone: Over time, sharpening stones may develop uneven surfaces or dents due to regular use. To maintain a flat surface, periodically flatten the stone using a stone flattening plate or a diamond lapping plate. This restores the stone’s effectiveness and ensures consistent sharpening results.
- Store Properly: When not in use, store the sharpening stone in a clean and dry place. Avoid exposing the stone to extreme temperature changes or storing it in a humid environment, as this can cause the stone to deteriorate.
- Replace when Necessary: Despite proper maintenance, sharpening stones will eventually wear out and lose their effectiveness. If you notice significant grooves, cracks, or a decrease in sharpening performance, it may be time to replace the stone.
By following these maintenance and cleaning tips, you can prolong the life of your sharpening stone and ensure optimal sharpening results. Regular maintenance not only keeps the stone in good condition but also contributes to the longevity and performance of your knives.
Knowing When It’s Time to Replace the Sharpening Stone
Sharpening stones are an essential tool for maintaining the sharpness of your knives. However, just like any other tool, sharpening stones have a lifespan and will eventually need to be replaced. Here are some signs to look out for, indicating that it’s time to replace your sharpening stone:
- Worn Surface: Over time, the sharpening stone’s surface will gradually wear down due to the abrasive action of sharpening blades. If you notice significant flat spots, grooves, or indentations on the stone’s surface that cannot be easily flattened, it may hinder effective sharpening. A worn surface can also result in an unevenly sharpened blade.
- Reduced Sharpening Performance: If you find that despite your best efforts, your knives are not achieving the desired level of sharpness, it may be an indication that the sharpening stone has lost its effectiveness. As the stone wears down, its ability to remove metal and create a sharp edge diminishes. This reduced sharpening performance can be a clear sign that a replacement is needed.
- Cracks or Breakage: Cracks or breakage in the sharpening stone are indicators that it has reached the end of its usable life. A cracked or broken stone can cause instability during sharpening, affect the accuracy of the sharpened edge, and potentially damage your knives.
- Excessive Wear and Tear: If the sharpening stone shows signs of excessive wear and tear, such as chipping, flaking, or crumbling, it is a strong indication that it is no longer capable of delivering consistent and effective sharpening results. Continuing to use a severely deteriorated stone may result in poor sharpening and potential damage to your knives.
- Uneven and Inconsistent Results: If you consistently notice uneven or inconsistent results when sharpening your knives, even with proper technique and maintenance, it may be an indication that the sharpening stone has worn down and is no longer capable of providing consistent and reliable sharpening outcomes.
It’s important to remember that the specific lifespan of a sharpening stone can vary based on factors such as usage frequency, the type of stone, and the maintenance practices followed. Regularly inspect and evaluate the condition of your sharpening stone to determine if it still meets your sharpening needs. When in doubt, it is always better to err on the side of caution and replace the stone to ensure optimal sharpening results and the longevity of your knives.