
Choosing the Right Piece of Carpet
When it comes to turning a piece of carpet into a beautiful rug, the first step is selecting the right carpet. Before you rush off to the store, take a moment to consider a few key factors that will ensure your rug project is a success.
One important consideration is the size of the carpet. Measure the space where you want the rug to go and take note of the dimensions. This will help you determine the appropriate size of carpet you need to purchase. Keep in mind that you may need to cut the carpet to fit your desired dimensions, so it’s better to choose a slightly larger piece to allow for adjustments.
Another aspect to consider is the type of carpet. Look for a carpet that is durable and well-suited for the intended use of the rug. For example, if you plan on placing the rug in a high-traffic area, such as the living room or hallway, opt for a carpet with a tight weave and a low pile height to ensure longevity and easy maintenance.
Additionally, think about the design and color of the carpet. Consider the existing decor and color scheme of the space where the rug will be placed. Choose a carpet that complements the overall aesthetic and adds a touch of style to the room. Keep in mind that if you plan on cutting the carpet into a specific shape or pattern, opting for a solid color or a carpet with a simple design will make the process easier.
Lastly, don’t forget to consider your budget. Carpets come in a wide range of prices, so determine how much you’re willing to spend before making a decision. Factor in the size, type, and quality of the carpet when assessing its value for money.
By taking the time to carefully choose the right piece of carpet, you’ll set yourself up for a successful rug-making project. Remember to consider the size, type, design, and budget to ensure you find the perfect carpet that meets your needs and matches your personal style.
Measuring and Cutting the Carpet
Once you have chosen the perfect piece of carpet for your rug project, the next step is to accurately measure and cut the carpet to fit your desired dimensions. This stage is crucial to ensure that your rug will fit seamlessly into its intended space.
Start by determining the exact size you want your rug to be. Use a measuring tape to measure the length and width of the area where the rug will be placed. Take into account any furniture or other items that will be on top of the rug, making sure to leave enough space around them for a visually balanced design.
With the dimensions in mind, mark the measurements on the backside of the carpet using a straight edge and a fabric marker or chalk. Ensure that the lines are straight and accurately reflect the size you need. Double-check your measurements before proceeding to cut the carpet.
When cutting the carpet, use a sharp utility knife or carpet cutter. Lay the carpet flat on a sturdy surface, such as a cutting mat or a piece of plywood. Align the straight edge with your marked lines and firmly cut through the carpet in one continuous motion. Take your time and be cautious, as a clean and precise cut is essential for a professional-looking rug.
It’s important to note that some carpets may unravel when cut. To prevent fraying, you can apply a thin line of fabric glue or use carpet binding tape along the cut edges. This will help secure the fibers and maintain the integrity of your rug.
If your rug has a specific shape or pattern, such as a round or oval shape, you can create a template using cardboard or paper. Trace the shape onto the backside of the carpet and carefully cut along the lines to achieve the desired shape.
Remember, accuracy is key when measuring and cutting the carpet for your rug. Take your time, be patient, and double-check your measurements to ensure a precise fit. With careful attention to detail, you’ll be one step closer to transforming your piece of carpet into a beautiful and custom-made rug.
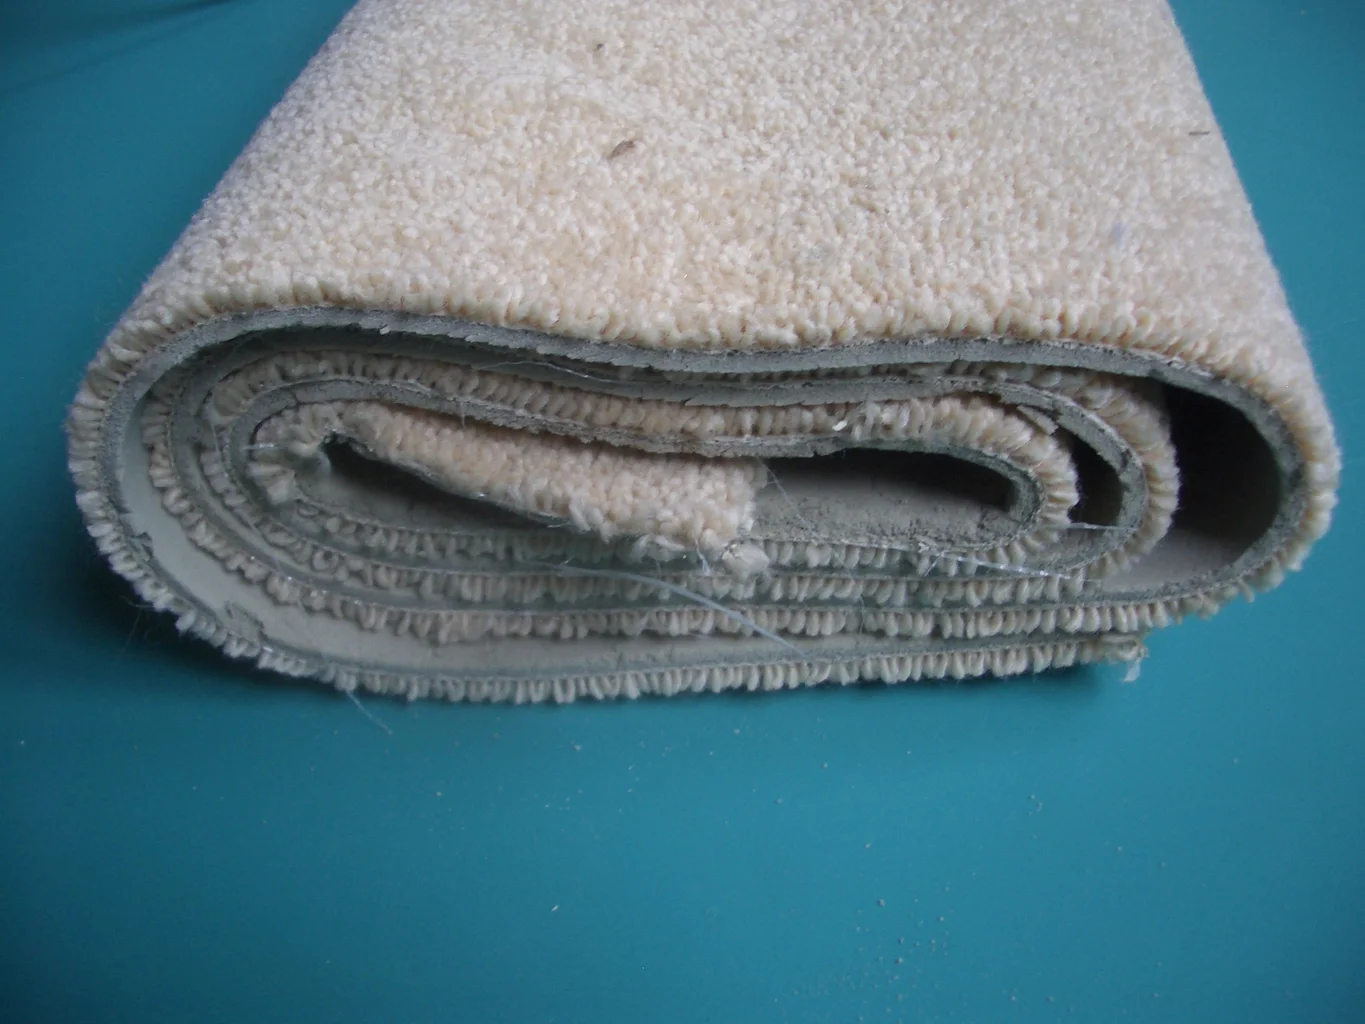
Prepping the Edges of the Carpet
After cutting the carpet to your desired dimensions, the next step in turning it into a rug is to prep the edges. This process involves ensuring that the edges of the carpet are neat, clean, and well-finished, giving your rug a polished and professional look.
One common method for prepping the edges is called “overlocking” or “serging.” This technique involves using an overlocking machine to stitch a tightly woven thread along the edges of the carpet. This not only prevents fraying but also adds durability and stability to the rug.
If you don’t have access to an overlocking machine, you can achieve a similar effect by using a carpet binding tape. Carpet binding tape is a narrow strip of fabric that is specifically designed to secure the edges of a carpet. It comes in various colors and styles, allowing you to match it to your carpet or create a contrasting border for a more decorative touch.
To use carpet binding tape, start by aligning it along one edge of the carpet, ensuring that it covers the raw edge completely. Depending on the type of binding tape you choose, you may need to fold the excess carpet fabric over the tape before securing it with adhesive or stitching.
Once the tape is in place, use a sewing machine or a needle and thread to sew along the edges, securing the tape and the carpet fabric together. Make sure to sew as close to the edge as possible for a clean and seamless finish.
If you prefer a more natural and rustic look, you can opt for a fringe edging instead. Fringe is typically made from yarn or fabric strips and is attached to the ends of the carpet, creating a decorative border. You can sew or glue the fringe to the edges, ensuring it is evenly distributed and securely attached.
Regardless of the method you choose, it’s important to take your time and ensure that the edges are neatly finished. Trim any loose threads or excess fabric to achieve a clean and professional appearance.
By prepping the edges of the carpet, you not only enhance the overall look of your rug but also prolong its lifespan. A well-prepared edge will prevent unraveling and fraying, ensuring that your rug remains in good condition for years to come.
Adding a Non-Slip Backing
When it comes to creating a rug from a piece of carpet, adding a non-slip backing is an important step to ensure the safety and stability of the rug. A non-slip backing helps to keep the rug in place, preventing it from sliding or shifting, especially on hard and smooth surfaces.
There are several options available for adding a non-slip backing to your rug. One popular choice is a rug pad or gripper. These are thin cushions or mats that are placed underneath the rug to provide grip and prevent sliding. Rug pads are available in different materials, such as rubber or felt, with varying levels of thickness and cushioning. Choose a rug pad that best suits your needs and the type of flooring the rug will be placed on.
To apply a rug pad, place it on a clean and dry surface, and then lay your rug on top. Make sure to fully cover the bottom surface of the rug with the rug pad, trimming any excess if necessary. The textured or sticky surface of the rug pad will create friction between the rug and the floor, keeping it securely in place.
Another option is using a non-slip rug spray or adhesive. These products provide a thin layer of grip when sprayed or applied to the backside of the rug. Simply follow the instructions on the product label to apply the spray or adhesive evenly across the rug’s back surface. Allow it to dry thoroughly before placing the rug in its intended location. Non-slip rug sprays and adhesives are particularly useful for smaller rugs or for rugs that are frequently moved or repositioned.
If you prefer a more DIY approach, you can also use silicone caulk to create a non-slip backing. Apply small dots or lines of silicone caulk across the backside of the rug, leaving some space between each dot. Allow the caulk to dry completely, creating a grippy surface that will anchor the rug to the floor.
By adding a non-slip backing, you can ensure that your rug stays in place, providing a safe and comfortable surface to walk on. Whether you choose a rug pad, non-slip spray, or a DIY solution, the non-slip backing will give your rug the stability it needs, allowing you to enjoy your rug without any worries of it slipping or moving underfoot.
Adding Fringe to the Rug
Adding fringe to a rug is a wonderful way to enhance its appearance and give it a more decorative and refined look. Fringe can be made from various materials, such as yarn, fabric strips, or even leather, and it can be attached to the ends of the rug to create a beautiful border.
To add fringe to your rug, you will need to gather the materials and tools necessary for the task. This includes the desired fringe material, a ruler or measuring tape, fabric glue or a sewing machine, and scissors.
Start by determining the length of the fringe you want for your rug. Measure the width of the rug and add an additional inch or so for the fringe to hang down. This will give you the length of each fringe strand that you need to cut.
Next, cut several strands of fringe material to the desired length. The number of strands will depend on the width of your rug and how dense you want the fringe to be. As a general guide, you can space the fringe strands about half an inch apart along the edge of the rug.
If you are using fabric strips or yarn for the fringe, you can simply tie each strand to the end of the rug, ensuring that they are evenly distributed and hang down uniformly. Trim the ends of the fringe to your desired length for a neat and consistent look.
If you prefer a more permanent attachment, you can use fabric glue or a sewing machine to secure the fringe in place. Apply a thin line of fabric glue along the edge of the rug and press the fringe onto it, ensuring it is tightly attached. Alternatively, if you are sewing the fringe, use a straight stitch to sew each strand onto the rug securely.
As you add the fringe, periodically step back and assess the overall look. Adjust the placement and spacing of the fringe strands as needed to achieve a balanced and visually pleasing result.
Adding fringe to your rug can give it a touch of elegance and sophistication. Whether you opt for a classic, symmetrical fringe design or a more bohemian and tousled look, the addition of fringe will elevate the aesthetics of your rug and make it a stunning focal point in any room.
Binding the Edges of the Rug
Binding the edges of a rug is an essential step that not only enhances its durability but also gives it a clean and finished appearance. By binding the edges, you will protect the carpet fibers from unraveling, fraying, and wearing down over time.
There are different methods you can use to bind the edges of your rug, depending on your preference and available resources. One popular option is using carpet binding tape. This narrow strip of fabric is specifically designed for securing the edges of a carpet.
To bind the edges with tape, start by positioning the tape along one edge of the rug, ensuring that it covers the raw edge completely. Depending on the type of binding tape you use, you may need to fold the excess carpet fabric over the tape before securing it with adhesive or stitching.
Once the tape is in place, use a sewing machine or a needle and thread to sew along the edges, attaching the tape and the carpet fabric together. Sew as close to the edge as possible for a neat and seamless finish. If you don’t have access to a sewing machine, you can opt for a heavy-duty fabric adhesive to secure the binding tape in place.
If you prefer a more traditional and decorative approach, you can bind the edges using a method called “whip stitching.” This involves using a thick thread or yarn to hand-sew along the edges, creating a visible stitch that adds a charming and personalized touch to the rug.
When whip stitching, start by hiding the knot of your thread or yarn under the binding tape or inside the fold of the fabric. Insert the needle or thread from behind the binding tape, then bring it back through the carpet fabric and binding tape, creating a loop. Pull the thread or yarn tight, ensuring a secure and even stitch. Repeat this process along the entire edge until the binding is complete.
Regardless of the method you choose, take your time to ensure that the binding is even and smooth. Trim any loose threads or excess fabric for a tidy and professional finish.
By binding the edges of your rug, you not only protect the carpet from unraveling but also add a touch of durability and refinement. Whether you choose to use carpet binding tape or opt for a more intricate whip stitching technique, the result will be a well-made rug that adds beauty and longevity to any space.
Securing the Binding
Once you have successfully bound the edges of your rug, it is important to ensure that the binding is securely attached. This step will help to maintain the integrity of the rug and prevent any loosening or unraveling of the binding over time.
One method to secure the binding is by using a strong adhesive. Carefully lift the binding tape or fabric fold and apply a generous amount of fabric glue or carpet adhesive underneath. Press the binding firmly onto the dried adhesive, ensuring that it is evenly attached along the entire edge of the rug.
Allow the adhesive to dry fully according to the manufacturer’s instructions. This will provide a strong bond that will keep the binding in place even with regular use of the rug.
If you prefer a more durable and long-lasting option, you can secure the binding with stitching. Using a sewing machine or a needle and thread, sew a straight or zigzag stitch close to the edge of the binding tape, ensuring that it goes through both the tape and the carpet fabric. Be sure to backstitch at the beginning and end of each stitch line to secure it further.
Alternatively, you can employ a method called “tacking” to secure the binding. Using a needle and thread, hand-stitch through the binding tape and the carpet fabric at regular intervals along the edge of the rug. This technique creates small loops or knots that hold the binding firmly in place. Be sure to make the stitches tight and secure.
Regardless of the method you choose, continuously check your work to ensure that the binding remains smooth and evenly attached. Trim any loose threads or excess fabric for a clean and polished appearance.
Securing the binding is an essential step in the rug-making process. It ensures that the binding stays intact and prevents any potential unraveling or fraying, allowing your rug to withstand regular use and the test of time.
By employing adhesive or stitching techniques, you can confidently enjoy your rug, knowing that the binding is securely attached and will continue to enhance the overall look and durability of your creation.
Adding a Decorative Border
Adding a decorative border to your rug is a wonderful way to personalize and elevate its design. A border can create a distinct and polished look, enhancing the overall aesthetic appeal of your rug and complementing the existing décor of your space.
There are various options for adding a decorative border to your rug, depending on your style preferences and the materials you have available. Here are a few popular methods:
1. Fabric Binding: Fabric binding is a classic and versatile option for creating a decorative border. Cut strips of fabric in a contrasting color or pattern, and sew or glue them along the edges of your rug. This method adds a pop of color and texture, making your rug stand out.
2. Braided Border: Using fabric, yarn, or even strips of leather, create a braided border around your rug. Braid together the materials, and then sew or glue the braid around the edges of the rug. This technique adds a unique and intricate detail to your rug.
3. Piping: Piping consists of a narrow fabric tube filled with cord or stiffening material. This technique involves attaching the piping to the edges of the rug using sewing and upholstery techniques. Piping adds a polished and structured finish to your rug, giving it a tailored look.
4. Embroidery: For a more intricate and decorative border, consider adding embroidery to the edges of your rug. Using embroidery thread of various colors, create unique designs or patterns along the edge. This method allows for personalization and a truly custom-made rug.
5. Stenciling: If you are feeling creative, consider using stencils and fabric paint to add a decorative border to your rug. Choose stencils that match your desired design or theme, and carefully paint the pattern onto the edge of the rug. This method allows for endless possibilities and artistic expression.
When adding a decorative border, take your time and ensure that the materials are securely attached to the rug. Use appropriate adhesives or sewing techniques to ensure durability and longevity.
Remember to consider the overall design and style of your rug when choosing a decorative border. Coordinate the colors, patterns, and materials to create a cohesive and visually appealing result.
By adding a decorative border, you can transform your rug into a unique and eye-catching piece of art. Whether you opt for fabric binding, braiding, piping, embroidery, or stenciling, the decorative border will showcase your creativity and make your rug a true statement piece in your home.
Cleaning and Maintaining Your New Rug
Once you have transformed a piece of carpet into a beautiful rug, it is essential to know how to properly clean and maintain it. Regular maintenance will help keep your rug looking fresh and vibrant for years to come. Here are some tips to help you keep your new rug in top condition:
1. Vacuum regularly: Regular vacuuming is key to removing dirt, dust, and debris that can accumulate on your rug. Use a vacuum cleaner with a brush attachment and gently run it along the surface of the rug. Be sure to vacuum both sides of the rug if possible, as dust can settle deep within the fibers.
2. Address spills immediately: Accidents happen, but it’s important to address spills and stains as soon as they occur to prevent them from setting into the rug. Blot the spill with a clean cloth or paper towel to absorb as much liquid as possible. Avoid rubbing the stain, as it can spread and damage the fibers. Use a mild detergent or carpet stain remover according to the manufacturer’s instructions to treat the stain.
3. Rotate the rug: To ensure even wear and minimize the risk of sun fading or discoloration, rotate your rug regularly. This helps distribute foot traffic and exposure to sunlight evenly across the rug’s surface.
4. Protect from direct sunlight: Prolonged exposure to direct sunlight can cause fading and damage to your rug’s colors. If possible, place the rug away from windows or use curtains or blinds to block excessive sunlight.
5. Professional cleaning: Depending on the type of rug and its material, it may be beneficial to get your rug professionally cleaned every one to two years. Professional cleaners are equipped with the knowledge and tools to deep clean and remove stubborn stains or odors.
6. Consider a rug pad: Adding a rug pad underneath your rug can provide extra cushioning, prevent slipping, and protect both the rug and the floor underneath. Rug pads also help to extend the lifespan of your rug by reducing friction and wear.
7. Avoid high foot traffic: If possible, place your rug in low to medium foot traffic areas to minimize wear and tear. Rugs placed in high traffic areas may require more frequent cleaning and maintenance.
8. Regularly check for damage: Inspect your rug periodically for any signs of damage, such as fraying edges or loose threads. Promptly repair any small damages to prevent them from worsening over time.
9. Follow manufacturer’s care instructions: Different types of rugs may require specific care and cleaning instructions. Always refer to the manufacturer’s guidelines for the best practices to maintain your specific rug.
By incorporating these cleaning and maintenance practices into your routine, you can enjoy a beautiful and long-lasting rug. Regular care will preserve the appearance and quality of your rug, allowing you to continue enjoying its beauty for years to come.