
Choosing the Right Fleece Fabric
When it comes to sewing a fleece blanket, one of the most important steps is selecting the right fabric. With its soft and cozy texture, fleece is a popular choice for blankets, but not all fleece fabrics are created equal. Here are a few factors to consider when choosing the right fleece fabric for your project.
1. Weight: Fleece fabric comes in various weights, ranging from lightweight to heavyweight. The weight of the fabric will determine the warmth and thickness of the blanket. Lightweight fleece is suitable for mild climates or as a layering option, while heavyweight fleece provides extra warmth for colder temperatures.
2. Material: Fleece can be made from different materials, including polyester, cotton, or a blend of both. Polyester fleece is the most common and offers excellent durability, softness, and moisture-wicking properties. Cotton fleece, on the other hand, is more breathable and suitable for warmer climates.
3. Pile: Consider the pile or nap of the fleece fabric. Some fleece fabrics have a smooth, short pile, while others have a longer pile. The pile can affect the softness and thickness of the blanket. Choose a pile length that appeals to your preference and intended use.
4. Prints and Patterns: Fleece fabrics come in a wide variety of prints, patterns, and colors. Take the time to explore different options and choose a design that matches your personal style or the recipient’s preferences. Whether you prefer solid colors, fun prints, or elegant patterns, there is a fleece fabric to suit every taste.
5. Care Instructions: Check the care instructions for the fleece fabric before making a purchase. Some fleece fabrics are machine washable, while others may require special care such as delicate washing or air-drying. Consider your lifestyle and maintenance preferences when selecting a fabric that is easy to care for.
By considering these factors, you can ensure that you choose the perfect fleece fabric for your blanket project. Whether you are making a cozy throw for yourself or a thoughtful gift for a loved one, selecting the right fabric is essential for a successful and enjoyable sewing experience.
Gathering the Supplies
Before you begin sewing your fleece blanket, it’s important to gather all the necessary supplies. Having everything you need on hand will make the process smoother and more enjoyable. Here are the essential supplies you’ll need to get started:
- Fabric: Choose the fleece fabric you’ve selected for your blanket. Make sure to have enough fabric to achieve the desired size.
- Measuring tools: You’ll need a measuring tape or ruler to measure and mark the fabric accurately.
- Scissors or rotary cutter: A sharp pair of fabric scissors or a rotary cutter will make it easier to cut the fabric cleanly and precisely.
- Pins or clips: These will help keep the fabric in place during the cutting and sewing process.
- Thread: Choose a high-quality thread that matches or complements the color of your fabric.
- Sewing machine: A sewing machine will make the sewing process faster and more efficient. Ensure that it’s in good working condition and threaded correctly.
- Needles: If you prefer hand sewing or need to do any finishing touches by hand, have a set of sewing needles ready.
These are the basic supplies you’ll need to sew a fleece blanket. Depending on your preferences and the specific design of your blanket, you may also need additional embellishments or trims, such as ribbons, pompoms, or appliques. Make sure to gather all the necessary supplies before you start to avoid any interruptions or delays during the sewing process.
Once you have all your supplies ready, you can move on to the next steps of preparing the fabric and measuring and cutting it to the desired size. Having everything organized and within reach will allow you to focus on the sewing itself, bringing your cozy fleece blanket to life.
Preparing the Fabric
Before you start sewing your fleece blanket, it’s important to properly prepare the fabric to ensure the best results. Here are the steps to follow for preparing the fabric:
- Pre-wash: It’s recommended to pre-wash your fleece fabric before sewing to remove any excess dyes, chemicals, or shrinkage. Follow the care instructions on the fabric label and wash it using a gentle cycle with cold water. After washing, tumble dry on low heat or air dry.
- Ironing: Fleece fabric doesn’t typically need to be ironed, as it’s naturally wrinkle-resistant. However, if your fabric has noticeable creases or wrinkles from the packaging or washing, you can use a low heat setting and a pressing cloth to gently iron them out. Avoid placing the iron directly on the fabric.
- Trimming the edges: Inspect the edges of your fabric for any frayed or uneven areas. Use scissors or a rotary cutter to trim any excess or uneven edges. This will ensure that your blanket has clean and straight edges when sewn together.
- Matching the grain lines: Check that the selvage edges of your fabric are aligned, ensuring that the fabric is straight and not skewed. Aligning the grain lines will improve the overall appearance and drape of the finished blanket.
- Pressing seams: If you have any seams or folds in your fleece fabric, you can use a warm iron on a low setting to press them flat. Be sure to use a pressing cloth to protect the fabric from direct heat.
By following these steps, you will prepare your fleece fabric for sewing and create a smoother sewing experience. Pre-washing the fabric helps eliminate any shrinkage that may occur during washing later on, while ironing and trimming the edges ensure that your blanket has a polished finish. Taking the time to align the grain lines and press any seams will result in a professional-looking final product.
Once the fabric is properly prepared, you can move on to measuring and cutting it to the desired size for your blanket. With a well-prepared fabric, you are ready to embark on the next steps of creating your cozy fleece blanket.
Measuring and Cutting the Fabric
Accurate measurement and precise cutting are crucial steps in sewing a fleece blanket. Taking the time to measure and cut the fabric correctly will ensure that your blanket turns out the way you envision it. Here’s a step-by-step guide on measuring and cutting the fabric:
- Determine the desired size: Decide on the dimensions of your fleece blanket, considering its intended use and the recipient’s preferences. You can refer to standard blanket sizes or customize the measurements according to your needs.
- Prepare the workspace: Clear a large, flat surface to work on, such as a table or the floor. Ensure that the area is clean and free from any obstacles that may impede the measuring and cutting process.
- Spread out the fabric: Lay the fleece fabric on the prepared workspace, making sure it’s smooth and free from wrinkles. Align the edges of the fabric with the selvage aligned.
- Measure and mark: Use a measuring tape or ruler to measure the desired length and width of the blanket. Make marks on the fabric using fabric chalk or pins to indicate where to cut.
- Cut the fabric: With a sharp pair of fabric scissors or a rotary cutter, carefully cut along the marked lines. Take your time to ensure clean, straight cuts. If you need multiple panels for a larger blanket, repeat the measuring and cutting process as needed.
It’s essential to use sharp cutting tools and take your time when cutting the fleece fabric to achieve clean edges and prevent fraying. If the fabric has a pattern or print, make sure to align the cuts accordingly to maintain a consistent design throughout the blanket.
Remember to double-check your measurements before cutting, as mistakes can be difficult to rectify once the fabric is cut. If you’re unsure, it’s always better to err on the side of caution and leave a little extra fabric to trim later if needed.
By following these steps, you will be able to measure and cut the fleece fabric accurately, setting the foundation for a well-constructed blanket. With the fabric cut to the desired size, you’re now ready to move on to the next step of sewing the blanket edges.
Sewing the Blanket Edges
Once you have measured and cut your fleece fabric to the desired size, it’s time to sew the edges of the blanket. Sewing the edges will not only give your blanket a clean and finished look but also prevent the fabric from fraying over time. Here’s a step-by-step guide on sewing the blanket edges:
- Prepare your sewing machine: Ensure that your sewing machine is set up with a matching or contrasting thread color, and the machine is threaded correctly. Select a straight stitch or a zigzag stitch, which works well for fleece fabric.
- Optional: Fold and press the edges: If you prefer a neater finish, you can fold each edge of the fabric by about 1/2 inch and press it with a warm iron. This will create a folded hem that you can stitch over.
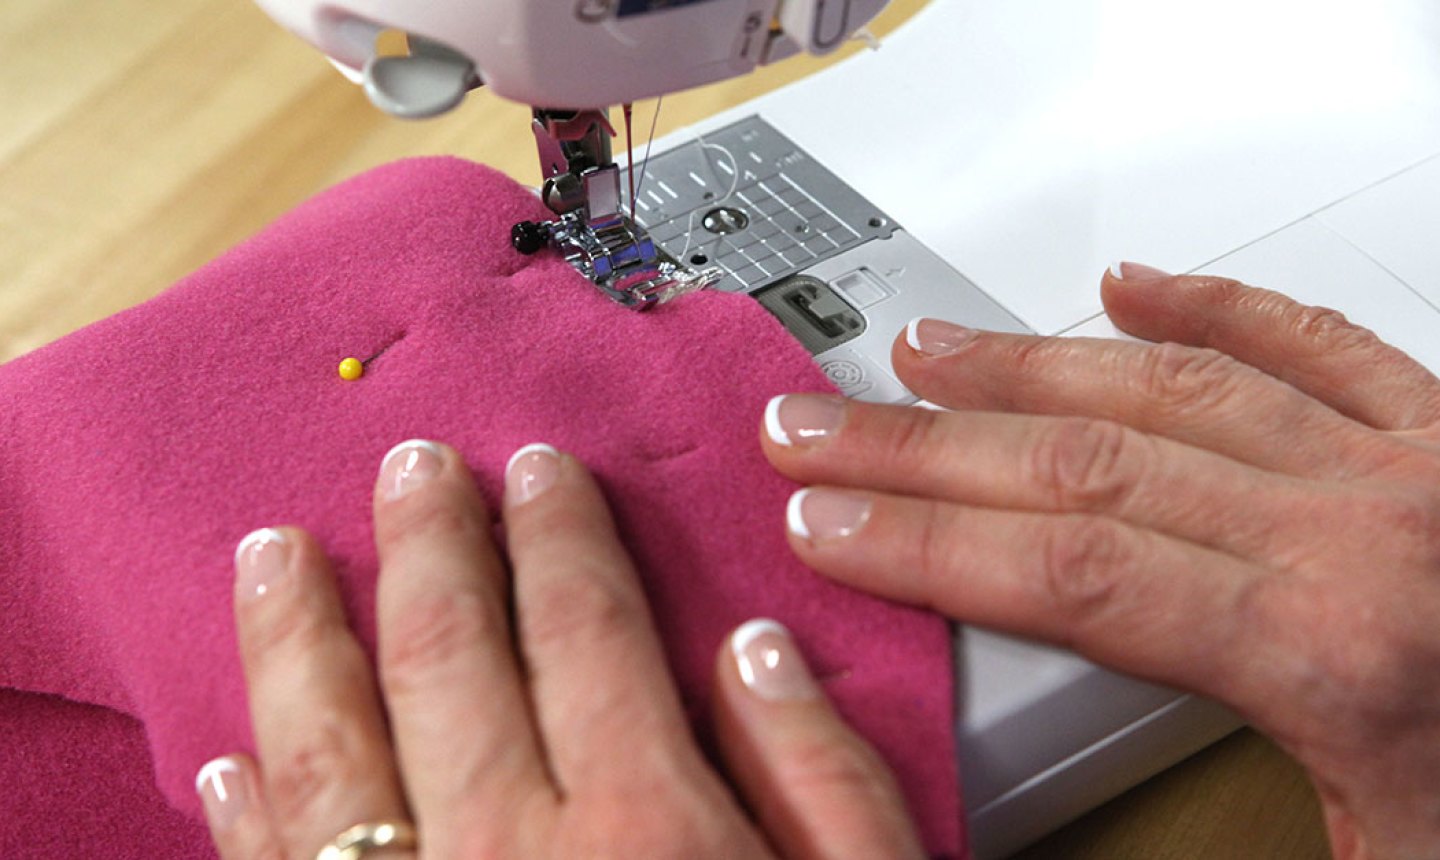
- Start sewing the edges: Begin at one corner and position the fabric under the sewing machine foot. Backstitch a few stitches to secure the thread and then sew along the edge, maintaining a consistent seam allowance. If you folded the edges, sew close to the folded edge.
- Pivot at the corners: When you reach a corner, stop with the needle down in the fabric, lift the presser foot, and pivot the fabric to continue sewing along the next edge. This creates crisp corners and ensures the edges are fully secured.
- Continue sewing all the edges: Sew along all four sides of the fabric until you reach the starting point. Backstitch a few stitches to secure the thread, and then trim any excess thread.
Take your time while sewing the blanket edges to ensure straight and even stitches. If you encounter bulky sections or multiple layers of fabric, it may help to use a fabric walking foot or adjust the presser foot pressure on your sewing machine for smoother stitching.
Remember, the purpose of sewing the edges is to prevent the fabric from fraying, so make sure the stitches are close enough to encapsulate the raw edges of the fabric. If you folded the edges, the stitches will secure the folded hem in place.
Once you finish sewing the edges, give your blanket a final inspection to check for any loose threads or uneven seams. Trim any excess fabric or thread, and your fleece blanket’s edges will be professionally finished and ready for use.
Adding Embellishments (optional)
If you want to add a personal touch or enhance the visual appeal of your fleece blanket, you can consider adding embellishments. Embellishments can range from simple decorative elements to more intricate designs, depending on your preferences and creativity. Here are a few optional embellishments you can incorporate into your fleece blanket:
- Appliques: Appliques are small fabric shapes or designs that can be sewn onto the blanket. They can be cut out of different fabrics and then stitched onto the fleece using a straight stitch or a zigzag stitch. Appliques can be used to create patterns, letters, or decorative motifs.
- Embroidery: Embroidery is a technique where thread is stitched onto the fabric to create intricate designs or patterns. You can hand embroider or use a sewing machine with embroidery capabilities to add personalized details, names, monograms, or decorative stitches to your fleece blanket.
- Ribbons and trims: Adding ribbons or trims to the edges or corners of your blanket can add a decorative flair. You can sew them along the hem, or create a border by stitching them around the entire blanket. Choose ribbons or trims that complement the color or pattern of your fleece fabric.
- Pompoms and tassels: Pompoms and tassels can be attached to the corners or along the edges of your fleece blanket for a playful and whimsical touch. You can purchase ready-made pompoms or tassels, or create them yourself using yarn and a small piece of cardboard.
- Patches or iron-on transfers: Patches or iron-on transfers are an easy way to add decorative elements to your fleece blanket. They come in various designs, such as flowers, animals, or logos, and can be ironed on or sewn onto the fabric.
Before adding any embellishments, consider the overall design and purpose of your fleece blanket. You want the embellishments to complement the fabric and enhance its appeal, without overpowering or distracting from the blanket itself. It’s also important to ensure that the embellishments are securely attached to withstand washing and regular use.
Feel free to explore your creativity and experiment with different embellishments to make your fleece blanket unique and special. Adding these optional decorative elements can elevate your blanket and make it a cherished item for yourself or a thoughtful gift for someone else.
Adding a Binding (optional)
If you’re looking to give your fleece blanket a polished and professional finish, adding a binding is a great option. A binding not only adds a decorative touch but also reinforces the edges of the blanket, increasing its durability. Here’s a step-by-step guide on how to add a binding to your fleece blanket:
- Choose a binding fabric: Select a fabric that complements or contrasts with your fleece blanket. You can use cotton, flannel, or any other fabric that is suitable for bindings. Consider the thickness and texture of the binding fabric to ensure it works well with the fleece.
- Measure and cut the binding: Determine the total length of the blanket’s edges and add a few extra inches for seams. Cut bias strips of fabric for the binding that are twice the desired width plus seam allowance. For example, if you want a 2-inch binding, cut strips that are 4 inches wide.
- Join the binding strips: If necessary, join the binding strips together by stitching them at a 45-degree angle to create one long continuous strip. Trim the excess fabric, and press the seams open or to one side to reduce bulk.
- Prepare the binding strip: Fold the binding strip in half lengthwise, wrong sides together, and press it with an iron. This will create a neat folded edge.
- Attach the binding: Starting at one corner of the blanket, align the raw edge of the binding strip with the raw edge of the fleece fabric. Pin or clip in place. Using a straight stitch, sew along the folded crease of the binding, securing it to the blanket. Stop stitching about 1/4 inch away from the corner.
- Miter the corners: To create neat corners, fold the binding strip up, away from the blanket, and then fold it back down, following the direction of the next edge. This will create a diagonal fold at the corner. Continue sewing along the next edge, starting from the folded corner.
- Finish the binding: Sew all the way around the blanket, mitering the corners as you go. When you reach the starting point, overlap the binding strip and trim any excess fabric. Fold the end of the binding inside itself to create a clean finish.
Adding a binding to your fleece blanket not only adds a decorative element but also reinforces the edges, giving it a more finished look and preventing fraying. It may take some practice to master the technique of mitering the corners, but with patience, your binding will turn out beautifully.
When choosing a fabric for the binding, consider its color, pattern, or texture to enhance the overall aesthetic of your fleece blanket. Additionally, ensure that the binding fabric is of good quality and complements the softness and texture of the fleece.
By adding a binding, your fleece blanket will have a professional touch and be more resistant to wear and tear, making it a cozy and durable companion for chilly nights.
Finishing Touches
After completing the main steps of sewing and adding any optional embellishments or bindings, there are a few final touches you can consider to complete your fleece blanket project. These finishing touches will add that extra touch of personalization and make your blanket truly special. Here are some ideas to consider:
- Label or tag: Add a fabric label or tag to your blanket, showcasing your name or a special message. You can sew it onto a corner or attach it with a decorative pin to signify the handmade nature of the blanket.
- Quilting or tie-off stitches: If you prefer, you can add quilting stitches to secure the layers of the blanket together. Alternatively, you can use a tying-off technique where you make small knots in regular intervals using coordinating yarn or thread. This not only adds visual interest but also helps keep the layers in place.
- Personalized embroidery: If you have embroidery skills or access to an embroidery machine, consider adding a special message, initials, or a design that holds meaning to you or the recipient of the blanket. This personal touch will make the blanket even more cherished.
- Wash and press: Once your blanket is complete, give it a final wash according to the fabric care instructions. This will help remove any lingering marks or wrinkles and give the blanket a fresh and clean feel.
- Photograph or note: Attach a small photograph or a handwritten note to the blanket before gifting it to someone special. This sentimental addition will add a heartfelt touch and create lasting memories.
- Storage or gift packaging: Consider how you will present or store the finished blanket. Use a fabric bag, a ribbon-tied bundle, or a decorative box to keep the blanket safe and make it even more appealing when gifted.
Your blanket is a labor of love, and these finishing touches will help make it a truly unique and cherished item. The level of personalization and extra steps you choose to include will depend on your preferences and the intended use of the blanket. Whether you’re keeping it for yourself or giving it as a gift, these final touches will elevate the overall experience and make the blanket even more special.
Remember to take the time to admire your finished creation and appreciate the effort and creativity you put into making your cozy fleece blanket.