
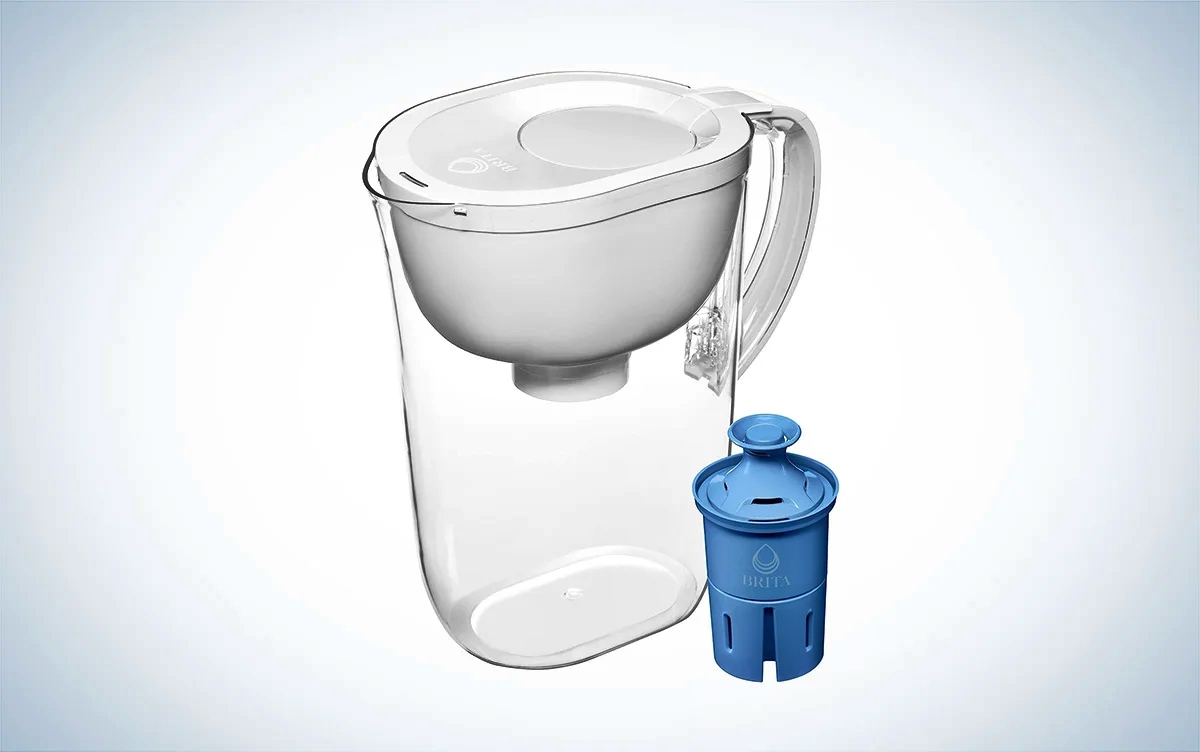
What is a Brita Water Filter?
A Brita water filter is a popular household device designed to improve the quality of tap water. It is a simple and cost-effective solution for removing impurities such as chlorine, lead, mercury, and certain types of bacteria from drinking water. Brita filters work by utilizing a combination of activated carbon and ion exchange resin to trap contaminants and provide clean and fresh-tasting water.
The filters are typically used in water pitchers or dispensers that can be conveniently stored in the refrigerator or placed on a countertop. Some Brita models also come with a built-in indicator that measures the filter’s lifespan, indicating when it needs to be replaced or reset.
Using a Brita water filter offers several benefits. Not only does it provide a more enjoyable drinking experience by reducing unpleasant odors and tastes, but it also helps to protect your health by removing potentially harmful substances. Additionally, using Brita filters is an eco-friendly alternative to purchasing and consuming single-use plastic water bottles, as it helps to reduce plastic waste.
Brita water filters have gained significant popularity due to their effectiveness, affordability, and ease of use. With regular maintenance and proper reset procedures, you can ensure that your Brita filter continues to provide you with clean and refreshing drinking water for an extended period.
Why Should You Reset Your Brita Water Filter?
Resetting your Brita water filter is an essential step in maintaining its optimal performance and ensuring that you continue to receive high-quality filtered water. Over time, the filter cartridge becomes clogged with impurities, which can decrease its ability to effectively remove contaminants from the water. Resetting the filter helps to refresh it, allowing for better filtration and improving the taste and odor of the water.
Here are a few reasons why it is important to reset your Brita water filter regularly:
- Ensure a consistent flow rate: As the filter gets used and becomes saturated with contaminants, it may start to slow down the flow of water through the filter. By resetting the filter, you can remove any trapped particles and restore the flow rate, ensuring a continuous supply of clean water.
- Maintain optimal filtration: Resetting the Brita water filter helps to clear out accumulated impurities and renews the filter’s ability to effectively capture chlorine, lead, and other harmful substances. This ensures that you continue to enjoy clean and safe drinking water.
- Extend the lifespan of the filter: Regularly resetting the Brita water filter can help prolong its usage life. When the filter is reset, it allows the activated carbon and ion exchange resin to resume their filtration capabilities, making the filter last longer and saving you money in the long run.
- Keep your water pitcher indicator accurate: Some Brita models come with an indicator light that alerts you when it’s time to replace the filter. By resetting your filter at the appropriate time, you can ensure that the indicator accurately reflects the filter’s lifespan, making it easier for you to know when it needs to be replaced.
- Enjoy better-tasting water: Over time, a used filter may develop a mildew-like odor or produce water with an unpleasant taste. By resetting your Brita water filter, you can eliminate these issues and enjoy fresh, clean-tasting water once again.
By taking the time to reset your Brita water filter regularly, you can maintain its efficiency, prolong its lifespan, and continue to enjoy the benefits of clean and great-tasting water for you and your family.
When Should You Reset Your Brita Water Filter?
Knowing when to reset your Brita water filter is crucial to ensure that you are consistently receiving clean and filtered water. Although the frequency of resetting may vary depending on usage and water quality, there are some general guidelines to follow.
Here are a few indicators that it may be time to reset your Brita water filter:
- Elapsed time: Brita recommends replacing its filters every two months or after filtering approximately 40 gallons of water. If it has been more than two months since you last reset your filter, or you have exceeded the recommended gallon capacity, it is time to reset and replace the filter cartridge.
- Changes in taste or odor: If you notice a change in the taste or odor of the filtered water, it may be an indication that the filter is reaching its maximum capacity and needs to be reset. Resetting the filter can help eliminate any impurities and restore the freshness of the water.
- Slower flow rate: If the flow rate of the filtered water begins to slow down significantly, it may be due to the filter becoming clogged with sediment and contaminants. Resetting the filter can help improve the flow rate and ensure that water is properly filtered.
- Indicator light: Some Brita models come equipped with an indicator light that changes color or provides a notification when it’s time to replace or reset the filter. Pay attention to the instructions provided by the manufacturer regarding how to reset the indicator light and follow them accordingly.
- Water quality issues: If you are experiencing water quality issues, such as excessive chlorine taste or visible sediment in the filtered water, it may be necessary to reset the filter to improve the water’s taste and clarity.
Remember, it’s important to check your specific Brita model’s instructions for the recommended reset frequency and any additional guidelines. By resetting your Brita water filter at the appropriate times, you can ensure optimal filtration, maintain water quality, and extend the lifespan of the filter.
How to Know If You Need to Reset Your Brita Water Filter?
Knowing when to reset your Brita water filter is important to ensure that it continues to effectively remove impurities and provide you with clean, great-tasting water. Here are a few signs that indicate you may need to reset your Brita water filter:
- Water flow is slow: If you notice a significant decrease in water flow when pouring from your Brita pitcher, it could be a sign that the filter needs to be reset. A clogged or saturated filter can impede the flow of water and affect its filtration capabilities.
- Changes in taste or odor: If the water filtered through your Brita starts to have a strange taste or odor, it’s a clear indication that the filter needs a reset. Over time, impurities and contaminants can build up, affecting the quality of the filtered water. Resetting the filter can help eliminate any trapped particles and restore the freshness of the water.
- Visual examination: Take a look at the filter cartridge to assess its condition. If it appears dirty or discolored, it’s a sign that it may be time to reset or replace the filter. A clean and well-maintained filter will ensure better filtration and improve the overall quality of the water.
- Indicator light: If your Brita water pitcher comes with an indicator light, pay attention to its color or notification. The indicator light is designed to let you know when to reset or replace the filter. Follow the manufacturer’s instructions on how to reset the indicator light to ensure accurate monitoring of the filter’s lifespan.
- Elapsed time and usage: Brita recommends replacing its filters every two months or after filtering approximately 40 gallons of water. If it has been longer than the recommended two-month period or if you have exceeded the gallon capacity, it’s a good time to reset the filter and replace the cartridge.
By paying attention to these signs, you can determine when it’s time to reset your Brita water filter. Regularly resetting and maintaining your filter will ensure its effectiveness in removing impurities and providing you with clean and refreshing water.
How to Reset a Brita Water Filter?
Resetting a Brita water filter is a simple process that can be done in a few easy steps. Follow these instructions to ensure that your filter is properly refreshed and ready to provide you with clean and fresh-tasting water:
- Step 1: Remove the filter from the water pitcher: Begin by removing the filter cartridge from the water pitcher. This is typically done by lifting the lid or cover of the pitcher and gently pulling out the filter.
- Step 2: Soak the filter in cold water: Fill a bowl or container with cold water and submerge the filter cartridge in it. Allow the filter to soak for about 15 minutes. This helps to flush out any trapped particles and refreshes the filter.
- Step 3: Replace the filter in the water pitcher: After soaking, remove the filter from the bowl of water and discard the water. Place the filter back into the filter holder or designated area within the water pitcher. Make sure it is securely seated.
- Step 4: Run cold water through the filter for 5 minutes: Position the pitcher under a cold water tap or faucet. Turn on the water and let it run through the filter for approximately 5 minutes. This helps to flush out any remaining impurities and ensures that the filter is properly activated.
- Step 5: Reset the indicator light (for models with a light indicator): If your Brita water pitcher has an indicator light that needs to be reset after changing or resetting the filter, consult the user manual for specific instructions. Follow the manual to reset the indicator light and ensure accurate monitoring of the filter’s lifespan.
- Step 6: Discard the first three pitchers of filtered water: After completing the previous steps, it is recommended to discard the first three pitchers of filtered water. This helps to flush out any remaining particles and ensures that only clean and filtered water is consumed.
- Step 7: Enjoy your clean and fresh-tasting water: Your Brita water filter is now reset and ready to provide you with clean and refreshing water. Enjoy the benefits of purified water and remember to regularly maintain and reset your filter to ensure optimal performance.
By following these steps, you can easily reset your Brita water filter and continue to enjoy clean and great-tasting water for you and your family.
Step 1: Remove the Filter from the Water Pitcher
The first step in resetting a Brita water filter is to remove the filter cartridge from the water pitcher. Here’s how you can do it:
- Lift the lid or cover of the water pitcher: Most Brita water pitchers come with a removable lid or cover that allows easy access to the filter. Gently lift the lid or cover to reveal the filter compartment.
- Identify the filter: The filter is typically located in the center of the water pitcher. It is a cylindrical or rectangular cartridge that may have a handle or grip for easy removal.
- Grasp the filter: Firmly hold the handle or grip of the filter cartridge with your hand. If the filter does not have a handle, grip it securely with your fingers around the cartridge.
- Pull the filter out: Apply gentle pressure and pull the filter cartridge straight up to remove it from the water pitcher. Be cautious not to spill any water that might be contained within the filter.
- Inspect the filter: Take a moment to visually inspect the filter for any visible signs of dirt, discoloration, or wear. This will give you an idea of the filter’s condition and if it needs replacement or just a reset.
By following these steps, you can easily remove the filter from your Brita water pitcher. This will allow you to proceed with the necessary steps for resetting the filter and ensuring its optimal performance.
Step 2: Soak the Filter in Cold Water
After removing the filter from the water pitcher, the next step in resetting a Brita water filter is to soak it in cold water. This process helps to flush out any trapped particles and rejuvenate the filter. Follow these instructions to properly soak the filter:
- Prepare a bowl or container: Get a clean bowl or container that is large enough to accommodate the filter cartridge. Make sure the bowl or container is clean and free of any contaminants.
- Fill the bowl with cold water: Fill the bowl or container with cold water. It’s essential to use cold water rather than hot water, as hot water can damage the filter and affect its performance.
- Submerge the filter in water: Place the filter cartridge into the bowl or container, ensuring that it is fully submerged in the cold water. Gently press down on the filter to ensure it is completely soaked.
- Let it soak for about 15 minutes: Allow the filter to soak in cold water for approximately 15 minutes. This time allows the water to penetrate the filter, helping to dislodge any trapped particles and rejuvenate the filtration media.
- Swirl or agitate the filter: During the 15-minute soaking period, you may gently swirl or agitate the filter in the water. This can help to dislodge any stubborn particles and further improve the effectiveness of the soaking process.
- Remove the filter from the water: After the soaking time is complete, carefully lift the filter cartridge out of the water, allowing any excess water to drain back into the bowl or container.
By following these steps, you can effectively soak the Brita water filter in cold water, clearing out any impurities and preparing it for the next steps in the resetting process. Soaking the filter helps to restore its filtration capabilities and ensures that you receive clean and fresh-tasting water from your Brita filter.
Step 3: Replace the Filter in the Water Pitcher
Once you have properly soaked the Brita water filter, it’s time to proceed to the next step: replacing the filter back into the water pitcher. Follow these simple instructions to ensure a secure and proper fit:
- Locate the filter compartment: Identify the filter compartment in the water pitcher. It is usually a designated area in the center or side of the pitcher where the filter is meant to be placed.
- Hold the filter properly: Gently hold the filter cartridge, ensuring that you have a secure grip on it. If the filter has a handle, make sure to hold it firmly. If it doesn’t have a handle, hold it with your fingers around the cartridge’s body.
- Align the filter and the compartment: Position the filter in the filter compartment, aligning it with the designated slots or grooves. Make sure the filter is properly aligned for a secure fit.
- Push the filter into place: Apply gentle pressure and push the filter cartridge down into the filter compartment. Ensure that the filter fits snugly and securely into the designated area of the water pitcher.
- Confirm the proper placement: Double-check that the filter is properly seated in the filter compartment. It should be in a stable and secure position, without any wobbling or loose connections.
By following these steps, you can successfully replace the Brita water filter back into the water pitcher. This ensures that the filter is in the correct position to effectively filter the water as it passes through during the filtration process. With the filter securely in place, you can now proceed to the next steps in the resetting process and enjoy clean and refreshing water from your Brita filter.
Step 4: Run Cold Water Through the Filter for 5 Minutes
After replacing the Brita water filter in the pitcher, the next step is to run cold water through the filter to ensure its proper activation and clear out any remaining impurities. Follow these instructions to effectively flush the filter:
- Position the water pitcher: Place the water pitcher under a cold water tap or faucet. Ensure that the pitcher is stable and positioned correctly to collect the filtered water.
- Turn on the cold water: Gently turn on the cold water tap or faucet, allowing the water to flow into the pitcher. Start with a slow to moderate flow rate to ensure thorough filtration.
- Let the water run for 5 minutes: Run the cold water through the filter for approximately 5 minutes. This duration allows the water to pass through the filter, flushing out any remaining particles and contaminants.
- Observe the water: During the 5-minute flushing process, observe the water as it flows through the filter. Initially, you may notice some cloudiness or discoloration, which is normal as the filter clears out trapped particles.
- Wait for clear and clean water: As the water continues to flow through the filter, it should gradually become clear and clean. This indicates that the filter is effectively removing impurities, ensuring the water is filtered properly.
- Monitor the flow rate: Make sure to monitor the flow rate of the water during the 5-minute flushing process. If the flow slows down significantly or stops altogether, it may indicate a clogged or saturated filter that requires further attention.
By following these steps, you can effectively run cold water through the Brita water filter, clearing out any remaining particles and activating the filter for optimal performance. This process ensures that you receive clean, filtered water that is ready to enjoy.
Step 5: Reset the Indicator Light (For Models with a Light Indicator)
If your Brita water pitcher is equipped with an indicator light that tracks the filter’s lifespan, it’s important to reset it after changing or resetting the filter. This allows for accurate monitoring of the filter’s usage. Follow these instructions to reset the indicator light:
- Refer to the user manual: Consult the user manual or instruction booklet that came with your Brita water pitcher. The manual will provide specific instructions on how to reset the indicator light for your particular model.
- Locate the reset button or switch: Look closely at the water pitcher or the indicator panel to locate the reset button or switch. It is usually labeled or indicated by a specific symbol.
- Press or switch the reset button: Using your finger or a small tool, gently press or switch the reset button. Follow the manufacturer’s instructions regarding the amount of pressure or duration to apply. It may require a momentary press or a longer hold.
- Confirm the reset: After pressing or switching the reset button, check for any visual cues or changes. This may include a change in the indicator light color or a flashing pattern to indicate that the indicator has been successfully reset.
- Refer to the manual for verification: Verify the reset process by referring to the user manual. It should provide guidance on how to confirm the successful reset and how the indicator light should behave thereafter.
It is important to note that not all Brita water filters have an indicator light. If your model does not have one, you can skip this step and proceed to the next step. However, if your water pitcher does have an indicator light, resetting it ensures accurate tracking of the filter’s lifespan and helps you determine when it needs to be replaced or reset.
Always refer to the specific instructions provided by the manufacturer to ensure that you reset the indicator light correctly for your particular Brita water pitcher model.
Step 6: Discard the First Three Pitchers of Filtered Water
After completing the previous steps of resetting your Brita water filter, it is important to discard the first three pitchers of filtered water before using it for consumption. This step helps to ensure that any remaining impurities or particles are thoroughly flushed out, providing you with clean and pure water from your Brita filter. Follow these instructions to discard the initial filtered water:
- Prepare three empty pitchers: Get three clean and empty pitchers that are suitable for holding and pouring water. Ensure that these pitchers are specifically designated for clean water use.
- Pour the filtered water into the first pitcher: Fill the first empty pitcher with the filtered water that comes out of the Brita water pitcher immediately after resetting the filter. It is normal for the initial water output to contain more particles or appear cloudy due to the flush-out process.
- Discard the water from the first pitcher: Carefully pour out the water from the first pitcher into the sink or drain. The water should be discarded rather than consumed or reused.
- Repeat for the second and third pitchers: Pour the filtered water into and discard it from the second and third pitchers, one after another. This thorough process helps to ensure that any remaining impurities are completely removed.
- Observe the water clarity: As you discard the water from each pitcher, you may notice that the clarity of the water improves with each batch. The water should become clearer as any trapped particles are flushed out.
By discarding the first three pitchers of filtered water, you effectively remove any lingering impurities or particles that may have been present after resetting the Brita water filter. This step ensures that the subsequent filtered water is clean, fresh, and ready for consumption.
Step 7: Enjoy Your Clean and Fresh-Tasting Water!
After completing all the necessary steps to reset your Brita water filter, it’s time to enjoy the benefits of clean and fresh-tasting water. Follow these final instructions to delight in the crisp and purified water from your Brita filter:
- Pour the filtered water: Fill a glass or container with the clean and filtered water from your Brita pitcher. Be sure to use an appropriate vessel that is clean and suitable for drinking water.
- Savor the freshness: Take a moment to appreciate the clean and fresh taste of the filtered water. Notice the absence of any unpleasant odors or flavors that may have been present in the unfiltered tap water.
- Repeat the process as needed: Whenever you need more filtered water, simply refill your glass or container from the Brita water pitcher. Remember to replace the filter as directed by the manufacturer to maintain the quality of the filtered water.
- Enjoy the benefits: By regularly resetting and maintaining your Brita water filter, you can continue to enjoy the benefits of purified drinking water. Your Brita filter helps to reduce impurities, improve taste, and provide you with a convenient and cost-effective alternative to single-use plastic bottles.
- Stay hydrated and refreshed: Make it a habit to drink the clean and refreshing water from your Brita filter every day. Staying hydrated is essential for overall health and well-being.
Congratulations! You have successfully reset your Brita water filter and are now ready to enjoy clean, filtered water whenever you need it. By following the recommended resetting and maintenance guidelines, you can continue to experience the benefits of clean and fresh-tasting water from your Brita filter for months to come.