
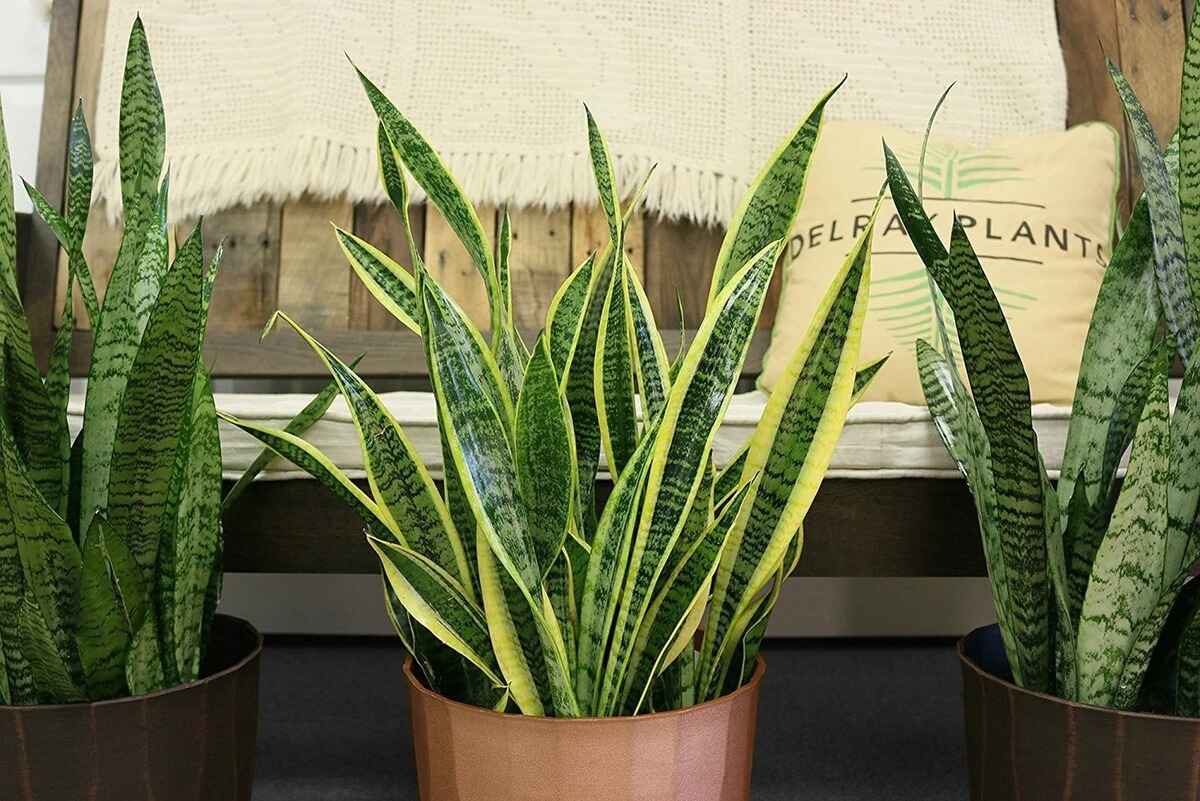
Choosing the Right Pot and Soil
When it comes to repotting a snake plant, selecting the right pot and soil is crucial for its health and growth. Here are some important factors to consider:
- Pot Size: Choose a pot that is only slightly larger than the current pot. A pot that is too big can hold excess moisture, which can lead to root rot. Aim for a pot that provides about an inch or two of additional space around the roots.
- Drainage: Opt for a pot with drainage holes at the bottom. Snake plants prefer well-draining soil, and excess moisture can cause root rot. Proper drainage allows excess water to escape, preventing waterlogged soil.
- Material: Consider using a pot made of terracotta or clay. These materials are porous, allowing the soil to breathe and preventing water from pooling at the bottom of the pot.
- Soil: Snake plants thrive in well-draining soil. Use a well-balanced potting mix that consists of equal parts of peat moss, perlite, and coarse sand. This combination ensures good drainage while retaining some moisture for the plant.
- Fertilizer: Avoid using fertilizers during repotting. Newly repotted snake plants need time to adjust to their new environment. Wait for a few weeks before resuming the regular fertilization routine.
Choosing the right pot and soil for your snake plant sets the foundation for a successful repotting. Remember to prioritize proper drainage and a well-balanced soil mixture to promote healthy growth and prevent water-related issues. With the right pot and soil, your snake plant will have the best chance of thriving in its new home.
Preparing the Snake Plant for Repotting
Before you begin repotting your snake plant, it’s essential to prepare the plant for the process. Follow these steps to ensure a smooth transition:
- Choose the right time: Repot your snake plant during the spring or summer months, when it’s actively growing. This allows the plant to recover more quickly and adjust to its new pot.
- Water the plant: Approximately a few days before repotting, water your snake plant thoroughly. This will help loosen the soil and make it easier to remove the plant from its current pot without causing damage to the roots.
- Trim the foliage: If your snake plant has excessive foliage or long leaves, consider trimming them. This will make the repotting process less cumbersome and allow the plant to establish itself in the new pot more easily.
- Clean the leaves: Take a soft cloth or sponge and gently wipe the leaves of your snake plant to remove any dust or debris. Clean leaves not only enhance the plant’s appearance but also promote better photosynthesis and overall health.
- Inspect for pests and diseases: Before repotting, thoroughly inspect your snake plant for any signs of pests or diseases. If you notice any issues, treat them accordingly before transferring the plant to a new pot. This ensures that you don’t spread any problems to the fresh soil.
By properly preparing your snake plant for repotting, you minimize stress for the plant and increase the chances of a successful transplant. Taking the time to water, trim, clean, and inspect the plant ensures that it is in the best possible condition before being transferred to its new pot. When the preparation is complete, you’re ready to move on to the next steps of the repotting process.
Removing the Plant from Its Current Pot
Now that you have prepared your snake plant for repotting, it’s time to carefully remove it from its current pot. Follow these steps to ensure a smooth extraction without causing harm to the plant:
- Loosen the soil: Gently tap the sides of the pot or squeeze it to loosen the soil. This helps to separate the soil from the pot walls and allows for easier removal of the plant.
- Support the plant: Place one hand over the top of the soil, holding the base of the plant’s stem. This provides support and prevents the plant from falling or breaking during the removal process.
- Turn the pot upside down: Carefully turn the pot upside down while keeping a firm grip on the plant’s base. Use your other hand to support the pot and prevent it from slipping. Give the pot a gentle tap on its bottom, if needed, to help loosen the plant from the pot.
- Slide the plant out: With the pot upside down, gently tap the bottom of the pot to coax the plant and root ball out. If the plant is stubborn, you can lightly squeeze the sides of the pot to loosen it further. Avoid pulling on the plant forcefully, as it may damage the roots.
- Inspect the root ball: Once the plant is out of the pot, carefully examine the root ball for any signs of damage or disease. Take this opportunity to trim off any black or mushy roots using clean pruning shears. Healthy white or light-colored roots are a good sign.
By following these steps, you can safely remove your snake plant from its current pot. Remember to handle the plant with care throughout the process to avoid any unnecessary damage. Once the plant is freed from its old pot, you can move on to the next steps in the repotting process.
Inspecting the Roots and Removing Old Soil
After successfully removing your snake plant from its current pot, it’s time to inspect the roots and remove the old soil. This step ensures that your plant gets a fresh start in its new pot. Here’s how to do it:
- Examine the root system: Take a close look at the roots of your snake plant. Look for any signs of damage, such as rotting, mushy roots, or discoloration. Healthy roots should be firm, white, and well-distributed throughout the root ball.
- Remove the old soil: Gently shake off the excess soil from the root ball. Use your fingers or a small tool to carefully loosen the old soil and remove it. Be gentle to avoid damaging the roots in the process. Ensure that you remove as much of the old, compacted soil as possible.
- Inspect for pest infestation: While removing the old soil, keep an eye out for any signs of pests like mealybugs or spider mites. These can hide in the soil and cause problems for your plant. If you spot any pests, gently remove them using a damp cloth or treat with an appropriate insecticide.
- Rinse the roots (optional): If you notice a significant buildup of old soil or if the roots are particularly compacted, you can gently rinse the roots with water to remove any remaining soil particles. This step can help promote better root growth in the fresh soil.
- Trim damaged or overgrown roots: If you find any damaged or excessively long roots during the inspection, it’s best to trim them using clean pruning shears or scissors. Trim the roots just above the damaged or overgrown area, ensuring a clean cut. This encourages healthier root development.
By thoroughly inspecting the roots and removing the old soil, you ensure that your snake plant starts fresh with a clean and healthy root system. Carefully examine the roots for any signs of damage or pests, and take the necessary steps to address them. With the old soil removed and any problematic roots trimmed, your snake plant is now ready for its new pot and fresh soil.
Trimming the Damaged or Overgrown Roots
During the inspection of your snake plant’s root system, you may come across damaged or overgrown roots that need to be trimmed. Trimming these roots is an essential step in ensuring the overall health and vitality of your plant. Here’s how to properly trim the roots:
- Prepare your tools: Before you begin trimming, make sure you have clean pruning shears or sharp scissors. Clean tools help minimize the risk of introducing pathogens or causing further damage to the plant.
- Identify damaged or overgrown roots: Carefully examine the root system and identify any roots that are brown, mushy, or show signs of rot. These damaged roots will have a negative impact on the plant’s overall health and need to be removed. Additionally, look out for roots that have become excessively long or tangled.
- Trim damaged roots: Using your pruning shears or scissors, start by cutting off the damaged portion of the root. Make a clean, diagonal cut just above the damaged area. Be cautious not to cut too close to the plant’s base, as this can cause unnecessary harm.
- Trim overgrown roots: If you notice roots that have become too long or entangled, trim them back to a more manageable length. Cut these roots just above a healthy node or growth point. Trimming overgrown roots helps redirect the plant’s energy toward new growth and prevents them from becoming tangled or restricting the plant’s development.
- Avoid excessive trimming: While it’s important to remove damaged or overgrown roots, be careful not to overdo it. Removing too many healthy roots can cause stress to the plant. Aim to strike a balance by removing only what is necessary for the health and structure of the plant.
By trimming the damaged or overgrown roots, you promote healthier growth and ensure that the plant allocates its energy to maintaining a strong root system. Remember to sanitize your tools before and after trimming, and handle the roots with care to avoid unnecessary damage. With the roots properly trimmed, your snake plant is ready for the next steps in the repotting process.
Preparing the New Pot and Fresh Soil
Before planting your snake plant in its new pot, it’s essential to properly prepare the pot and fresh soil. This ensures that the plant has a suitable environment for healthy growth. Here are the steps to take:
- Clean the pot: If you’re using a previously used pot, clean it thoroughly to remove any dirt or debris. Wash the pot with mild soap and water, then rinse it well to ensure it’s free from any potential contaminants.
- Add a drainage layer: Place a layer of small stones or pebbles at the bottom of the pot. This helps improve drainage by preventing water from pooling at the roots. The drainage layer should be about one to two inches in depth.
- Fill with fresh soil: Fill the pot with fresh potting soil, leaving enough space for the snake plant’s root ball. Use a well-draining potting mix specifically formulated for indoor plants. Avoid using garden soil, as it may be too heavy and compact for the snake plant’s needs.
- Ensure proper soil level: Make sure that the soil level in the pot is at a height that allows the snake plant to sit at the same depth it was previously in its old pot. Adjust the soil level as needed, ensuring that the crown of the plant (where the leaves meet the roots) is positioned just above the soil surface.
- Firm the soil: Gently press down on the soil around the edges of the pot to lightly compact it. Avoid pressing down too hard, as this can result in overly compacted soil that hinders water drainage and root growth.
By preparing the new pot and fresh soil correctly, you provide a healthy and well-suited environment for your snake plant’s new home. A clean pot with proper drainage and fresh, well-draining soil allows the roots to grow and breathe, promoting optimal growth and vitality in the plant. Once the pot and soil are prepared, it’s time to plant your snake plant in its new home.
Planting the Snake Plant in the New Pot
Now that you have prepared the new pot and fresh soil, it’s time to plant your snake plant. Follow these steps to ensure a successful planting process:
- Make a hole: Use your fingers or a small tool to create a hole in the center of the soil. The hole should be deep enough to accommodate the root ball of the snake plant.
- Place the plant: Carefully position the snake plant’s root ball into the hole, ensuring that the plant is vertical and upright. Gently press the soil around the roots, securing the plant in place. Avoid touching the plant directly, as snake plant leaves can be sensitive to oils and residues on human hands.
- Fill in with soil: Once the plant is in position, start adding fresh soil around the root ball. Gradually fill the pot, covering the roots, and gently firm the soil to eliminate air pockets. Be careful not to bury the plant too deeply, as this can cause issues with drainage and suffocate the roots.
- Level the soil: Ensure that the soil is evenly distributed and level with the top of the pot. Adjust the soil level as needed to maintain the proper planting depth for the snake plant. Avoid compacting the soil too heavily, as this can impede water penetration and root growth.
- Water gently: After planting, give the snake plant a gentle watering to help settle the soil and initiate root establishment. Water the plant until you see water coming out of the drainage holes at the bottom of the pot. Allow any excess water to drain away.
By following these planting steps, you provide a stable and supportive environment for your snake plant to thrive. Ensure that the plant is positioned correctly, and take care not to bury it too deeply or compact the soil excessively. With the snake plant securely planted in its new pot, it’s time to move on to proper watering and post-repotting care.
Properly Watering the Newly Repotted Snake Plant
After repotting your snake plant, it’s crucial to establish a proper watering routine to promote healthy growth and prevent issues like root rot. Here are some essential tips for watering your newly repotted snake plant:
- Allow the soil to dry: Snake plants prefer slightly dry conditions, so allow the top inch or two of soil to dry out before watering. Insert your finger into the soil to check the moisture level. Only water when the soil feels dry to the touch.
- Water thoroughly but infrequently: When it’s time to water, do so thoroughly. Water the soil until it’s evenly moist, ensuring that excess water drains out through the pot’s drainage holes. Avoid overwatering, as this can lead to root rot. Allow the soil to dry out completely between waterings to prevent waterlogged conditions.
- Avoid standing water: Never let your snake plant sit in standing water as it can lead to root rot. After watering, make sure to empty any excess water that may have collected in the pot’s saucer or tray.
- Consider the environment: Environmental factors such as temperature, humidity, and sunlight can affect the watering needs of your snake plant. During hot, dry weather, you may need to water more frequently, while in cooler, humid conditions, less frequent watering may be necessary.
- Observe the plant’s signals: Your snake plant will show visible signs when it needs water. Look out for drooping leaves or a slight softening of the leaves. These signs indicate that it’s time to water. However, avoid waiting until the plant is severely wilted as it can cause stress to the plant.
- Use room-temperature water: It’s recommended to use room-temperature water for watering your snake plant. Cold water can shock the plant’s roots, while hot water can scald them. Allow tap water to sit out overnight to reach room temperature before watering.
By following these watering guidelines, you provide your newly repotted snake plant with the right amount of moisture to support its growth. Remember to observe the plant’s signals, adjust watering frequency based on environmental conditions, and be mindful of not overwatering. With the correct watering routine, your snake plant will thrive and continue to beautify your indoor space.
Caring for the Snake Plant Post-Repotting
After completing the repotting process for your snake plant, it’s crucial to provide proper care to ensure its continued health and growth. Here are some essential post-repotting care tips to follow:
- Placement: Find a suitable location for your snake plant where it can receive indirect, bright light. Snake plants tolerate low light conditions, but they thrive with moderate to bright indirect light. Avoid placing them in direct sunlight, as this can scorch the leaves.
- Temperature and humidity: Snake plants prefer moderate temperatures between 60-85°F (15-29°C). They can tolerate occasional temperature fluctuations but should be protected from extreme cold or hot conditions. Normal room humidity is sufficient, and they can adapt well to dry indoor environments.
- Proper fertilization: Allow your snake plant to settle in its new pot for a few weeks before resuming fertilization. Once it has adjusted, you can fertilize it with a balanced houseplant fertilizer once every 2-3 months during the growing season. Follow the manufacturer’s instructions for dosage and application method.
- Regular cleaning: Keep the leaves of your snake plant clean by wiping them gently with a soft, damp cloth or using a plant-based leaf shine product. This helps remove dust and allows the leaves to absorb more light for optimal photosynthesis.
- Monitor watering needs: After repotting, observe the watering needs of your snake plant closely. Adjust the watering frequency based on environmental conditions, such as temperature and humidity, as well as the moisture levels in the soil. Remember to allow the soil to dry out between waterings to prevent overwatering.
- Pruning: Regularly inspect your snake plant for any yellow, damaged, or dead leaves, and promptly remove them using clean pruning shears. Pruning helps maintain the plant’s appearance and redirects energy towards healthy growth.
- Patience: It’s normal for a snake plant to go through an adjustment period after repotting. During this time, it may experience slight stress and take a while to acclimate to its new environment. Be patient and provide consistent care, and your snake plant will recover and thrive.
By providing proper care to your snake plant post-repotting, you promote its overall well-being and encourage healthy growth. Place it in the right location, monitor watering needs, maintain proper humidity levels, and perform regular cleaning and pruning. With time and patience, your snake plant will continue to flourish, enriching your space with its beauty and air-purifying qualities.
Common Mistakes to Avoid While Repotting a Snake Plant
When repotting a snake plant, it’s important to avoid some common mistakes that can potentially harm the plant. By being aware of these pitfalls, you can ensure a successful repotting process. Here are some mistakes to avoid:
- Using the wrong pot size: Avoid choosing a pot that is too large for your snake plant. An excessively large pot can lead to overwatering and root rot. Select a pot that provides only a slight increase in size, allowing for proper root development.
- Using improper soil: Using heavy, poorly-drained soil can suffocate the roots and promote disease. Avoid using regular garden soil or soil that retains too much moisture. Opt for a well-draining potting mix specifically designed for indoor plants.
- Not preparing the plant: Neglecting to prepare the snake plant before repotting can cause stress and damage. Water the plant a few days in advance to loosen the soil and make it easier to remove from the pot. Additionally, trim any excessive foliage or damaged roots.
- Overwatering: One of the most common mistakes is overwatering the snake plant. Incorrect watering practices can lead to root rot and other water-related issues. Always allow the soil to dry out between waterings and ensure proper drainage to prevent waterlogging.
- Underwatering: While overwatering is a common mistake, underwatering can also be detrimental to the plant’s health. When the soil becomes too dry for extended periods, the snake plant can suffer dehydration and stress. Keep a consistent watering schedule, allowing the soil to dry out slightly between waterings.
- Ignoring root health: Failing to inspect the roots and address any issues can have negative consequences on the plant’s vitality. Avoid leaving damaged or rotting roots and trim them as necessary during the repotting process.
- Not acclimating to new conditions: After repotting, the snake plant needs time to adjust to its new environment. Placing it in direct sunlight or subjecting it to extreme temperature changes immediately after repotting can cause stress. Gradually introduce it to its new conditions over a few days.
By avoiding these common mistakes, you can ensure a successful repotting process for your snake plant. Pay attention to proper pot size and soil selection, prepare the plant beforehand, and maintain a balanced watering routine. By providing a suitable environment and addressing any potential issues, you set the stage for a healthy and thriving snake plant.