
Choosing the Right Snake Plant
When it comes to adding a snake plant to your indoor garden, selecting the right variety is essential. Snake plants, also known as Sansevieria, come in various shapes, sizes, and colors, each with its own unique charm. Here are a few tips to help you choose the perfect snake plant for your home:
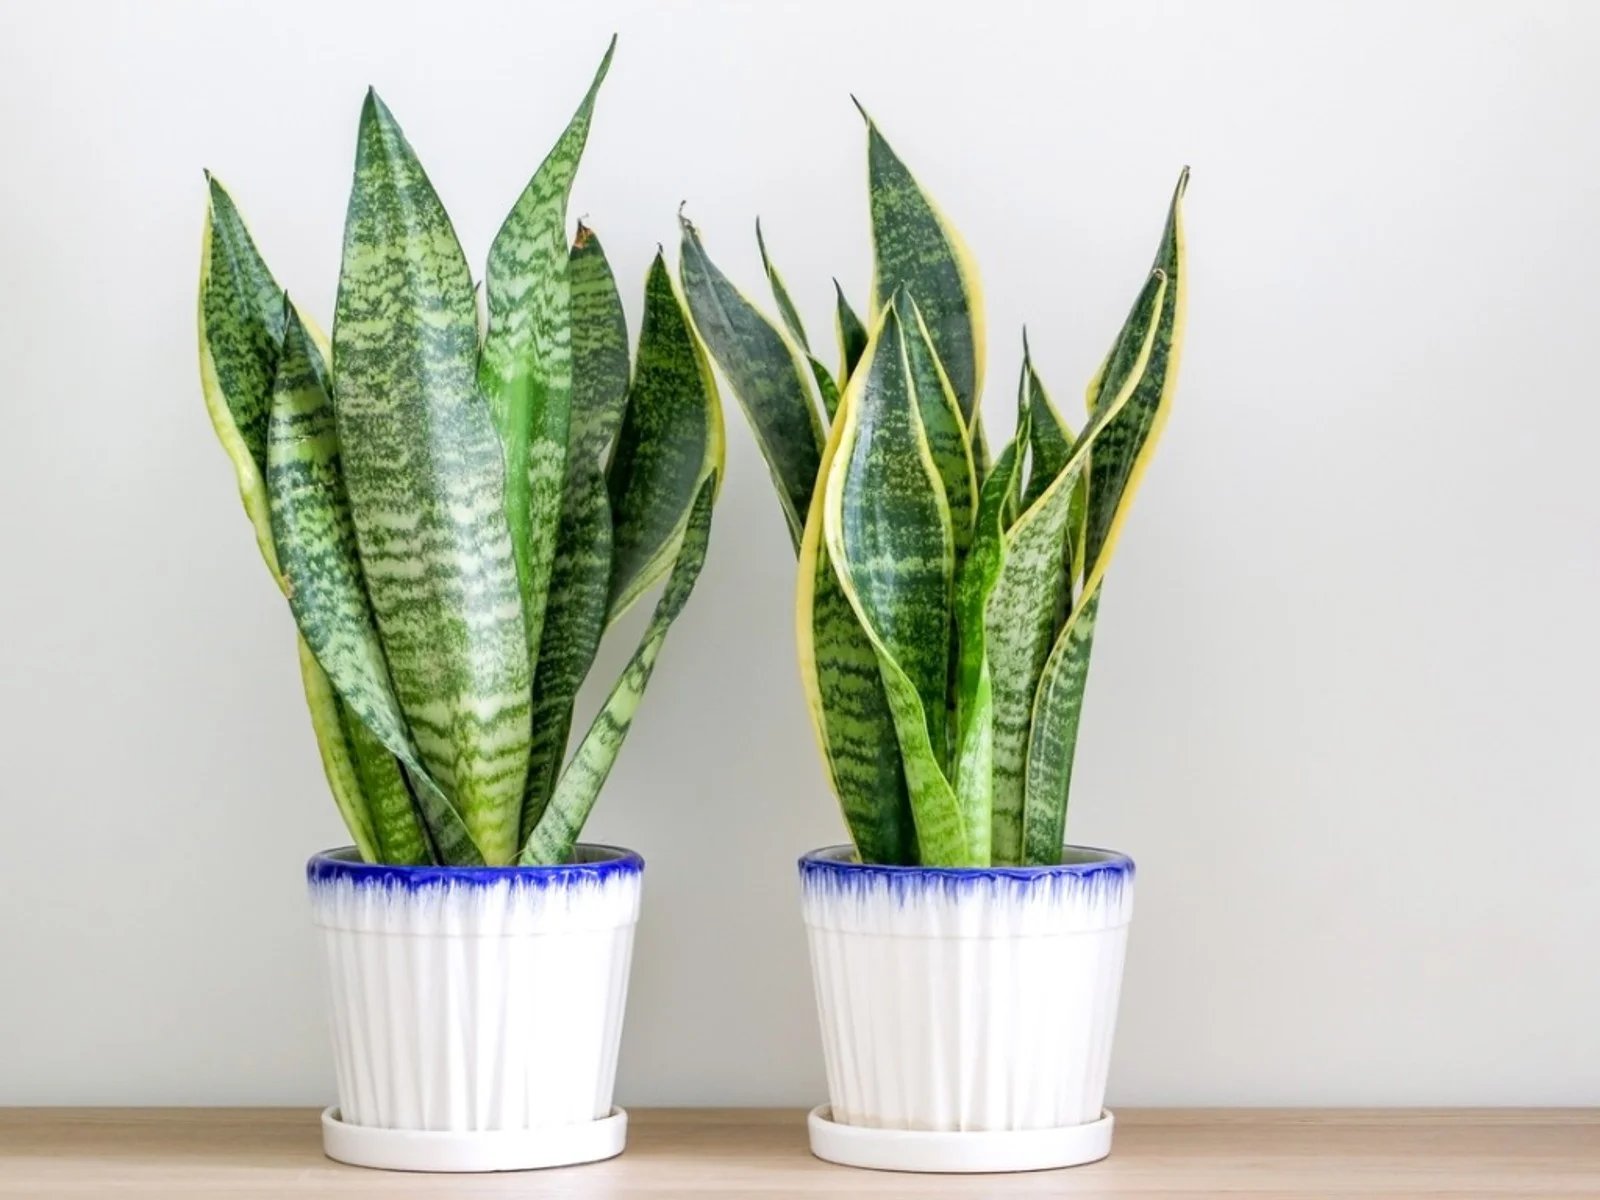
- Consider the space: First, assess the available space in your home. Snake plants can range from small and compact to tall and commanding. If you have limited space, opt for a compact variety like Sansevieria trifasciata ‘Hahnii’ or Sansevieria cylindrica. For larger areas, consider the towering presence of varieties like Sansevieria trifasciata ‘Laurentii’ or Sansevieria moonshine.
- Examine the leaves: Take a close look at the leaves of the snake plants you are considering. Look for well-formed leaves that are thick, upright, and free from discoloration or signs of damage. The leaves should have bright colors or intriguing markings, depending on the variety. Sansevieria varieties like ‘Golden Hahnii’ and ‘Whale Fin’ have variegated leaves that add a vibrant touch to any room.
- Check the roots: Healthy roots are crucial for the success of your snake plant. When inspecting the plant, gently remove it from its pot and examine the roots. They should be firm, white, and well-established. Avoid plants with mushy or discolored roots, as this may indicate root rot or other diseases.
- Consider the lighting conditions: Snake plants are known for their ability to thrive in various lighting conditions. However, different varieties may have specific light requirements. If your home has plenty of natural light, go for varieties like Sansevieria trifasciata or Sansevieria futura superba, which can tolerate bright indirect light. For low-light environments, choose hardier varieties like Sansevieria cylindrica or Sansevieria laurentii.
- Take your personal preference into account: Ultimately, choose a snake plant that you find visually appealing and complements your overall home decor. Whether it’s the striking vertical growth of Sansevieria zeylanica or the playful twists of Sansevieria masoniana, select a variety that resonates with your aesthetic taste.
By carefully considering these factors, you can find the perfect snake plant that not only adds beauty to your home but also thrives in its specific environment. Remember that snake plants are not only visually appealing but also known for their air-purifying qualities, making them an excellent addition to any indoor space. Happy plant shopping!
Preparing the Pot and Soil
Before planting your snake plant, it’s important to prepare the right pot and soil to ensure optimal growth. Here are the steps to follow:
- Selecting the pot: Choose a pot that is appropriate for the size of your snake plant. Ensure that it has proper drainage holes to prevent water from accumulating at the bottom. This will help prevent root rot, a common issue for snake plants. Additionally, consider using a pot with a saucer or tray to catch excess water.
- Choosing the soil: Snake plants thrive in well-draining soil that is slightly acidic to neutral. You can use a commercially available cactus and succulent mix or create your own by combining equal parts of potting soil, perlite, and coarse sand. This mixture provides the necessary aeration and drainage for the roots.
- Preparing the pot: Before planting, clean the pot thoroughly to ensure it is free from any contaminants or residue from previous plants. You can wash the pot with mild soap and water, then rinse it well.
- Add a drainage layer: To further enhance drainage, add a layer of small rocks or broken pottery shards to the bottom of the pot. This helps prevent water from sitting directly on the roots, reducing the risk of root rot.
- Filling the pot: Fill the pot with the prepared soil mixture, leaving some space at the top to accommodate the root ball of your snake plant. Gently pat down the soil to remove any air pockets and ensure a stable planting environment.
By paying attention to these preparatory steps, you create an ideal environment for your snake plant’s roots to grow and thrive. The well-draining soil and properly prepared pot will promote healthy root development and minimize the risk of overwatering. Remember to regularly monitor the moisture levels in the soil and adjust your watering routine accordingly. With a well-prepared pot and soil, your snake plant will have a solid foundation for healthy growth.
Propagating Snake Plant with Cuttings
If you want to expand your collection of snake plants or share them with friends, propagating through cuttings is an excellent and cost-effective method. Here’s how you can propagate snake plants using cuttings:
- Selecting the cutting: Choose a healthy snake plant with mature leaves that you can use to take cuttings. Look for a leaf that is at least 4-6 inches long and has no signs of disease or damage.
- Preparing the cutting: Using a clean, sharp knife or shears, cut the selected leaf close to the base of the plant. Ideally, the cutting should be taken from the outer edge of the mother plant, as the leaves in the center are usually younger and less conducive to propagation.
- Drying the cutting: Allow the freshly cut leaf to dry for several days in a shaded, well-ventilated area. This will promote the formation of a callus at the cut end, which will help prevent rotting when planted.
- Planting the cutting: Once the cutting has dried, prepare a pot with well-draining soil. Make a small hole in the soil using a pencil or your finger and gently place the base of the cutting into the hole. Ensure that the calloused end is inserted into the soil, leaving the leaf above the surface.
- Providing the right conditions: Place the potted cutting in a warm and bright location, but avoid direct sunlight. Maintain a consistent level of moisture in the soil without overwatering. Mist the cutting occasionally to provide some humidity, which can aid in root development.
- Root development: Over several weeks, the cutting will begin to develop roots. You can gently tug on the leaf to check for resistance, indicating that roots have formed. Once the roots are established, you can treat the cutting as a mature snake plant.
Propagating snake plants with cuttings is a simple and rewarding process. It allows you to create new plants from an existing one and share the beauty of snake plants with others. Remember to be patient and provide the necessary care for the cutting throughout the rooting process. With time, you’ll witness the growth and success of your newly propagated snake plant.
Planting Snake Plant from Division
Another popular method of propagating snake plants is through division. This involves separating the mother plant into smaller sections, each with their own root system. Here’s a step-by-step guide on how to plant snake plants using division:
- Selecting the mother plant: Choose a mature snake plant that has multiple shoots or “pups” emerging from the base. These pups are the perfect candidates for division, as they have already started developing their own root systems.
- Preparing for division: Gently remove the mother plant from its pot and shake off excess soil to get a clear view of the rhizomes (thick, horizontal stems). Look for areas where the pups have formed their own roots or there is a natural separation between the shoots.
- Dividing the plant: Using a clean and sharp knife or shears, carefully separate the pup from the mother plant. Make sure to include a portion of the root system with each division. You can also gently pull apart the pups if they are easily separated.
- Planting the divisions: Prepare individual pots with well-draining soil and place each divided section into its own container. Position the division in the pot, making sure the roots are covered with soil and the leaves are above the surface. Gently pat down the soil to secure the division.
- Providing the right care: After planting, place the pots in a location that receives bright, indirect light. Avoid direct sunlight, as it can scorch the leaves. Water the divisions thoroughly but allow the soil to dry slightly before watering again. As the divisions establish themselves, you can gradually adjust your watering routine to match that of mature snake plants.
By propagating snake plants through division, you not only expand your collection but also rejuvenate the mother plant, allowing it to focus energy on new growth. With proper care and time, the divided sections will develop into thriving snake plants, ready to beautify your indoor space.
Planting Snake Plant from Seeds
Although propagating snake plants from seeds is less common and more challenging than other methods, it can be a rewarding way to grow these unique plants. Here’s a step-by-step guide on how to plant snake plants from seeds:
- Obtaining seeds: Start by sourcing fresh snake plant seeds from a reliable supplier or collect them from a mature snake plant. It’s essential to ensure that the seeds are viable and haven’t been exposed to harsh conditions or chemicals.
- Preparing the soil: Create a well-draining soil mixture by combining equal parts of peat moss, perlite, and coarse sand. By providing good drainage, you minimize the risk of overwatering and dampening off, a common issue with seed germination.
- Sowing the seeds: Fill a seed tray or small pots with the prepared soil mixture. Sprinkle the snake plant seeds evenly on the surface of the soil and press them gently into the soil. Avoid burying the seeds too deeply, as they require light to germinate.
- Providing the right conditions: Place the seed tray or pots in a warm and bright location, but away from direct sunlight. Keep the soil consistently moist by misting it or using a bottom-watering method. Covering the container with a plastic sheet or using a propagator can help create a humid environment that aids in germination.
- Germination and growth: Be patient, as snake plant seeds can take several weeks or even months to germinate. Once they start to sprout, provide them with adequate light and continue to keep the soil moist. As the seedlings grow, you can gradually increase their exposure to light.
It’s important to note that not all snake plant species produce viable seeds, and germination success can vary. Additionally, growing snake plants from seeds may result in variations in leaf patterns and characteristics compared to the parent plants. However, this method allows for experimentation and the potential discovery of unique and interesting snake plant varieties.
Remember, growing snake plants from seeds requires patience, attention to detail, and proper care. With time and the right conditions, you may witness the successful germination and growth of your snake plant seeds, leading to a beautiful addition to your indoor garden.
Transplanting Snake Plant
Transplanting a snake plant is necessary when it outgrows its current container or when you want to refresh the soil. Whether you’re moving your snake plant to a larger pot or dividing it into multiple plants, here are the steps to follow for a successful transplant:
- Choose the right time: The best time to transplant a snake plant is during its active growth period, which is typically in spring or summer. This allows the plant to recover quickly from the transplant and establish its roots in the new pot or location before winter.
- Select a suitable pot: If you’re moving your snake plant to a larger pot, choose one that is about 2 inches wider in diameter than the current pot. Ensure the new pot has good drainage holes to prevent water accumulation. If dividing the plant, prepare separate pots for each section.
- Prepare the new pot and soil: Fill the new pot with well-draining soil, such as a cactus and succulent mix. It’s recommended to add a layer of small rocks or broken pottery shards at the bottom of the pot to enhance drainage.
- Remove the plant from its current pot: Gently loosen the soil around the edges of the pot and turn it upside down, supporting the base of the plant with your hand. Tap the bottom of the pot or squeeze its sides to help release the root ball. Carefully lift the plant from the pot.
- Inspect and divide: Examine the root system. If you’re dividing the snake plant, gently separate the individual sections, ensuring each division has roots intact. If not dividing, skip to the next step.
- Replanting: Place the snake plant in the center of the new pot, ensuring that the base of the plant is at the same level as it was previously. Fill in around the root ball with the prepared soil, gently firming it down around the plant. Leave some space at the top of the pot for watering.
- Water and settle the plant: After transplanting, thoroughly water the snake plant until water drains out of the bottom of the pot. This helps settle the soil and promotes root establishment. Allow the soil to dry slightly between waterings to avoid overwatering.
- Provide proper care: Place the transplanted snake plant in an area with bright, indirect light. Avoid placing it in direct sunlight, as intense rays can scorch the leaves. Maintain regular watering and monitor the moisture levels in the soil. Over time, the plant will adapt and continue its growth.
Transplanting snake plants provides them with the space and fresh soil they need to thrive. By following these steps and providing the necessary care, your snake plant will continue to beautify your indoor space with its striking appearance and air-purifying abilities.
Caring for Snake Plant
Caring for a snake plant is relatively easy, making it a popular choice among indoor plant enthusiasts. Here are some essential care tips to help your snake plant thrive:
- Watering: Snake plants are adapted to survive in drought-like conditions, so it’s important not to overwater them. Allow the soil to dry out between waterings, and only water when the top inch of the soil feels dry to the touch. Be cautious not to let the plant sit in standing water, as this can lead to root rot.
- Lighting: Snake plants can tolerate a wide range of light conditions, from low to bright indirect light. However, they tend to thrive in medium to bright indirect light. Place your snake plant near a window where it can receive filtered sunlight, but avoid direct sunlight as it can scorch the leaves.
- Temperature: Snake plants are adaptable to different temperature ranges, but they prefer temperatures between 70-90°F (21-32°C). Avoid exposing them to extreme cold drafts or hot, dry air from heating vents.
- Humidity: Snake plants are native to arid regions of West Africa and can tolerate low humidity levels. They don’t require additional humidity, but occasional misting can provide a slight boost, especially in dry indoor environments.
- Fertilizing: Snake plants are not heavy feeders and can survive with minimal fertilization. During the growing season in spring and summer, you can feed your snake plant with a balanced houseplant fertilizer diluted to half strength. Avoid over-fertilization, as it can lead to root burn.
- Pruning: Snake plants typically don’t require much pruning. However, if you notice any yellow or wilted leaves, you can trim them off at the base using clean, sharp scissors or shears. Regular pruning can help maintain the plant’s shape and overall appearance.
- Pest control: Snake plants are generally resistant to pests, but occasionally they can attract mealybugs or spider mites. Regularly inspect your plant for any signs of pests, such as webbing or tiny insects. If detected, wipe the affected areas with a cotton swab dipped in rubbing alcohol or use an organic insecticidal soap.
With proper care and attention, your snake plant will continue to flourish and add beauty to your indoor space. By providing the right amount of water, light, and occasional fertilization, you can enjoy the benefits of this resilient and visually appealing plant.
Watering Snake Plant Properly
Proper watering is crucial for the health and vitality of your snake plant. While they can tolerate periods of drought, it’s important to water them appropriately to prevent overwatering or underwatering. Here are some tips for watering your snake plant:
- Allow soil to dry: Snake plants prefer drier conditions, so it’s essential to let the soil dry out between waterings. Before watering, check the top inch of the soil with your finger. If it feels dry, it’s time to water. If it is still moist, wait a few more days before watering.
- Avoid overwatering: One of the most common mistakes with snake plants is overwatering. Excess moisture can lead to root rot and other diseases. Only water when the soil is dry, and be cautious not to let the plant sit in standing water. Ensure that your pot has drainage holes to allow any excess water to escape.
- Water sparingly in winter: During the winter months, when snake plants enter a dormant period, you’ll need to reduce watering frequency. The plant requires less water in colder temperatures, so adjust your watering schedule accordingly. Allow the soil to dry out more between waterings, but still ensure that the plant doesn’t become completely dehydrated.
- Use the right watering technique: When watering your snake plant, pour water directly into the soil, avoiding the leaves if possible. This helps prevent the leaves from becoming waterlogged and reduces the risk of fungal issues. Water until it starts to drain from the bottom of the pot, ensuring thorough penetration throughout the root system.
- Consider the environment: Factors such as humidity, light levels, and temperature can influence the watering needs of your snake plant. In lower light or higher humidity conditions, the plant may require less frequent watering. Monitor these environmental factors and adjust your watering routine accordingly.
By following these guidelines, you can develop a watering routine that suits your snake plant’s needs. Remember, it’s better to underwater than overwater your snake plant, as they are more tolerant of drought conditions. Pay attention to the signs of underwatering (wilting, drooping leaves) and adjust your watering schedule accordingly. With proper watering, your snake plant will thrive and continue to enhance your indoor space.
Providing the Right Amount of Light
Proper lighting is essential for the health and growth of your snake plant. While they can tolerate a wide range of light conditions, providing the right amount of light will help your plant thrive. Here are some important considerations when it comes to snake plant lighting:
- Indirect sunlight: Snake plants prefer bright, indirect light. Look for a location in your home where the plant can receive filtered sunlight, such as near a north or east-facing window. Avoid placing it in direct sunlight for extended periods, as intense rays can scorch the leaves.
- Low light conditions: Snake plants are renowned for their ability to tolerate low light environments. They can thrive in areas of your home that receive minimal natural light, making them a popular choice for offices, bathrooms, and darker corners. However, keep in mind that snake plants will grow slower in low light conditions.
- Avoid intense light: While snake plants can handle low light, they can also tolerate moderate to bright indirect light. However, prolonged exposure to intense sunlight can cause damage to the leaves. If you have a south or west-facing window, it’s best to place your snake plant further away from direct sunlight or use sheer curtains to filter the light.
- Rotate for even growth: To ensure even growth and prevent your snake plant from leaning towards the light source, rotate the pot every few weeks. This allows all sides of the plant to receive adequate light and encourages upright growth.
- Artificial lighting: If natural light is limited in your space, you can supplement it with artificial lighting. LED grow lights or fluorescent lights can provide the necessary light spectrum for snake plant growth. Place the light source a few feet above the plant and adjust the duration of light exposure based on the needs of your specific snake plant variety.
Observing your snake plant’s response to light is crucial in determining whether it is receiving the proper amount. If the leaves become too pale or develop yellowing, it may be a sign of too much light, while elongated and drooping leaves may indicate insufficient light. Adjust the placement accordingly to find the optimal lighting conditions for your snake plant.
Remember, each snake plant variety may have slightly different light preferences, so it’s important to observe and adjust accordingly. By providing the right amount of light, your snake plant will thrive, maintain its vibrant color, and continue to be an eye-catching addition to your indoor space.
Fertilizing Snake Plant
Fertilizing your snake plant can help provide essential nutrients for healthy growth. While snake plants are known for their ability to survive in nutrient-poor conditions, occasional fertilization can give them a boost. Here are some guidelines to follow when it comes to fertilizing your snake plant:
- Choose the right fertilizer: Select a balanced, water-soluble fertilizer specifically formulated for houseplants. Look for a fertilizer with an NPK ratio (nitrogen, phosphorus, and potassium) of 10-10-10 or a similar balanced ratio. Avoid using fertilizers high in nitrogen, as this can lead to excessive foliage growth at the expense of root development.
- Fertilize during the growing season: Snake plants experience a period of active growth in spring and summer. This is the ideal time to fertilize them. Start fertilizing in early spring and continue every 2-3 months throughout the growing season. Reduce or stop fertilization during the fall and winter when growth slows down.
- Dilute the fertilizer: Always dilute the fertilizer according to the manufacturer’s instructions. It’s better to under-fertilize than to over-fertilize, as excess nutrients can lead to fertilizer burn and other issues. A weak solution is generally sufficient to provide the necessary nutrients without overwhelming the plant.
- Apply evenly: When applying the fertilizer, distribute it evenly over the soil surface. Avoid direct contact with the leaves, as this can cause burns. Water the plant after fertilizing to help distribute the nutrients throughout the root zone.
- Monitor and adjust: Observe how your snake plant responds to fertilization. If you notice signs of fertilizer burn, such as brown tips on the leaves or stunted growth, reduce the frequency or strength of fertilization. Remember that snake plants have relatively low fertilizer requirements, so it’s better to err on the side of caution. Adjust the fertilization schedule based on the specific needs of your plant and the fertilization product you’re using.
- Organic alternatives: If you prefer organic options, you can use organic fertilizers or compost to provide nutrients to your snake plant. Make sure to follow the instructions for application and adjust the frequency as needed.
By fertilizing your snake plant appropriately, you can promote healthy growth and maintain vibrant foliage. However, it’s important to remember not to overdo it. Snake plants are adapted to survive in low-nutrient conditions, and excessive fertilization can cause more harm than good. With proper fertilization and care, your snake plant will continue to thrive and bring beauty to your indoor space.
Troubleshooting Common Problems with Snake Plants
While snake plants are generally low-maintenance and resilient, they can still encounter some common issues. Identifying and addressing these problems promptly can help keep your snake plant healthy. Here are some troubleshooting tips for common problems that may arise:
- Root rot: Overwatering or poorly draining soil can lead to root rot, which is characterized by mushy and discolored roots. To prevent root rot, ensure proper drainage by using well-draining soil and allowing the soil to dry out between waterings. If root rot occurs, remove any affected roots and repot the plant in fresh, well-draining soil.
- Yellowing leaves: Yellow leaves can signal various issues, including overwatering, underwatering, or exposure to extreme temperatures. Check the moisture level of the soil and adjust your watering routine accordingly. Remove any yellow leaves to redirect energy to healthier foliage. Assess the plant’s location for any drafts or temperature extremes that may be causing stress.
- Leaf tip burn: Brown, crispy leaf tips can indicate underwatering, low humidity levels, or excessive fertilizer usage. Maintain consistent watering, ensuring the soil doesn’t become bone dry. Increase humidity around the plant by misting or placing a tray of water nearby. If fertilizing, dilute the fertilizer to avoid overexposure to nutrients.
- Soft, drooping leaves: Soft, drooping leaves can be a sign of overwatering or root issues. Check the moisture level of the soil and adjust your watering routine accordingly. If the plant is in a pot without proper drainage, consider repotting into a container with drainage holes. Assess the roots for any signs of root rot and trim away any affected areas.
- Pests: While snake plants are generally resistant to pests, they can occasionally be affected by common houseplant pests like spider mites or mealybugs. Regularly inspect your plant for signs of pests, such as webs, tiny insects, or sticky residue on the leaves. If detected, treat the plant with an appropriate insecticidal soap or neem oil, ensuring thorough coverage of all affected areas.
Being proactive and observant is key to preventing and addressing common problems with snake plants. By maintaining a consistent watering schedule, providing proper lighting and humidity, and promptly addressing any issues that arise, you can ensure the health and longevity of your snake plant.
Pruning Snake Plant for Maintenance
Pruning your snake plant is an essential aspect of maintenance that helps keep the plant healthy, aesthetically pleasing, and manageable in size. While snake plants are known for their low-maintenance nature, occasional pruning can help promote new growth and maintain the plant’s shape. Here are some guidelines for pruning your snake plant:
- Remove damaged or yellowing leaves: Regularly inspect your snake plant for any leaves that are yellow, brown, or wilted. These leaves are no longer healthy and can detract from the plant’s appearance. Using clean and sharp pruners or scissors, trim these leaves at their base to redirect the plant’s energy towards healthy growth.
- Trim excessively long leaves: Snake plants can grow long, strappy leaves, which can sometimes become unsightly or top-heavy. If you prefer a compact appearance or if the plant’s height is becoming impractical, you can trim the leaves to a desired length. Make clean cuts at an angle just above the soil level or at the desired point on the leaf, taking care not to damage the remaining foliage.
- Control size and shape: If your snake plant has become too large or is encroaching on nearby plants or furniture, you can prune back the plant to manage its size and shape. Start by removing any overcrowded or densely clustered leaves to improve air circulation and promote overall plant health. Trim back the outer leaves or those that are extending beyond the desired boundaries.
- Propagation: Pruning can also serve as an opportunity for propagation. Instead of discarding the pruned leaves, you can propagate them to create new snake plant babies. Allow the trimmed leaf to dry for a few days, then place it in well-draining soil. With time and proper care, it will develop roots and grow into a new plant.
- Maintain cleanliness: Regularly remove any fallen leaves or debris from the base of the plant. This helps prevent the accumulation of moisture and reduces the risk of pests or diseases. Keeping the plant clean also improves its overall appearance.
Snake plants are relatively forgiving when it comes to pruning, so don’t be afraid to trim and shape as needed. However, remember to strike a balance and avoid excessive pruning, as it can stress the plant. Monitor the plant’s growth and adjust your pruning routine accordingly. With proper pruning and maintenance, your snake plant will remain healthy, visually appealing, and a delightful addition to your indoor space.
Repotting Snake Plant When Necessary
Repotting your snake plant is necessary when it outgrows its current container or when the soil becomes depleted and unable to support healthy growth. Repotting provides the plant with fresh soil, more room for root growth, and a rejuvenated environment. Here are some indications and steps to follow when repotting your snake plant:
- Signs that repotting is needed: Observe the roots of your snake plant. If they start to grow through the drainage holes, become crowded, or the plant becomes top-heavy and unstable, it’s time to repot. Additionally, if the soil no longer retains water, drains poorly, or you have noticed a decline in the plant’s overall health and growth, it could indicate the need for repotting.
- Choose the right time: The best time to repot your snake plant is during its active growth period, typically in spring or summer. This allows the plant to recover quickly from the repotting and establish roots in the fresh soil before its dormant period in the winter.
- Select a larger pot: Choose a pot that is one size larger than the current one. Ensure the new pot has proper drainage holes to prevent water accumulation at the bottom. Repotting into a significantly larger pot may lead to overwatering and slow root growth.
- Prepare the new pot and soil: Fill the new pot with a well-draining soil mixture. You can use a cactus and succulent mix or create your own by combining potting soil, perlite, and coarse sand. This mix allows for proper aeration and drainage, avoiding excessive moisture around the roots.
- Remove the plant from its current pot: Gently loosen the soil around the edges of the pot and turn it upside down, supporting the base of the plant with your hand. Tap the bottom of the pot or squeeze the sides to help release the root ball. Lift the plant carefully from its pot.
- Inspect and divide (if necessary): Examine the root system. If the plant has outgrown its current pot, you may choose to divide it into smaller sections. Gently separate the plant into divisions, ensuring each section has its own healthy roots. Division allows you to propagate and create multiple snake plants.
- Replanting: Place the snake plant or its divisions into the new pot, positioning them at the same depth as they were previously. Fill in around the root ball or divisions with the prepared soil, gently pressing it down to eliminate any air pockets. Leave some space at the top for watering.
- Water and settle the plant: After repotting, water the snake plant thoroughly until water drains out of the bottom of the pot. This helps settle the soil and initiates the establishment of the plant’s roots in its new environment. Allow the soil to dry slightly between waterings to prevent overwatering.
With proper repotting, your snake plant will have renewed vigor and space for growth. Monitor the plant’s condition and adjust your watering routine to accommodate its new environment. Remember that snake plants prefer slightly dry conditions and will thrive when given adequate space for root development.