
Tools You Will Need
Before you begin the process of removing curtain rods from your walls, it’s important to gather the necessary tools. Having these tools ready will make the entire process much smoother and more efficient. Here are the essential tools you will need:
- Screwdriver: A screwdriver is a versatile tool that you’ll need to loosen and remove screws from the curtain rod brackets.
- Drill: If your curtain rods are secured with wall anchors, a drill with the appropriate bit will be necessary to remove them.
- Pliers: Pliers will come in handy if the screws or wall anchors are difficult to remove or if you need to keep them from spinning while unscrewing.
- Putty Knife: You’ll need a putty knife to help patch any holes left behind after removing the wall anchors.
- Spackle: Spackle is a lightweight compound that you’ll use to fill in the holes left behind by the wall anchors.
- Sanding Block: After patching the holes, use a sanding block to smooth and level the spackled areas for a seamless finish.
- Paint and Brush: If necessary, have some paint and a brush on hand to touch up the patched areas and match the wall color.
- Cloth or Towel: A cloth or towel will be useful for wiping away any dust or debris that may accumulate during the process.
By having these tools prepared and easily accessible, you will save time and effort while removing the curtain rods from your walls. So, gather all the necessary tools before proceeding to the next steps.
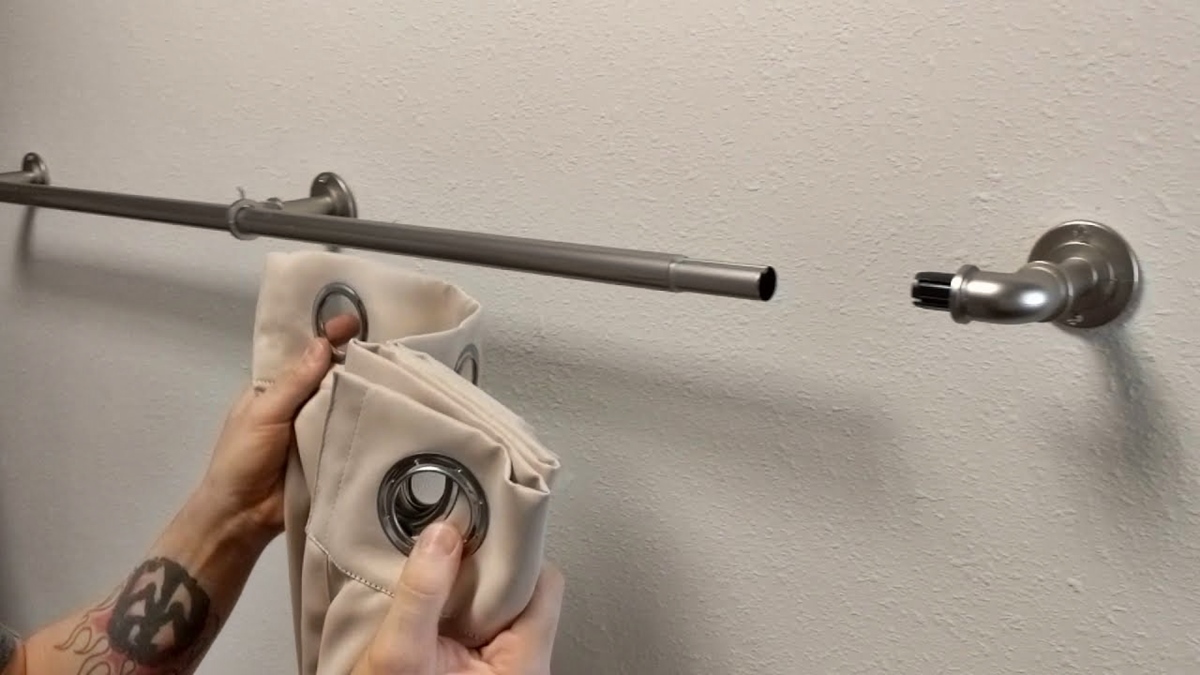
Step 1: Remove the Curtains
Before you can begin the process of removing curtain rods from your walls, you first need to take down the curtains themselves. Follow these steps:
- Start by sliding the curtain hooks or rings off the curtain rod. This may require some gentle pulling or twisting, depending on the type of hooks or rings you have.
- Once the hooks or rings are removed, carefully detach the curtains from the rod. If the curtains are secured with clips or ties, loosen them to release the fabric.
- As you remove the curtains, be cautious not to damage or snag the material. If the curtains are delicate or require special care, fold them neatly and set them aside for cleaning or storage.
By removing the curtains first, you’ll have a clear view of the curtain rod and brackets, making it easier to proceed with the next steps. Once the curtains are safely stored away, you can move on to removing the hooks or rings from the curtain rod.
Step 2: Take off the Curtain Hooks or Rings
After removing the curtains, the next step in removing the curtain rods from your walls is to take off the curtain hooks or rings. Follow these steps:
- Inspect the curtain rod to see how the hooks or rings are attached. Some may have small screws or clips holding them in place, while others may simply slide off.
- If there are screws or clips, carefully loosen them using a screwdriver or pliers. Be sure to keep track of any small hardware you remove, as you will need them later when reinstalling the curtain rod.
- If the hooks or rings slide off, gently slide them along the curtain rod until they are all removed. It may help to use a twisting motion or apply a bit of lubricant, such as a light oil or silicone spray, to make this process easier.
Be mindful of any decorative elements on the hooks or rings, as they could easily break or get damaged if mishandled. Once all the hooks or rings are removed, set them aside in a safe place to avoid misplacing them.
By taking off the curtain hooks or rings, you are preparing the curtain rod for removal from the wall brackets. The next step will involve loosening the wall mounting brackets, so make sure you have the necessary tools handy before proceeding.
Step 3: Loosen the Wall Mounting Brackets
With the curtain hooks or rings removed, you can now focus on loosening the wall mounting brackets that hold the curtain rod in place. Follow these steps:
- Locate the wall mounting brackets on both ends of the curtain rod. They are typically secured with screws or brackets.
- Using a screwdriver, start by loosening the screws that hold the brackets in place. Depending on how tightly they are installed, you may need to apply some force to break them free.
- If the brackets have brackets instead of screws, you will need to disengage them by lifting or twisting the bracket. This will release the curtain rod from the brackets.
- Once the screws or brackets are loosened, carefully remove the wall mounting brackets from the wall. Keep them aside as you may need them if you decide to reinstall the curtain rod in the future.
It’s essential to be extra cautious when removing the wall mounting brackets to prevent any damage to the surrounding walls or surfaces. Take your time and ensure a steady hand to avoid any accidents or mishaps.
By loosening the wall mounting brackets, the curtain rod is now ready to be completely detached from the wall. The next step will guide you through the process of unscrewing the curtain rod itself.
Step 4: Unscrew the Curtain Rod
Now that you have loosened the wall mounting brackets, it’s time to unscrew the curtain rod from the brackets. Follow these steps:
- Inspect the curtain rod to determine how it is attached to the mounting brackets. In most cases, you will find screws or clips securing the rod in place.
- Using a screwdriver, carefully unscrew the screws that hold the curtain rod in place. If there are clips, gently release them to detach the rod from the brackets.
- Once the screws or clips are removed, check if there are any additional mechanisms or hooks holding the rod in place. If so, disengage them before attempting to remove the rod completely.
- Gently pull the curtain rod away from the wall, making sure to support it with your other hand to avoid any accidental damage or falling.
Take your time and be gentle when unscrewing the curtain rod to prevent any marks or scratches on the walls. If the rod is particularly long or heavy, you may need a second person to assist you in safely removing it.
By unscrewing the curtain rod from the brackets, you have successfully detached it from the wall. The next step will guide you through removing any wall anchors that may be present.
Step 5: Remove the Wall Anchors
After unscrewing the curtain rod, you might find that there are wall anchors left behind in the wall. These anchors are used to provide additional support for the curtain rod. Follow these steps to remove them:
- Inspect the wall anchors to determine their type. They may be plastic anchors, toggle bolts, or other varieties.
- If you have plastic wall anchors, gently pull them out of the wall by gripping the outer rim with pliers and applying firm, steady pressure. Be cautious not to damage the surrounding wall.
- For toggle bolts or other types of wall anchors, you’ll need to unscrew them in a counterclockwise direction using pliers or a screwdriver. As you turn the screws, the toggle will eventually come loose from the wall.
- Once the wall anchors are removed, inspect the area to ensure the wall surface is smooth and free from any protruding pieces or debris.
If the wall anchors are firmly stuck or difficult to remove, you can try gently tapping them with a hammer to loosen them before attempting to pull them out. However, be careful not to cause any damage to the wall in the process.
By removing the wall anchors, you are ensuring a clean and smooth wall surface, ready for any future installations or repairs. The next step will guide you through patching and painting the holes left behind from the wall anchors.
Step 6: Patch and Paint the Holes
Now that the curtain rod and wall anchors have been removed, you’ll need to patch and paint the holes left behind on the wall. Follow these steps:
- Start by using a putty knife to apply spackle or a lightweight wall patching compound to fill the holes left by the wall anchors. Smooth the spackle over the holes, ensuring to fill them completely.
- Allow the spackle to dry according to the manufacturer’s instructions. This typically takes a few hours, but it’s best to leave it overnight to ensure complete drying.
- Once the spackle is dry, use a sanding block or sandpaper to smooth down the patched areas. Sand gently in circular motions until the patched areas are flush with the surrounding wall surface.
- Wipe away any dust or debris with a damp cloth or towel to ensure a clean surface before painting.
- If the wall color is not a perfect match, you may need to touch up the patched areas with paint. Use a small brush to carefully apply a coat of paint that matches the surrounding wall color.
- Allow the paint to dry completely before inspecting the patched areas. If necessary, apply additional coats of paint to achieve a seamless blending with the rest of the wall.
By patching and painting the holes left behind from the wall anchors, you are restoring a smooth and visually appealing wall surface. This step ensures that any evidence of the previous curtain rod installation is seamlessly hidden.
With the patched and painted holes, your wall is now ready for a fresh look. The final step will guide you through cleaning and storing the curtain rods for future use or disposal.
Step 7: Clean and Store the Curtain Rods
After successfully removing the curtain rods and completing the necessary repairs, it’s important to properly clean and store them for future use or disposal. Follow these steps:
- Start by using a clean cloth or towel to wipe down the curtain rods to remove any dust or debris that may have accumulated during the removal process.
- If the curtain rods have any detachable parts, such as finials or decorative elements, carefully remove them for separate cleaning and storage.
- For metal curtain rods, you can use mild soap and water to clean them. Gently scrub them with a soft sponge or cloth and rinse thoroughly. Avoid using abrasive cleaners that could damage the finish.
- If the curtain rods are made of wood, use a wood cleaner or a mixture of mild soap and water to clean them. Wipe them down with a damp cloth and be sure to dry them thoroughly to prevent any moisture damage.
- Once the curtain rods are clean and dry, consider storing them in a safe place to prevent any damage. You can use a storage bag or wrap them in a soft cloth or bubble wrap to protect them from dust and scratches.
- If you no longer have a use for the curtain rods, consider recycling them or donating them to someone in need. Check with local recycling centers or charitable organizations to see if they accept curtain rods.
By properly cleaning and storing the curtain rods, you preserve their condition for future use or ensure that they are disposed of responsibly. This step completes the process of removing the curtain rods from the wall and tidying up the area.
With the curtain rods safely cleaned and stored, your project of removing curtain rods from the wall is now successfully completed. Take a step back and admire your newly updated space!