
Choosing the Right Frame for Your Mirror
Choosing the right frame for your mirror is essential to elevate the overall aesthetic appeal of your space. It’s important to consider various factors such as the style of your room, the size and shape of the mirror, and your personal taste. Here are some key points to keep in mind when selecting a frame:
- Style: Determine the style that best complements your room’s decor. Whether you prefer a modern, rustic, or traditional look, there are frames available that will suit your needs.
- Materials: Consider the materials used in the frame construction. Wood frames are popular for their timeless appeal, while metal frames can offer a sleek and contemporary vibe. Alternatively, synthetic materials provide durability and affordability.
- Color: Take into account the color scheme of your room and choose a frame color that complements it. A frame in a contrasting color can create a focal point, while a matching color can blend seamlessly with the surroundings.
- Size: Measure your mirror accurately and select a frame that fits its dimensions perfectly. A frame that is too small or too large can look disproportionate and detract from the mirror’s overall impact.
- Design: Decide on the design elements you want in the frame. Whether it’s ornate carvings, sleek lines, or intricate patterns, consider how they will enhance the mirror and tie into the overall aesthetic of the room.
By taking these factors into consideration, you can choose a frame that not only complements your mirror but also harmonizes with the existing decor in your space. Remember to explore different options and consider your personal style to find the perfect frame that will enhance the beauty of your mirror for years to come.
Gathering the Materials and Tools You’ll Need
Before you begin the process of putting a frame on your mirror, it’s important to gather all the necessary materials and tools. Having everything prepared in advance will make the installation process smooth and efficient. Here are the essential items you’ll need:
- Measuring tape: Use a measuring tape to accurately measure the dimensions of your mirror. This will help you determine the length and width of the frame pieces.
- Frame material: Choose the frame material of your choice, such as wood, metal, or synthetic. Ensure that the material is suitable for framing and matches the desired style of your mirror.
- Saw: Depending on the frame material, you may need a saw to cut the frame pieces to the correct size. Ensure that you have the appropriate type of saw for your chosen material.
- Sandpaper: Sandpaper will be needed to smooth out any rough edges or surfaces of the frame pieces. This will help you achieve a professional finish.
- Stain or paint: If you prefer a stained or painted frame, make sure you have the desired stain or paint color along with a brush or roller for application.
- Screws or adhesive: Depending on your chosen method of frame attachment, you’ll need screws or adhesive to secure the frame pieces to the mirror’s surface. Ensure that you have the appropriate type of screws or adhesive for your mirror material.
- Screwdriver or drill: If you’re using screws to attach the frame, you’ll need a screwdriver or drill for the installation process. Make sure you have the right tools and bits for the job.
- Cloth or towel: Keep a cloth or towel handy for wiping away any excess adhesive, stain, or paint during the installation process.
By gathering all these materials and tools beforehand, you’ll have everything you need to successfully complete the frame installation. This will save you time and ensure that the process goes smoothly. Double-check that you have everything on the list, so you can begin transforming your mirror with a beautiful frame.
Preparing Your Mirror for Frame Installation
Before you start attaching the frame to your mirror, it is crucial to prepare the mirror surface to ensure a secure and seamless installation. Follow these steps to properly prepare your mirror:
- Clean the mirror: Thoroughly clean the mirror surface to remove any dirt, dust, or smudges. Use a non-abrasive glass cleaner and a lint-free cloth to achieve a streak-free shine.
- Protect the edges: Apply painter’s tape or masking tape along the edges of the mirror to protect it from accidental scratches or damage during the installation process.
- Locate the studs or anchors: If you plan to secure the frame using screws, use a stud finder or anchor screws to locate the studs or anchors on the wall. Mark their positions with a pencil for reference.
- Measure and mark the placement: Measure and mark the desired placement of the frame on the mirror. Use a pencil to make light marks at the top, bottom, and sides of the mirror. This will serve as a guide for attaching the frame evenly.
- Prime the mirror surface (optional): If you plan to paint the mirror frame, you may want to prime the mirror surface before installation. Apply a thin coat of glass primer using a foam brush, following the manufacturer’s instructions.
Following these preparation steps will ensure that your mirror is clean and protected during the frame installation process. Taking the time to properly prepare your mirror will result in a professional-looking and secure frame attachment. Once your mirror is ready, you can move on to the next steps of measuring, cutting, and attaching the frame pieces.
Measuring and Cutting the Frame Pieces
Accurate measurements and precise cutting are essential for a properly fitting frame on your mirror. Follow these steps to measure and cut the frame pieces:
- Measure the mirror dimensions: Use a measuring tape to measure the length and width of your mirror. Write down the exact measurements to ensure accuracy.
- Add frame width: Decide on the desired width of the frame and add it to both the length and width measurements. This will account for the space the frame will occupy around the mirror.
- Cut the frame pieces: Using the measurements you obtained, cut the frame pieces accordingly. If you’re using wood, use a saw to make precise cuts. If you’re using a different material, ensure you have the appropriate tool for cutting.
- Double-check the dimensions: After cutting the frame pieces, double-check their dimensions to ensure they match the measurements of your mirror. Adjust and recut if necessary.
- Smooth the edges: Use sandpaper to smooth any rough edges or corners of the frame pieces. This will ensure a clean and professional-looking finish.
It’s crucial to take accurate and precise measurements to avoid any gaps or misalignments in the frame installation. Double-checking the dimensions before cutting will save you time and ensure a proper fit. Remember to use appropriate safety precautions when handling tools and cutting materials.
Once you have your frame pieces accurately measured and cut, you’ll be ready to move on to the next step of sanding and staining/painting the frame to enhance its visual appeal.
Sanding and Staining/Painting the Frame
After measuring and cutting the frame pieces, it’s time to enhance the aesthetics of the frame by sanding and staining/painting it. Follow these steps to achieve a polished and visually appealing frame:
- Sand the frame: Use sandpaper to smooth out any rough surfaces or edges of the frame pieces. Start with a coarse-grit sandpaper and then move to a finer grit for a smoother finish. This will create a clean and even surface for staining or painting.
- Remove sanding residue: Wipe away any sanding residue or dust from the frame pieces using a cloth or brush. This will ensure that the stain or paint adheres properly to the surface.
- Stain or paint the frame: Depending on the desired look, you can either stain the frame to enhance the natural beauty of the wood or paint it to match your room’s decor. Apply the stain or paint evenly using a brush or roller, following the manufacturer’s instructions for drying and application times.
- Apply multiple coats (if necessary): If you want a deeper color or more coverage, you may need to apply multiple coats of stain or paint. Allow each coat to dry completely before applying the next one, ensuring a smooth and consistent finish.
- Allow the frame to dry: Once you’ve achieved the desired stain or paint coverage, allow the frame to dry thoroughly. Follow the recommended drying time on the stain or paint product to ensure a durable finish.
Sanding the frame and applying a stain or paint not only enhances its appearance but also provides protection against wear and tear. Choose a stain or paint color that complements your room’s style and adds visual interest to your mirror.
With the frame sanded, stained, or painted, you’re now ready to attach it to your mirror. In the next section, we’ll cover the process of securely attaching the frame to your mirror.
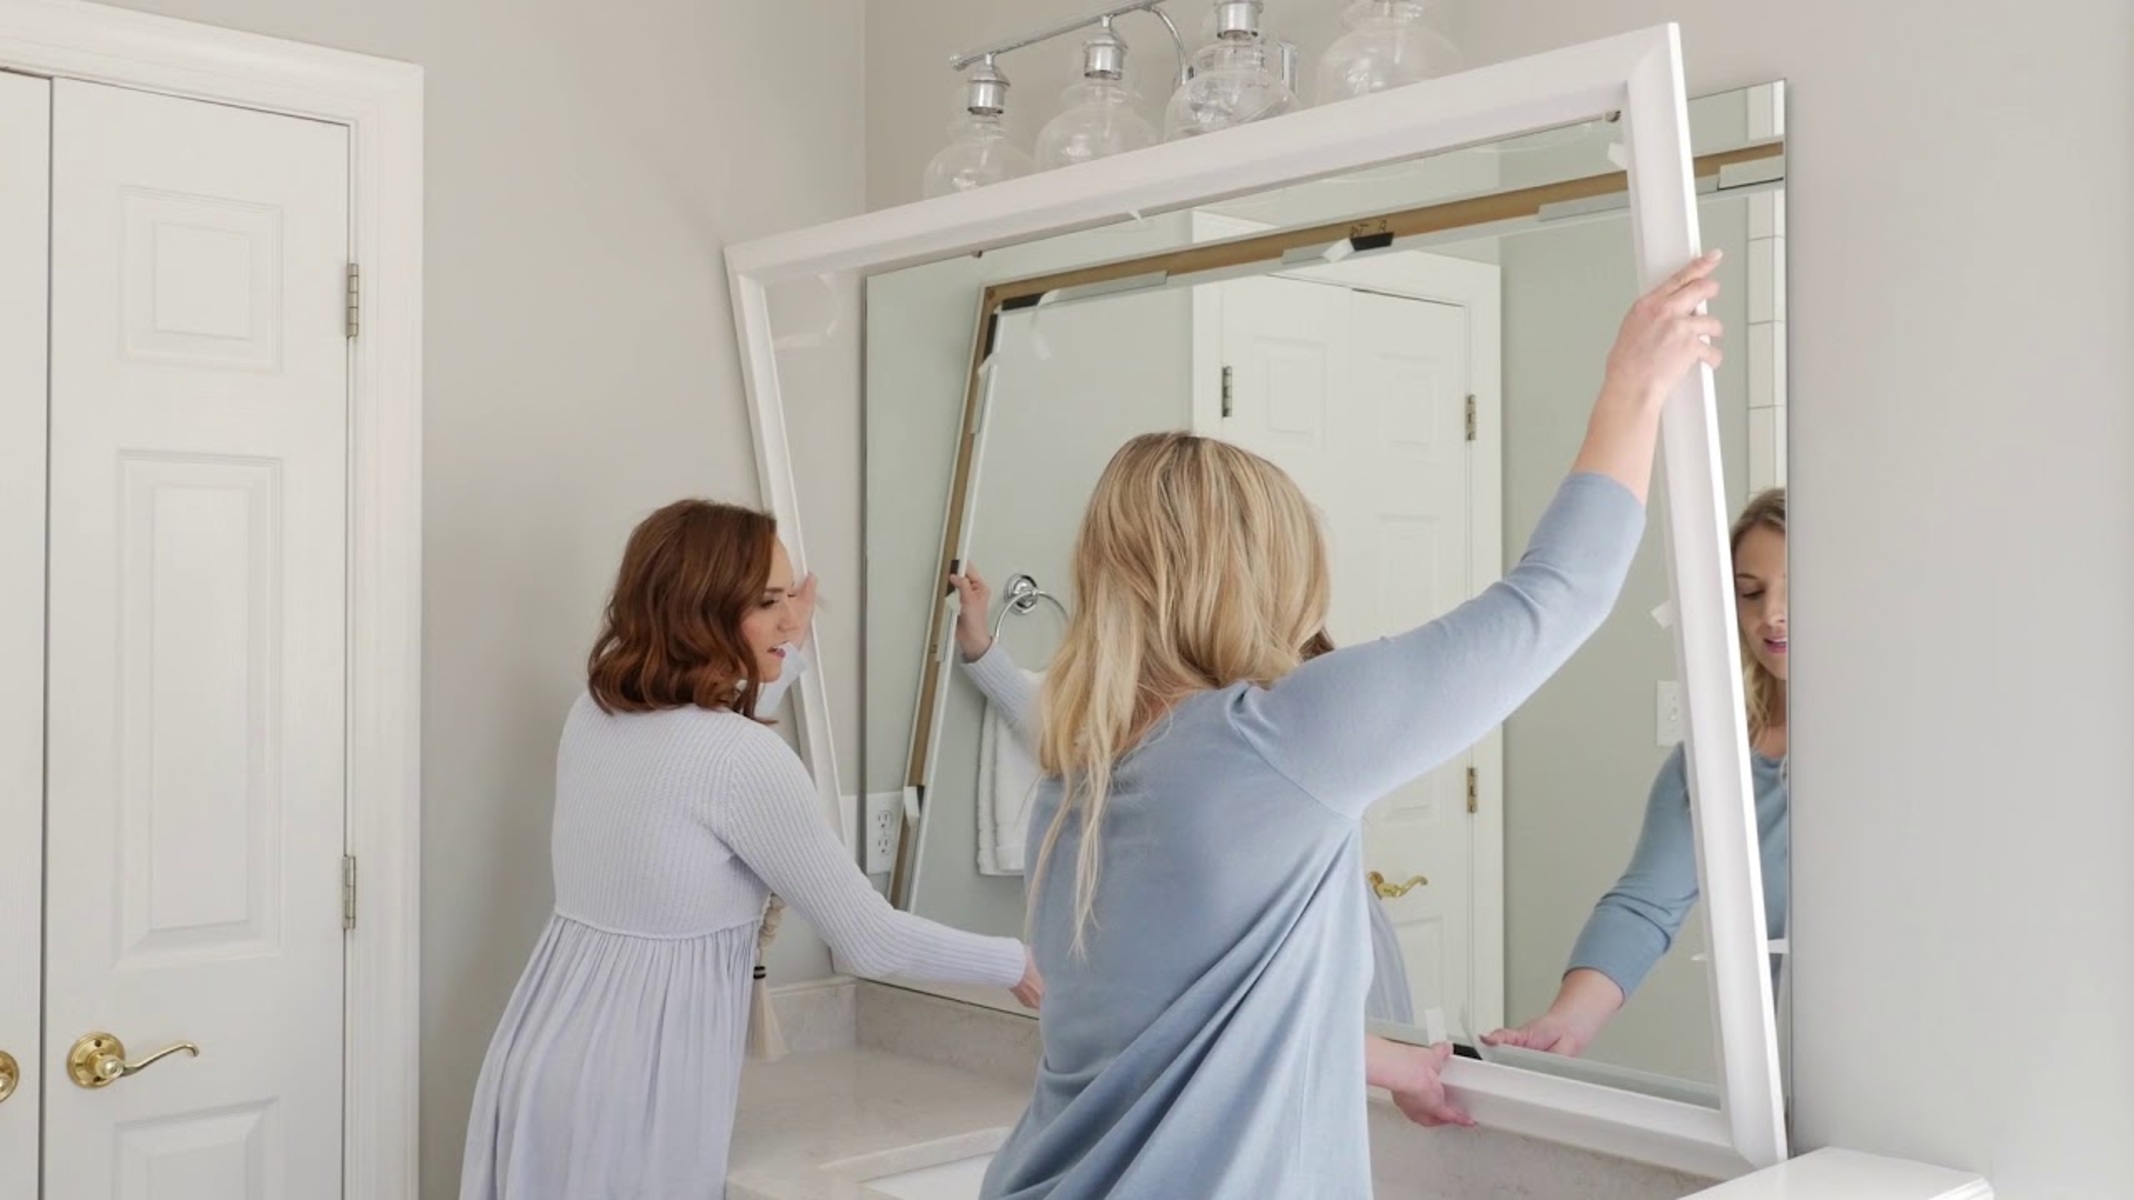
Attaching the Frame to Your Mirror
Now that you have prepared and enhanced your frame, it’s time to attach it to your mirror. Follow these steps to securely attach the frame:
- Position the frame: Carefully position the frame around the edges of the mirror, aligning it with the markings you made during the preparation stage.
- Secure the frame: Depending on your preferred method, you can either use screws or adhesive to secure the frame to the mirror. If using screws, pre-drill holes into the frame, taking care not to go too deep and damage the mirror. Then, using a screwdriver or drill, attach the frame by driving screws through the pre-drilled holes into the mirror’s surface. If using adhesive, apply it to the back of the frame and press firmly against the mirror, following the manufacturer’s instructions for drying and curing times.
- Double-check alignment: Once the frame is attached, check that it is level and evenly aligned with the edges of the mirror. Make any necessary adjustments before the adhesive sets or tightening the screws completely.
- Remove protective tape: If you applied painter’s tape or masking tape during the preparation stage, carefully remove it to reveal the clean edges of your newly framed mirror.
When attaching the frame, take your time to ensure a secure and level installation. Double-check the alignment before fully securing the frame to avoid any misalignments or crooked results. Whether you choose screws or adhesive, follow the manufacturer’s guidelines for the best results.
Once the frame is securely attached, you’re almost done! The final step is to add some finishing touches to the frame to enhance its overall appearance. We’ll cover this in the next section.
Adding Finishing Touches to the Frame
Now that you have successfully attached the frame to your mirror, it’s time to add those final touches that will elevate its overall appearance. Follow these steps to give your framed mirror a polished and refined look:
- Fill nail/screw holes: If you used screws to attach the frame, fill the nail/screw holes with wood filler or putty. Smooth out the filler with a putty knife and let it dry. Then, sand the filled areas until they are flush with the frame’s surface.
- Touch up paint or stain: If there are any areas where the paint or stain is scratched or uneven, touch up those areas with a small brush or roller. This will ensure a seamless and consistent appearance.
- Add decorative elements: Consider adding decorative elements to further enhance the frame’s aesthetic appeal. This could include applying trim or decorative molding to the frame’s edges or attaching decorative accents such as metal or wooden embellishments.
- Apply a protective finish: Applying a protective finish, such as a clear coat or sealant, will help protect the frame from moisture, UV rays, and general wear and tear. Follow the manufacturer’s instructions for the specific product you’re using to ensure proper application and drying times.
- Step back and admire: Once you’ve completed all the finishing touches, step back and admire your beautifully framed mirror. Take a moment to appreciate the transformation and the effort you put into creating a stunning piece for your space.
By adding these finishing touches, you can take your framed mirror to the next level. The attention to detail and additional decorative elements will contribute to the overall appeal of the frame and create a focal point in your room.
Now that you’ve completed your framed mirror, it’s important to know how to properly clean and maintain it. In the next section, we’ll discuss cleaning and maintenance tips to keep your framed mirror looking its best.
Cleaning and Maintaining Your Framed Mirror
Proper cleaning and maintenance will help keep your framed mirror looking pristine and extend its lifespan. Follow these tips to effectively clean and maintain your framed mirror:
- Use a gentle cleaning solution: Mix a solution of mild soap or glass cleaner with warm water. Apply the solution to a lint-free or microfiber cloth and gently wipe the mirror’s surface. Avoid spraying the solution directly onto the mirror to prevent seepage into the frame.
- Avoid abrasive materials: To prevent scratching or damaging the mirror or frame, avoid using abrasive cleaning tools or materials, such as harsh scrub brushes or rough cloths. Stick to soft, non-abrasive cloths or sponges for cleaning.
- Dry thoroughly: After cleaning, use a dry cloth to remove any remaining moisture from the mirror’s surface. This will prevent streaks or water spots from forming.
- Regular dusting: Dust the frame regularly with a soft cloth or a feather duster to prevent dust buildup. This will help maintain the frame’s appearance and prevent scratches caused by dirt or debris.
- Avoid direct sunlight: Excessive exposure to direct sunlight can cause the frame’s color to fade over time. If possible, position your framed mirror away from direct sunlight or use curtains or blinds to protect it.
- Handle with care: When moving or adjusting your framed mirror, handle it with care to prevent any accidental damage. Hold it by the frame and avoid putting excessive pressure or force on the glass surface.
- Inspect for damage: Regularly inspect the frame for any signs of damage, such as loose screws, cracks, or chipped paint. Repair or replace any damaged parts promptly to maintain the integrity and appearance of the frame.
By following these cleaning and maintenance practices, you can keep your framed mirror looking beautiful for years to come. Regular cleaning and care will ensure that it remains a stylish and functional addition to your space.
With proper cleaning and maintenance, your framed mirror will continue to serve as a stunning accent piece in your home or office. Enjoy the beauty and functionality it brings to your space!