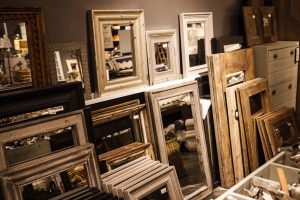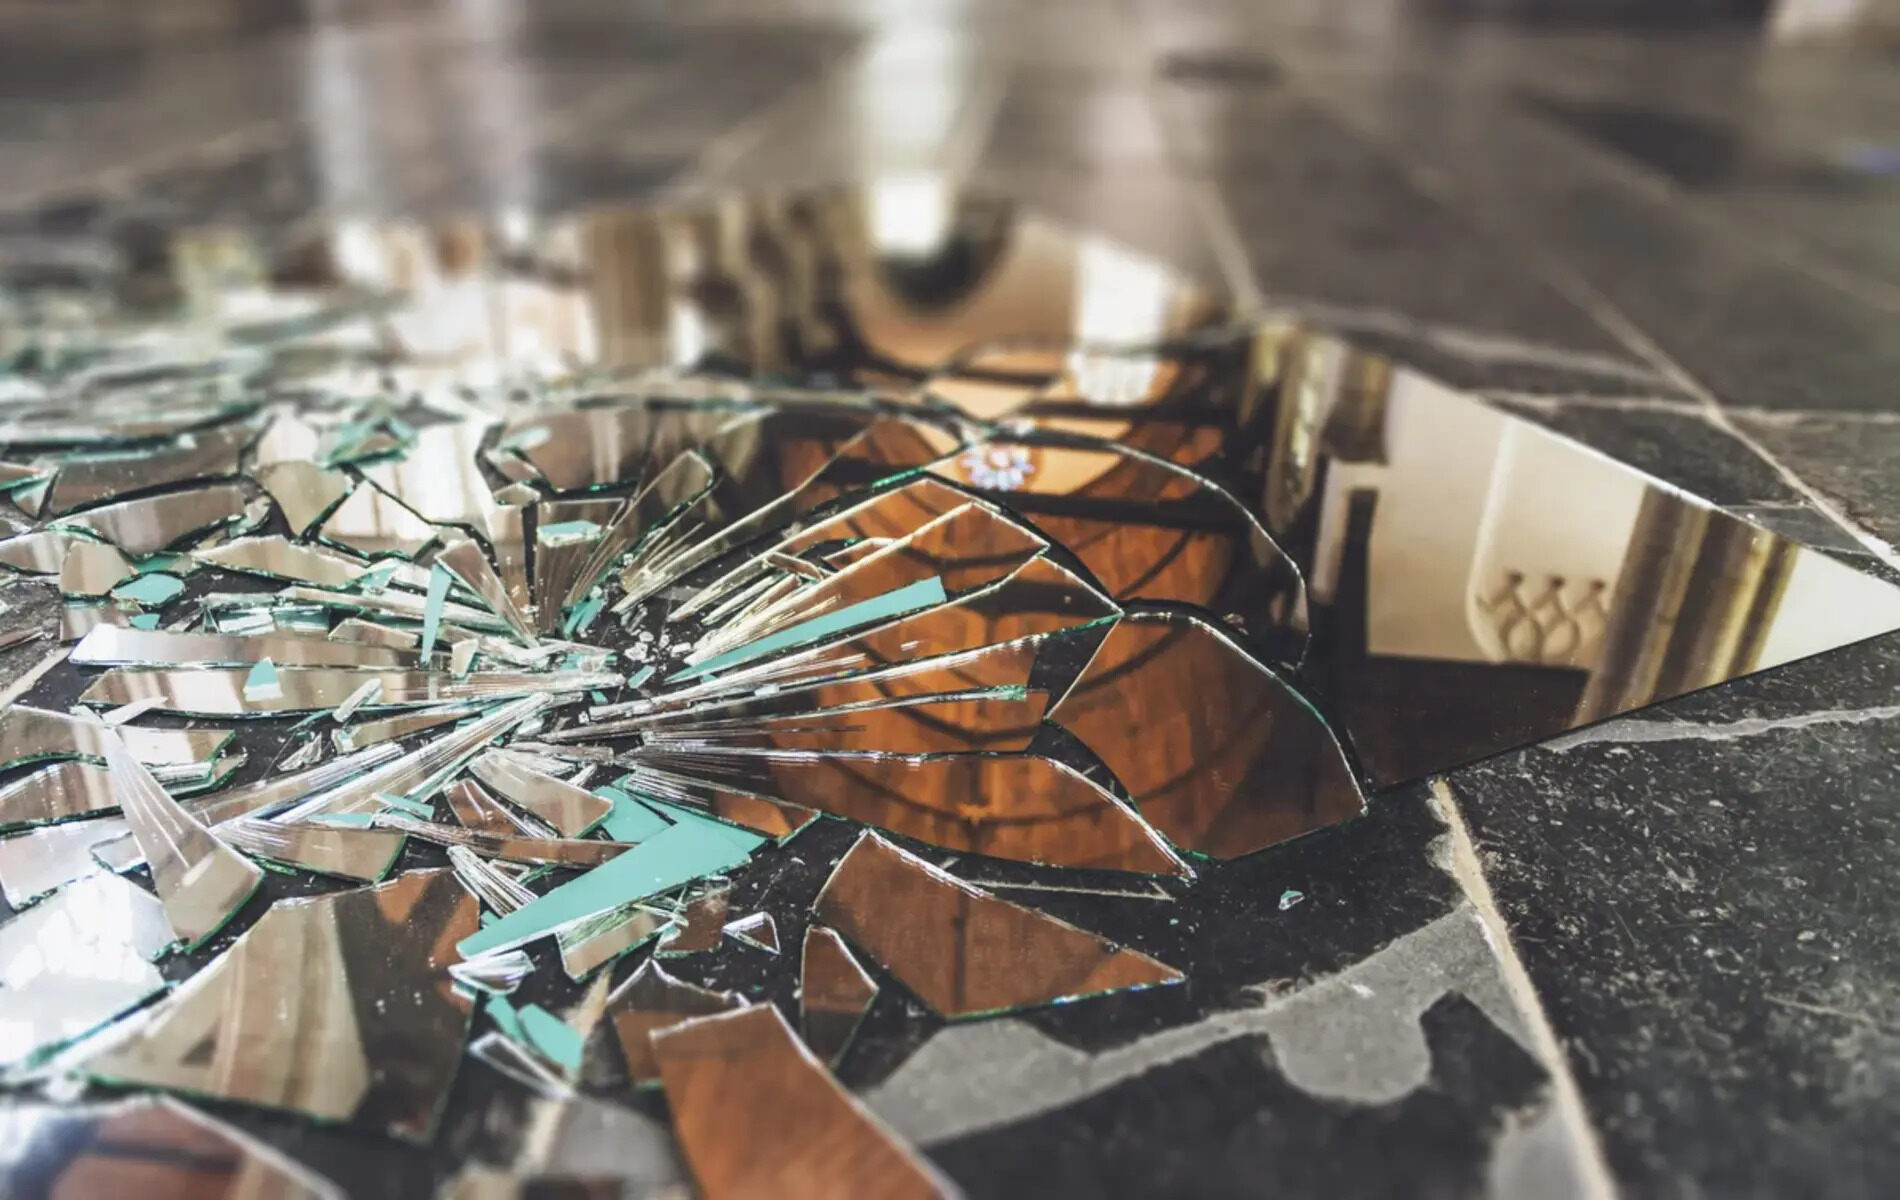
How to Handle Broken Mirror Pieces Safely
Accidents happen, and if you find yourself with a broken mirror, it’s essential to handle the situation with caution. Broken glass can be sharp and dangerous, so taking the necessary precautions is crucial. Here are some steps to safely handle broken mirror pieces:
- Put on protective gear: Before you start cleaning up the broken mirror, protect yourself by wearing thick gloves and safety goggles. This will reduce the risk of cuts and eye injuries.
- Clear the area: Make sure to clear the immediate area of any furniture or objects that may obstruct your movement. Create a safe and spacious work area to allow for easy cleanup.
- Handle large pieces carefully: If there are sizeable broken mirror pieces, use a broom and dustpan to carefully sweep them up. Handle the pieces by the edges rather than touching the sharp edges.
- Collect small fragments: To collect smaller fragments and tiny shards, use a damp paper towel or a piece of masking tape. Gently press the towel or tape onto the surface, ensuring all the glass fragments adhere to it.
- Dispose of broken mirror pieces: Place all the broken mirror pieces, including the larger ones and the collected fragments, into a sturdy cardboard box or a puncture-resistant bag. Seal it securely to prevent any accidental injuries and dispose of it responsibly according to your local waste management guidelines.
- Clean the area thoroughly: After removing the broken mirror, thoroughly clean the area using a broom and a damp cloth to ensure no glass shards are left behind. Be sure to dispose of the cloth properly once you’re done.
- Inspect for hidden shards: Carefully inspect the surrounding area to ensure no small glass pieces have gone unnoticed. Run your fingers lightly over surfaces and check corners and crevices. If you spot any remaining shards, use the aforementioned methods to collect and dispose of them safely.
By following these steps, you can handle broken mirror pieces with care and minimize the risk of accidents. Remember, safety should always be your top priority when dealing with broken glass.
Make a Mosaic Art Piece with Broken Mirror
Don’t let those broken mirror pieces go to waste! Instead, turn them into a stunning mosaic art piece that will captivate your guests. Mosaic art is a creative and fun way to repurpose broken mirror fragments. Here’s how you can create your own unique mosaic art piece:
- Gather your materials: Aside from the broken mirror pieces, you’ll need a base material such as a wooden panel or a sturdy canvas, adhesive (such as mosaic glue or strong craft glue), grout, a grout spreader, and protective gloves.
- Prepare the base: Clean and prep the base material by sanding it lightly and wiping away any dust or debris. This will ensure a smooth surface for your mosaic design.
- Plan your design: Sketch out or visualize the design you want to create with the broken mirror pieces. You can go for a geometric pattern, an abstract design, or even a pictorial representation.
- Apply adhesive: Using your chosen adhesive, apply a thin and even layer onto the base material. Work in small sections to prevent the adhesive from drying out too quickly.
- Arrange the broken mirror pieces: Carefully place the broken mirror pieces onto the adhesive, following your planned design. Play around with different shapes and sizes to create a visually appealing composition.
- Secure the mirror pieces: Press down gently on the broken mirror pieces to ensure they adhere well to the adhesive. Use a small brush or your gloved fingers to fix any misaligned pieces or adjust their positions as needed.
- Let it dry: Allow the mosaic art piece to dry completely according to the adhesive’s instructions. This typically takes around 24 to 48 hours, but follow the specific guidelines provided by your adhesive product.
- Apply grout: Once the adhesive is dry, mix the grout according to the instructions on the packaging. Using a grout spreader, apply the grout over the entire surface, making sure it fills the gaps between the broken mirror pieces.
- Clean off excess grout: After applying the grout, use a damp sponge or cloth to gently remove any excess grout from the mirror pieces’ surfaces. Be careful not to dislodge or damage the mirror pieces while cleaning.
- Let it cure: Allow the grout to cure for the recommended time specified by the product instructions. This usually ranges from 24 to 72 hours, depending on the type of grout used.
Once your mosaic art piece is completely dry and cured, you can proudly display it on your wall or use it as a decorative element in your home. Crafting a mosaic art piece with broken mirror pieces not only gives them a new lease on life but also adds an eye-catching and unique touch to your space.
Create a Unique Wall Decor with Broken Mirror
Transform the shattered beauty of broken mirror pieces into a one-of-a-kind wall decor that will instantly elevate your interior design. With a little creativity and some simple materials, you can create a stunning focal point for any room. Here’s how you can make a unique wall decor using broken mirror pieces:
- Gather your materials: In addition to the broken mirror pieces, you’ll need a wooden or metal frame, strong adhesive (such as heavy-duty craft glue or mirror adhesive), a measuring tape, a level, and a hanging kit if necessary.
- Prepare the frame: Clean the frame thoroughly and ensure it’s free from dust or debris. If desired, you can also paint the frame to match your decor aesthetic or leave it as-is for a rustic look.
- Measure and mark: Determine the dimensions for the broken mirror pieces to fit within the frame. Measure and mark these dimensions accordingly on the frame, ensuring precise placement of the mirror pieces.
- Apply adhesive: Using the selected adhesive, apply a generous amount onto the backside of each broken mirror piece. Take care to cover the entire surface to ensure secure attachment to the frame.
- Arrange the mirror pieces: Carefully place the broken mirror pieces onto the marked areas of the frame. Experiment with different arrangements and orientations to create a visually appealing pattern.
- Secure the mirror pieces: Press down firmly on each mirror piece to ensure it adheres well to the frame. Use a cloth or your gloved hand to smooth out any air bubbles or excess adhesive.
- Let it dry: Allow the wall decor to dry completely based on the adhesive’s instructions. This typically takes several hours or overnight, so exercise patience to ensure a strong bond.
- Hang the wall decor: Once the adhesive has completely dried, attach any necessary hardware or hanging kit to the back of the frame. Use a level to ensure the wall decor hangs straight and securely on your chosen wall.
- Find the perfect spot: Select a prominent spot on your wall to showcase your unique creation. Consider areas where the light can reflect off the broken mirror pieces, enhancing the overall visual impact.
- Enjoy your masterpiece: Step back and admire your handiwork! Your unique wall decor made with broken mirror pieces adds a touch of elegance and intrigue to your living space, captivating the attention of all who enter.
By repurposing broken mirror pieces into a stunning wall decor, you not only give them a new life but also create a conversation piece that adds character and style to your home. Embrace the beauty of imperfection and let your creativity shine through this unique DIY project.
Repurpose Broken Mirror Pieces as a Jewelry Holder
If you have broken mirror pieces lying around, why not repurpose them into a stylish and functional jewelry holder? Not only will this DIY project help you organize your accessories, but it will also add a touch of elegance to your vanity or dresser. Follow these simple steps to repurpose broken mirror pieces into a unique jewelry holder:
- Gather your materials: Apart from the broken mirror pieces, you’ll need a wooden or metal frame, craft glue, a measuring tape, hooks or small dowels, a paintbrush, and optional embellishments like decorative knobs or trim.
- Prepare the frame: Clean the frame thoroughly and remove any dirt or debris. Consider painting or staining the frame to match your personal style or leave it in its natural state for a rustic feel.
- Measure and mark: Determine the size and spacing for your mirror pieces within the frame. Use a measuring tape to mark the positions where the broken mirror pieces will be attached.
- Adhere the mirror pieces: Apply a generous amount of craft glue onto the backside of each broken mirror piece. Press each piece firmly onto the marked spots on the frame, ensuring they adhere securely.
- Add hooks or dowels: Depending on your preference, attach small hooks or insert small dowels onto the frame where you can hang necklaces, bracelets, or rings. Make sure they are evenly spaced and firmly attached.
- Decorate and customize: Get creative and personalize your jewelry holder. You can paint designs on the frame, add decorative knobs as hangers, or attach trim around the edges for extra flair.
- Let it dry: Allow the glue to dry completely based on the adhesive instructions. This usually takes a few hours or overnight, so be patient to ensure a strong bond.
- Organize your jewelry: Once the jewelry holder is fully dried, start arranging your accessories. Hang necklaces and bracelets on the hooks, insert rings on the dowels, and use the broken mirror pieces to display earrings or pins.
- Place it on display: Find a convenient and accessible spot where you can proudly showcase your repurposed jewelry holder. This could be on your vanity, dresser, or even wall-mounted for easy access and visual appeal.
- Enjoy your organized jewelry: With your repurposed broken mirror jewelry holder, you can now easily find and display your favorite accessories while adding a touch of glamour to your space. It’s a stylish and functional DIY project that breathes new life into broken mirror pieces.
Get creative with your repurposing project and let your jewelry holder become a unique and eye-catching piece of decor that reflects both your personal style and resourcefulness.
Use Broken Mirror to Create a Glamorous Tabletop
Broken mirror pieces can be transformed into a glamorous tabletop that adds a touch of elegance and sparkle to any space. This DIY project allows you to repurpose the shattered mirror fragments into a stunning focal point for your coffee table, side table, or even a vanity. Follow these steps to create your own glamorous tabletop using broken mirror pieces:
- Gather your materials: In addition to the broken mirror pieces, you’ll need a wooden tabletop or a pre-existing table surface, strong adhesive (such as heavy-duty craft glue or mirror adhesive), a measuring tape, a paintbrush, and a protective cloth or cardboard.
- Prepare the table surface: Clean the table surface thoroughly and ensure it’s free from dust or debris. If desired, you can sand or paint it to create a smooth base for your broken mirror pieces.
- Measure and mark: Determine the size and arrangement of the broken mirror pieces on the table surface. Use a measuring tape to mark the positions where the mirror pieces will be attached, ensuring a balanced and visually appealing layout.
- Apply adhesive: Apply a generous amount of adhesive onto the backside of each broken mirror piece. Make sure to cover the entire surface to ensure a secure attachment to the table surface.
- Place the mirror pieces: Carefully place the broken mirror pieces onto the marked areas of the table surface. Adjust their positions as needed to create a symmetrical or artistic pattern that suits your taste.
- Secure the mirror pieces: Press down firmly on each mirror piece to ensure it adheres well to the table surface. Use a cloth or protective cardboard to protect your hands and to smooth out any air bubbles or excess adhesive.
- Let it dry: Allow the tabletop to dry completely based on the adhesive’s instructions. This can take several hours or overnight, so be patient to ensure a strong bond.
- Protect the mirror pieces: Since the mirror pieces are exposed on the tabletop, it’s important to protect them from scratches and damage. Consider applying a layer of clear resin or a glass-like epoxy over the mirror pieces to ensure durability and longevity.
- Enjoy your glamorous tabletop: Once the tabletop is dry and protected, place it in the desired location and admire the glamorous transformation it brings to your space. The broken mirror pieces create a captivating and luxurious focal point that will undoubtedly impress your guests.
With a little creativity and effort, you can repurpose broken mirror pieces into a glamorous tabletop that not only showcases your resourcefulness but also adds a touch of sophistication to your home decor. Embrace the sparkling beauty of the broken mirror pieces and enjoy the glamorous ambiance they create in your space.
Make a Stunning Picture Frame from Broken Mirror
Turn those broken mirror pieces into a stunning picture frame that adds a touch of elegance and charm to your photographs or artwork. Creating a unique frame from broken mirror fragments is an excellent way to repurpose them and showcase your creativity. Follow these steps to make your own stunning picture frame using broken mirror pieces:
- Gather your materials: Aside from the broken mirror pieces, you’ll need a plain wooden or metal picture frame, craft glue, a paintbrush, a protective cloth or newspaper, and optional embellishments such as decorative beads or mosaic tiles.
- Prepare the frame: Clean the picture frame thoroughly and remove any dust or debris. Place a protective cloth or newspaper underneath to catch any glue drips and protect your work surface.
- Arrange the broken mirror pieces: Lay out the broken mirror pieces on the frame to visualize the design and placement. Play around with different shapes and orientations until you’re satisfied with the overall look.
- Apply craft glue: Working one section at a time, apply a thin layer of craft glue onto the backside of each mirror piece. Press each piece firmly onto the frame, ensuring a secure bond.
- Fill in the gaps: If desired, use smaller mirror pieces or mosaic tiles to fill in any gaps between the larger mirror fragments. This adds visual interest and creates a mosaic-like effect.
- Add additional embellishments: Get creative and enhance your picture frame by adding decorative beads or mosaic tiles along the edges or corners. This will further elevate the visual appeal of the frame.
- Let it dry: Allow the glue to dry completely based on the adhesive’s instructions. This typically takes a few hours or overnight, so exercise patience to ensure a strong bond.
- Seal and protect: Consider applying a clear sealant or varnish over the mirror pieces to protect them from scratches and to ensure the longevity of your picture frame.
- Insert your artwork or photo: Once the frame is fully dried and protected, remove the back of the frame and insert your chosen artwork or photograph. Secure the back of the frame in place.
- Showcase your stunning frame: Find the perfect spot to display your unique picture frame. Whether it’s on a mantel, a shelf, or a wall, your broken mirror frame will instantly become a focal point that adds a touch of glamour to any space.
By repurposing broken mirror pieces into a stunning picture frame, not only do you give them a second life, but you also showcase your artistic side. Display your cherished memories or favorite art pieces in a frame that reflects your creativity and transforms brokenness into beauty.
Transform Broken Mirror into Beautiful Coasters
Don’t let those broken mirror pieces go to waste; repurpose them into stunning coasters that will add an elegant touch to your home decor. Creating unique and eye-catching coasters from broken mirror fragments is a simple and rewarding DIY project. Follow these steps to transform your broken mirror into beautiful coasters:
- Gather your materials: In addition to the broken mirror pieces, you’ll need cork sheets, strong adhesive (such as E6000 or super glue), a ruler, a pen or marker, a utility knife or scissors, and optional decorative elements like ribbon or felt.
- Measure and mark: Use a ruler and pen or marker to measure and mark the desired size and shape for your coasters on the cork sheets. Square or round shapes are common choices, but feel free to get creative.
- Cut out the cork: With a utility knife or scissors, carefully cut along the marked lines to create the cork bases for your coasters. Take your time to ensure clean and precise cuts.
- Prepare the broken mirror pieces: Clean the broken mirror pieces to remove any dust or debris. If the edges of the mirror pieces are sharp, consider using sandpaper or a file to smooth them out for safety.
- Apply adhesive: Using a strong adhesive, apply a thin and even layer onto the backside of each broken mirror piece. Make sure to cover the entire surface to ensure a secure attachment to the cork.
- Attach the mirror pieces: Carefully place the broken mirror pieces onto the cork bases, pressing them firmly to ensure a strong bond. Align the mirror pieces with the edges of the cork to create a seamless and polished look.
- Add decorative elements: To make your coasters even more unique, consider adding decorative elements like ribbon or felt to the edges. Glue these elements around the perimeter of the coaster to create a finished and stylish touch.
- Let it dry: Allow the adhesive to dry completely based on the glue’s instructions. This may take a few hours or overnight, so be patient to ensure a strong and durable bond.
- Protect the surfaces: To prevent scratching, consider applying a clear sealant or varnish to the mirror pieces and cork bases. This will not only add a protective layer but also enhance the coasters’ overall appearance.
- Show off your beautiful coasters: Once the coasters are fully dried and protected, place them on your coffee table, dining table, or anywhere you want to add a touch of elegance. Enjoy using these coasters while protecting your surfaces in style.
By repurposing broken mirror pieces into beautiful coasters, you not only give new life to the shattered glass but also create functional and decorative items for your home. Add a touch of glamour and sophistication to your entertaining spaces and make a unique statement with your DIY coasters.
Craft a Reflective Tray with Broken Mirror
Transform your broken mirror pieces into a stunning reflective tray that serves both function and style. Crafting a tray from broken mirror fragments allows you to repurpose the shards into a unique centerpiece for your home. Follow these steps to craft your own reflective tray using broken mirror pieces:
- Gather your materials: In addition to the broken mirror pieces, you’ll need a wooden or acrylic tray base, protective gloves, strong adhesive (such as E6000 or glass glue), a paintbrush or foam brush, a ruler, a pen or pencil, and optional decorative elements like handles or knobs.
- Measure and mark: Measure the dimensions of the tray base and mark the desired placement for the broken mirror pieces. Plan your design to ensure a visually appealing arrangement of the mirror fragments.
- Prepare the mirror pieces: Put on protective gloves and clean the broken mirror pieces to remove any dust or debris. Ensure the sharp edges are smoothed out using sandpaper or a file for safety.
- Apply adhesive: Using a strong adhesive, apply a thin layer onto the backside of each mirror piece. Make sure to cover the entire surface to ensure a secure attachment to the tray base.
- Arrange the mirror pieces: Carefully place the broken mirror pieces onto the tray base, following the marked design. Press each piece firmly to ensure a strong bond, and adjust their positions as needed.
- Add optional decorative elements: To enhance the tray’s aesthetic appeal, consider adding handles or knobs on the sides. This not only adds functionality but also adds a touch of elegance to your finished reflective tray.
- Let it dry: Allow the adhesive to dry completely according to the product’s instructions. This may take several hours or overnight, so exercise patience to ensure a strong and durable bond.
- Seal and protect: Consider applying a clear sealant or varnish to the mirror pieces and tray base to protect them from scratches and to ensure the longevity of your reflective tray.
- Show off your reflective tray: Once the tray is fully dried and protected, proudly display it on your coffee table, vanity, or wherever you desire. Your reflective tray not only adds a touch of glamour to the space but also serves as functional decor.
Repurposing broken mirror pieces into a reflective tray is a creative and resourceful way to give new life to the shattered glass. With just a few simple materials and a bit of creativity, you can create a beautiful and eye-catching centerpiece that will surely impress and elevate your home decor.
Design a Custom Mirror Backsplash with Broken Mirror
Transform your kitchen or bathroom with a stunning custom mirror backsplash crafted from broken mirror pieces. This unique DIY project allows you to repurpose shattered glass into an eye-catching and reflective feature that adds style and elegance to your space. Follow these steps to design your own custom mirror backsplash using broken mirror pieces:
- Gather your materials: In addition to the broken mirror pieces, you’ll need a sturdy backing material (such as plywood or cement board), adhesive suitable for mirrors, a trowel or putty knife, a measuring tape, a pencil, safety goggles, and protective gloves.
- Prepare the backing material: Measure the dimensions of the area where you want to install the custom mirror backsplash. Cut the backing material to size, ensuring it fits snugly against the wall.
- Clean and mark the surface: Ensure that the wall surface is clean and free from dust or debris. With a pencil, mark the boundaries of the area where you will be placing the broken mirror pieces.
- Apply adhesive: Put on your safety goggles and gloves. Using a trowel or putty knife, apply a layer of mirror adhesive onto the backing material within the marked area. Follow the adhesive manufacturer’s instructions.
- Arrange the mirror pieces: Carefully place the broken mirror pieces onto the adhesive layer, following your desired design or pattern. Press them gently but firmly into place, ensuring proper adhesion.
- Fill in gaps and spaces: Use smaller mirror pieces or cut larger ones to fill in any gaps or spaces between the broken mirror pieces. Aim for a seamless and cohesive look.
- Let it dry and cure: Allow the mirror adhesive to dry and cure according to the manufacturer’s instructions. This may take several hours or even days, so be patient to ensure a strong bond.
- Secure the backsplash: Once the adhesive is fully dried and cured, securely attach the custom mirror backsplash to the wall using appropriate screws or hardware. Ensure it is level and flush against the surface.
- Clean the mirror surface: Carefully wipe down the mirror surface using a soft cloth and a mild glass cleaner. Take care to avoid scratching or damaging the mirror pieces.
- Enjoy your custom mirror backsplash: Step back and admire your transformed kitchen or bathroom. The custom mirror backsplash adds a sense of depth, brightness, and visual interest, creating a stunning focal point that reflects your unique style.
Designing a custom mirror backsplash using broken mirror pieces not only repurposes the shattered glass but also adds a touch of glamour and sophistication to your space. Enjoy the beauty and functionality of a unique feature that will impress and enhance your home decor.
Turn Broken Mirror into a Vibrant Sun Catcher
Give your broken mirror pieces new life by transforming them into a vibrant sun catcher. This creative DIY project allows you to repurpose shattered glass into a beautiful and colorful decorative piece that catches the sunlight and fills your space with enchanting hues. Follow these steps to turn your broken mirror into a vibrant sun catcher:
- Gather your materials: In addition to the broken mirror pieces, you’ll need a wooden or metal hoop, fishing line or sturdy thread, beads or crystals, craft glue, a paintbrush, protective gloves, and optional decorative elements like feathers or charms.
- Prepare the mirror pieces: Put on protective gloves and clean the broken mirror pieces to remove any dust or debris. Ensure the sharp edges are smoothed out using sandpaper or a file for safety.
- Create the hoop structure: Use the wooden or metal hoop as the base for your sun catcher. You can leave it as it is or paint it with vibrant colors that complement your mirror pieces.
- Attach the mirror pieces: Using craft glue and a paintbrush, carefully apply a small amount of glue onto the backside of each mirror piece. Press the mirror pieces onto the hoop, spacing them out evenly.
- Add beads or crystals: Enhance the sparkle and vibrancy of your sun catcher by adding colorful beads or crystals. Thread them onto fishing line or sturdy thread, and attach them to the hoop, hanging at different lengths beneath the mirror pieces.
- Incorporate decorative elements: Personalize your sun catcher by attaching decorative elements such as feathers, charms, or ribbons to the hoop. Get creative and add elements that reflect your personal style and aesthetic preferences.
- Let it dry and secure: Allow the craft glue to dry completely according to the product’s instructions. Once dry, ensure that all the mirror pieces, beads, and decorative elements are securely attached to the hoop before moving on.
- Hang your sun catcher: Find the perfect spot to hang your vibrant sun catcher, such as near a window or in a breezy outdoor area. Be sure to choose a location where it can catch the sunlight and create a mesmerizing display of reflections and colors.
- Enjoy the enchanting display: As the sun shines through your vibrant sun catcher, watch as it fills your space with dancing colors and captivating reflections. Appreciate the beauty and positivity it brings to your environment.
By repurposing broken mirror pieces into a vibrant sun catcher, you not only breathe new life into the shattered glass but also create a mesmerizing decorative piece that adds a touch of beauty and joy to your surroundings. Embrace the magical allure of reflections and colors as your sun catcher delights and enchants all who behold it.