
Selecting the Right Pumpkin Variety
When it comes to planting pumpkins, one of the most important considerations is selecting the right pumpkin variety. With numerous options available, choosing the best variety for your needs can make a significant difference in the success of your pumpkin growing venture.
There are several factors to consider when selecting a pumpkin variety:
- Size: Determine whether you want to grow small decorative pumpkins, medium-sized carving pumpkins, or large pumpkins for pies and recipes.
- Growth habit: Some pumpkin varieties have a bushy growth habit, taking up less space in the garden, while others have sprawling vines that require ample space.
- Days to maturity: Consider the growing season in your area and choose a variety that will mature within that timeframe. Typically, pumpkins take anywhere from 75 to 120 days to reach maturity.
- Resistance to diseases: Look for pumpkin varieties that are resistant to common diseases in your region, such as powdery mildew or downy mildew.
- Taste and texture: If you plan to use the pumpkins for cooking, pay attention to flavor and texture characteristics of different varieties. Some pumpkins are better suited for pies, while others are ideal for soups or roasting.
Popular pumpkin varieties include Jack O’Lantern, Sugar Pie, Big Max, and Connecticut Field. Jack O’Lantern pumpkins are great for carving, while Sugar Pie pumpkins are renowned for their sweet, smooth flesh, perfect for making pies. Big Max pumpkins are gigantic specimens, often used for display purposes, and Connecticut Field pumpkins have traditional orange, ribbed exteriors, making them great for fall decorations.
When making your final selection, consider your personal preferences, gardening space, and intended use for the pumpkins. By choosing the right variety, you can ensure a bountiful harvest of pumpkins that meet your specific needs and preferences.
Preparing the Soil
Before planting pumpkins, it is essential to prepare the soil to provide the best growing conditions for your plants. Properly prepared soil will ensure optimal nutrient availability, drainage, and root development, resulting in healthy and vigorous pumpkin plants. Here are some key steps to prepare the soil for planting:
- Clear the area: Start by removing any weeds, rocks, or debris from the planting area. This will help create a clean and well-prepared space for your pumpkins.
- Loosen the soil: Use a garden fork or a tiller to loosen the soil thoroughly. Breaking up compacted soil allows for better root penetration and helps with water drainage.
- Amend the soil: Incorporating organic matter, such as compost or well-rotted manure, into the soil will improve its fertility and structure. This step adds essential nutrients and enhances moisture retention, promoting healthy root development.
- Test the soil: Conduct a soil test to determine its pH levels and nutrient content. This will help you understand if any specific amendments are required to provide the optimal growing conditions for pumpkins. Follow the recommendations provided by the soil test results.
- Apply fertilizer: Before planting, apply a balanced granular fertilizer according to the package instructions. This will provide a nutrient boost to the soil and help support the initial growth of your pumpkin plants.
- Ensure proper drainage: Pumpkins prefer well-draining soil. If the soil in your chosen area is heavy clay or tends to retain water, consider incorporating additional organic matter or planting pumpkins in raised beds to improve drainage.
By following these steps, you can ensure that your pumpkin plants have a healthy environment to thrive in. Well-prepared soil will promote robust root growth, nutrient uptake, and overall plant vigor. Remember to periodically check the moisture levels and adjust watering accordingly to maintain the ideal soil conditions for your pumpkins.
Choosing the Ideal Location
When it comes to successfully growing pumpkins, choosing the right location is crucial. The ideal location will provide optimal sunlight, good air circulation, and adequate space for vine growth. Here are some key factors to consider when selecting a location for your pumpkin patch:
- Sunlight: Pumpkins thrive in full sun, so choose a location that receives at least 6-8 hours of direct sunlight each day. Avoid areas that are shaded by trees or structures, as this can hinder pumpkin growth and reduce yield.
- Air circulation: Good air circulation helps prevent the development and spread of fungal diseases. Select a location where there is adequate airflow to keep the foliage dry and minimize the risk of diseases like powdery mildew.
- Space: Pumpkin vines require ample space to spread out and grow. Ensure that your chosen location provides enough room for the vines to extend and sprawl without any restrictions. This will allow the plants to produce multiple pumpkins and reduce the risk of overcrowding.
- Soil drainage: Pumpkins prefer well-draining soil to prevent waterlogged roots and rot. Avoid low-lying areas that tend to retain water and select a spot with good drainage or consider using raised beds or mounds to improve drainage in your pumpkin patch.
- Proximity to water source: While pumpkins require regular watering, it’s also important to consider the proximity of your chosen location to a water source. This will make it more convenient for you to provide the necessary irrigation during the growing season.
- Accessibility: Consider the accessibility of the location. Ensure that it is easy to reach for necessary maintenance tasks such as watering, fertilizing, and harvesting. It’s also helpful if the location is easily accessible for pollinators such as bees to visit and pollinate the flowers.
By carefully considering these factors, you can select an ideal location that will provide the best possible growing conditions for your pumpkins. A sunny and well-ventilated location, with adequate space for the vines to spread, will contribute to healthier plants and maximize your pumpkin harvest.
Starting Pumpkin Seeds Indoors
Starting pumpkin seeds indoors is a great option for gardeners who want to get a head start on the growing season or live in areas with shorter growing seasons. By starting seeds indoors, you can ensure that your pumpkin plants have a strong and healthy start before transplanting them outdoors. Here are the steps to follow when starting pumpkin seeds indoors:
- Select the right time: Start pumpkin seeds indoors about 2-4 weeks before the last expected frost date in your region. This will allow the seedlings to have a good head start before being transplanted outdoors.
- Choose suitable containers: Use small seed trays or biodegradable pots that can accommodate the pumpkin seeds and allow for proper root development. Ensure that the containers have drainage holes to prevent waterlogging.
- Prepare seed starting mix: Use a high-quality seed starting mix that is light, well-draining, and rich in organic matter. Avoid using regular garden soil, which may compact and hamper seedling growth.
- Sow the seeds: Plant 2-3 pumpkin seeds in each container, about 1 inch deep. Gently cover the seeds with the seed starting mix and lightly press down to ensure good soil-to-seed contact.
- Provide proper moisture and warmth: Keep the seed trays or pots consistently moist but not waterlogged. Use a spray bottle to mist the soil to avoid displacing the seeds. Place the containers in a warm location, ideally around 70-85°F (21-29°C), until germination occurs.
- Ensure adequate light: Once the seeds germinate and seedlings emerge, provide them with plenty of bright light. Place the trays or pots near a sunny windowsill or use grow lights to provide 12-16 hours of light per day.
- Thin out seedlings: Once the pumpkin seedlings develop their first set of true leaves, thin them out, leaving only the strongest and healthiest seedling in each container. Remove the weaker seedlings by snipping them at the soil level.
- Harden off the seedlings: Before transplanting the seedlings outdoors, acclimate them to the outdoor environment gradually. Start by placing them in a sheltered location outdoors for a few hours each day, gradually increasing the time over the course of a week.
- Transplant outdoors: After the danger of frost has passed and the seedlings are accustomed to the outdoor conditions, transplant them into prepared garden beds or containers following proper spacing guidelines for the chosen pumpkin variety.
Starting pumpkin seeds indoors can give your plants a head start and help you extend the growing season. By following these steps, you can ensure robust and healthy pumpkin seedlings ready for successful transplantation and future growth in your garden.
Transplanting Pumpkin Seedlings Outdoors
Once your pumpkin seedlings have grown strong and sturdy indoors, it’s time to transplant them outdoors. Transplanting pumpkin seedlings is a critical step in their growth journey, as it allows them to establish their roots in the garden soil and continue their development. Here’s how to successfully transplant your pumpkin seedlings:
- Choose the right time: Transplant your pumpkin seedlings outdoors after the danger of frost has passed and the soil has warmed up. The soil temperature should be around 60°F (15°C) or higher for optimal growth.
- Prepare the planting area: Select a well-draining location in your garden where the pumpkin plants will receive full sun for at least 6-8 hours a day. Clear the area of weeds and work the soil by loosening it with a garden fork or tiller.
- Space the seedlings: Dig holes in the prepared soil that are large enough to accommodate the root ball of each seedling. Space the holes according to the recommended spacing for the variety you are growing, typically 2-3 feet apart.
- Remove seedlings from containers: Gently remove the pumpkin seedlings from their seed trays or pots by holding them by the leaves or using a small trowel to carefully lift them out. Avoid pulling on the delicate stems to avoid damage.
- Plant at appropriate depth: Place each seedling in a hole, making sure to plant it at the same depth it was growing indoors. The root ball should be covered with soil, with the stem just above the ground level.
- Water the seedlings: After planting, give the seedlings a good watering to settle the soil around the roots and help them establish. Ensure the soil remains moist but not waterlogged as the seedlings adapt to their new environment.
- Provide support: Depending on the pumpkin variety, it may be helpful to provide support for the sprawling vines as they grow. Use trellises, stakes, or wire cages to support the vines and prevent them from sprawling all over the garden.
- Mulch around the seedlings: Applying a layer of organic mulch around the base of the seedlings will help conserve soil moisture, suppress weed growth, and regulate soil temperature.
- Monitor and care for the seedlings: Keep a close eye on the transplanted seedlings and provide regular care. This includes watering as needed, monitoring for pests and diseases, and applying fertilizer if necessary.
- Protect from extreme weather: If there are sudden temperature drops or heavy rains after transplanting, consider using temporary covers or row covers to protect the young pumpkin plants from cold or excessive moisture.
By following these guidelines, you can ensure a smooth transition for your pumpkin seedlings from indoors to the outdoor garden. Transplanting them at the right time and providing adequate care will give them the best chance to thrive and produce a bountiful harvest.
Direct Sowing Pumpkin Seeds
Directly sowing pumpkin seeds in the garden is a popular method for growing these versatile and beloved squash plants. This process involves planting the seeds directly into the soil where they will grow, eliminating the need for indoor seed starting. Here’s how to successfully sow pumpkin seeds directly in your garden:
- Select the right time: Wait until all danger of frost has passed and soil temperatures consistently reach at least 60°F (15°C) before sowing pumpkin seeds. This will ensure optimal germination and growth.
- Prepare the soil: Choose a well-draining location in your garden with full sun exposure. Clear the area of any weeds or debris and loosen the soil with a garden fork or tiller. Add organic matter like compost or aged manure to enrich the soil and improve its fertility.
- Sow the seeds: Dig small holes or trenches in the prepared soil, spaced according to the recommended spacing for the pumpkin variety you are growing. Place two to three pumpkin seeds in each hole, about 1-2 inches deep.
- Cover and water: Gently cover the seeds with soil and lightly firm it down. Water the area thoroughly but gently to ensure proper seed-to-soil contact. Be careful not to displace the seeds while watering.
- Maintain moisture: It is crucial to keep the soil consistently moist but not waterlogged until the seeds germinate and the seedlings establish. Check the moisture levels regularly and adjust watering as needed to prevent the soil from drying out.
- Thin out the seedlings: Once the seedlings have emerged and developed a few sets of true leaves, thin them out to one healthy seedling per group. Remove the weaker seedlings by snipping them at the soil level. This will allow the remaining seedling to have sufficient space to grow.
- Provide support: Some pumpkin varieties produce long trailing vines that could benefit from support. Consider using trellises, fences, or other structures to provide support and keep the vines off the ground.
- Mulch the area: Apply a layer of organic mulch, such as straw or shredded leaves, around the base of the pumpkin plants. Mulching helps retain moisture, suppresses weeds, and regulates soil temperature.
- Monitor and care for the plants: Regularly check the pumpkin plants for pests, diseases, and signs of nutrient deficiencies. Water the plants deeply as needed and provide support and gentle guidance for the vines.
- Harvest and enjoy: In a few months, your pumpkin plants will produce beautiful flowers and develop mature fruit. Monitor the pumpkins as they ripen, harvest them when they have reached their desired size and color, and enjoy the delicious rewards of your direct sowing efforts!
Directly sowing pumpkin seeds in the garden can be an exciting and rewarding experience. By following these steps and providing proper care, you can enjoy a successful harvest of fresh pumpkins right from your own backyard.
Providing Proper Watering
Proper watering is essential for the healthy growth and development of pumpkin plants. Providing the right amount of water at the right time ensures that the plants receive adequate hydration and can thrive throughout the growing season. Here are the key factors to consider when it comes to watering pumpkins:
- Establish a watering routine: Consistency is key when it comes to watering pumpkins. Establish a regular watering routine and stick to it. Aim to water deeply, ensuring that the soil is thoroughly moistened.
- Monitor soil moisture: Check the moisture level of the soil regularly by sticking your finger into the ground. If the soil feels dry about an inch below the surface, it’s time to water. Avoid overwatering, as it can lead to root rot and other issues.
- Water at the base: Direct the water at the base of the plants rather than overhead. This helps prevent fungal diseases and ensures that the water reaches the roots where it is needed most. Use a watering can or a soaker hose for efficient and targeted watering.
- Avoid wetting the foliage: Wet foliage can promote the development and spread of diseases. Watering the leaves can also increase the risk of sunburn on hot and sunny days. Focus on watering the soil directly and avoid spraying the leaves whenever possible.
- Adjust based on weather conditions: Take into account the weather conditions when determining the watering frequency. During hot and dry periods, pumpkins may need more frequent watering to combat potential dehydration. Conversely, reduce watering during periods of heavy rain or cooler temperatures.
- Apply mulch: Applying a layer of organic mulch around the base of the plants can help conserve soil moisture by reducing evaporation. Mulch also helps to regulate soil temperature and suppresses weed growth that could compete for water resources with the pumpkin plants.
- Water deeply but less frequently: Instead of frequent shallow watering, aim for less frequent but deeper watering sessions. This encourages the pumpkin plant roots to grow deeper into the soil, making them more resilient and better able to access moisture.
- Consider drip irrigation: Drip irrigation is an efficient method for watering pumpkins. It delivers water directly to the root zone, minimizing water loss through evaporation and ensuring that the plants receive a consistent supply of moisture.
- Observe the plants: Keep an eye on the pumpkin plants for any signs of drought stress, such as wilting or yellowing leaves. Adjust your watering schedule accordingly to meet the specific needs of your plants.
Remember, the goal is to provide consistent moisture to the pumpkin plants without overwatering. By following these guidelines and paying attention to your plants’ needs, you can ensure that your pumpkins remain healthy, hydrated, and ready to produce a bountiful harvest.
Applying Fertilizer at the Right Time
Fertilizing your pumpkin plants with the right nutrients at the right time is vital for promoting healthy growth, vigorous vines, and abundant fruit production. While pumpkins are generally considered heavy feeders, it’s important to apply fertilizer judiciously to avoid overfeeding or nutrient deficiencies. Here are some essential guidelines for applying fertilizer at the right time to maximize your pumpkin harvest:
- Prepare the soil: Before planting your pumpkin seeds or seedlings, incorporate organic matter, such as compost or well-rotted manure, into the soil. This helps improve soil fertility and provides a solid foundation of nutrients for the plants.
- Test the soil: Conduct a soil test before planting to determine the soil’s nutrient content and pH level. This helps you understand the specific nutrient requirements of your soil and identify any deficiencies that need to be addressed.
- Apply initial fertilizer: At the time of planting or shortly after, apply a balanced slow-release fertilizer according to the package instructions. This provides the young seedlings with a steady supply of nutrients as they establish their root systems.
- Side-dress during active growth: As the pumpkin plants start to actively grow and develop vines, side-dress them with a nitrogen-rich fertilizer. Apply the fertilizer in a shallow trench or row alongside the plants, approximately 6-8 inches away from the base, and gently incorporate it into the soil. This provides a boost of nitrogen to fuel vine growth and fruit development.
- Avoid excessive nitrogen: While nitrogen is important for leafy growth, excessive nitrogen can lead to lush foliage at the expense of fruit production. Strike a balance by applying moderate amounts of nitrogen fertilizer, focusing more on phosphorus and potassium as the season progresses.
- Consider supplemental feeding: If your soil is particularly nutrient-deficient or if you notice signs of nutrient deficiencies in the plants, consider supplementing with foliar sprays or liquid organic fertilizers during the growing season. This can provide an additional boost of nutrients directly to the plants.
- Monitor plant performance: Regularly observe and assess the health and growth of your pumpkin plants. Pay attention to any signs of nutrient deficiencies, such as yellowing leaves or stunted growth, and adjust your fertilization regimen accordingly.
- Discontinue late-season fertilization: As the growing season progresses and the pumpkins mature, it’s best to discontinue fertilizer application. This allows the plant’s energy to focus on ripening the fruit rather than producing excessive foliage.
- Consider organic alternatives: If you prefer organic gardening practices, opt for organic fertilizers such as compost, fish emulsion, or seaweed extracts. These natural options provide a rich source of nutrients and promote healthy soil microbial activity.
By applying fertilizer at the right time and in the appropriate amounts, you can provide essential nutrients to your pumpkin plants, ensuring optimal growth and a bountiful harvest. Remember to always follow the instructions provided on the fertilizer package and monitor the plants’ response to make adjustments as needed.
Protecting Pumpkin Plants from Pests and Diseases
Pumpkin plants are susceptible to a variety of pests and diseases that can hinder their growth and reduce fruit yield. To ensure a successful pumpkin harvest, it’s important to take proactive measures to protect your plants. Here are some effective strategies to safeguard your pumpkin plants from common pests and diseases:
- Implement crop rotation: Avoid planting pumpkins in the same location year after year. Practicing crop rotation helps disrupt pest and disease life cycles and reduces the buildup of soil-borne pathogens.
- Encourage beneficial insects: Attract beneficial insects, such as ladybugs, lacewings, and parasitic wasps, to your garden by planting companion plants that provide nectar and pollen. These beneficial insects prey on pests like aphids, mites, and caterpillars, helping control their populations naturally.
- Regularly inspect plants: Routinely check your pumpkin plants for any signs of pests or diseases. Look for chewed leaves, holes, discolored foliage, or evidence of pests such as aphids, squash bugs, or cucumber beetles. Early detection allows for quicker intervention.
- Practice good sanitation: Remove any dead or decaying plant material from the garden. This helps eliminate potential breeding grounds and hiding places for pests and reduces the chances of disease spread.
- Apply organic pest control methods: Utilize organic pest control methods such as neem oil, insecticidal soaps, or homemade solutions like garlic or chili pepper sprays. These options provide effective control against pests while minimizing the impact on beneficial insects and the environment.
- Prevent fungal diseases: Reduce the risk of fungal diseases, such as powdery mildew or downy mildew, by providing adequate airflow around the plants. Avoid overhead watering and promote good air circulation by properly spacing the plants and pruning excessive foliage if needed.
- Use physical barriers: Use physical barriers like floating row covers or netting to protect young seedlings from pests like birds, rabbits, or squirrels. These barriers can be removed once the plants start to flower to allow for proper pollination.
- Monitor and control weeds: Weeds can compete with pumpkin plants for nutrients and water while providing hiding spots for pests. Regularly weed the area around the pumpkin plants to keep them under control and reduce the risk of pest infestations.
- Rotate insecticides: If necessary, rotate the use of insecticides with different modes of action to prevent pests from developing resistance. Follow the instructions on the product label and use insecticides sparingly and as a last resort.
- Stay vigilant: Regularly monitor your pumpkin plants throughout the growing season and address any pest or disease issues promptly. Quick intervention can help prevent problems from escalating and ensure the health and productivity of your pumpkin plants.
By following these preventive strategies and monitoring your pumpkin plants closely, you can reduce the damage caused by pests and diseases and safeguard the health and productivity of your pumpkin crop. A healthy and pest-free pumpkin patch will lead to a more successful harvest and a greater enjoyment of these delightful fall favorites.
Managing Weeds Around Pumpkin Plants
Weeds can be a nuisance in any garden, competing with pumpkin plants for essential nutrients, water, and sunlight. It’s crucial to manage weeds effectively to ensure the healthy growth of your pumpkin plants and maximize their productivity. Here are some strategies to manage weeds around your pumpkin plants:
- Apply mulch: A layer of organic mulch, such as straw, wood chips, or shredded leaves, can help suppress weed growth by blocking sunlight and impeding weed seed germination. Apply a thick layer around the base of the pumpkin plants, being careful to keep the mulch a few inches away from the stems to avoid moisture accumulation.
- Hand pulling: Regularly inspect the area around your pumpkin plants and manually pull out any visible weeds. Be sure to remove the entire root system to prevent regrowth. This method is best suited for small-scale weed management or for removing individual weeds.
- Use a hoe or cultivator: Employ a hoe or cultivator to cultivate the soil gently between the pumpkin plants and disturb weed seedlings. This method disrupts weed growth and exposes weed roots to drying air and sunlight, making it easier for them to wither and die.
- Practice shallow cultivation: Use a shallow cultivation technique when the pumpkin plants are small. Take care not to damage the shallow root systems of the pumpkin plants while loosening the soil to prevent weed competition and improve water penetration.
- Hand mulching: For additional weed suppression, consider placing newspaper or cardboard around the base of the pumpkin plants and covering them with a layer of mulch. This acts as an extra barrier against weed growth and can be particularly effective in reducing weed competition.
- Timing is key: Stay vigilant and tackle weeds early in their growth. Regularly check for weed seedlings and remove them promptly to prevent them from establishing and spreading throughout the garden.
- Minimize soil disturbance: Consider using techniques such as no-till gardening or minimum tillage to reduce soil disruption that can bring weed seeds to the surface and stimulate weed growth.
- Apply pre-emergent herbicides: When necessary and appropriate for your gardening practices, apply pre-emergent herbicides to hinder weed seed germination. Follow the instructions carefully and use herbicides sparingly and judiciously.
- Regularly maintain weed-free zones: Keep areas immediately around the pumpkin plants consistently weed-free throughout the growing season. This reduces competition for resources and allows the pumpkin plants to thrive.
- Persistency is key: Weed management requires consistent effort. Stay diligent in monitoring and managing weeds throughout the growing season to prevent them from overpowering your pumpkin plants.
By employing these weed management strategies, you can minimize weed competition and promote the healthy growth and productivity of your pumpkin plants. Regular maintenance and staying proactive in weed management will help you maintain a clean and thriving pumpkin patch.
Pruning and Training Pumpkin Vines
Pruning and training pumpkin vines is an essential aspect of maintaining healthy and productive pumpkin plants. By implementing proper pruning techniques and providing structural support, you can encourage better air circulation, manage vine growth, and increase the overall yield of your pumpkin patch. Here are some guidelines for pruning and training pumpkin vines:
- Identify main vines: After your pumpkin plants have several sets of true leaves, identify the main vines that are growing most vigorously. These main vines will serve as the primary framework for your pumpkin plants.
- Remove unwanted vines: Search for any secondary or tertiary vines that might compete with the main vines for nutrients and space. Remove these unwanted vines by gently cutting them close to the main stem, taking care not to damage the main vines or leaves.
- Limit the number of fruits per vine: To encourage larger and healthier pumpkins, consider limiting the number of fruits per vine. For larger varieties, keep one or two pumpkins per vine; for smaller varieties, three or four may be manageable.
- Support the vines: As the pumpkin plants grow, provide support for the heavy fruit by placing them on straw, a wooden board, or a piece of fabric. This helps prevent the pumpkins from sitting directly on the soil, reducing the risk of rot and pest damage.
- Train the vines: Guide the pumpkin vines in the desired direction by gently redirecting them as they grow. Encourage the vines to spread outwards rather than bunching up, ensuring adequate airflow and reducing the risk of diseases.
- Remove excessive foliage: To improve air circulation, remove some of the lower leaves and any yellowing or diseased foliage. This promotes better sunlight penetration and helps prevent pests and diseases from thriving in a crowded and humid environment.
- Prune lateral branches: Lateral branches that emerge from the main vines may compete for resources and hinder the growth of the main vines. Keep an eye out for these branches and prune them selectively to focus energy on the main vines and developing pumpkins.
- Adjust the direction of growth: If the pumpkin vines start to encroach on neighboring plants or wander into undesirable areas, gently redirect them back into the desired growing zone. Use stakes or trellises for support and guidance as needed.
- Monitor for pests and diseases: Regularly inspect the pruned and trained vines for any signs of pests or diseases. Promptly address any issues to prevent them from spreading and affecting the overall health of your pumpkin plants.
- Water and fertilize accordingly: Pay attention to the water and nutrient needs of your pruned and trained pumpkin vines. Ensure they receive adequate irrigation and fertilization to support their growth and fruit development.
By properly pruning and training your pumpkin vines, you can create a healthier and more manageable growing environment for your plants. This fosters improved air circulation, reduced disease pressure, and enhanced fruit production, ultimately leading to a more successful and rewarding pumpkin harvest.
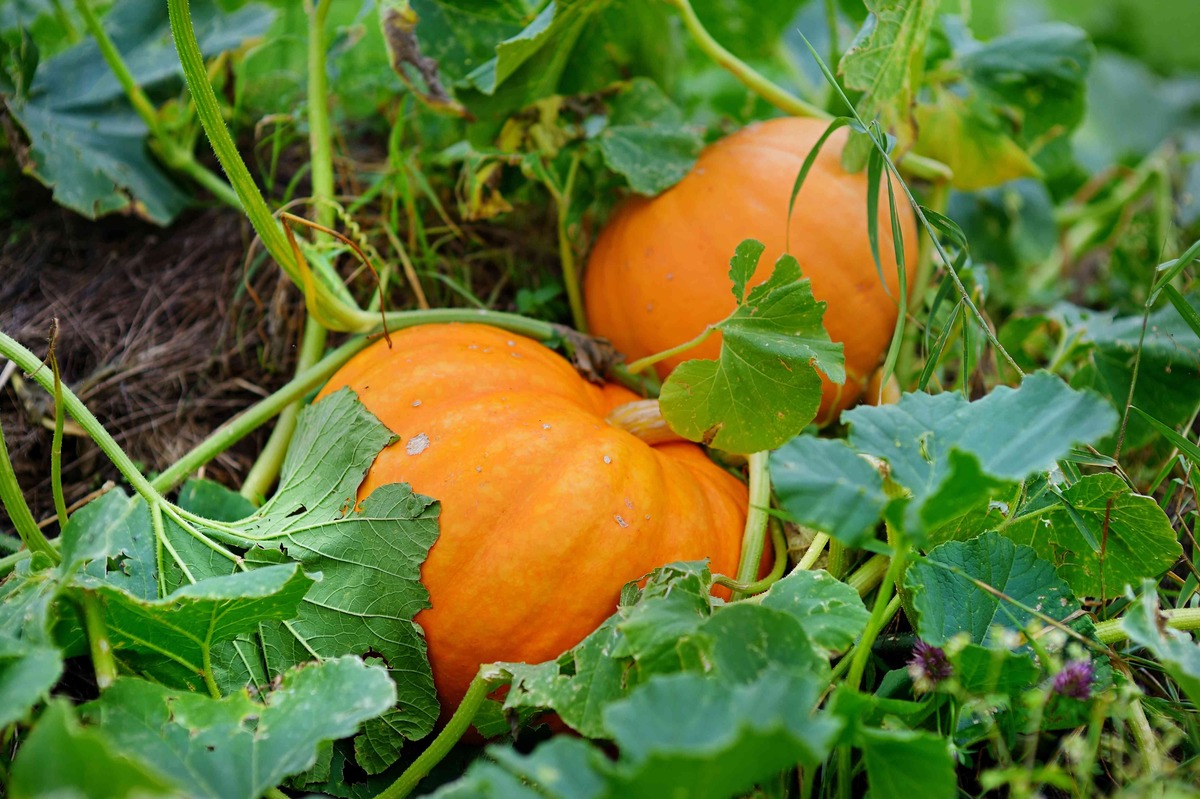
Harvesting Pumpkins at the Peak of Ripeness
Knowing when and how to harvest pumpkins at the right time is vital to ensure optimal flavor, color, and storage longevity. Harvesting pumpkins at their peak of ripeness guarantees the best taste and texture for culinary use and ensures that they can be stored effectively. Here are some guidelines for harvesting pumpkins:
- Observe the color: Different pumpkin varieties have different color indicators of ripeness. Generally, ripe pumpkins will have a deep, consistent color across the entire surface. Look for a vibrant, rich shade that corresponds to the particular pumpkin variety you are growing.
- Check the skin hardness: A ripe pumpkin will have a hard, tough skin that cannot be easily punctured with a thumbnail. Gently press the skin with your fingernail; if it dents or feels soft, it’s a sign that the pumpkin is not fully ripe.
- Examine the stem: The stem of a ripe pumpkin should be dry and firmly attached to the fruit. If the stem feels moist or shows signs of rot, it’s an indication that the pumpkin may not be ripe or may have started to deteriorate.
- Measure the maturity: Refer to the seed packet or variety information to determine the expected maturity timeframe for your specific pumpkin variety. Most pumpkins take anywhere from 75 to 120 days from planting to reach maturity. Harvest them within this timeframe for optimal results.
- Use the “thumbnail test”: Perform the “thumbnail test” by pressing your thumbnail gently into the skin of the pumpkin. If the skin resists puncturing and feels hard, it’s a sign that the pumpkin is fully ripe and ready for harvesting.
- Leave a long stem: When harvesting pumpkins, leave a few inches of the stem intact. A longer stem helps prolong the shelf life of the pumpkin and reduces the risk of rotting at the stem end.
- Cut rather than twist: To harvest pumpkins, use a sharp knife or pruners to cut the stem cleanly, leaving a short section of stem attached. Avoid twisting or yanking the pumpkin, as this can damage the vines and increase the risk of rot.
- Handle with care: Handle harvested pumpkins gently to prevent bruising or damage to the skin. Avoid dropping or tossing them, as even minor injuries can lead to rot or spoilage during storage.
- Cure before storage: After harvesting, allow your pumpkins to cure in a warm and dry location for 10-14 days. This helps the skin harden and provides optimal conditions for long-term storage.
- Store properly: Once cured, store pumpkins in a cool, dry, and well-ventilated area. A temperature around 50-55°F (10-13°C) with moderate humidity levels is ideal for extending their storage life. Check periodically for any signs of rot or spoilage.
By following these guidelines, you can harvest your pumpkins at the peak of ripeness and ensure that they retain their flavor, texture, and quality. Enjoy the satisfaction of using freshly harvested pumpkins in your favorite recipes, or store them for decorative purposes throughout the autumn season.
Curing and Storing Pumpkins for Long-Term Use
Curing and storing pumpkins properly is essential for preserving their quality and extending their shelf life. Proper curing allows the pumpkin’s skin to harden, enhances flavor development, and improves their ability to withstand long-term storage. Here’s how to cure and store pumpkins for long-term use:
- Harvest at the right time: Harvest pumpkins when they are fully mature by checking for color, skin hardness, and stem conditions as mentioned earlier in the harvesting section. This ensures that the pumpkins are ready for curing and storing.
- Clean the surface: Before curing, gently brush off any dirt or debris from the surface of the pumpkins. Use a soft brush or cloth to remove loose soil, taking care not to damage the skin.
- Cure in a warm, dry place: Place the pumpkins in a warm and dry area, ideally with temperatures around 80-85°F (27-29°C) and low humidity. This allows them to cure and develop a hardened skin over a period of 10-14 days and enhances the pumpkin’s flavor.
- Provide good air circulation: Ensure that there is ample airflow around the curing pumpkins to prevent moisture buildup and the onset of rot. Avoid stacking them too closely together or placing them in a confined space.
- Check for signs of readiness: After the curing period, inspect the pumpkins for any signs of rot, soft spots, or damage. If a pumpkin is showing signs of deterioration, use it immediately instead of storing it for long-term use.
- Store in a cool, dry location: Once cured, transfer the pumpkins to a cool, dry area for long-term storage. Ideally, the temperature should be around 50-55°F (10-13°C). Avoid storing pumpkins near fruits that release ethylene gas, as it can hasten ripening and spoilage.
- Protect from direct contact: Store pumpkins on a clean, dry surface to avoid direct contact with the ground or other surfaces. This helps prevent moisture absorption and reduces the risk of rot or mold development.
- Check regularly: Regularly inspect stored pumpkins for any signs of decay or spoilage. Remove any pumpkins that show signs of deterioration to prevent the spread of rot to other pumpkins in storage.
- Use stored pumpkins: As needed, retrieve pumpkins from storage and enjoy them in your favorite recipes or as seasonal decorations. Pumpkins stored under proper conditions can last several months, allowing you to enjoy their flavors and festive appearance over an extended period.
By following these curing and storage guidelines, you can ensure that your pumpkins remain in excellent condition for long-term use. Properly cured and stored pumpkins offer a taste of autumn well beyond the harvest season, giving you the opportunity to savor the flavors of fall in various culinary delights.