
Choosing the Right Variety of Peas
When it comes to planting peas, choosing the right variety is crucial for a successful harvest. With so many pea varieties available, it’s important to consider factors like space, climate, and personal preference. Here are some tips to help you select the perfect pea variety for your garden:
- Determining Space: Consider the available space in your garden or containers. If you have limited space, choose dwarf or bushy pea varieties that don’t require trellising. These compact plants are ideal for small gardens or patio containers.
- Climate Considerations: Peas prefer cooler temperatures and can be planted in early spring or late summer for a fall harvest. If you live in a region with a short growing season, select early-maturing pea varieties. These varieties can tolerate cooler temperatures and will produce peas faster.
- Edible Pod or Snow Peas: If you enjoy eating the entire pod, consider growing edible pod or snow peas. These varieties have tender and sweet edible pods that can be stir-fried or eaten raw in salads.
- Shelling Peas: Shelling peas are grown for their plump peas inside the pods. If you prefer traditional peas for cooking or freezing, choose shelling pea varieties. These peas have a crisp texture and a delicious, sweet flavor.
- Pea Varieties for Succession Planting: To extend your pea harvest, consider selecting pea varieties with different maturity dates. This will allow you to stagger your planting, ensuring a continuous supply of fresh peas throughout the season.
Remember to read the seed packets or consult gardening catalogs for specific variety recommendations suitable for your growing conditions. By selecting the right variety of peas, you’ll be on your way to a bountiful and delicious harvest.
Selecting the Perfect Spot for Planting
Choosing the right spot to plant your peas is essential for their growth and productivity. Here are some factors to consider when selecting the perfect spot:
- Sunlight: Peas love sunlight, so choose a location that receives at least 6 hours of direct sunlight daily. Avoid areas with excessive shade, as it can delay their growth and reduce yield.
- Soil Quality: Peas thrive in well-drained, fertile soil. Test your soil’s pH level, aiming for a slightly acidic to neutral range (6.0 to 7.0). If your soil is heavy clay or sandy, amend it with organic matter, such as compost or well-rotted manure, to improve its texture and nutrient content.
- Water Drainage: Ensure that the chosen spot has good water drainage to prevent waterlogged soil, which can lead to root rot and other diseases. If the area tends to retain water, consider building raised beds or mounds to improve drainage.
- Protection from Wind: Pea plants can be delicate, especially when they start climbing. Choose a sheltered location or erect a windbreak to protect them from strong winds that could break or damage the plants.
- Proximity to Water Source: It’s convenient to have your pea plants located near a water source for easy irrigation. Peas require consistent moisture, especially during flowering and pod formation.
- Companion Planting: Consider planting peas near companion plants like carrots, radishes, and lettuce. These plants help deter pests, and their different root depths prevent competition for nutrients and water.
By selecting the perfect spot for planting, you provide an ideal environment for your pea plants to flourish. Take the time to prepare the soil and create suitable growing conditions, and you’ll be rewarded with a bountiful pea harvest.
Preparing the Soil for Planting
Properly preparing the soil is essential for providing your pea plants with the nutrients and growing conditions they need to thrive. Follow these steps to prepare the soil for planting peas:
- Clear the Area: Start by removing any weeds, rocks, or debris from the planting area. Peas are sensitive to competition, so it’s important to create a weed-free environment.
- Loosen the Soil: Peas prefer well-drained soil with good airflow. Use a garden fork or tiller to loosen the soil to a depth of at least 8 inches. This will improve the soil structure and allow the roots to penetrate easily.
- Add Organic Matter: Incorporate organic matter, such as compost or well-rotted manure, into the soil. This will enrich the soil with nutrients, improve drainage, and promote beneficial soil organisms.
- Test the Soil: Consider testing the soil pH and nutrient levels. Peas prefer a slightly acidic to neutral pH range of 6.0 to 7.0. Based on the test results, amend the soil accordingly with lime to raise the pH or sulfur to lower it.
- Apply Fertilizer: Peas are nitrogen-fixing plants, which means they can convert atmospheric nitrogen into a usable form through a symbiotic relationship with bacteria. However, if your soil is deficient in nutrients, you may need to apply a phosphorus-rich organic fertilizer before planting.
- Smooth and Level: After incorporating organic matter and fertilizers, rake the soil surface to create a smooth and level planting bed. This will make it easier to sow the seeds evenly and ensure consistent germination.
Remember, the goal of soil preparation is to create a nutrient-rich, well-drained, and loose soil structure that promotes healthy root development and optimal plant growth. By following these steps, you’re setting the stage for successful pea cultivation.
How to Soak Pea Seeds Before Planting
Soaking pea seeds before planting can help speed up germination and improve seed viability. It’s a simple process that involves hydrating the seeds before sowing them in the soil. Here’s how to soak pea seeds effectively:
- Select High-Quality Seeds: Choose high-quality pea seeds that are fresh, plump, and free from damage or disease. This will increase the chances of successful germination.
- Clean the Seeds: Before soaking, gently rinse the pea seeds in clean water to remove any dirt or debris. This will ensure that the seeds are clean and ready for soaking.
- Use a Container: Find a shallow container or bowl that can hold the seeds and enough water to cover them. Make sure the container is clean and free from any contaminants.
- Add Water: Place the pea seeds in the container and add enough water to cover them completely. Use room temperature or lukewarm water, as it helps to soften the seed coat and promote hydration.
- Soak Time: Allow the pea seeds to soak for 8-12 hours or overnight. This soaking period helps to break seed dormancy, leading to faster and more uniform germination.
- Drain and Rinse: After the soaking period, drain the water from the container and rinse the seeds with clean water. This removes any residue and activates the growth process.
- Plant Immediately: Once the seeds are soaked and rinsed, plant them in the prepared soil immediately. Handle the soaked seeds with care to avoid damaging the delicate sprouts.
Soaking pea seeds before planting can give them a head start in the germination process. The hydrated seeds will absorb moisture more easily from the soil, leading to faster and more successful germination. Incorporate this simple step into your pea planting routine for improved results.
Planting Peas Correctly
Proper planting techniques are vital for the successful growth and development of pea plants. Follow these guidelines to ensure you’re planting peas correctly:
- Timing: Plant peas as soon as the soil can be worked in early spring, or sow them in late summer for a fall harvest. Check the seed packet for specific recommendations based on your climate and growing zone.
- Row Spacing: Plant peas in rows that are spaced approximately 2-3 feet apart. This provides enough room for the plants to spread and climb without crowding each other.
- Sowing Depth: Sow the pea seeds about 1-2 inches deep. Planting too shallow may result in less vigorous growth, whereas planting too deep can delay germination or cause the seeds to rot.
- Seed Spacing: Space the pea seeds 1-2 inches apart. This allows enough space for the plants to grow and develop without competing for nutrients and sunlight.
- Support Structures: Pea plants are climbers and require support to prevent them from sprawling on the ground. Install trellises, stakes, or a mesh fence alongside the rows to provide vertical support for the plants to grow and cling to.
- Watering: After planting the pea seeds, water the soil gently but thoroughly. Moisture is essential for germination, so ensure the soil remains consistently moist throughout the germination and growth stages.
- Thinning: If you’ve sown the pea seeds too close together, thin them out once they’ve reached a few inches in height. This will provide adequate space for the remaining plants to thrive and ensures proper air circulation.
- Mulching: Consider applying a layer of organic mulch, such as straw or shredded leaves, around the pea plants. Mulch helps conserve moisture, suppresses weed growth, and keeps the soil temperature regulated.
By following these planting guidelines, you’re setting your pea plants up for healthy growth and abundant yields. Remember to monitor the plants regularly and provide ongoing care as they continue to mature.
Providing Support for Pea Plants
Pea plants are climbers and require support as they grow to ensure proper development and to prevent them from sprawling on the ground. Here’s how you can provide the necessary support for your pea plants:
- Trellises: Install trellises or wire mesh along the planting rows to provide vertical support for the pea plants. Secure the trellis firmly in the ground to prevent it from shifting or falling in windy conditions.
- Stakes: Alternatively, you can use stakes made of bamboo or wooden dowels to support the pea plants. Insert the stakes into the ground at various points along the row and tie the plants loosely with garden twine to keep them upright.
- Fence: If you have a fence near your garden, consider growing peas alongside it. The fence can act as a natural support structure, allowing the pea plants to climb as they grow.
- Wire Mesh: Attach a wire mesh or netting to the support structure for the pea plants to climb. This provides a sturdy framework for the plants to wrap their tendrils around and encourages upward growth.
- Regular Tending: As the pea plants grow, gently guide the vines towards the support structure, helping them attach to it. Regularly check for any loose or wayward tendrils and gently wrap them around the support for better stability.
- Pruning: If your pea plants become too dense, consider pruning out some of the excess foliage. This allows better air circulation and prevents disease or pests from thriving in crowded conditions.
- Monitoring: Regularly inspect the support structure to ensure it remains sturdy and intact. Adjust or tighten any loose ties or connections to prevent the plants from falling or getting damaged.
By providing proper support for your pea plants, you’ll help them reach their full potential and produce a healthy crop. Regular monitoring, guiding, and pruning will ensure that the plants remain upright and continue to climb the support structure throughout their growing season.
Watering Pea Plants
Watering is a crucial aspect of caring for pea plants as they require consistent moisture for optimal growth and development. Here are some guidelines on how to properly water your pea plants:
- Consistent Moisture: Pea plants prefer moist soil, so it’s important to keep the soil consistently moist throughout their growing season. Avoid letting the soil dry out completely, as this can lead to stunted growth and reduced yields.
- Frequent Watering: Check the soil moisture regularly, especially during dry periods or hot weather. Water the pea plants deeply, ensuring that the water reaches the root zone. Watering should be done at least 1-2 times per week, depending on the weather conditions.
- Early Morning Watering: Water your pea plants early in the morning to allow the foliage to dry before evening. Wet foliage at night can increase the risk of fungal diseases. Watering in the morning also ensures that the plants have access to moisture throughout the day.
- Avoid Overwatering: While regular watering is essential, be cautious not to overwater the pea plants. Overwatering can lead to waterlogged soil, which can suffocate the roots and promote the development of root diseases. Allow the top layer of soil to dry slightly between watering sessions.
- Water at the Base: Direct the water at the base of the plants to minimize wetting the foliage. This reduces the risk of fungal diseases and ensures that the water reaches the roots where it is needed most.
- Mulching: Apply a layer of organic mulch around the base of the pea plants. Mulch helps retain soil moisture, reduce evaporation, and suppress weed growth, resulting in less water loss from the soil.
- Consider Drip Irrigation: If possible, utilize drip irrigation for watering pea plants. Drip irrigation delivers water directly to the plant roots, minimizing water wastage and reducing the risk of foliar diseases.
By providing adequate and consistent moisture through proper watering techniques, you’ll promote healthy growth and maximize the productivity of your pea plants. Remember to monitor soil moisture levels and adjust your watering routine as needed based on weather conditions and the specific needs of your plants.
Mulching to Control Weeds and Conserve Moisture
Mulching is a beneficial practice for pea plants as it helps control weeds, conserve moisture, and maintain soil temperature. By applying mulch around your pea plants, you create a protective layer that offers numerous advantages. Here’s how mulching can benefit your pea plants:
- Weed Suppression: Mulch acts as a barrier, preventing weed seeds from germinating and competing with your pea plants for nutrients, water, and sunlight. This reduces the need for frequent weeding and allows your pea plants to thrive without unnecessary competition.
- Moisture Conservation: Mulch helps retain moisture by reducing evaporation from the soil surface. It acts as a natural shield, preventing water loss and providing a more consistent moisture level for your pea plants. This is particularly important during hot and dry periods.
- Temperature Regulation: Mulch helps moderate the soil temperature by insulating the soil, keeping it cooler during hot weather and warmer during colder periods. This helps create a more favorable environment for the pea plants’ root development and overall growth.
- Soil Protection: Applying mulch around your pea plants helps protect the soil from erosion caused by heavy rainfall or strong winds. Mulch also acts as a buffer, reducing the impact of raindrops on the soil surface, which can cause compaction and damage delicate young plants.
- Organic Matter Addition: Organic mulch, such as straw, grass clippings, or shredded leaves, slowly decomposes over time, adding organic matter to the soil. This improves soil structure, increases nutrient availability, and enhances microbial activity, contributing to long-term soil health.
- Easy Application: Applying mulch is a straightforward and simple process. Spread a layer of mulch around the base of your pea plants, ensuring it covers the soil surface adequately. Leave a small gap around the stem to prevent moisture buildup, which can promote disease.
Remember to replenish the mulch as needed throughout the growing season to maintain its effectiveness. Mulching not only benefits your pea plants but also has long-lasting positive effects on the health of your garden soil. With the help of mulch, you can keep your pea plants healthy, conserve moisture, and reduce the maintenance required to keep the garden weed-free.
Fertilizing Pea Plants
Fertilizing pea plants is essential to ensure healthy growth and maximum yield. While peas are nitrogen-fixing plants that can obtain some of their nutrient needs from the air, providing additional nutrients can further enhance their performance. Here’s how to fertilize your pea plants effectively:
- Soil Testing: Before applying any fertilizer, it’s helpful to conduct a soil test to determine the nutrient levels and pH of your soil. This information will guide you in making appropriate fertilizer choices.
- Nitrogen Needs: Peas have a high demand for nitrogen, which is essential for their vigorous growth and nitrogen fixation process. Incorporating organic matter, such as compost or well-rotted manure, into the soil before planting can provide a good source of nitrogen.
- Phosphorus and Potassium: Peas also benefit from phosphorus and potassium, which promote root development, flowering, and fruit production. If your soil test reveals deficiencies, apply a balanced organic fertilizer with the appropriate levels of phosphorus and potassium.
- Timing of Fertilization: Apply fertilizers when the pea plants are in their early growth stages, typically about 3-4 weeks after germination. This ensures that the plants receive the necessary nutrients at the right time for optimal growth.
- Side-Dressing Technique: Apply fertilizers as a side-dressing alongside the row of pea plants. Make a shallow trench or groove in the soil, about 4-6 inches away from the base of the plants, and sprinkle the fertilizer into the trench. Gently cover it with soil and water thoroughly.
- Organic Fertilizers: Organic options like fish emulsion, bone meal, or compost tea can provide slow-release nutrients to your pea plants. These organic fertilizers also improve soil fertility and promote beneficial microbial activity.
- Avoid Excessive Fertilization: While providing nutrients is important, it’s crucial not to over-fertilize your pea plants. Excessive fertilizer application can lead to nitrogen burn or nutrient imbalances, which can negatively impact plant health. Follow the recommended application rates on the fertilizer package.
- Watering After Fertilization: After applying fertilizers, water the plants thoroughly to help dissolve and distribute the nutrients into the soil. This ensures that the roots can access the fertilizers effectively.
Proper fertilization of your pea plants gives them the nutrients they need to grow vigorously and produce a bountiful harvest. By balancing their nitrogen, phosphorus, and potassium requirements through organic fertilizers, you’ll promote strong, healthy plants and encourage optimal pea production.
Protecting Pea Plants from Pests and Diseases
Keeping your pea plants protected from pests and diseases is essential for a successful and healthy harvest. By being proactive and applying preventive measures, you can minimize the risk of damage to your plants. Here are some strategies to protect your pea plants:
- Plant Resistant Varieties: Select pea varieties that are known to have resistance to common pests and diseases in your area. Check with local gardening experts or seed catalogs for recommendations.
- Maintain Good Garden Hygiene: Keep your garden clean and free from debris, which can harbor pests and diseases. Remove any fallen foliage or plant debris promptly to reduce the risk of fungal infections.
- Monitor Regularly: Regularly inspect your pea plants for signs of pests or diseases. Look for chewed foliage, discolored leaves, stunted growth, or any unusual symptoms. Early detection allows for prompt intervention.
- Companion Planting: Planting aromatic herbs, such as mint, basil, or rosemary, near your pea plants can help deter common pests. Additionally, planting marigolds can repel nematodes and other harmful soil-borne pests.
- Provide Proper Air Circulation: Pea plants are susceptible to fungal diseases, especially in humid conditions. Proper spacing between plants and ensuring good air circulation can help reduce the risk of fungal infections.
- Practice Crop Rotation: Avoid planting peas in the same location year after year. Rotate them with different crops each growing season to prevent the buildup of pests and diseases that specifically target peas.
- Natural and Organic Pest Control: Use organic pest control methods such as handpicking pests off the plants, spraying a solution of diluted neem oil or insecticidal soap, or introducing beneficial insects like ladybugs or lacewings into the garden.
- Protect from Birds and Rodents: Birds and rodents can be attracted to pea plants. Use protective measures like netting, bird scare devices, or fencing to keep them away from your plants.
- Water Management: Overwatering can lead to fungal diseases in pea plants. Water in the early morning, at the base of the plants, and avoid wetting the foliage excessively.
By following these practices, you can significantly reduce the risk of pest infestations and diseases in your pea plants. Regular monitoring and early intervention are key to maintaining healthy plants and ensuring a productive pea harvest.
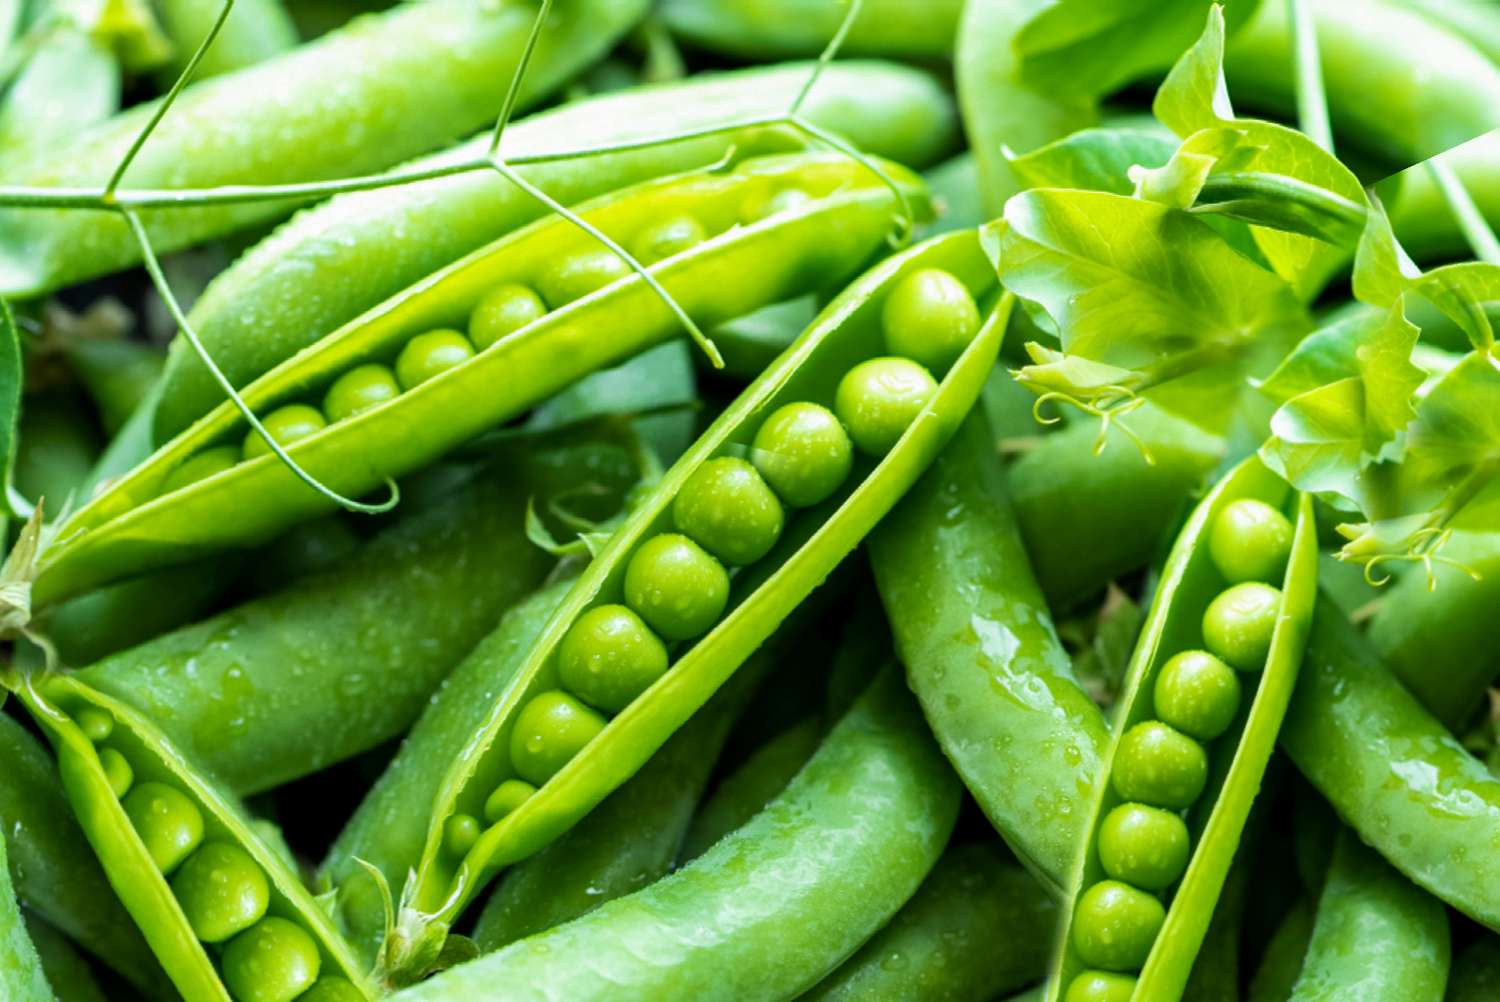
Harvesting and Storing Peas
Knowing when and how to harvest your peas is crucial for enjoying their fresh and flavorful taste. Here are some guidelines to help you harvest and store your pea harvest:
- Harvesting Time: Peas should be harvested when they have reached their full size but are still tender and sweet. This is typically 60-70 days after planting, depending on the variety. Check the seed packet or catalog for specific maturity information.
- Check for Readiness: Gently squeeze the pea pod to check if the peas inside are fully formed. The pods should be firm and plump, while the peas should be bright and sweet. Avoid harvesting overly mature peas, as they can be tough and starchy.
- Harvesting Technique: Use one hand to hold the plant and the other to grasp the pea pod. Apply a slight twisting motion to detach the pod from the plant. Be careful not to damage delicate stems or pull down the entire plant when harvesting.
- Continual Harvesting: Peas produce over an extended period, so it’s best to harvest regularly, every 1-2 days as pods reach maturity. This encourages further production and ensures that you enjoy the freshest and most flavorsome peas.
- Shelling Peas: If you’re growing shelling peas, remove the peas from the pod by either splitting the pod open with your fingers or using a small knife. Discard any pods or peas that appear discolored or damaged.
- Edible Pod Peas and Snow Peas: For edible pod peas and snow peas, the entire pod is consumed. Harvest them when the pods are still flat, before the peas inside begin to swell. The pods should be crisp and snap easily when bent.
- Immediate Cooling: After harvesting, transfer the peas to a cool place or chill them in the refrigerator. This helps preserve their flavor and nutritional quality.
- Storage Duration: Fresh peas are best consumed immediately after harvesting to enjoy their peak flavor and texture. If you need to store them, place them in a breathable container or bag in the refrigerator and use them within a few days.
- Freezing: For long-term storage, peas can be blanched in boiling water for one to two minutes and then rapidly cooled in ice water. Drain and transfer them to freezer-safe containers or bags. Properly stored, they can last up to 6-12 months in the freezer.
Harvesting your peas at the ideal time and storing them properly ensures that you can fully enjoy their delicious taste and nutritional benefits. Whether you choose to eat them fresh or preserve them for later, the satisfaction of harvesting your own peas is unparalleled.