
Choosing the Right Peanut Varieties
When it comes to planting peanuts, selecting the right variety is crucial for a successful harvest. There are several factors to consider, such as climate, disease resistance, and the intended use of the peanuts. Here are some key points to keep in mind when choosing peanut varieties for planting:
1. Regional Adaptability: Different peanut varieties thrive in certain climates. Ensure you select a variety that is well-suited to the local growing conditions in your area. Consult with local agricultural extension services or experienced peanut farmers for recommendations.
2. Disease Resistance: Peanuts are susceptible to various diseases, including leaf spot, stem rot, and viral infections. Look for varieties that have a good level of resistance to common peanut diseases in your region. This will help reduce the risk of crop loss and ensure healthier plants.
3. Market Demand: Consider the market demand for peanuts in your area. If you are planning to sell your harvest, choose varieties that are popular and in high demand. This will increase your chances of selling the peanuts at a competitive price and maximizing your profits.
4. Nut Size and Flavor: Different peanut varieties produce nuts of varying sizes and flavors. Consider your preferences and the preferences of potential consumers when selecting a variety. Some varieties are known for their large-sized nuts, while others are prized for their rich flavor profiles.
5. Yield Potential: Evaluate the yield potential of different peanut varieties. Look for varieties that have a track record of high yields and good pod development. Higher yielding varieties can result in larger harvests and increased profitability.
6. Planting Purpose: Determine the intended purpose of your peanut crop. Are you planting for personal consumption, animal feed, or value-added products like peanut butter? Different varieties may be better suited for specific purposes, so choose accordingly based on your goals.
By carefully considering these factors, you can select the peanut varieties that are best suited for your specific needs and conditions. Remember to keep track of your experiences with different varieties and make adjustments in subsequent plantings based on their performance.
Selecting the Ideal Location
Choosing the right location for planting peanuts is essential to ensure optimal growth and a bountiful harvest. Here are some important factors to consider when selecting the ideal location for your peanut crop:
1. Sunlight: Peanuts require full sun exposure to thrive. Choose a location that receives at least 6-8 hours of direct sunlight each day. This will promote healthy plant growth and maximize yield potential.
2. Soil Type and Drainage: Peanuts prefer well-draining soil with a pH level between 5.8 and 6.2. Sandy loam soil is considered ideal for peanut cultivation. It is important to avoid areas prone to waterlogging or poor drainage, as excess moisture can lead to root rot and other diseases.
3. Wind Protection: Strong winds can damage peanut plants and hinder their growth. Select a location that is protected from strong winds by natural features like trees, hills, or buildings. Alternatively, you can create windbreaks using fencing or plant wind-resistant crops around the peanut field.
4. Proximity to Water Source: Peanuts require adequate irrigation throughout their growing season. Choose a location that is close to a reliable water source, such as a well, river, or irrigation system. Easy access to water will make it more convenient to meet the irrigation needs of the plants.
5. Pest and Disease History: Investigate the pest and disease history of the potential planting location. Avoid areas with a known history of peanut pests or diseases, as this can increase the risk of crop damage. Additionally, selecting a location away from previous peanut plantings can help reduce the buildup of soil-borne diseases.
6. Accessibility: Consider the accessibility of the location for planting, maintenance, and harvest operations. Choose a site that allows easy movement of machinery and equipment and is convenient for transporting harvested peanuts.
By carefully evaluating these factors and selecting an ideal location, you can provide the optimal growing conditions for your peanut plants. This will set the foundation for a successful peanut crop and increase your chances of achieving a fruitful harvest. Remember to regularly monitor the growing conditions and make any necessary adjustments to ensure the health and productivity of your peanut plants.
Preparing the Soil for Planting
Before planting peanuts, it is crucial to prepare the soil to create a suitable environment for optimal growth and productivity. Proper soil preparation helps improve nutrient availability, soil structure, and water-holding capacity. Here are the key steps to follow when preparing the soil for planting peanuts:
1. Clear the Field: Begin by clearing the field of any vegetation or debris. Remove rocks, weeds, and other obstacles that may interfere with the growth and development of the peanut plants. This will ensure a clean and conducive environment for the peanuts to thrive.
2. Soil Testing and Analysis: Conduct a soil test to assess the nutrient levels and pH of the soil. This information will guide you in determining the appropriate amendments required to improve the soil’s fertility. Adjusting the pH can help optimize nutrient availability for the peanuts.
3. Incorporate Organic Matter: To enhance the soil’s organic content and improve its structure, incorporate organic matter such as compost, well-rotted manure, or cover crops. This helps improve moisture retention, drainage, and nutrient-holding capacity of the soil, creating a favorable environment for root development.
4. Soil Tilling: Till the soil to break up any compacted layers and create a loose and friable seedbed. This promotes better root penetration, allowing the peanut plants to establish themselves more easily and access essential nutrients and water.
5. Address Soil Nutrient Imbalances: Based on the soil test results, amend the soil with appropriate fertilizers to address any nutrient deficiencies or imbalances. Pay particular attention to phosphorus and potassium levels, as they are crucial for peanut growth and development.
6. Weed Control: Prior to planting, control any existing weeds through manual removal or through the use of herbicides. Weeds compete with the peanut plants for nutrients, water, and sunlight, so it is important to establish a weed-free environment for the peanuts.
By following these steps, you will ensure that the soil is well-prepared and enriched, providing an optimal foundation for successful peanut growth. Remember to periodically monitor the soil moisture and adjust irrigation and fertilization practices accordingly to support the health and development of your peanut plants.
How to Sow Peanut Seeds
Once the soil is prepared, it’s time to sow peanut seeds and start the growing process. Follow these steps to ensure proper sowing of peanut seeds:
1. Seed Selection: Choose high-quality peanut seeds from a reputable source. Look for seeds that are uniform in size and free from any signs of disease or damage. This will increase the chances of healthy germination and vigorous plant growth.
2. Planting Time: Peanut seeds should be planted when the soil temperature reaches around 65°F (18°C) for optimal germination. Check with local gardening resources or agricultural extension services to determine the best time to plant peanuts in your specific area.
3. Planting Depth: Peanut seeds should be planted about 1 to 2 inches (2.5 to 5 cm) deep. Dig furrows in the prepared soil at the desired spacing, usually 4 to 6 inches (10 to 15 cm) apart, and place the seeds in the furrows, spacing them about 2 inches (5 cm) apart. Cover the seeds with soil and lightly firm the surface.
4. Spacing and Rows: Maintain a spacing of 24 to 36 inches (61 to 91 cm) between rows. This provides enough space for the peanut plants to grow and allows good air circulation. Proper spacing helps prevent the development of diseases and encourages healthier plant development.
5. Mulching: Apply a layer of organic mulch, such as straw or chopped leaves, around the peanut plants. Mulching helps conserve moisture, suppress weed growth, and maintain a more stable soil temperature, which is beneficial for peanut growth.
6. Irrigation: After planting, water the peanut seeds thoroughly to ensure good seed-to-soil contact and promote germination. Maintain adequate soil moisture throughout the growing season, aiming for approximately 1 inch (2.5 cm) of water per week. Adjust irrigation practices depending on rainfall and weather conditions.
7. Protecting from Birds: Use scare devices or netting to protect the newly planted peanut seeds from birds, which may be attracted to the fresh seeds. This will reduce the risk of seed loss and ensure successful germination.
By following these steps, you can successfully sow peanut seeds and initiate the growth of your peanut plants. Continue to provide proper care and maintenance as the peanuts grow, and anticipate the excitement of seeing your peanut plants flourish in the coming weeks.
Covering and Watering the Seeds
After sowing peanut seeds, it is essential to provide appropriate covering and watering to ensure successful germination and initial growth. Follow these steps to effectively cover and water the peanut seeds:
1. Covering the Seeds: Once the seeds are planted in the furrows, gently cover them with soil. Ensure that the seeds are adequately covered, approximately 1 to 2 inches (2.5 to 5 cm) deep, and that the soil is firmed gently so that the seeds make good contact with the soil. Proper covering helps protect the seeds and provides the ideal environment for germination.
2. Irrigation After Covering: After covering the seeds, water the seeded area thoroughly. This helps settle the soil and aids in seed-to-soil contact. Irrigation soon after covering ensures that the seeds are moist and helps initiate the germination process. Use a gentle flow of water to avoid dislodging the seeds or causing soil erosion.
3. Maintaining Moisture: During the germination period, it is crucial to maintain consistent moisture in the soil. Dry soil can hinder germination and slow down the growth of the emerging seedlings. Adequate moisture levels promote faster and more uniform germination. Monitor the soil moisture regularly and provide additional irrigation as needed to keep the soil moist but not waterlogged.
4. Watering Schedule: Plan a regular watering schedule, especially during drier spells or when there is limited rainfall. Peanut plants have a shallow root system, so frequent, light irrigation is ideal. Aim to provide approximately 1 inch (2.5 cm) of water per week, adjusting the frequency and volume based on weather conditions and the moisture needs of the plants.
5. Avoid Overwatering: While consistent moisture is crucial, avoid overwatering the peanut plants. Excessive moisture can lead to root rot and other diseases. Monitor the soil moisture levels carefully and adjust irrigation practices accordingly. Proper drainage and avoiding waterlogged conditions are essential for healthy peanut plant growth.
6. Mulching: Apply a layer of organic mulch around the peanut plants after watering. Mulching helps conserve moisture, reduce weed growth, and regulate soil temperature. Spread a layer of straw or chopped leaves around the plants, leaving space around the stems to prevent rotting.
By following these steps, you will ensure that the peanut seeds are properly covered and receive the necessary moisture for successful germination and initial growth. Consistency in watering and appropriate soil moisture management are crucial for healthy peanut plant development in the early stages. As the seedlings emerge and grow, continue to provide regular water as needed to support their growth and establish a strong foundation for a successful peanut crop.
Providing Proper Care and Maintenance
To ensure the healthy growth and development of your peanut plants, it is essential to provide proper care and maintenance throughout the growing season. Follow these guidelines to effectively care for your peanut plants:
1. Regular Monitoring: Regularly monitor your peanut plants for any signs of pests, diseases, or nutrient deficiencies. Act promptly if any issues are detected, as early intervention can prevent further damage and promote plant health.
2. Weed Control: Control weeds in and around the peanut field to reduce competition for nutrients, water, and sunlight. Regularly remove weeds manually or use appropriate herbicides, taking care to follow the recommended application rates and safety precautions.
3. Fertilization: Peanut plants require regular fertilization to meet their nutrient needs. Conduct soil tests periodically to determine the nutrient requirements of your plants. Apply fertilizers as recommended based on test results, taking care to follow proper application techniques and rates.
4. Irrigation Management: Maintain consistent soil moisture throughout the growing season, particularly during flowering and pod development. Adequate irrigation is crucial for optimal peanut growth and yield. Adjust irrigation practices based on weather conditions, rainfall, and the moisture needs of the plants.
5. Disease and Pest Management: Stay vigilant for any signs of pests or diseases that can affect peanut plants. Take appropriate measures to manage and control them, such as using cultural practices, biological controls, or approved pesticides. Follow integrated pest management (IPM) principles to minimize the impact on beneficial organisms and the environment.
6. Provide Support: As the peanut plants grow, they may benefit from support to prevent lodging (falling over). Place stakes or cages around the plants to provide support and maintain proper plant growth and development.
7. Remove Infected Plants: If any peanut plants become severely diseased or infected, it is best to remove them from the field to prevent the spread of diseases to healthy plants. Promptly discard or destroy infected plants to protect the overall crop.
8. Regular Scouting: Walk through your peanut field regularly to observe plant health, identify potential issues, and make necessary adjustments to your care and maintenance practices. Prompt action and responsive management can help prevent potential problems from escalating.
By providing proper care and maintenance to your peanut plants, you can promote their growth, minimize the risk of diseases and pests, and optimize the overall yield of your crop. Regular monitoring, timely intervention, and adherence to best practices are key factors in ensuring the health and vitality of your peanut plants from planting to harvest.
Controlling Pests and Diseases
Pests and diseases can pose a threat to the health and productivity of your peanut plants. Implementing effective pest and disease control measures is crucial to ensure a successful harvest. Here are some strategies for controlling pests and diseases in your peanut crop:
1. Integrated Pest Management (IPM): Adopt an IPM approach to pest control, which emphasizes prevention, monitoring, and the use of a combination of techniques. This includes cultural practices, biological controls, and targeted pesticide use, if necessary. Implementing IPM helps minimize the impact on beneficial organisms and reduces pesticide use.
2. Regular Monitoring: Scout your peanut plants regularly to identify signs of pests or diseases. Look for chewing damage, wilting, discoloration, or unusual growth patterns. By detecting issues early, you can take prompt action to prevent further damage and reduce the spread of pests and diseases.
3. Crop Rotation: Practice crop rotation to disrupt pest and disease cycles. Avoid planting peanuts in the same location year after year, as this can contribute to the buildup of pathogens or pests. Rotate peanuts with non-host crops to reduce the risk of specific peanut-related diseases and pests.
4. Proper Sanitation: Maintain good sanitation practices to minimize the spread of diseases. Remove and destroy any infected plant debris or plant parts promptly. Clean equipment between uses to avoid spreading diseases between fields.
5. Resistant Varieties: Select peanut varieties that have resistance to specific diseases or pests prevalent in your area. Resistant varieties are naturally equipped to defend against certain pathogens or insects, reducing the need for chemical control methods.
6. Cultural Practices: Implement cultural practices that help deter pests and diseases. These include proper spacing between plants to promote air circulation, timely weeding to minimize potential habitats for pests, and avoiding excessive nitrogen fertilization, which can make plants more susceptible to diseases.
7. Biological Controls: Utilize beneficial organisms to control pests naturally. Encourage the presence of beneficial insects, such as ladybugs or spiders, which can prey on pest populations. Consider introducing biological control agents specific to peanut pests if necessary.
8. Targeted Pesticide Use: If pest populations reach damaging levels and other control methods have not been effective, targeted pesticide applications may be necessary. Follow label instructions carefully, use pesticides sparingly, and choose products that are specifically formulated for peanut pests to minimize environmental impact.
By implementing these pest and disease control strategies, you can minimize the impact of pests and diseases on your peanut crop. A proactive and holistic approach to pest and disease management will help ensure the health, productivity, and overall success of your peanut plants.
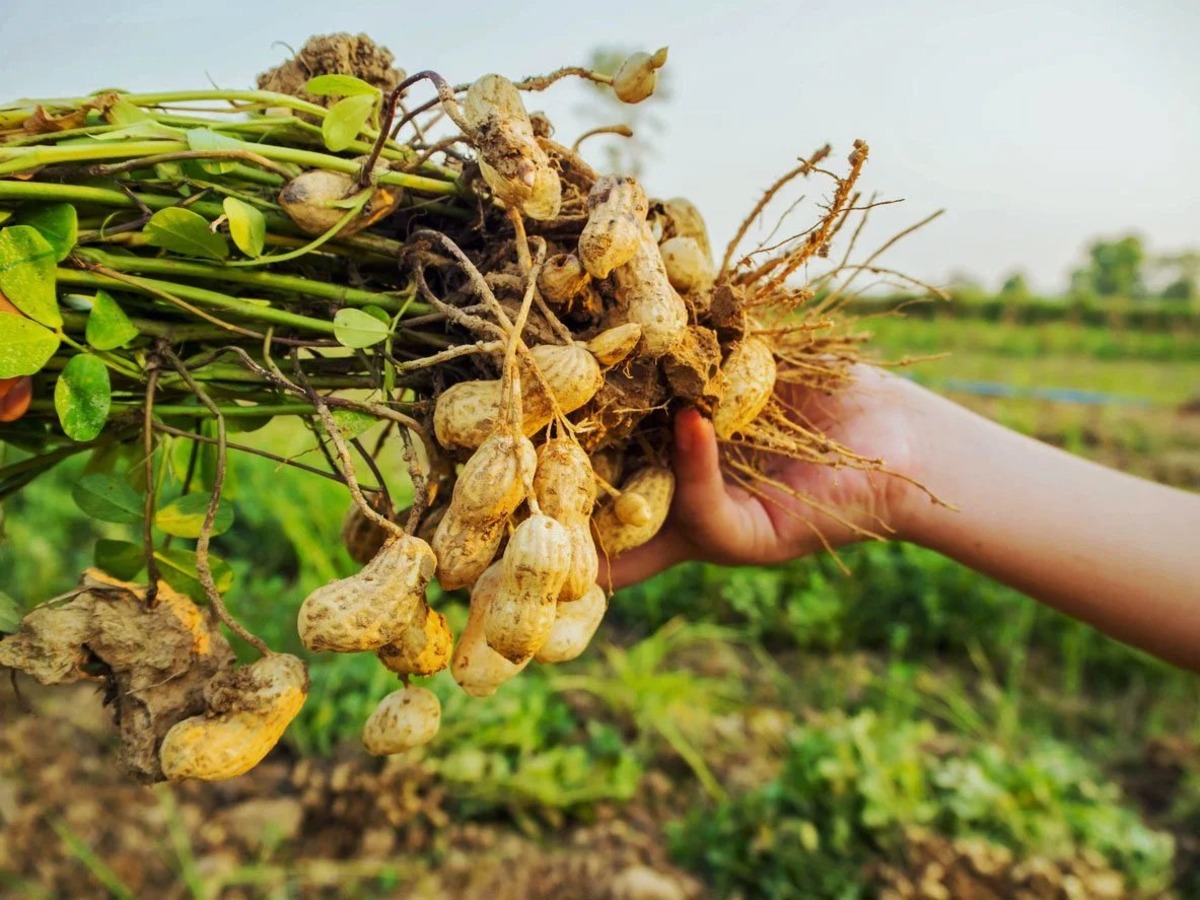
Harvesting Peanuts
After months of care and cultivation, the time for harvesting peanuts has finally arrived. Harvesting peanuts at the right time is essential to ensure optimal yield and quality. Here are the steps to follow for harvesting peanuts:
1. Monitor Maturity: Observe the maturity of the peanut plants to determine the appropriate time for harvest. The most accurate method is to check the pods by carefully digging up a few plants. Pods are ready for harvest when they have reached full size and the inside kernel is mature and well-developed.
2. Timing: Harvest peanuts when the soil moisture level is appropriate. The soil should be dry enough to prevent damage to the peanuts during harvest. Avoid harvesting after rainfall or when the soil is excessively wet, as this can lead to increased pod damage and spoilage.
3. Digging: Carefully pull up the peanut plants from the ground. Use a gardening fork or a mechanical digger to loosen the soil around the plants before pulling them out. Take care not to damage the pods or separate them from the plants during the digging process.
4. Shake off Excess Soil: Gently shake off excess soil from the uprooted peanut plants. This can be done by hand or through mechanical means. Removing excess soil minimizes the risk of moisture retention and the potential for the development of molds or rots during the curing process.
5. Curing: Once the peanut plants have been uprooted and excess soil removed, leave them in a well-ventilated area to cure. This allows the pods to dry and harden, enhancing the flavor and making them suitable for long-term storage. Curing usually takes about two to three weeks.
6. Removing Foliage: After the curing process, remove the foliage from the peanut plants. Snip off the leaves close to the base of the plant, leaving only the main stems with the attached pods. This makes handling and further processing easier.
7. Shelling: Once the peanut plants have been cured and the foliage removed, it is time to shell the peanuts. This can be done manually by hand or with the help of mechanical shelling equipment. Gently remove the pods from the plants and collect the peanuts.
8. Cleaning and Sorting: Thoroughly clean and sort the shelled peanuts to remove any debris, damaged or moldy nuts, and foreign materials. This ensures a higher quality product for consumption or further processing.
9. Storage: Store the cleaned and sorted peanuts in a cool, dry, and well-ventilated area. Proper storage conditions help maintain the quality and freshness of the peanuts over an extended period. Use appropriate containers, such as mesh bags or airtight containers, to protect them from moisture and pests.
By following these steps, you can successfully harvest and prepare your peanuts for storage or further processing. Harvesting at the right time, curing properly, and ensuring proper storage conditions will help preserve the flavor, quality, and nutritional value of your homegrown peanuts.
Curing and Storing Peanuts
Once peanuts have been harvested and shelled, it is important to properly cure and store them to preserve their flavor, quality, and nutritional value. Proper curing and storage techniques will help extend the shelf life of the peanuts. Follow these steps for effective curing and storage:
1. Drying: After shelling the peanuts, spread them out in a single layer on a clean, dry surface. Allow them to air-dry for about two to three weeks. Choose a well-ventilated area with good air circulation to facilitate the drying process. Rotate and turn the peanuts occasionally to ensure even drying.
2. Checking for Dryness: To determine if the peanuts are dry enough for storage, perform a “snap test.” Take a peanut and try to break it in half. If it snaps cleanly, it is adequately dry. If it bends or doesn’t snap easily, continue drying for a few more days before retesting.
3. Removing Excess Skin: Once the peanuts are completely dry, gently rub them between your hands or wrap them in a clean cloth and rub them to remove any remaining loose skin or outer layer. This ensures a cleaner appearance and reduces the risk of mold or pest infestation during storage.
4. Sorting and Quality Control: Inspect the peanuts carefully, removing any damaged, moldy, or shriveled ones. Discard any peanuts that show signs of spoilage or are otherwise unfit for consumption. This helps maintain the overall quality of your stored peanuts.
5. Choosing Storage Containers: Store peanuts in clean, dry, and airtight containers. Opt for containers or bags specifically designed for food storage. Glass jars, resealable plastic bags, or metal containers with tight-fitting lids are all viable options. Avoid using containers that allow moisture or pests to enter.
6. Ideal Storage Conditions: Store peanuts in a cool and dry environment. Maintain a temperature between 60°F and 70°F (15°C to 21°C) and a relative humidity below 60%. Avoid exposing the peanuts to direct sunlight or extreme temperature fluctuations, as these can compromise their quality.
7. Labeling and Date: Label storage containers with the date of storage to keep track of the freshness and ensure proper rotation. This is especially important if you are storing peanuts for an extended period. Use the oldest peanuts first to maintain the best quality and flavor.
8. Monitoring and Rotation: Regularly check stored peanuts for any signs of mold, pests, or spoilage. Inspect the containers for any moisture buildup or damage. Rotate the peanuts periodically, gently shaking or stirring them to prevent clumping and ensure even air circulation.
By following these steps, you can successfully cure and store your peanuts to maintain their freshness and quality. Properly cured and stored peanuts will be ready for consumption or use in your favorite peanut recipes whenever you desire.