
Selecting the Right Grass Seed
Choosing the right grass seed for your lawn is crucial to achieving a lush, healthy, and visually appealing yard. There are several factors to consider when selecting the appropriate grass seed variety for your specific needs. Let’s take a closer look at each one:
- Climate and Region: Different grass species thrive in different climates. Consider the climate and region where you live to determine which grass varieties are best suited for your area. Cool-season grasses like Kentucky bluegrass and fescue are ideal for northern regions, while warm-season grasses like Bermuda grass and Zoysia grass perform better in southern climates.
- Usage and Functionality: Think about how you intend to use your lawn. If you have children or pets who will be playing and running on the grass, you need a durable and wear-resistant variety. For areas with heavy foot traffic, consider grass seeds that are specifically designed for high traffic areas.
- Sun or Shade: Assess the amount of sunlight your lawn receives. Some grasses thrive in full sun, while others can tolerate partial shade. If your lawn has areas with limited sunlight, choose shade-tolerant grass seed varieties that will still thrive in those conditions.
- Soil Type: The type of soil you have plays a role in the success of your grass seed. Conduct a soil test to identify the pH level, nutrient content, and texture of your soil. Different grass species have specific soil requirements, so choose a grass seed that matches your soil type.
- Maintenance Level: Consider the level of maintenance you’re willing to commit to. Some grass varieties require more frequent mowing, watering, and fertilizing, while others are low-maintenance and can withstand neglect better. Choose a grass seed that aligns with the amount of time and effort you can dedicate to lawn care.
By carefully evaluating these factors, you can select the right grass seed that will thrive in your specific environment and meet your lawn’s specific needs. Keep in mind that seeking advice from local nurseries or lawn care professionals can also provide valuable insights into the best grass seed options for your area.
Testing Your Soil
Before you start planting grass seeds, it’s important to test your soil to ensure optimal growing conditions for your lawn. A soil test will provide essential information about the pH level, nutrient content, and texture of your soil. Here’s why soil testing is crucial and how to go about it:
Why is soil testing important?
Soil testing allows you to assess the fertility and composition of your soil, providing valuable insights into any nutrient deficiencies or imbalances. By understanding your soil’s characteristics, you can make informed decisions about the types and quantities of fertilizers and soil amendments to apply, ensuring that your grass receives the proper nutrition and grows vigorously.
How to test your soil:
1. Obtain a soil testing kit: Soil testing kits are readily available at gardening centers or online. These kits typically consist of small vials or containers for collecting soil samples and instructions for submitting them to a laboratory for analysis. Make sure to follow the instructions carefully to obtain accurate results.
2. Select sampling areas: Divide your lawn into different sections based on factors such as soil type, sunlight exposure, or problem areas. You should have a separate sample for each unique area. Use a trowel or soil probe to collect soil samples from different depths (around 6-8 inches) within each section.
3. Prepare and package the samples: Remove any debris, stones, or grass from the soil samples. Thoroughly mix the soil from each section in a clean container. Take a representative sub-sample and place it in the testing kit container or bag, following the instructions provided.
4. Submit samples for analysis: Complete any necessary paperwork or information required by the soil testing laboratory, ensuring proper identification of each sample. Mail or deliver the samples to the designated laboratory according to the provided instructions.
5. Interpret the results: Once you receive the soil test report, carefully review the results, paying close attention to the nutrient levels, pH, and any recommendations provided by the laboratory. If necessary, consult with a local gardening expert or the extension office for further guidance on interpreting the results and implementing the recommended amendments.
Soil testing is a crucial step in establishing a healthy lawn. It provides the necessary information to optimize your soil’s fertility, promote healthy grass growth, and prevent nutrient deficiencies or excesses. By following these steps and taking the time to understand your soil’s characteristics, you can set the stage for successful grass seed planting and long-term lawn health.
Preparing the Soil for Planting
Proper soil preparation is essential for successful grass seed planting. It provides an optimal environment for seed germination and establishment, leading to a healthy and thriving lawn. Follow these steps to prepare your soil for planting grass seeds:
1. Clear the area:
Remove any existing vegetation, such as weeds or grass, from the planting area. Use a shovel or a rake to loosen and remove the debris. This step ensures that the grass seeds have direct contact with the soil and aren’t hindered by competing plants.
2. Test and amend the soil:
If you haven’t done so already, perform a soil test to determine the pH level and nutrient content of your soil. Based on the test results, add any necessary amendments, such as lime to adjust pH or organic matter to improve soil structure and nutrient availability.
3. Loosen the soil:
Using a garden tiller or a hand tool, loosen the top layer of soil. Aim for a depth of about 6 inches to improve aeration and drainage. Avoid over-tilling, as it can disrupt the soil structure and promote weed growth.
4. Remove rocks and debris:
While loosening the soil, remove any rocks, roots, or other debris that may hinder the growth of the grass seeds. Smooth out the surface to create an even and level planting bed.
5. Add organic matter:
Incorporate organic matter, such as compost or well-rotted manure, into the soil. This helps improve soil structure, enhances water retention, and provides essential nutrients for the grass seedlings.
6. Rake the soil:
Use a garden rake to level the soil surface and create a fine texture. This step ensures that the grass seeds make good contact with the soil, aiding in germination.
7. Roll or pack the soil:
If necessary, use a lawn roller or simply walk over the prepared soil to lightly compact it. This step helps ensure firm seed-to-soil contact, which is crucial for successful germination.
8. Water the soil:
Before planting the grass seeds, thoroughly water the prepared soil. This helps settle the soil, providing an ideal environment for seed germination.
By following these steps, you’ll create a well-prepared soil bed that promotes seed germination and root development. Remember to always refer to the specific instructions provided by the grass seed manufacturer for precise soil preparation guidelines.
Choosing the Right Time to Plant
Timing plays a crucial role in the success of grass seed planting. Selecting the right time to plant ensures favorable conditions for seed germination and establishment. Consider the following factors when determining the ideal time to sow your grass seeds:
1. Climate and Growing Season:
Understand your region’s climate and the typical growing season for grass in your area. Cool-season grasses thrive in cooler temperatures and are best planted in early fall or spring when the soil is still warm. Warm-season grasses, on the other hand, should be planted in late spring or early summer when soil temperatures are consistently above 60°F.
2. Soil Temperature:
Soil temperature is a critical factor influencing the success of seed germination. Different grass species have specific temperature requirements for optimal growth. It’s recommended to plant grass seeds when the soil temperature is within the suitable range for your selected grass variety.
3. Moisture and Rainfall:
Adequate soil moisture is essential for seed germination and early growth. Monitor the weather forecast and choose a time when rainfall or irrigation can provide consistent moisture to the soil without causing waterlogging. Avoid planting during periods of drought or excessive rain, as they can hamper successful germination.
4. Pest and Weed Pressure:
Consider the prevalent pests and weeds in your area. Planting grass seeds at the right time can help minimize pest and weed pressure. For instance, weed competition is reduced when planting cool-season grasses in early fall, as many weed species have completed their lifecycle by that time.
5. Lawn Usage and Timing:
If you have specific events or activities planned for your lawn, time your grass seed planting accordingly. Allow ample time before any major lawn usage to ensure that the grass has sufficient time to establish and grow.
6. Follow Regional Recommendations:
Consult local agricultural extension offices or gardening experts to learn about the recommended planting times in your specific location. They have valuable knowledge about your region’s climate and can provide insights into the best time to plant grass seeds.
By carefully considering these factors, you can choose an optimal time to plant your grass seeds, giving them the best chance for successful germination and establishment. Remember that the ideal planting time may vary based on your specific grass species and local conditions, so always refer to the recommended guidelines provided by your seed supplier or local gardening experts.
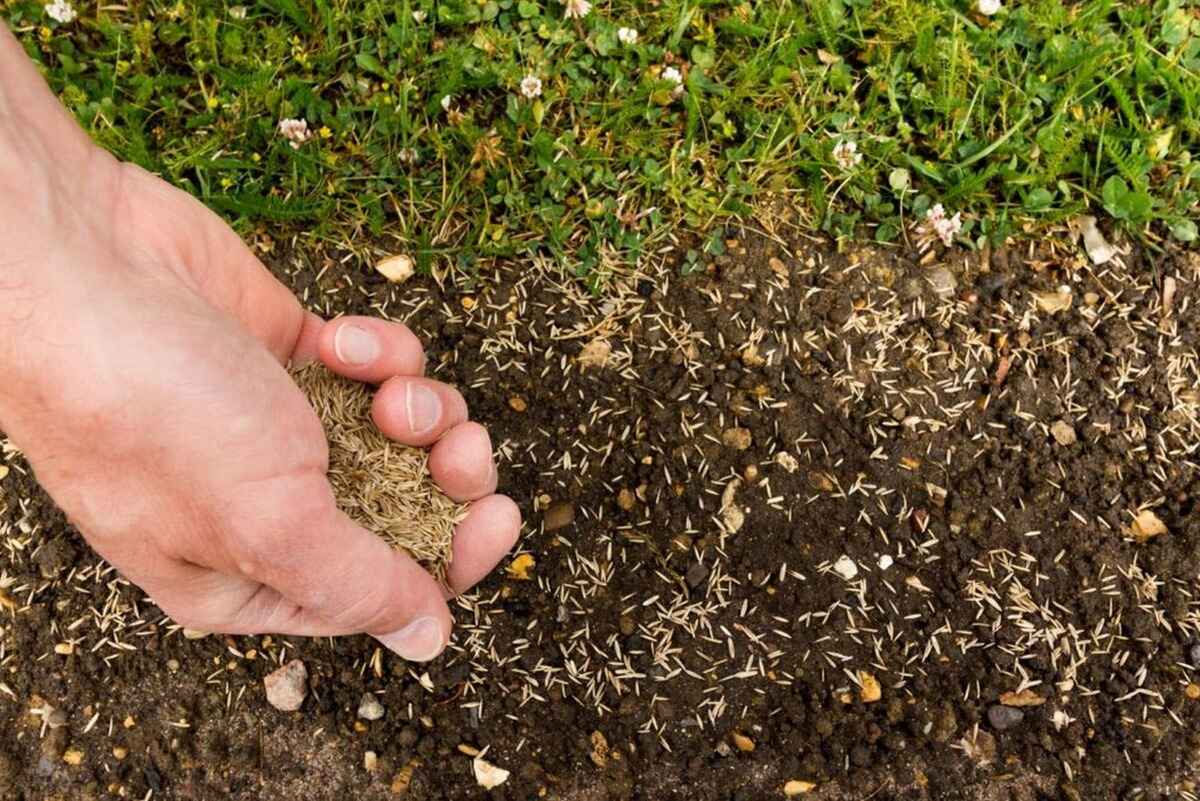
Spreading the Grass Seed
Once you have prepared the soil, it’s time to spread the grass seed. Properly dispersing the seeds ensures even coverage and maximizes the chances of successful germination. Follow these steps to effectively spread the grass seed:
1. Calculate the seed quantity:
Determine the appropriate amount of grass seed required for your lawn. Refer to the seed packaging or consult with a local lawn care expert to determine the recommended seeding rate for your specific grass variety.
2. Use a spreader:
Choose a spreader that best suits your needs. There are two common types: broadcast spreaders for larger areas and drop spreaders for more precise application. The type of spreader you use will depend on the size and shape of your lawn.
3. Divide your lawn into sections:
Divide your lawn into smaller sections to ensure proper seed distribution. This prevents uneven coverage and helps you keep track of where you’ve already spread the seeds.
4. Follow the recommended pattern:
If using a broadcast spreader, walk in a steady, straight line across each section of your lawn. Overlap each pass slightly to ensure complete coverage. For drop spreaders, simply follow the manufacturer’s recommendations for the desired coverage pattern.
5. Adjust the spreading rate:
Make sure to set the spreader at the appropriate seeding rate specified for your grass variety. Follow the instructions provided by the manufacturer to adjust the spreader accordingly.
6. Walk at a consistent pace:
For even distribution, maintain a consistent walking pace while operating the spreader. This helps avoid uneven seeding caused by varying walking speeds.
7. Seed in multiple directions:
To achieve optimal coverage, spread the grass seed in multiple directions. This helps ensure that the seeds are evenly distributed, filling in any gaps or sparse areas on your lawn.
8. Lightly rake the area:
After spreading the grass seeds, use a garden rake to lightly rake the soil. This helps incorporate the seeds into the top layer of soil, improving seed-to-soil contact and increasing germination rates.
9. Protect the seeds:
Consider applying a thin layer of straw or mulch to protect the seeds from birds, erosion, and extreme weather conditions. Avoid using too much, as it can hinder seed germination.
By following these steps, you can effectively spread your grass seeds, ensuring even coverage and optimal conditions for germination. Remember to water the area regularly and monitor the progress of the seedlings as they grow.
Watering the Area
Proper and consistent watering is crucial for the germination and establishment of your newly planted grass seeds. Adequate moisture creates the ideal environment for seedlings to take root and grow into a healthy lawn. Follow these watering guidelines to promote the success of your grass seed:
1. Water immediately after seeding:
After spreading the grass seed, give the area a thorough watering. Use a gentle spray or a sprinkler to avoid displacing the seeds. Ensure that the soil is evenly moist, but be cautious of overwatering, as it can lead to waterlogging and seed washout.
2. Maintain soil moisture:
Keep the soil consistently moist during the germination period, which typically lasts 2-3 weeks. Water the area lightly multiple times a day or as needed to prevent the soil from drying out. Aim to keep the top inch of soil moist but not saturated.
3. Watch for signs of underwatering or overwatering:
Monitor the soil moisture closely to avoid underwatering or overwatering. Signs of underwatering include dry patches, slow or uneven germination, and wilting seedlings. Signs of overwatering include pooling water, excessive runoff, or fungal growth. Adjust your watering frequency accordingly to maintain the right level of moisture.
4. Water deeply:
As the grass seedlings start to grow, gradually transition to deeper and less frequent watering. This encourages the roots to grow deeper into the soil, promoting stronger and more drought-tolerant grass.
5. Time of day:
Water your newly seeded area in the early morning or late afternoon. This allows the grass and soil to dry before nighttime, reducing the risk of fungal diseases. Avoid watering during the hottest part of the day, as it promotes excessive evaporation.
6. Adjust watering based on weather conditions:
Take into account the weather conditions when determining your watering schedule. If there is rainfall, adjust your watering accordingly to avoid oversaturation. In periods of drought or high temperatures, you may need to water more frequently to keep the soil moist.
7. Avoid runoff:
Pay attention to the water absorption rate of your soil. If the water tends to run off or puddle, it’s an indication that the soil is saturated. To prevent runoff, water in shorter intervals, allowing the water to soak into the soil before continuing with additional watering.
By following these watering guidelines, you can provide the necessary moisture for your grass seed to germinate and establish into a healthy lawn. Remember to adjust your watering routine as the seedlings grow and develop, transitioning to a more established lawn care schedule.
Mowing and Maintenance of New Seedlings
Mowing and proper maintenance practices are vital for the healthy development and establishment of your new grass seedlings. Following the right techniques helps promote strong root growth, density, and overall lawn health. Consider the following guidelines for mowing and maintaining your new seedlings:
1. Wait for the right time:
Allow your seedlings to establish a strong root system before mowing. Typically, you should wait until the grass reaches a height of around 3-4 inches before the first mowing.
2. Adjust the mower height:
Set your mower at the highest cutting height recommended for your grass species. Avoid cutting the grass too short, as it can stress the seedlings and lead to weed growth. Aim to trim no more than one-third of the grass blade length at each mowing.
3. Use sharp mower blades:
Ensure that the mower blades are sharp to create clean cuts. Dull blades can damage the grass, causing frayed or torn edges that are more susceptible to disease and stress.
4. Remove only a small amount of grass:
To avoid stressing the young seedlings, mow frequently and remove only a small amount of grass at a time. This allows the grass to recover quickly and encourages dense, healthy growth.
5. Leave the clippings:
Allow the grass clippings to remain on the lawn after mowing. They act as a natural mulch, providing valuable nutrients and moisture to the young seedlings as they decompose.
6. Maintain a regular mowing schedule:
Continue to mow on a regular basis, adhering to the recommended cutting height for your grass species. Regular mowing helps train the grass to grow thicker and discourages weed growth.
7. Water deeply and infrequently:
Maintain a consistent watering routine to encourage deep root growth. Provide ample moisture to the soil, aiming for about an inch of water per week. Deep, infrequent watering promotes stronger roots and drought tolerance.
8. Seedling-friendly maintenance:
Avoid heavy foot traffic, sports activities, or parking vehicles on your new seedlings. These activities can damage the delicate young grass and hinder its establishment. Additionally, avoid applying herbicides or fertilizers until the grass is well established.
By following these mowing and maintenance practices, you can promote the healthy growth and establishment of your new grass seedlings. Remember to adjust your mowing routine as the seedlings mature and gradually transition to a regular lawn care schedule.
Dealing with Common Grass Seed Problems
While planting grass seeds can lead to a lush and vibrant lawn, there are some common problems that you may encounter along the way. By being aware of these issues and taking prompt action, you can address them effectively and ensure the success of your grass seed planting. Here are some common problems and their corresponding solutions:
1. Weed Invasion:
Weeds can compete with your grass seedlings for nutrients, sunlight, and space. To prevent weed growth, hand-pull any visible weeds or use a selective herbicide that targets broadleaf or grassy weeds without harming your new grass. It’s important to apply herbicides only after the grass seedlings have established and follow the manufacturer’s instructions carefully.
2. Soil Erosion:
Due to factors like rainfall or irrigation, newly planted grass seeds can be susceptible to soil erosion. To prevent erosion, mulch the area with straw or apply erosion control netting. These measures help protect the soil, retain moisture, and prevent the seeds from being washed away.
3. Poor Seed Germination:
If you notice patchy or uneven germination, it may be due to improper seed-to-soil contact, insufficient moisture, or low-quality seeds. To address this issue, lightly rake the area to enhance seed-to-soil contact and ensure the seeds are firmly in place. Additionally, check soil moisture levels and adjust watering if necessary. If the problem persists, consider obtaining high-quality grass seeds from a reputable supplier.
4. Fungal Diseases:
Fungal diseases such as damping-off or brown patch can affect young seedlings. To prevent or treat fungal diseases, ensure proper drainage, avoid overwatering, and mow at the correct height to promote good air circulation. In severe cases, a fungicide may be necessary—consult with a local lawn care expert or the extension office for appropriate treatment options.
5. Insect Infestation:
Some insects, such as grubs or armyworms, can damage or destroy young grass seedlings. Monitor your lawn regularly for signs of insect activity, such as chewed blades or brown patches. If an infestation is detected, apply an appropriate insecticide targeted towards the specific pests, following the instructions provided.
6. Nutrient Deficiencies:
If your grass seedlings appear pale or show signs of stunted growth, it may indicate nutrient deficiencies. Conduct a soil test to identify any nutrient imbalances and apply the appropriate fertilizers or soil amendments to improve nutrient availability. Be mindful not to over-fertilize, as it can burn the young seedlings.
7. Pet Damage:
If you have pets that frequently use your lawn, they may cause damage to the newly planted grass seeds. To prevent this, restrict pet access to the seeded area until the grass is fully established. Consider erecting temporary barriers or using pet-safe deterrents to prevent them from urinating or digging in the freshly seeded areas.
By being proactive in identifying and addressing these common grass seed problems, you can ensure the healthy establishment of your new lawn. If you encounter persistent or severe issues, don’t hesitate to seek advice from local lawn care professionals for personalized solutions.
Tips for Successful Grass Seed Planting
To achieve a beautiful and thriving lawn, successful grass seed planting is essential. Here are some tips and tricks to help you achieve optimal results:
1. Choose the right grass seed:
Select the appropriate grass seed variety based on your climate, soil type, lawn usage, and maintenance preferences. Consider factors such as sunlight exposure, foot traffic, and water requirements to ensure the best fit for your specific needs.
2. Prepare the soil thoroughly:
Take the time to properly prepare the soil by removing debris, testing its pH level, and improving its texture with organic matter. A well-prepared soil bed promotes good seed-to-soil contact and provides the foundation for healthy seed germination and growth.
3. Follow recommended seeding rate:
Adhere to the recommended seeding rate provided by the seed supplier or the manufacturer. Over- or under-seeding can result in uneven growth or poor germination. Achieving the right seeding rate ensures adequate coverage and maximum utilization of the grass seeds.
4. Water consistently and regularly:
Provide consistent moisture to the seeded area during germination and establishment. Water gently and frequently to keep the soil moist but not waterlogged. Monitor soil moisture levels regularly and adjust watering if needed based on weather conditions.
5. Avoid excessive foot traffic:
Minimize foot traffic on newly planted grass seed to prevent compaction and damage to the delicate seedlings. Restrict access to the seeded area until the grass has fully established and grown to a suitable height.
6. Maintain grass height:
Maintain the recommended mowing height for your grass species. Regular mowing encourages healthy growth, helps control weed competition, and promotes a denser and more attractive lawn. Avoid cutting the grass too short, as it weakens the plants and makes them more susceptible to stress and disease.
7. Monitor for pests and diseases:
Regularly inspect your lawn for signs of pest infestations, such as chewed leaves or discolored patches. Additionally, look out for symptoms of fungal diseases, including brown patches or wilting grass. Take prompt action to address any issues and seek professional advice if needed.
8. Overseeding for thicker growth:
If your existing lawn is thin or sparse, consider overseeding to promote a thicker and healthier turf. Overseeding involves spreading grass seed over an established lawn to fill in gaps and enhance its overall density.
9. Follow a proper fertilization schedule:
For optimal growth and nutrition, follow a regular fertilization schedule based on the needs of your specific grass species. Use a high-quality lawn fertilizer with the correct nutrient balance. Avoid over-fertilizing, as it can harm the grass and contribute to environmental pollution.
10. Practice ongoing maintenance:
Maintain a consistent lawn care routine, including regular mowing, watering, weed control, and proper fertilization. Practice good lawn maintenance habits to ensure the long-term health and beauty of your grass.
By following these tips for successful grass seed planting, you can establish a strong and vibrant lawn that will be the envy of your neighborhood. Don’t hesitate to seek guidance from local lawn care professionals or gardening experts for additional personalized advice.