
Choosing the Right Clover Variety
When it comes to establishing a lush and vibrant clover lawn, choosing the right clover variety is essential. Clover, a type of legume, offers numerous benefits such as nitrogen fixation, drought tolerance, and weed suppression. With several different clover varieties available, selecting the one that suits your needs and preferences is crucial. Here are some factors to consider when choosing a clover variety for your lawn:
- Climate: Different clover varieties thrive in specific climates. Consider the average temperature, rainfall, and seasonal variations in your region to determine the most suitable clover variety. For cool-season areas, consider white clover (Trifolium repens), while warm-season regions may benefit from crimson clover (Trifolium incarnatum) or subterranean clover (Trifolium subterraneum).
- Intended Use: Determine the primary use of your clover lawn. Are you looking to create a low-maintenance ground cover, attract pollinators, or improve soil fertility? Choose a clover variety that aligns with your specific goals. For instance, white clover is excellent for erosion control and beneficial for honeybees, while red clover (Trifolium pratense) is often preferred for its soil-building properties.
- Growth Habit: Clover varieties exhibit different growth habits, such as creeping, clumping, or upright. Consider the aesthetic appeal and functionality you desire from your lawn. Low-growing and creeping varieties like white clover are ideal for a lush and uniform ground cover, while taller varieties like crimson clover can add visual interest and complement flower beds.
- Tolerance to Foot Traffic: If you anticipate frequent foot traffic on your clover lawn, opt for a clover variety known for its durability. Dutch white clover (Trifolium repens var. vulgare), for example, is known for its resilience to trampling and can withstand recreational activities and play areas.
- Availability: Check the availability of different clover varieties in your local area. Some varieties may be more readily accessible than others, making them a practical choice for your lawn.
Remember to consider your specific needs and preferences when choosing a clover variety for your lawn. By selecting the right clover variety, you can ensure a successful establishment of a healthy and beautiful clover lawn.
Preparing the Soil
Preparing the soil is a critical step in establishing a thriving clover lawn. By providing the right conditions for growth, you can ensure that your clover seeds have the best chance of sprouting and flourishing. Follow these steps to prepare your soil for the clover lawn:
- Clear the Area: Start by clearing the area of any existing vegetation, rocks, or debris. Use a rake or shovel to remove these obstacles and create a clean and level surface for the clover seeds.
- Test the Soil pH: It’s important to know the pH level of your soil before planting clover. Most clover varieties thrive in slightly acidic to neutral soil (pH 6.0-7.0). Conduct a soil test using a pH testing kit or send a sample to a local agricultural extension office for analysis.
- Amend the Soil: Based on the soil test results, you may need to amend the soil to adjust the pH level or improve its texture and fertility. If the pH is too low (acidic), add lime to raise it. If the pH is too high (alkaline), add sulfur or organic matter to lower it. Incorporate organic matter such as compost or well-rotted manure to improve soil structure and nutrient content.
- Till the Soil: Use a garden tiller or a hand tiller to loosen the soil and incorporate amendments. This will help create a loose and well-draining soil bed for the clover seeds.
- Remove Weeds: Take the time to remove any existing weeds or their roots from the soil. Weeds can compete with the young clover plants for nutrients and water, hindering their growth and establishment.
By following these steps, you can create a favorable soil environment for your clover seeds. Adequate soil preparation sets the stage for successful germination and healthy growth of your clover lawn. It’s an investment of time and effort that will pay off in the long run.
Clearing the Area
Prior to planting your clover lawn, it’s important to clear the area of any existing vegetation, rocks, or debris. Clearing the area not only provides a clean slate for your new lawn but also helps to minimize competition for resources and ensures optimal growth for your clover. Follow these steps to effectively clear the area:
- Remove Existing Vegetation: Begin by removing any grass, weeds, or other vegetation from the area where you plan to establish your clover lawn. You can use a shovel, rake, or a sod cutter to dig up and remove the existing vegetation. Ensure that you dig deep enough to remove the roots of the plants to prevent regrowth.
- Dispose of Debris: Once you have cleared the vegetation, gather and dispose of the debris properly. Compost any organic matter that is free from diseases or weeds, or dispose of it in designated green waste bins. Remove any non-organic debris such as rocks, twigs, and other debris, and dispose of them in appropriate trash receptacles.
- Level the Surface: After removing the vegetation and debris, take the time to level the surface of the area. Use a rake or a garden leveling tool to smooth out any uneven spots and create a flat and even surface. This will provide a uniform base for planting your clover seeds.
- Address Weed Control: Even after clearing the area, there may still be weed seeds present in the soil. Consider using a pre-emergent herbicide to prevent weed growth before planting your clover seeds. Follow the instructions on the herbicide packaging carefully to ensure safe and effective weed control.
Clearing the area prior to planting your clover lawn helps to eliminate competition and create an optimal environment for the clover seeds to establish and grow. Taking the time to properly clear the area ensures that your clover lawn gets the best start possible.
Testing the Soil pH
Testing the soil pH is an essential step in preparing your soil for a successful clover lawn. The pH level of your soil determines its acidity or alkalinity and plays a significant role in the availability of nutrients to plants. Clover generally thrives in slightly acidic to neutral soil (pH 6.0-7.0). Conducting a soil pH test will help determine if any adjustments need to be made to create the ideal environment for your clover. Follow these steps to test the soil pH:
- Obtain a Soil Testing Kit: Purchase a soil testing kit from a garden center or online. These kits typically include testing strips or a soil probe along with instructions on how to use them.
- Collect Soil Samples: Using a small garden trowel or shovel, collect soil samples from different areas of your lawn. Take samples at a depth of 4-6 inches and ensure that you collect a representative sample that includes both the topsoil and subsoil.
- Prepare the Samples: Remove any stones, roots, or debris from the soil samples. Combine the samples in a clean bucket and mix them thoroughly. This will give you a composite sample that represents the overall soil conditions of your lawn.
- Use the Testing Kit: Follow the specific instructions provided with your soil testing kit. This may involve placing the soil sample in a container, adding the testing solution or test strip, and waiting for the recommended amount of time for the results to develop.
- Interpret the Test Results: Once the test results are available, compare the color or numerical reading to the pH scale provided with the kit. This will indicate the soil pH level of your lawn. If the pH falls outside the optimal range for clover (6.0-7.0), adjustments may be necessary.
Testing the soil pH is a vital step in determining the acidity or alkalinity of the soil in your lawn. By understanding the pH level, you can make informed decisions about soil amendments or other adjustments to create the ideal growing conditions for your clover lawn.
Amending the Soil
In order to create the ideal growing environment for your clover lawn, it may be necessary to amend the soil. Soil amendments can help correct imbalances in pH, improve soil structure, and provide essential nutrients for optimal clover growth. Here are some steps to follow when amending the soil:
- Soil Test Results: Before determining the specific amendments needed, refer to your soil test results. The report will provide information on soil nutrient levels, organic matter content, and pH. It will guide you in making the appropriate amendments.
- Adjusting Soil pH: If the soil pH is outside the ideal range for clover, it can be corrected by adding amendments. For acidic soil, lime is commonly used to raise the pH. To lower alkaline soil, sulfur or other acidifying agents can be added. Follow the recommended application rates on the packaging.
- Improving Soil Structure: If the soil is heavy clay or compacted, organic matter can be incorporated to improve drainage and aeration. Compost, well-rotted manure, or peat moss are excellent options. Spread a layer of organic matter over the soil and mix it in with a garden tiller or a shovel.
- Adding Nutrients: Clovers are nitrogen-fixing plants, meaning they can convert atmospheric nitrogen into a usable form. However, if the soil is deficient in other nutrients, amendments may be necessary. Apply a balanced fertilizer or specific nutrients based on the recommendations from your soil test results. Work the fertilizer into the soil according to the manufacturer’s instructions.
- Watering and Settling: After incorporating amendments, water the soil thoroughly to help the amendments settle and integrate with the existing soil. This will ensure that the nutrients are more readily available to the clover plants during their establishment.
- Test the Soil Again (Optional): If you made significant amendments to the soil, it may be beneficial to conduct another soil test after a few weeks to monitor the changes and make any necessary adjustments.
Amending the soil is an important step in creating the optimal conditions for a healthy clover lawn. By addressing pH levels, improving soil structure, and providing essential nutrients, you are setting the foundation for successful clover growth and establishment.
Seeding the Clover
Seeding the clover is the next step in establishing your clover lawn. Proper seeding techniques will help ensure good germination and successful establishment of the clover plants. Follow these steps to effectively seed the clover:
- Choose the Right Time: Determine the appropriate time to seed based on your region and the specific clover variety you’ve selected. Clover is typically sown in early spring or early fall, when the soil temperature is suitable for germination.
- Prepare the Seedbed: Rake the soil lightly to create a smooth seedbed. Remove any rocks, debris, or large clumps of soil that may hinder the seeding process.
- Measure the Seed: Calculate the recommended seeding rate for your specific clover variety. It’s important to follow the packaging instructions or consult with a local gardening expert to ensure accurate seeding rates.
- Broadcast the Seed: Using a hand spreader or by hand, distribute the clover seeds evenly over the prepared seedbed. Start by sowing the seeds in one direction and then go over the area again perpendicular to the initial direction. This helps ensure even coverage.
- Rake and Tamp the Seed: After seeding, use a rake to gently incorporate the seeds into the top layer of soil. This helps ensure good seed-to-soil contact, which is crucial for germination. Lightly tamp down the soil with the back of the rake or with a lawn roller to press the seeds into the soil surface.
- Water the Seeded Area: After seeding, water the area thoroughly to moisten the soil. Keep the seeded area consistently moist but not waterlogged during the germination period, which is typically around 7-14 days. Avoid letting the soil dry out completely.
- Monitor and Protect: Keep a close eye on the seeded area as the clover germinates. Protect the area from excessive foot traffic, heavy rainfall, or any disturbance that may disrupt the seedbed. Consider installing temporary fencing or signs to keep people and animals away until the clover has established.
Seeding the clover properly is crucial for successful establishment. By following these steps and providing the necessary care during the germination period, you will be on your way to a beautiful and healthy clover lawn.
Watering the Clover
Proper watering is essential for the establishment and maintenance of a healthy clover lawn. Adequate moisture will help the clover seeds germinate, promote root development, and sustain the growth of the clover plants. Follow these guidelines for effective watering of your clover:
- Germination Stage: During the initial germination stage, it’s important to keep the seeded area consistently moist. Water the area gently and evenly to prevent runoff. Depending on the weather conditions, you may need to water lightly multiple times a day to ensure the soil stays consistently damp.
- Established Stage: Once the clover has germinated and established, gradually reduce the frequency of watering. Allow the top layer of soil to dry slightly between waterings. This will encourage the clover roots to grow deeper and promote overall lawn resilience.
- Deep Watering: When watering the clover, aim for deep penetration to encourage deep root growth. Watering deeply allows the clover to access moisture from lower soil layers, making it more resilient during periods of drought.
- Time of Day: Watering in the early morning or late afternoon is ideal. This allows the clover leaves to dry before cooler evening temperatures, reducing the risk of disease and fungal growth. Avoid watering during the hottest part of the day to minimize evaporation.
- Avoid Overwatering: While clover prefers moist soil, it is important to avoid overwatering, as it can lead to shallow root development and make the lawn susceptible to diseases, such as root rot. Monitor the soil moisture and adjust watering accordingly.
- Consider Rainfall: Take into account any rainfall the area receives. If the soil is already moist from rain, adjust your watering schedule accordingly. Avoid watering if the soil is already adequately saturated.
- Tolerate Some Browning: Clover is naturally drought-tolerant and can withstand dry periods better than traditional grasses. Allow the clover to naturally brown or go dormant during extreme heat or extended periods without rainfall. Once moisture returns, the clover will usually recover its vibrant green color.
By following these watering guidelines, you can ensure that your clover lawn remains healthy and resilient. Monitoring soil moisture levels and adjusting watering practices accordingly will help promote optimal growth and long-term success for your clover lawn.
Fertilizing the Clover
Fertilizing is an important aspect of maintaining a healthy and thriving clover lawn. While clover can fix nitrogen from the atmosphere through a process called nitrogen fixation, providing additional nutrients can help support its growth and overall health. Follow these guidelines when fertilizing your clover:
- Soil Test: Before applying any fertilizer, it’s recommended to conduct a soil test to determine the nutrient levels and pH of the soil. This will help you determine if any specific nutrient deficiencies need to be addressed.
- Choose the Right Fertilizer: Select a balanced fertilizer that is suitable for clover. Look for a fertilizer with an NPK (nitrogen, phosphorus, and potassium) ratio that is close to 10-10-10, or slightly higher in nitrogen (e.g., 16-4-8). Avoid high-nitrogen fertilizers, as they can promote excessive leaf growth at the expense of flower production.
- Apply Fertilizer at the Right Time: Apply the fertilizer to your clover lawn during the early spring or fall when the clover is actively growing. Avoid fertilizing during periods of extreme heat or drought, as it can cause stress to the plant.
- Follow the Recommended Application Rate: Read and follow the instructions on the fertilizer packaging for the recommended application rate. Apply the fertilizer evenly across the lawn, using a spreader for larger areas or broadcasting it by hand for smaller areas.
- Water After Fertilizing: Once you have applied the fertilizer, water the lawn lightly to help dissolve the nutrients and carry them down to the root zone. This will facilitate nutrient uptake by the clover plants.
- Avoid Excessive Fertilizer Use: Over-fertilizing can lead to nutrient runoff and pollution of water bodies, so it’s important to use fertilizers judiciously. Follow the recommended application rates and avoid applying fertilizer more frequently than necessary.
- Consider Organic Alternatives: Organic fertilizers, such as compost, well-rotted manure, or natural-based fertilizers, can be used to provide nutrients to your clover lawn. These options are environmentally friendly and can contribute to the long-term health of the soil.
Fertilizing your clover lawn appropriately can help ensure that your plants receive the necessary nutrients for optimal growth and vitality. By following the guidelines for fertilization and using the right products, you can maintain a healthy and lush clover lawn.
Controlling Weeds
Weed control is crucial to maintain the health and appearance of your clover lawn. While clover has some natural weed-suppressing properties, it’s still necessary to take proactive measures to minimize weed growth and competition. Follow these guidelines to effectively control weeds in your clover lawn:
- Maintain Healthy Clover: A dense and healthy clover lawn is the first line of defense against weeds. By providing optimal growing conditions for your clover, you can help it outcompete and suppress weed growth. Follow proper watering, fertilizing, and mowing practices to keep your clover lawn in optimal condition.
- Monitor Regularly: Take the time to regularly inspect your clover lawn for any signs of weed growth. Early detection allows for prompt action and prevents weeds from establishing and spreading. It’s easier to control a few isolated weeds than to manage a full-blown infestation.
- Hand Pulling: For small patches of weeds, hand pulling is an effective method of control. Make sure to remove the entire weed, including the roots, to prevent regrowth. This method is particularly useful for broadleaf weeds, which can be easily distinguished from the clover plants.
- Spot Treat with Herbicides: If hand pulling alone is not sufficient, spot treating with herbicides specifically formulated for broadleaf weeds can be an effective solution. Follow the instructions on the label carefully and apply the herbicide only to the weed, avoiding contact with the surrounding clover plants.
- Mow Properly: Maintain a proper mowing height for your clover lawn. Mowing too short can stress the clover plants and allow weeds to thrive. Aim to mow at a higher setting to create shading and competition against weed growth. Additionally, avoid mowing when the weeds are producing seeds to prevent their spread.
- Prevent Weed Seed Spread: Be mindful of preventing the spread of weed seeds into your clover lawn. Regularly check your shoes, clothing, and gardening tools for any seeds or plant parts that could introduce weeds. Also, clean or sterilize equipment and don’t use contaminated soil or compost.
- Maintain Vigilance: Weed control is an ongoing process. Continuously monitor your clover lawn for weed growth, even after initial control efforts. Regular maintenance, such as hand pulling and spot treating as needed, will help keep your clover lawn free from weeds.
By implementing an effective weed control strategy and being proactive in maintaining your clover lawn, you can keep weeds at bay and enjoy a lush and weed-free clover lawn.
Mowing and Maintenance
Proper mowing and maintenance practices are essential for keeping your clover lawn in optimal condition. Regular mowing helps promote healthy growth, control weeds, and maintain an attractive appearance. Follow these guidelines for mowing and maintenance of your clover lawn:
- Mowing Height: Set your mower to a proper mowing height for clover, which is typically around 2-3 inches. Mowing at a higher setting helps shade out weeds and promotes a more robust clover lawn.
- Mowing Frequency: Aim to mow your clover lawn when it reaches about 4-6 inches in height. Regularly mowing at the appropriate height helps maintain the desired density and prevents the clover from becoming too tall and floppy.
- Sharpen Mower Blades: Keep your mower blades sharp to ensure clean cuts. Dull blades can tear the clover and leave it susceptible to diseases and stress. Sharpen the blades at the beginning of the mowing season and periodically throughout to maintain their sharpness.
- Leave Clippings on the Lawn: Consider leaving grass clippings on the clover lawn after mowing. When cut to the correct height, the clippings break down easily and contribute organic matter and nutrients back into the soil. This helps improve overall soil health and reduces the need for additional fertilization.
- Avoid Mowing When Wet: Avoid mowing your clover lawn when the grass and soil are wet. Mowing wet grass can lead to clumping and uneven cutting, which may smother the clover plants and promote disease. Wait until the grass and soil have dried before mowing.
- Control Weeds: As mentioned earlier, proper weed control is crucial for maintaining a healthy clover lawn. Regular mowing can help prevent weeds from flowering and producing seeds, reducing their spread. Additionally, removing any visible weeds during mowing will help maintain the lawn’s appearance.
- Perform Regular Maintenance: In addition to mowing, perform regular maintenance tasks to keep your clover lawn in top condition. This includes monitoring for weed growth, watering as needed, fertilizing when necessary, and addressing any pest or disease issues promptly.
By following these mowing and maintenance guidelines, you can ensure the long-term health and beauty of your clover lawn. Regular maintenance practices, combined with proper mowing techniques, promote healthy growth and allow you to enjoy a lush and vibrant clover lawn throughout the season.
Monitoring and Troubleshooting
Regular monitoring and troubleshooting are important aspects of maintaining a healthy and thriving clover lawn. By staying vigilant and addressing any issues promptly, you can prevent potential problems from worsening and ensure the long-term success of your lawn. Here are some key points to consider when monitoring and troubleshooting your clover lawn:
- Monitor Growth and Appearance: Regularly observe the growth and appearance of your clover lawn. Look for any signs of stress, discoloration, or patchy areas that may indicate underlying issues.
- Check for Pests and Diseases: Keep an eye out for pests and diseases that may affect your clover lawn. Common pests include aphids, clover mites, and white grubs, while diseases like powdery mildew or leaf spot can occur. Identify the specific problem and take appropriate action, such as using organic insecticides or fungicides if necessary.
- Address Nutrient Deficiencies: If you notice any signs of nutrient deficiencies, such as yellowing leaves or stunted growth, address the issue promptly. Conduct a soil test to determine the specific nutrient deficiency and provide the necessary amendments or fertilizers accordingly.
- Manage Weeds: Continuously monitor your clover lawn for weed growth and take immediate action to control them. Regular mowing, hand-pulling, or spot treatment with herbicides can help keep the weed population in check.
- Monitor Soil Moisture: Regularly check the soil moisture levels of your clover lawn. Ensure that the soil is consistently moist during the germination stage, but not waterlogged. After establishment, adjust watering to allow the top layer of soil to dry slightly between waterings, promoting deep root growth.
- Assess Sunlight and Shade: Evaluate the amount of sunlight and shade that reaches your clover lawn. Clover thrives in partial shade to full sun. If your lawn is not receiving adequate sunlight, consider pruning nearby trees or plants to allow more light to reach the clover.
- Watch for Signs of Overcrowding: Keep an eye out for signs of overcrowding in your clover lawn. If the plants become too dense, it can lead to weak growth and increased susceptibility to disease. Thin out the clover by hand or by mowing at a higher setting to promote better air circulation.
- Seek Expert Advice: If you encounter persistent or unfamiliar issues with your clover lawn, don’t hesitate to seek advice from local gardening experts, agricultural extension offices, or reputable online resources. They can provide specific guidance tailored to your region and help troubleshoot any challenges you may face.
By actively monitoring and troubleshooting your clover lawn, you can catch and address issues before they become major problems. Regular observation, prompt action, and seeking expert advice when needed will contribute to the long-term health and success of your clover lawn.
Enjoying Your Clover Lawn!
After putting in the effort and care to establish and maintain your clover lawn, it’s time to sit back, relax, and enjoy the beauty and benefits it provides. Here are some reasons why you can truly enjoy your clover lawn:
- Lush Green Appearance: Clover lawns offer a beautiful, lush green backdrop to your outdoor space. The low-growing, dense foliage creates a carpet-like effect that is visually appealing and provides a vibrant and natural-looking lawn.
- Drought Tolerance: One of the standout features of clover is its excellent drought tolerance. Clover has deep roots that can tap into moisture reserves in the soil, enabling it to withstand dry periods without excessive watering. This means less water usage and reduced maintenance in the long run.
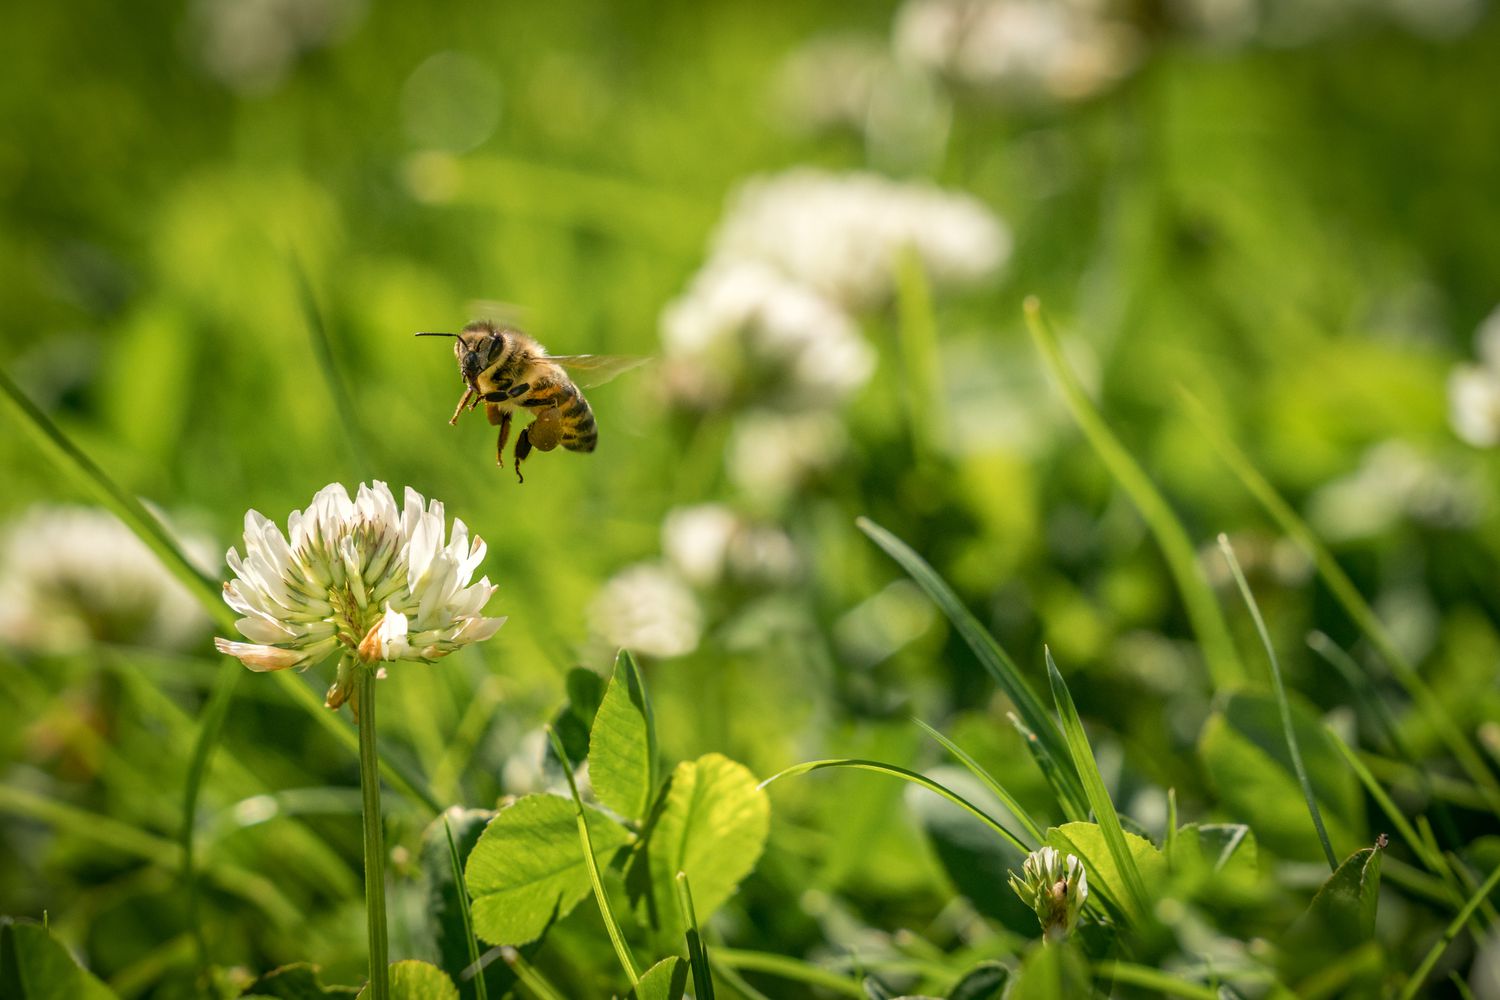
- Pollinator Attraction: Clover is known for its attractive flowers, which come in various colors depending on the variety. The delicate blossoms not only add aesthetic appeal to your lawn but also act as a magnet for pollinators such as bees and butterflies, helping to support local ecosystems and promote biodiversity.
- Nitrogen Fixation: One of the unique benefits of clover is its ability to fix nitrogen from the atmosphere and convert it into a usable form for plants. This natural nitrogen fixation process eliminates the need for additional nitrogen fertilizers, making your clover lawn environmentally friendly and cost-effective.
- Low Maintenance: Compared to traditional grass lawns, clover lawns require relatively low maintenance. Clover grows more slowly than grass, reducing the frequency of mowing. It also competes well with weeds, minimizing the need for herbicides. With proper care and occasional monitoring, you can enjoy a beautiful clover lawn without the constant hassle of extensive maintenance.
- Environmental Benefits: Clover lawns offer numerous environmental benefits. The deep-rooted clover plants help improve soil structure, increase water infiltration, and prevent erosion. They also act as a natural ground cover, reducing soil temperature and conserving moisture. Additionally, clover releases oxygen into the air, contributing to cleaner and healthier surroundings.
- A Natural Playground: Clover lawns are perfect for outdoor activities and play. Clover’s resilience to foot traffic, combined with its cushiony texture, makes it an ideal choice for children’s play areas and recreational spaces. Whether it’s running barefoot or playing games, your clover lawn provides a comfortable and safe experience for you and your family.
With its lush green appearance, drought tolerance, pollinator attraction, and numerous environmental benefits, a clover lawn offers a unique and enjoyable outdoor space. Sit back, relax, and revel in the beauty and advantages that your clover lawn provides.