
Choosing the Right Basil Seeds
When embarking on your basil-growing journey, the first crucial step is to choose the right basil seeds. With so many different varieties available, selecting the best ones for your needs can seem overwhelming. However, with a little guidance, you can confidently pick out the perfect seeds for your basil garden.
1. Consider the Basil Variety – Basil comes in various flavors and scents, each with its own unique characteristics. If you’re looking for a classic herb for your Italian dishes, Sweet Genovese basil is an excellent choice. For a more distinct flavor, Thai basil or Lemon basil can add a wonderful twist. Determine the taste and aroma you desire to narrow down your options.
2. Assess Growing Conditions – Different basil varieties have specific growing requirements. Some are more tolerant of hot climates, while others prefer cooler temperatures. Take into account the climate in your region and the growing conditions you can provide. This will help you select a basil variety that will thrive in your specific environment.
3. Decide on Organic or Non-Organic – Another factor to consider is whether you prefer organic or non-organic basil seeds. Organic seeds are grown without the use of synthetic fertilizers or pesticides, which makes them a healthier and more environmentally friendly choice. Non-organic seeds, on the other hand, may be more readily available and may suit your needs if organic gardening is not a priority for you.
4. Read Reviews and Recommendations – Researching online reviews and recommendations can provide valuable insights into the quality and performance of different basil seed varieties. Learning from the experiences of other gardeners can help you make an informed decision and avoid potential disappointments.
5. Check Seed Freshness – Basil seeds have a shelf life, and it’s crucial to select fresh seeds for successful germination. Examine the packaging for the “packed for” or “expiration” date to ensure that you’re purchasing recently harvested seeds. Fresher seeds have higher germination rates, increasing the chances of a successful harvest.
Once you’ve considered these factors, you will have a better understanding of which basil seeds will be the most suitable for your garden. Remember, the right choice of basil seeds is the foundation for a flourishing basil crop. Take your time, do your research, and select the seeds that align with your preferences and growing conditions.
Preparing the Planting Containers
In order to give your basil seeds the best start, it’s important to prepare suitable planting containers. Properly prepping your containers will provide the ideal environment for your basil plants to grow and thrive. Follow these steps to ensure your planting containers are ready for sowing the basil seeds:
1. Select the Right Containers – Choose containers that are at least 6 inches deep and have drainage holes at the bottom. This will prevent water from accumulating and causing root rot. Options such as clay pots, plastic pots, or seed trays can all be suitable choices for growing basil.
2. Clean and Sterilize the Containers – Before planting, clean the containers with mild soap and water to remove any dirt or debris. If reusing containers from previous plantings, sterilize them by soaking them in a 10% bleach solution for 10 minutes. Rinse thoroughly to remove any remaining bleach.
3. Fill with Potting Mix – Fill the containers with a high-quality potting mix that is well-draining. Avoid using garden soil, as it may contain pests or diseases that can harm your basil plants. Consider adding organic matter, such as compost or peat moss, to improve fertility and moisture retention.
4. Level the Soil – Ensure that the soil is evenly distributed and level within the containers. Gently compact it to remove any air pockets, as they can hinder root growth and water distribution.
5. Moisten the Soil – Before sowing the basil seeds, lightly moisten the soil in the containers. This will help promote good seed-to-soil contact and initiate the germination process.
By following these steps, you’ll have well-prepared planting containers that provide the optimal growing conditions for your basil seeds. Remember to place the containers in a location that receives ample sunlight and is protected from harsh elements. With the right containers and soil, you’re setting the stage for successful basil growth and a bountiful harvest.
Creating the Ideal Soil Mix
The quality of soil is fundamental to the success of your basil plants. To create the ideal soil mix for growing basil, you need to ensure that it is well-draining, nutrient-rich, and has the right texture. Follow these guidelines to create the perfect soil mix:
1. Choose the Right Soil Components – Start with a high-quality potting mix as the base of your soil mix. Look for a mix that is formulated specifically for container gardening and contains a combination of peat moss, vermiculite, and perlite. These components provide excellent drainage and aeration for the roots of your basil plants.
2. Add Organic Matter – To improve the fertility of the soil mix, incorporate organic matter such as compost or well-rotted manure. Organic matter enriches the soil with essential nutrients and enhances its water-holding capacity, ensuring your basil plants receive the nutrients they need to thrive.
3. Balance the pH Level – Basil prefers a slightly acidic to neutral soil pH level, ranging between 6.0 and 7.0. Use a pH testing kit to measure the acidity or alkalinity of your soil mix. If it’s too acidic, add dolomite lime to raise the pH. Conversely, if it’s too alkaline, add sulfur or peat moss to lower the pH levels.
4. Mix Thoroughly – Use a large container or a wheelbarrow to mix the soil components and organic matter thoroughly. Ensure that the ingredients are evenly distributed, creating a homogenous soil mix that will provide consistent growing conditions for your basil plants.
5. Test the Moisture Retention – After mixing the soil components, check the moisture retention by squeezing a handful of soil tightly. If the soil holds together and feels slightly moist, it indicates that the moisture retention is sufficient. However, if it crumbles and feels dry, add water and mix again until the soil holds together better.
Creating the ideal soil mix is essential for promoting healthy basil growth. Good drainage, adequate nutrients, and the right pH level encourage strong root development and robust plants. By following these steps, you’ll have a well-balanced soil mix that will provide an excellent foundation for your basil plants to flourish.
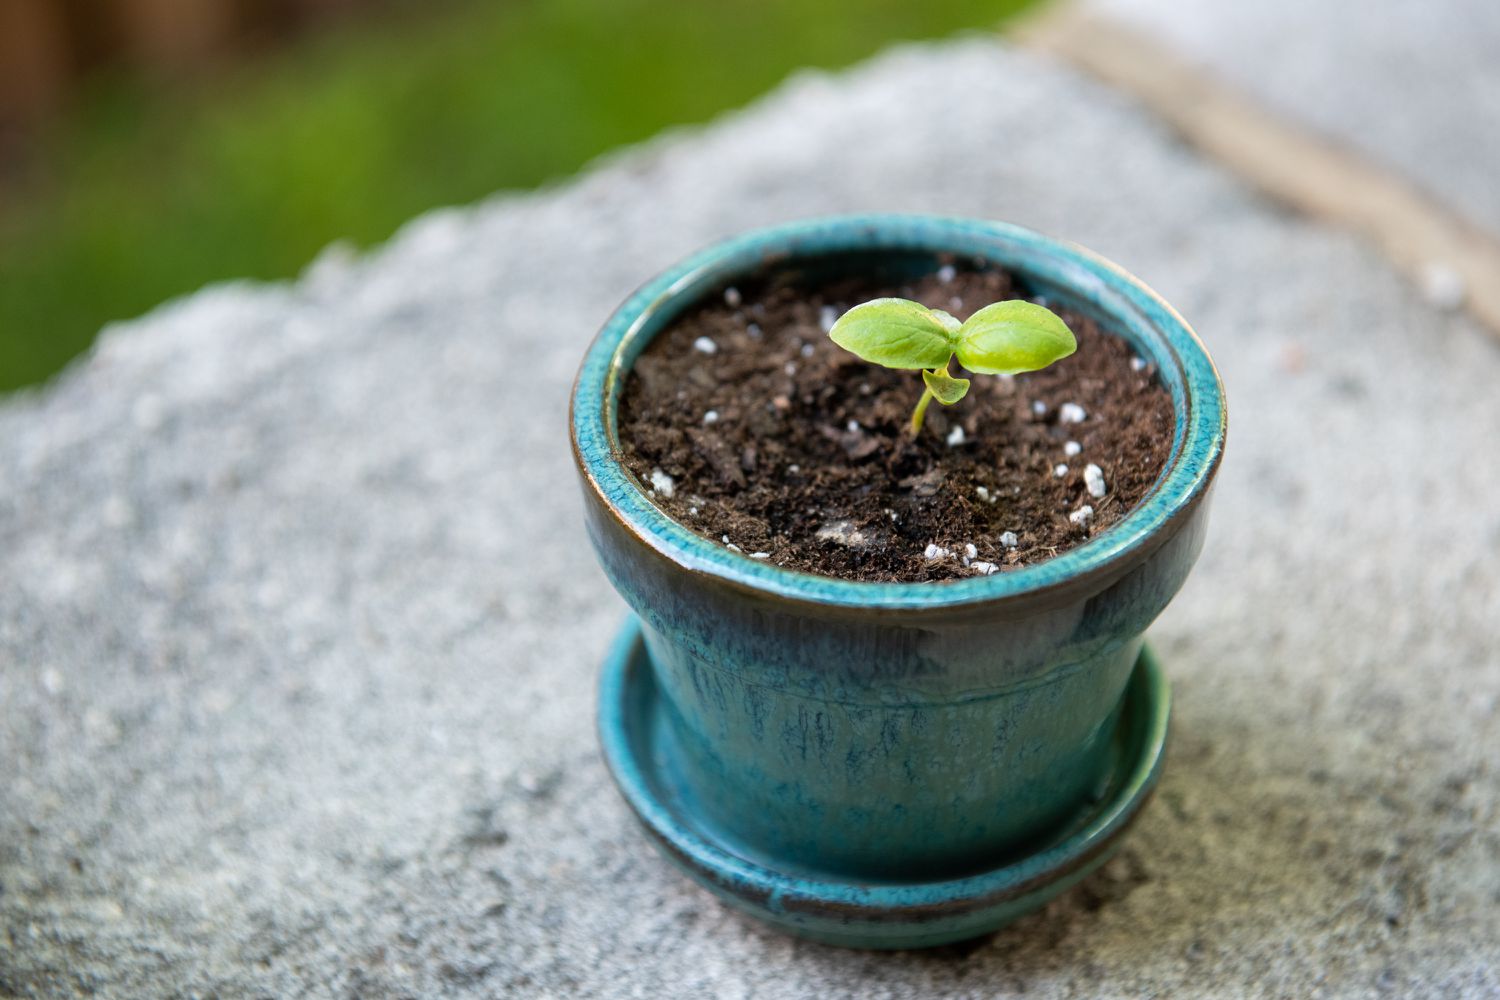
Sowing Basil Seeds
Now that you have prepared the planting containers and created the ideal soil mix, it’s time to sow your basil seeds. Follow these steps to ensure successful germination and healthy seedlings:
1. Determine Seed Spacing – Basil seeds should be sown about ¼ inch deep in the soil. Space the seeds approximately 4-6 inches apart to provide enough room for the seedlings to grow without overcrowding each other.
2. Planting Depth – Gently press the seeds into the soil at the recommended depth, ensuring that they are covered with a thin layer of soil. Avoid burying the seeds too deep, as it can hinder germination.
3. Watering After Sowing – After sowing the basil seeds, give them a light watering using a gentle mist or a watering can with a fine spout. This will help settle the soil and provide the necessary moisture for germination.
4. Maintain Moisture – Basil seeds require consistent moisture for successful germination. Keep the soil evenly moist but not waterlogged. Mist the top of the soil lightly whenever it starts to dry out, ensuring that it never becomes completely dry.
5. Provide Warmth and Light – Basil seeds germinate best in warm temperatures between 70-85°F (21-29°C). Place the planting containers in a warm and sunny location, such as a windowsill or a greenhouse. If the weather is still cool, consider using a heat mat to provide additional warmth.
6. Germination Period – Basil seeds typically take 5-10 days to germinate. Keep an eye on the containers, and once you see the tiny seedlings emerge, remove any covering or plastic to allow for proper air circulation.
7. Thinning Seedlings – As the basil seedlings grow, thin them out if they are too close together. Snip off the smaller, weaker seedlings, leaving only the strongest and healthiest ones to promote healthier and more robust growth.
By following these steps, you’ll be on your way to growing vibrant basil seedlings. Remember to provide the right amount of moisture, warmth, and light to encourage successful germination. Soon enough, you’ll have a tray full of healthy basil seedlings ready for the next stage of their growth journey.
Providing the Right Amount of Water
Watering is a critical aspect of caring for your basil plants. In order to support their growth and development, it is important to provide the right amount of water. Follow these guidelines to ensure proper watering for your basil:
1. Watering Frequency – Basil plants prefer evenly moist soil, so it is important to water them regularly. Check the moisture level of the soil by sticking your finger about an inch deep into the soil. If it feels dry, it’s time to water.
2. Avoid Overwatering – While basil requires consistent moisture, overwatering can lead to root rot and other problems. Ensure that the containers have adequate drainage holes to allow excess water to escape. Avoid letting the plants sit in waterlogged soil, as this can suffocate the roots and cause disease.
3. Watering Technique – Use a watering can or a gentle spray nozzle attachment on a hose to water your basil plants. Water the soil directly at the base of the plants, aiming to keep the foliage as dry as possible. Wet foliage can lead to fungal diseases.
4. Deep Watering – When you water, apply enough water to thoroughly moisten the soil to the root level. Water until you see excess water draining out of the bottom of the container. This ensures that the roots receive adequate hydration and promotes healthy growth.
5. Mulching – Apply a layer of organic mulch, such as straw or wood chips, around the base of your basil plants. Mulching helps retain moisture in the soil, reducing the frequency of watering and preventing evaporation.
6. Adjust Watering in Different Seasons – During hot summer months, basil may require more frequent watering to combat the heat. Pay attention to the weather conditions and adjust your watering schedule accordingly. In cooler seasons, reduce watering frequency to avoid waterlogged soil.
Remember that each plant may have slightly different water needs, so it is important to monitor the moisture content of the soil regularly. By providing the right amount of water, you will keep your basil plants healthy, ensuring optimal growth and a bountiful harvest of flavorful leaves.
Proper Lighting and Temperature
Creating the right conditions with regard to lighting and temperature is essential for the healthy growth of your basil plants. Basil is a sun-loving herb that thrives in warm temperatures, and providing optimal light and temperature conditions will ensure vigorous growth. Follow these guidelines to give your basil plants the lighting and temperature they need:
1. Sunlight Requirement – Basil plants require at least 6-8 hours of direct sunlight per day. Place your basil plants in a location that receives ample sunlight, such as a south-facing window or a spot in your garden that is not shaded by trees or buildings. If growing indoors, consider using artificial grow lights to supplement natural light.
2. Temperature Range – Basil prefers warm temperatures between 70-85°F (21-29°C). It is important to maintain a constant temperature within this range for optimal growth. Avoid exposing your basil plants to temperatures below 50°F (10°C), as they are sensitive to cold and may suffer from stunted growth or leaf damage.
3. Indoor vs. Outdoor Cultivation – If growing basil outdoors, make sure to plant it after the danger of frost has passed and the soil has warmed up. During hot summer months, provide some shade or afternoon protection from intense sunlight to prevent wilting. If growing indoors, ensure good air circulation and maintain a consistent temperature by avoiding drafts or placing the plants near air conditioning vents or heaters.
4. Seasonal Adjustments – Basil is a warm-weather herb and does not tolerate cold temperatures well. Consider starting seeds indoors or in a greenhouse before transplanting them outside when the weather warms up. In cooler seasons, protect basil plants from frost by covering them with a floating row cover or bringing potted plants indoors at night.
5. Monitoring for Signs of Stress – Monitor your basil plants closely for any signs of stress due to lighting or temperature issues. If the leaves start to yellow, droop, or wilt, it may indicate inadequate light or extreme temperatures. Adjust the placement of your plants or provide shade if necessary.
By understanding and providing the proper lighting and temperature conditions for your basil plants, you will promote healthy growth and ensure a bountiful harvest of aromatic leaves. Pay attention to the specific needs of your basil variety and adjust lighting and temperature accordingly to maximize their growth potential.
Transplanting Basil Seedlings
Once your basil seedlings have grown stronger and developed several true leaves, it’s time to transplant them to their permanent growing location. Transplanting basil seedlings not only provides them with more space to grow, but also allows for better access to nutrients and sunlight. Follow these steps for a successful transplanting process:
1. Choose the Right Timing – Wait until the seedlings are 3-4 inches tall and have a sturdy stem before transplanting. This usually takes about 3-4 weeks after germination. Transplant on a calm, overcast day or in the late afternoon to reduce stress on the seedlings.
2. Prepare the Planting Area – Select a location that receives full sun, as basil thrives in bright light. Ensure that the soil is well-drained and has been amended with compost to improve its fertility. Remove any weeds or debris from the area and loosen the soil to make it easier for the seedlings to establish their roots.
3. Dig the Planting Holes – Dig holes in the prepared planting area that are slightly larger than the root ball of the basil seedlings. Space the holes approximately 8-12 inches apart to allow for proper airflow and growth.
4. Gently Remove Seedlings from Containers – Carefully remove the seedlings from their original containers by pushing up from the bottom. Be gentle to avoid damaging the delicate roots. If the roots are densely tangled, you can gently loosen them with your fingers.
5. Place Seedlings in the Holes – Set each basil seedling into a planting hole and cover the roots with soil. Press the soil gently around the seedling to secure it in place. Ensure that the soil level is the same as it was in the original container, with the stem of the seedling just above the soil surface.
6. Water and Mulch – After transplanting, thoroughly water the newly planted seedlings to settle the soil around the roots. Apply a layer of organic mulch around the plants to help retain moisture, suppress weed growth, and maintain a consistent temperature for the basil plants.
7. Provide Aftercare – Keep the newly transplanted basil seedlings well-watered and protected from extreme weather conditions. Monitor the soil moisture regularly and water as needed to keep the soil evenly moist.
By following these steps when transplanting your basil seedlings, you’ll give them a strong start in their new home. With adequate care and attention, your basil plants will continue to thrive and provide you with a bountiful harvest of aromatic leaves for culinary delights.
Mulching Your Basil Plants
Mulching is an essential practice for maintaining healthy basil plants. Applying a layer of organic mulch around your basil plants offers numerous benefits, including moisture retention, weed suppression, and soil temperature regulation. Follow these guidelines to effectively mulch your basil plants:
1. Choose the Right Mulch – Opt for organic mulch materials, such as straw, wood chips, or dried leaves. These materials break down over time, improving soil fertility and structure. Avoid using plastic mulch, as it can prevent air and water from reaching the soil.
2. Apply the Mulch Layer – Spread a 1-2 inch layer of mulch around the base of the basil plants. Be careful not to pile the mulch directly against the stems, as this can create a moist environment, increasing the risk of disease and rot.
3. Maintain Proper Distance – Leave a small space around the base of each plant to allow air circulation and prevent the mulch from directly touching the stems. This helps reduce the risk of pests and fungal diseases.
4. Mulch Thickness – Don’t overdo it with the mulch layer. A thin layer of mulch is sufficient to reap the benefits. Too much mulch can create excessive moisture retention and prevent oxygen from reaching the roots.
5. Weed Suppression – Mulching helps suppress the growth of weeds, reducing competition for nutrients and water. However, it is important to remove any existing weeds before applying the mulch to prevent them from growing through it.
6. Moisture Retention – Mulch acts as a natural barrier, reducing evaporation and helping to retain soil moisture. This is especially beneficial during hot and dry periods, as it reduces the frequency of watering required for your basil plants.
7. Soil Temperature Regulation – Mulch helps regulate soil temperature, keeping it cooler in hot weather and warmer in cooler weather. This moderates temperature fluctuations and creates a more favorable growing environment for your basil plants.
8. Mulch Renewal – Over time, organic mulch breaks down and decomposes. Renew the mulch layer as needed to maintain the desired thickness and reap the benefits of mulching throughout the growing season.
Mulching your basil plants is a simple yet effective way to promote their health and productivity. By following these guidelines, you’ll create a suitable growing environment that supports vigorous basil growth, reduces weed pressure, conserves moisture, and enhances overall plant performance.
Fertilizing Basil Plants
Fertilizing is an important aspect of caring for your basil plants, providing them with the essential nutrients they need for healthy growth and abundant leaf production. While basil plants are relatively low-maintenance, proper fertilization can help optimize their vigor and flavor. Follow these guidelines to effectively fertilize your basil plants:
1. Choose the Right Fertilizer – Use a balanced, water-soluble fertilizer that is specifically formulated for herbs or vegetables. Look for a fertilizer with equal or near-equal ratios of nitrogen (N), phosphorus (P), and potassium (K), such as a 10-10-10 or 14-14-14 blend.
2. Start with Organic Amendments – Before applying synthetic fertilizers, incorporate organic amendments into the soil during the planting stage. Compost or well-rotted manure enriches the soil with organic matter and beneficial microorganisms, which provide a slow-release source of nutrients.
3. Follow a Feeding Schedule – Begin fertilizing your basil plants about 3-4 weeks after planting, once they have established a strong root system. Follow the instructions on the fertilizer packaging for the recommended feeding frequency and dosage. Generally, a monthly application is sufficient.
4. Apply Fertilizer Properly – Dilute the fertilizer according to the package instructions. Apply the fertilizer to the soil around the base of the plants, avoiding direct contact with the foliage. Water the plants immediately after applying the fertilizer to help distribute the nutrients evenly in the soil.
5. Avoid Overfertilization – Basil plants are sensitive to excessive fertilizer, which can lead to leaf burn or excessive vegetative growth with fewer essential oils. Adhere to the recommended dosage and avoid applying more fertilizer than necessary.
6. Monitor Plant Response – Observe your basil plants closely after fertilization. If you notice any signs of leaf discoloration, wilting, or stunted growth, it may indicate an imbalance or excessive nutrient levels. Adjust the fertilization routine accordingly or consult a gardening expert for guidance.
7. Use Organic Liquid Fertilizers – If you prefer organic fertilizers or want to supplement your fertilization regimen, consider using diluted liquid seaweed or fish emulsion. These natural fertilizers provide essential minerals and micronutrients without the risk of synthetic chemical buildup.
Fertilizing your basil plants helps sustain their health and promote optimal growth. By providing the right nutrients at the right time, you’ll enjoy a continuous supply of flavorful basil leaves, perfect for enhancing your culinary creations.
Pruning and Harvesting Basil Leaves
Pruning is an essential practice for maintaining the health and productivity of your basil plants. Regular pruning promotes bushier growth, prevents flowering, and encourages the continuous production of fresh leaves. By properly pruning and harvesting basil leaves, you can enjoy a plentiful supply of flavorful herbs throughout the growing season. Follow these guidelines:
1. Start Pruning Early – Begin pruning your basil plants when they have developed a few sets of true leaves and are approximately 6-8 inches tall. This encourages the plants to branch out and promotes more vigorous growth.
2. Pinch or Cut – Pinch or cut the top set of leaves just above a pair of lower leaves. This will promote branching and encourage the development of lateral shoots. Repeat this process every few weeks or whenever the plants start to grow tall and leggy.
3. Focus on Removal – Remove any flower buds as soon as they appear. Basil plants tend to stop leaf production once they start flowering. By removing the flowers, you redirect the plant’s energy towards leaf production, ensuring a continuous harvest.
4. Harvesting – Harvest basil leaves as needed throughout the growing season. Start by removing the larger outer leaves, working your way in towards the center of the plant. Use sharp kitchen shears or scissors to make clean cuts just above a leaf node to encourage new growth.
5. Harvesting Tips – Avoid harvesting more than 1/3 of the plant’s foliage at a time to ensure its continued vigor. Regular harvesting stimulates the growth of new leaves, resulting in a denser and more productive basil plant. Harvest in the morning when the essential oils are at their peak for the best flavor and aroma.
6. Stem Harvesting – If you need a larger quantity of basil, consider harvesting entire stems rather than individual leaves. Cut the stem just above a pair of leaves to encourage the growth of new side shoots.
7. Storing Basil Leaves – Store freshly harvested basil leaves at room temperature in a loosely wrapped paper towel or a perforated plastic bag. Alternatively, preserve the leaves by freezing or drying them for future use in cooking.
By regularly pruning and harvesting your basil plants, you’ll keep them compact, productive, and flavorful. The more you prune and harvest, the more basil leaves your plants will produce, giving you a bountiful supply of this aromatic herb to enhance your culinary creations.