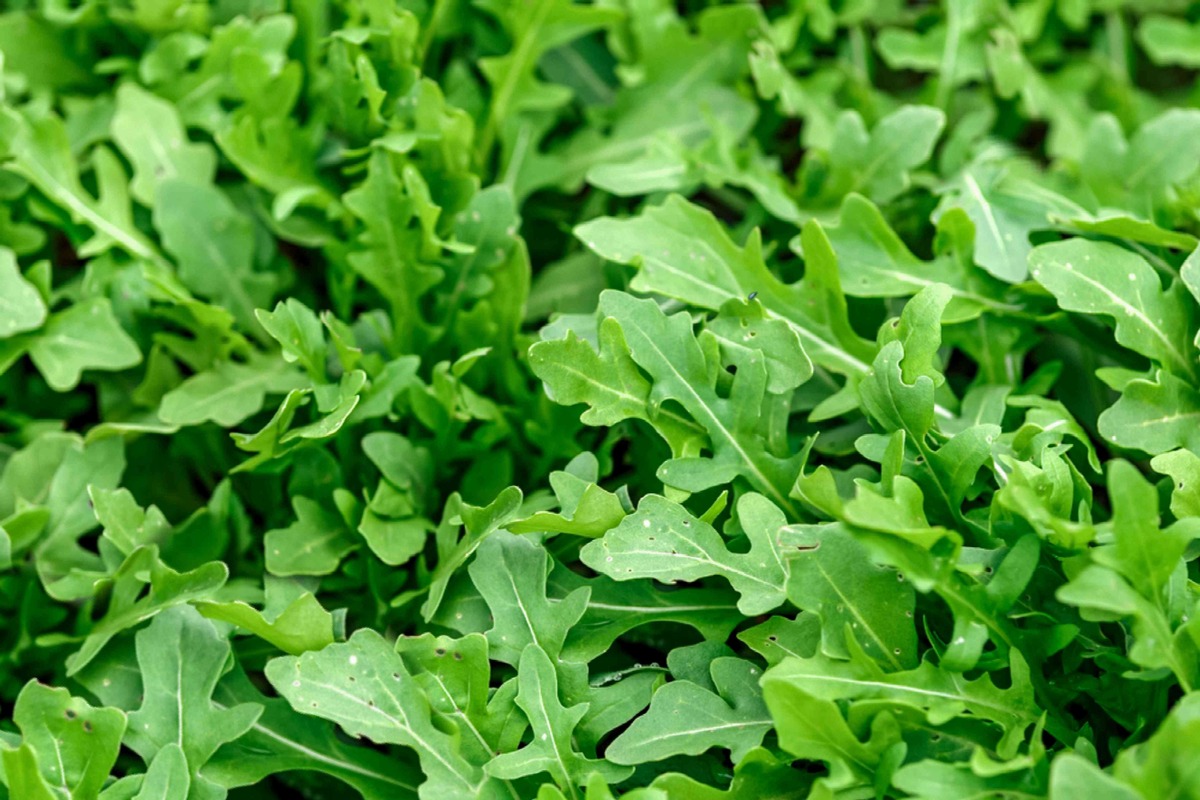
Choosing the Right Arugula Variety
When it comes to growing arugula, choosing the right variety is essential for a successful harvest. With several different types of arugula available, each offering its own unique flavor profile and growth characteristics, it’s important to select the variety that best suits your needs. Here are a few popular arugula varieties to consider:
- Common Arugula: Also known as “wild rocket,” common arugula is the most widely grown variety. It has a peppery, nutty flavor and features soft, lobed leaves. This variety grows quickly and is ready for harvest in just a few weeks.
- Italian Arugula: This variety is favored for its tender leaves and delicate, spicy flavor. Italian arugula, also known as “rucola selvatica,” is typically used in salads and pestos. It grows in a rosette shape and takes slightly longer to mature than common arugula.
- Wild Arugula: If you’re looking for a more intense arugula flavor, wild arugula is a great choice. With its deeply lobed, pungent leaves, it adds a bold kick to any dish. This variety thrives in cooler climates and can handle frost better than other types of arugula.
- Gourmet Arugula: Gourmet arugula varieties, such as ‘Astro’ or ‘Apollo,’ offer a milder, less spicy flavor compared to wild arugula. These varieties have smaller, deeply cut leaves and are often used as a garnish or in mixed greens.
Consider the flavor and texture you desire, as well as your growing conditions, when selecting an arugula variety. Additionally, keep in mind that some varieties are more tolerant of heat or cold, so be sure to choose accordingly based on your climate. Now that you have chosen the right arugula variety, let’s move on to preparing the soil for planting.
Preparing the Soil for Arugula
Before planting arugula, it is crucial to prepare the soil to provide the optimal conditions for growth and ensure a bountiful harvest. Here are some steps to follow when preparing the soil for arugula:
- Choose a well-draining location: Arugula prefers moist but not waterlogged soil. Select a spot in your garden or container that allows excess water to drain away easily.
- Remove any weeds: Clear the planting area of any weeds or grass. They can compete with arugula for nutrients and water.
- Loosen the soil: Use a garden fork or tiller to loosen the soil to a depth of around 6-8 inches. This will improve aeration and drainage.
- Amend the soil: Arugula thrives in fertile soil. Incorporate organic matter like compost or well-rotted manure into the soil to improve its nutrient content. Aim to have a pH level of around 6.0 to 7.0, which is slightly acidic to neutral.
- Rake the soil: Smooth the soil surface with a rake, removing any rocks or debris that may hinder arugula’s growth.
By following these steps, you’ll provide a favorable environment for arugula to grow and flourish. It’s important to note that arugula is a cool-season crop and prefers mild temperatures. Therefore, it’s best to plant arugula in early spring or late summer to avoid extreme heat or cold.
Now that you have prepared the soil, it’s time to move on to the next step: planting arugula from seeds.
Planting Arugula from Seeds
Planting arugula from seeds is a simple and rewarding process. Follow these steps to ensure successful germination and establishment of your arugula plants:
- Timing: Arugula is a cool-season crop that thrives in temperatures between 45°F and 65°F (7°C to 18°C). It’s best to plant arugula seeds in early spring or late summer, depending on your location and climate. Avoid planting during the hottest months of summer.
- Sowing: Prepare furrows or shallow trenches about half an inch deep in the prepared soil. Space the furrows approximately 12 inches apart to allow enough room for the plants to grow.
- Seed placement: Place the arugula seeds along the furrows, spacing them about 1 inch apart. You can thin the seedlings later if needed. Cover the seeds with a thin layer of soil or compost, gently pressing it down.
- Watering: After sowing the seeds, water the area thoroughly but gently. Ensure the soil remains evenly moist throughout the germination period.
- Germination and thinning: Arugula seeds typically germinate within 7 to 10 days. Once the seedlings emerge, thin them out to maintain a spacing of 4 to 6 inches between plants. Removing weaker seedlings will allow the stronger ones to grow and develop better.
Remember to provide adequate sunlight for your arugula plants. They require at least 4 to 6 hours of direct sunlight each day to thrive. If you are growing arugula indoors, place the pots or trays near a sunny window or use artificial grow lights.
With proper care, your arugula seeds will soon sprout, and you’ll witness the growth of healthy arugula plants. Next, we will discuss the essential care practices for arugula seedlings.
Caring for Arugula Seedlings
Once your arugula seedlings have emerged, it’s important to provide them with proper care to ensure their healthy growth and development. Here are some essential practices to follow when caring for arugula seedlings:
- Watering: Arugula seedlings require consistent moisture. Water them regularly to keep the soil evenly moist but not soggy. Avoid overwatering, as it can lead to root rot or other diseases. Check the moisture level by inserting your finger into the soil to a depth of about an inch. If it feels dry, it’s time to water.
- Thinning: If you haven’t already thinned out the seedlings, now is the time to do so. Maintain a spacing of 4 to 6 inches between plants to allow room for growth and airflow, which helps reduce the risk of disease.
- Weeding: Regularly inspect and remove any weeds that may compete with the arugula seedlings for nutrients and water. Be cautious when pulling weeds to avoid disturbing the fragile roots of the seedlings.
- Mulching: Applying a layer of organic mulch around the base of the arugula plants can help conserve moisture, suppress weed growth, and regulate soil temperature. Use materials like straw, shredded leaves, or grass clippings as mulch.
- Protection from extreme temperatures: Arugula prefers cooler temperatures but can tolerate a light frost. If the temperatures drop significantly, consider using row covers or cloths to protect the seedlings from frost or provide shade during hot summer days.
By following these care practices, you’ll promote the healthy growth of your arugula seedlings and increase your chances of a successful harvest. Arugula is generally a low-maintenance plant, but it’s important to monitor for any signs of pests or diseases and take appropriate measures to address them promptly.
Next, we will discuss the importance of proper watering for arugula plants.
Watering Arugula Plants
Proper watering is critical for the healthy growth and development of arugula plants. Maintaining adequate moisture levels ensures optimal leaf production and helps prevent common issues such as bolting or bitterness. Here are some important guidelines to follow when watering your arugula plants:
- Consistent moisture: Arugula plants prefer consistently moist soil. It’s important to avoid both drought stress and overwatering. Monitor the moisture levels regularly and aim to keep the soil moist but not waterlogged.
- Watering frequency: The frequency of watering depends on various factors such as weather conditions, soil type, and stage of growth. Generally, arugula plants require watering 1-2 times per week. However, during periods of hot weather, you may need to increase the frequency to ensure sufficient hydration.
- Deep watering: When watering, make sure to provide enough water to penetrate the root zone. Deep watering encourages the roots to grow deeper into the soil, resulting in a stronger and more resilient plant. Apply water at the base of the plants rather than overhead to avoid wetting the leaves excessively, which can promote disease.
- Morning watering: It’s best to water arugula plants in the morning, allowing the leaves to dry before the cooler nighttime temperatures. Watering in the morning also helps prevent fungal diseases that thrive in humid conditions.
- Watering container-grown arugula: The soil in containers tends to dry out more quickly, so frequent monitoring and watering may be necessary. Ensure that the water drains properly from the container to avoid waterlogged roots.
Keep in mind that these are general guidelines, and it’s important to monitor your arugula plants closely to understand their specific moisture needs. Observe the plants for signs of wilting or leaf loss, which may indicate either underwatering or overwatering.
Remember, consistent and appropriate watering practices will contribute to the overall health and productivity of your arugula plants. Next, let’s discuss the importance of fertilizing arugula for optimal growth and yield.
Fertilizing Arugula
Fertilizing arugula is essential to provide the necessary nutrients for vigorous growth and a bountiful harvest. While arugula is generally a low-maintenance plant, it still benefits from a balanced supply of nutrients. Here’s what you need to know about fertilizing arugula:
- Soil preparation: Before planting arugula, incorporate organic matter, such as compost or well-rotted manure, into the soil. This helps enrich the soil and provides a good foundation of nutrients for the plants.
- Slow-release fertilizer: You can start by applying a slow-release fertilizer when preparing the soil. This will provide a gradual release of nutrients over time, ensuring a steady supply for the arugula plants throughout their growth.
- Side-dressing: As arugula plants grow, you can supplement their nutrient intake by applying additional fertilizer through side-dressing. Side-dressing involves applying granular or liquid fertilizer along the sides of the plants, away from the stems. Follow the instructions on the fertilizer package for the recommended application rate.
- Organic options: If you prefer organic gardening practices, you can use organic fertilizers such as fish emulsion or seaweed extract. These natural fertilizers add valuable nutrients to the soil and contribute to the overall health of the plants.
- Timing: It’s important to time your fertilization properly. Apply fertilizer when the arugula plants are actively growing, typically about 4-6 weeks after planting. Avoid fertilizing too close to harvest time, as it may lead to an accumulation of nitrates in the leaves.
Remember to follow the recommended dosage and application instructions provided by the fertilizer manufacturer. Over-fertilization can be detrimental to the plant’s health and may result in excessive leafy growth or poor flavor. Always water the plants after fertilization to help dissolve and distribute the nutrients effectively.
By providing the right balance of nutrients through proper fertilization, you will support the growth and vitality of your arugula plants, resulting in healthy and delicious leaves. Next, let’s explore methods to protect arugula from common pests and diseases.
Protecting Arugula from Pests and Diseases
Just like any other plant, arugula is susceptible to various pests and diseases that can hinder its growth and damage the leaves. Implementing preventive measures and promptly addressing any issues can help protect your arugula crop. Here are some ways to protect arugula from pests and diseases:
- Inspect regularly: Regularly inspect your arugula plants for signs of pests or diseases. Look for chewed leaves, discoloration, wilting, or presence of pests such as aphids, flea beetles, or caterpillars. Early detection allows for timely intervention and control.
- Companion planting: Utilize companion plants to repel pests or attract beneficial insects. Arugula benefits from being planted alongside plants like marigolds, nasturtiums, or basil, which can deter pests such as aphids or flea beetles.
- Handpicking: If you notice pests on your arugula plants, such as caterpillars or beetles, manually remove them. Wear gloves and carefully inspect the plants, dropping the pests into a container of soapy water to eliminate them.
- Organic insecticides: If pest infestations are severe and manual removal is not sufficient, consider organic insecticides as a last resort. Choose insecticides that are specifically labeled for use on edible plants and follow the instructions carefully to protect both the plants and beneficial insects.
- Proper spacing: Ensure adequate spacing between arugula plants to allow for good airflow. Crowded plants can create favorable conditions for diseases, as moisture can get trapped and promote fungal growth.
- Sanitation: Keep the arugula growing area clean and free from debris to prevent the buildup of disease-causing pathogens. Remove any diseased or dead leaves promptly and dispose of them properly.
- Crop rotation: Rotate the planting location of your arugula crop each season to reduce the risk of diseases and pests that may overwinter in the soil. Give the soil a break from arugula for at least two years before replanting in the same spot.
By implementing these preventive measures and taking prompt action when necessary, you can protect your arugula plants from pests and diseases, ensuring healthy and thriving plants. Remember to monitor your plants regularly and make adjustments as needed to maintain their well-being.
Next, we will discuss the optimal time and techniques for harvesting arugula leaves.
Harvesting Arugula Leaves
Harvesting arugula leaves at the right time ensures the best flavor and texture. Arugula leaves are typically ready to harvest when they reach a certain size and have developed their characteristic peppery taste. Here are some guidelines for harvesting arugula leaves:
- Leaf size: Begin harvesting arugula leaves when they have grown to about 2-3 inches in length. At this stage, the leaves are tender and have a milder flavor.
- Cut-and-come-again method: Arugula is a cut-and-come-again crop, meaning you can harvest the outer leaves while allowing the inner ones to continue growing. This extends the harvest period and promotes continuous leaf production.
- Harvesting technique: To harvest arugula leaves, use a pair of clean scissors or garden shears. Cut the outer leaves, leaving the inner leaves and the growing point intact. This way, the plant can continue producing new leaves.
- Consistent harvesting: Regularly harvest arugula leaves every few days to keep the plant productive. As the plant matures, it may start to bolt and produce flowers or become bitter in taste. Harvesting regularly helps prevent this and encourages fresh growth.
- Storing harvested leaves: After harvesting, gently wash the arugula leaves and dry them thoroughly. You can pat them dry with a clean kitchen towel or use a salad spinner. Store the leaves in a sealed bag or container in the refrigerator for up to a week.
- Using harvested arugula: Freshly harvested arugula leaves can be enjoyed in salads, sandwiches, wraps, and various cooked dishes. The peppery flavor adds a delightful kick to your culinary creations.
By following these harvesting guidelines, you can enjoy a continuous supply of fresh and flavorful arugula leaves throughout the growing season. Remember to harvest regularly and provide the plant with proper care to ensure continued leaf production.
Now that you’ve successfully harvested your arugula, let’s discuss methods for storing and preserving the leaves to enjoy their goodness for longer.
Storing and Preserving Arugula
Properly storing and preserving arugula will help extend its shelf life and maintain its freshness and flavor for as long as possible. Here are some methods to store and preserve your arugula:
- Refrigeration: After harvesting or purchasing arugula, it’s important to store it in the refrigerator. Remove any damaged or wilted leaves and place the remaining leaves in a perforated plastic bag or a container lined with paper towels to absorb excess moisture. Store it in the crisper drawer of your refrigerator, which provides a slightly higher humidity level.
- Freezing: Freezing arugula is a great way to preserve its freshness for a longer period. Blanch the arugula leaves in boiling water for a few seconds, then transfer them to an ice bath to cool quickly. Drain and pack the blanched leaves in airtight freezer bags or containers. Frozen arugula can be added directly to soups, stews, or smoothies without thawing.
- Preserving as pesto or sauce: Arugula can be transformed into a flavorful pesto or sauce and stored for later use. Blend fresh arugula leaves with garlic, nuts, cheese, oil, and lemon juice to make a vibrant pesto. Alternatively, puree arugula with olive oil and seasonings to create a zesty sauce. Store the pesto or sauce in airtight containers in the refrigerator for up to a week or freeze it for longer preservation.
- Dehydrating: Dehydrating arugula leaves is an excellent method to have them on hand for seasoning or adding to various dishes. Wash and dry the leaves thoroughly, then spread them in a single layer on a dehydrator tray or baking sheet lined with parchment paper. Dehydrate them at a low temperature (around 120°F or 50°C) until they become crisp. Store the dried arugula leaves in airtight containers or jars away from direct light and moisture.
- Using in salads and meals: Arugula is best enjoyed fresh in salads or as a topping for pizzas, sandwiches, and wraps. Incorporate it into your meals right before consuming to enjoy its vibrant flavor and texture.
By following these storage and preservation methods, you can make the most of your arugula harvest and enjoy its goodness for an extended period. Whether refrigerated, frozen, transformed into pesto or sauce, or dehydrated, arugula can add a delightful touch to your culinary creations.
Now that you know how to store and preserve arugula, you can fully enjoy the flavor and nutritional benefits long after harvesting.