
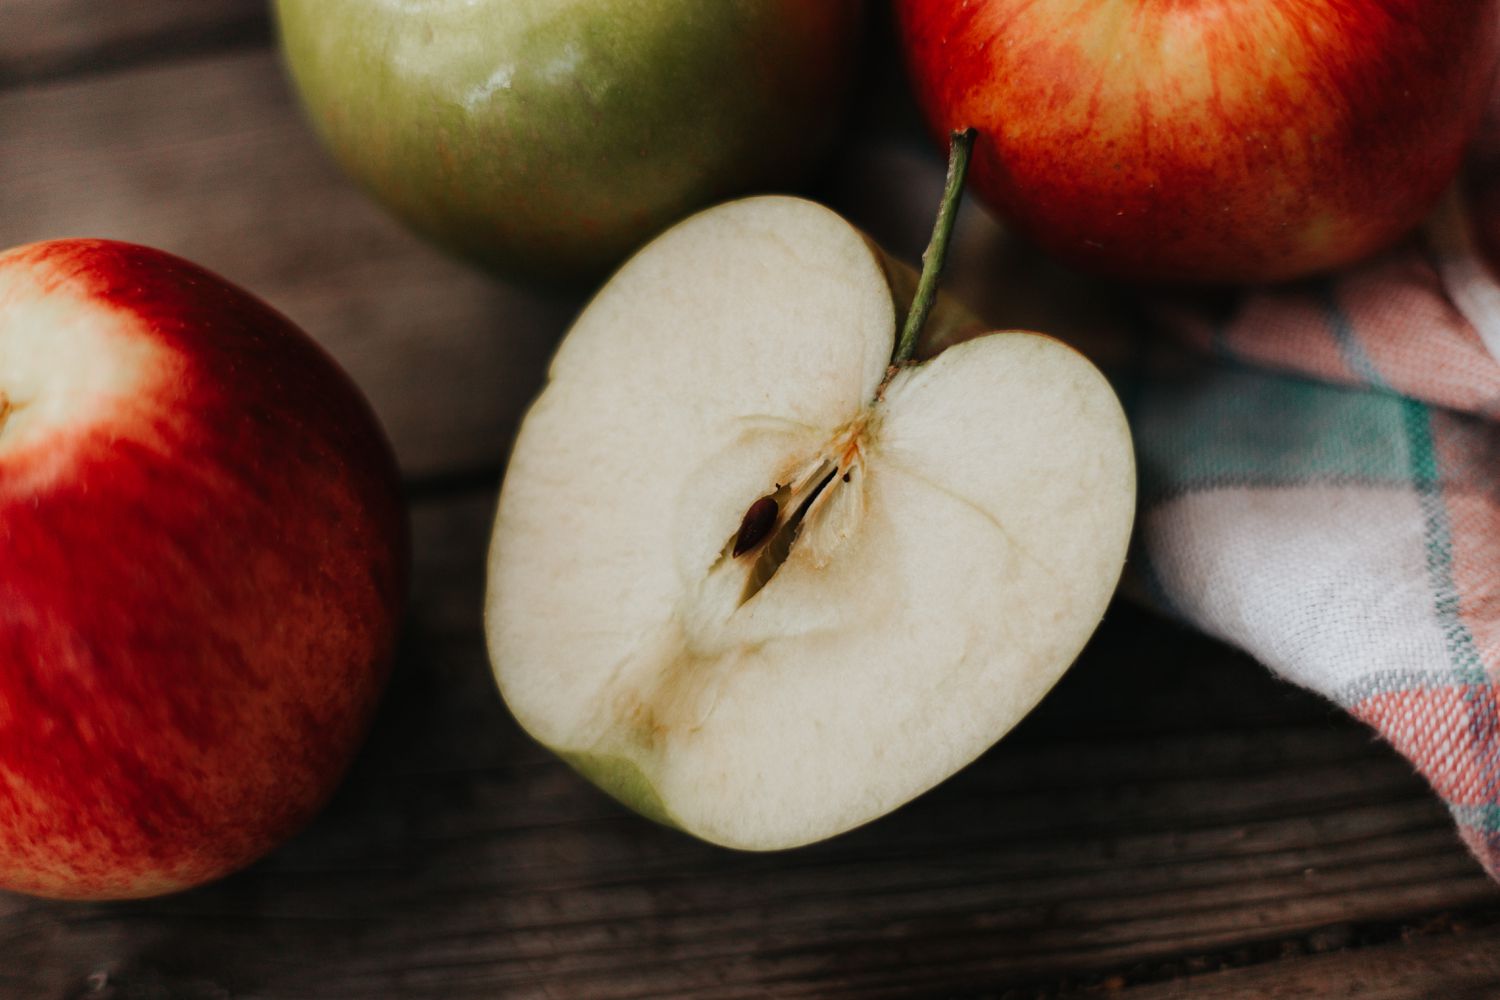
Select the Right Apple Variety
When it comes to planting apple seeds, one of the crucial steps is selecting the right apple variety. With so many different types of apples out there, it’s important to choose a variety that suits your specific needs and growing conditions.
Before you start your apple seed planting journey, take some time to research and explore the various apple varieties available. Consider factors such as climate, disease resistance, and flavor profiles to make an informed decision.
First and foremost, you need to ensure that the apple variety you choose is suitable for the climate in your region. Apples have specific chilling requirements, which means they need a certain amount of cold weather to break their dormancy and set fruit. Make sure to select a variety that is well-suited to the average winter temperatures in your area.
Another important consideration is disease resistance. Certain apple varieties are more resistant to common diseases like apple scab, powdery mildew, and fire blight. Opting for disease-resistant varieties will not only save you from the hassle of constant pest control but also ensure a healthier apple tree in the long run.
Of course, taste is an essential factor when choosing an apple variety. Some apples are known for their sweet, crisp flavor, while others are more tart or complex. Consider your personal preference and how you plan to use the apples – whether for fresh eating, baking, or making cider.
Additionally, take into account the size and characteristics of the mature tree. Some apple varieties are more compact and suitable for smaller gardens or containers, while others can grow into large, spreading trees that require ample space.
Remember, there is no one-size-fits-all apple variety. Each has its own unique qualities and attributes. Take the time to research and select the perfect variety that aligns with your preferences and growing conditions. By choosing the right apple variety, you’re setting yourself up for a bountiful harvest and a rewarding apple-growing experience.
Collect and Prepare Apple Seeds
Once you have chosen the right apple variety, the next step in planting apple seeds is collecting and preparing the seeds. While it may be tempting to simply use seeds from store-bought apples, it’s important to note that these seeds may not produce the same variety as the parent apple due to cross-pollination.
To ensure the best chance of growing a true-to-type apple tree, it’s recommended to collect seeds directly from the apple you wish to propagate. Select a healthy, ripe apple from your desired variety and carefully extract the seeds.
To extract the seeds, cut the apple open and remove the seeds using a knife or spoon. Rinse the seeds under cold water to remove any remaining pulp or residue. Be sure to handle the seeds with care, as they are delicate and can easily be damaged.
Once the seeds have been cleaned, it’s time to prepare them for germination. Apple seeds have a natural dormancy period and require a process called stratification to break this dormancy and encourage germination.
Start by placing the apple seeds in a damp paper towel or a moistened layer of peat moss. Seal them in a plastic bag or airtight container and store them in the refrigerator for at least 8 to 12 weeks. This cold treatment mimics the natural winter conditions that apple seeds need to sprout.
During the stratification period, check on the seeds occasionally to ensure they remain moist but not overly wet. This process helps to break down the seed coat and prepares the seeds for germination.
After the stratification period is complete, you’re ready to move on to the next step of planting the apple seeds. The seeds are now primed and ready to grow into healthy apple seedlings that will eventually develop into fruitful trees.
Stratify the Apple Seeds
Stratifying apple seeds is an essential step in the germination process that helps break the seed dormancy and stimulates successful sprouting. This process mimics the natural winter conditions that apple seeds require to initiate growth. Here’s how to stratify apple seeds effectively:
1. Clean the Seeds: Begin by cleaning the apple seeds to remove any pulp or residue that may be sticking to them. Gently rinse the seeds under cold water and pat them dry with a paper towel.
2. Dampen the Medium: Prepare a damp medium such as a paper towel, peat moss, or vermiculite. Moisten the chosen medium, ensuring it is damp but not soaking wet. Excess moisture can lead to mold or rot, which can harm the seeds.
3. Place Seeds in the Medium: Spread out the apple seeds evenly on the damp medium, ensuring that they are not touching each other. This allows for optimal air circulation and prevents the seeds from sticking together.
4. Seal in a Container: Gather the damp medium and seeds and place them in a resealable plastic bag or airtight container. This helps create a controlled environment for stratification. Be sure to label the container with the date and apple variety for future reference.
5. Refrigerate for Stratification: Put the bag or container with the seeds in the refrigerator. Stratification typically requires a cold period of 8 to 12 weeks at a temperature between 32°F and 45°F (0°C to 7°C). The cool temperatures simulate the winter dormancy period that allows the seeds to break their dormancy and prepare for germination.
6. Monitor Moisture Levels: Check on the seeds periodically to ensure that the medium remains moist. Avoid excessive drying or saturation, as it can hinder the stratification process. If the medium appears dry, lightly mist it with water to maintain the optimal moisture level.
7. Prepare for Germination: After the stratification period is complete, the apple seeds are ready for germination. Remove the seeds from the refrigerator and allow them to reach room temperature for a day or two before proceeding to plant them.
Remember, stratification is a crucial step in successful seed germination for apple trees. By providing the seeds with the proper cold treatment, you increase the chances of achieving healthy and vibrant apple seedlings that will grow into productive apple trees.
Choose the Right Soil and Container
When it comes to planting apple seeds, selecting the right soil and container is essential for the successful growth and development of your apple seedlings. The soil and container you choose will provide the necessary nutrients, support, and drainage for healthy root development. Here are some key factors to consider:
1. Soil Type: Apple trees thrive in well-draining soil that is rich in organic matter. Choose a high-quality potting mix or create a custom blend by combining equal parts of garden soil, compost, and peat moss. Avoid heavy clay soils that retain excessive moisture and can lead to root rot.
2. Container Size: Start with small containers that have drainage holes to prevent waterlogged soil. Seedlings can benefit from small pots or seed trays initially, but as they grow, they will require larger containers to accommodate their expanding root systems. Transplant seedlings into larger pots when their roots outgrow their current containers.
3. Container Material: Choose containers made of durable materials, such as plastic or clay pots. Plastic containers are lightweight, retain moisture well, and are less prone to breakage. Clay pots are porous and provide better airflow to the roots. Select a container that suits your preferences and growing conditions.
4. Drainage: Ensure that the chosen container has adequate drainage holes to prevent water from pooling. Proper drainage is crucial to prevent issues like root rot and waterlogged soil, which can be detrimental to the health of your apple seedlings.
5. pH Level: Apple trees prefer slightly acidic to neutral soil with a pH range of 6.0 to 7.0. Test the pH of your soil mixture and make necessary adjustments using appropriate soil amendments, such as lime to raise pH or sulfur to lower pH, if required.
6. Growing Location: If you plan to grow your apple seedlings indoors, select a bright and sunny location that receives at least 6-8 hours of sunlight each day. Alternatively, consider using grow lights to provide the necessary light intensity for optimal growth.
Remember, providing your apple seedlings with the right soil and container will set a solid foundation for healthy root development, nutrient absorption, and overall growth. Take the time to choose the appropriate soil type, container size, and proper drainage to ensure the long-term success of your apple trees.
Plant the Apple Seeds
Now that you have prepared your apple seeds and selected the appropriate soil and container, it’s time to plant the seeds and watch your apple seedlings begin to grow. Follow these steps to ensure successful planting:
1. Fill the Container: Start by filling your chosen container with the prepared soil mixture. Leave about one inch of space at the top to allow for watering.
2. Create Planting Holes: Use your finger or a small utensil to create planting holes in the soil. Space the holes about one inch apart to give the seedlings sufficient room to grow.
3. Plant the Seeds: Carefully place a single apple seed in each planting hole. Gently cover the seeds with a thin layer of soil, ensuring they are fully covered but not buried too deeply.
4. Water the Seeds: Give the planted seeds a gentle watering using a fine mist or a watering can with a rose attachment. Avoid overwatering, as excessive moisture can lead to rot. Keep the soil consistently moist but not saturated.
5. Provide the Right Environment: Place the container in a warm area with indirect sunlight. Maintain a temperature range between 65°F and 75°F (18°C to 24°C) for optimal germination. Consider using a plastic wrap or a clear dome cover to create a mini-greenhouse effect that helps retain moisture and warmth.
6. Be Patient: Germination can take anywhere from a few weeks to a couple of months, depending on the apple variety and conditions. Regularly check the soil moisture levels and monitor for any signs of growth.
7. Thin Out Seedlings: Once the apple seedlings have sprouted and developed their first set of true leaves, you may need to thin them out. Choose the strongest and healthiest seedlings and gently remove the weaker ones, leaving at least one inch of space between seedlings.
Remember, planting apple seeds is an exciting process, but it requires patience and care. By providing the right environment, proper watering, and allowing sufficient space for growth, you’ll give your apple seedlings the best chance to flourish and develop into thriving apple trees.
Provide Adequate Watering and Drainage
Watering is a crucial aspect of caring for apple seedlings as it ensures their roots receive the necessary moisture for healthy growth. Proper watering techniques, along with adequate drainage, are key to maintaining optimal soil moisture levels. Here are some guidelines to follow:
1. Watering Schedule: As a general rule, water your apple seedlings when the top inch of soil feels dry to the touch. Avoid overwatering, as this can lead to waterlogged soil and root rot. On the other hand, do not let the soil completely dry out, as this can stress the seedlings.
2. Watering Method: Use a gentle watering can or a spray bottle with a fine mist to water your seedlings. This helps prevent soil disturbance and damage to delicate roots. Pour the water slowly and evenly, ensuring it reaches the root zone.
3. Soil Moisture: Aim for moist but not soggy soil. Pay attention to the drainage of your container and adjust watering accordingly. If the soil feels too wet, reduce the frequency of watering. If it feels too dry, increase watering. The goal is to maintain consistent moisture levels.
4. Drainage: Good drainage is essential to prevent waterlogged soil, which can suffocate the roots. Ensure that your container has drainage holes to allow excess water to escape freely. Elevating the container on a tray or a set of pot feet can help facilitate drainage.
5. Avoid Leaf Wetting: When watering, try to avoid getting water directly on the leaves of the seedlings. Wet leaves can promote the growth of fungal diseases. Instead, aim to water the soil around the base of the seedlings.
6. Mulching: Consider adding a layer of organic mulch around the base of your apple seedlings. Mulching helps retain soil moisture, reduces weed growth, and regulates soil temperature. Use materials like straw, wood chips, or compost, and apply a layer about 2-3 inches thick, leaving space around the seedling stem.
Remember, consistently providing adequate watering and ensuring proper drainage are essential for the health and vigor of your apple seedlings. By following these watering guidelines, you’ll create an optimal growing environment that promotes strong root development and overall growth.
Provide Proper Lighting and Temperature Control
Proper lighting and temperature control are important factors in the successful growth of apple seedlings. These factors play a vital role in the photosynthesis process, overall plant development, and the ability of the seedlings to thrive. Here’s what you need to know:
1. Lighting Requirements: Apple seedlings require a sufficient amount of light to grow and thrive. Place them in a location that receives at least 6-8 hours of direct or indirect sunlight each day. If growing indoors, consider using grow lights that provide the appropriate light spectrum for optimal photosynthesis and growth.
2. Temperature Range: Apple seedlings prefer temperatures between 65°F and 75°F (18°C to 24°C) during the day and slightly cooler temperatures between 50°F and 60°F (10°C to 15°C) at night. Avoid exposing the seedlings to extreme temperature fluctuations or prolonged periods of high or low temperatures.
3. Air Circulation: Good air circulation is crucial for preventing issues like fungal diseases and promoting healthy growth. Avoid placing the seedlings in stagnant areas or crowded spaces. If growing indoors, provide adequate ventilation or use fans to promote airflow around the plants.
4. Avoid Drafts and Heat Sources: Protect the seedlings from extreme drafts and direct heat sources, as they can cause stress, dehydration, or damage to the tender leaves and stems. Keep them away from heating vents, open windows, and cold drafts during cooler months.
5. Monitor Temperature and Humidity: Regularly check the temperature and humidity levels in the growing area. Optimal humidity ranges between 50% and 70%. If the air is too dry, consider using a humidifier or placing a tray of water near the seedlings to increase moisture in the air.
6. Sun Exposure: Rotate the container occasionally to ensure even sun exposure for all sides of the seedling. This helps promote symmetrical growth and prevents the seedling from leaning or stretching towards the light source.
Remember, providing the proper lighting and temperature conditions for your apple seedlings is essential for their healthy development. By understanding their lighting needs, maintaining an optimal temperature range, and ensuring good air circulation, you’ll create an environment that promotes strong growth and prepares your seedlings for successful transplantation.
Nurture the Apple Seedlings
As your apple seedlings continue to grow, they require ongoing care and nurturing to ensure their healthy development. This stage is crucial for building strength, establishing a robust root system, and preparing the seedlings for transplantation. Here are some essential steps to nurture your apple seedlings:
1. Adequate Watering: Continue to water the seedlings regularly, ensuring the soil stays consistently moist but not waterlogged. Check the moisture level of the soil regularly and adjust watering as needed. Be mindful of maintaining proper drainage to prevent root rot.
2. Fertilization: Once the seedlings have developed their second set of true leaves, you can begin feeding them with a balanced, water-soluble fertilizer. Dilute the fertilizer according to the package instructions to avoid over-fertilization, which can damage the seedlings. Apply the fertilizer every two weeks during the growing season, gradually reducing the frequency as the seedlings mature.
3. Provide Support: As the seedlings grow taller, they may require support to prevent them from bending or breaking. Use plant stakes or thin bamboo sticks to gently secure the seedlings to help them grow straight and upright. Avoid tying the seedlings too tightly, as this can restrict growth.
4. Pruning: Regularly inspect the seedlings for any crossed or damaged branches, and promptly prune them using clean, sharp pruning shears. Pruning helps promote strong, well-shaped trees by removing any competing or weak branches. Aim to create a balanced and open structure for optimal light penetration and airflow.
5. Monitor Pests and Diseases: Keep a close eye on the seedlings for any signs of pests or diseases. Common issues include aphids, caterpillars, powdery mildew, or apple scab. If detected, take appropriate measures to control and treat the problem. Organic insecticides or horticultural oils can be effective against pests, while fungicides may be necessary for certain diseases.
6. Thinning Out: As the seedlings grow, they may become crowded. Thin out excess seedlings to ensure proper spacing and prevent competition for resources. Remove the weaker or less vigorous seedlings, leaving behind the strongest ones with ample space for growth.
7. Continue to Provide Proper Lighting and Temperature: Maintain the right lighting conditions and temperature range as outlined earlier. Remember to adjust the position of the seedlings to ensure even light exposure and prevent them from leaning or reaching towards the light source.
By consistently nurturing your apple seedlings with proper watering, fertilization, pruning, and pest control, you will encourage strong growth and prepare them for the next stage of their journey – transplanting them into the ground or larger containers.
Transplant the Apple Seedlings to Larger Containers
As your apple seedlings grow and develop, they will eventually outgrow their initial containers. Transplanting them to larger containers is a crucial step in their journey towards becoming mature apple trees. Here’s what you need to know to successfully transplant your apple seedlings:
1. Timing: Transplant your apple seedlings to larger containers when they have grown to a height of about 8-10 inches and have a well-established root system. This is usually after 8-10 weeks of growth.
2. Selecting Larger Containers: Choose containers that are at least 2-3 times larger in diameter and depth than the current containers. Opt for containers with drainage holes to ensure proper water flow and avoid waterlogged soil.
3. Preparing the New Containers: Fill the new containers with fresh, well-draining potting mix. Ensure that the soil level in the new container is at a similar depth to the previous container to avoid burying the seedling too deep.
4. Gently Removing the Seedlings: Carefully remove the seedlings from their current containers, taking care not to damage the fragile roots. Gently loosen the soil around the root ball and support the base of the seedling as you lift it out.
5. Planting in the New Containers: Make a hole in the soil of the new container that is slightly larger than the root ball of the seedling. Place the seedling in the hole and carefully fill in around the roots with the soil mixture. Firm the soil gently around the base of the seedling to provide stability.
6. Watering and Settling: After transplanting, give the seedlings a thorough watering to help settle the soil and remove any air pockets around the roots. Ensure that the soil is evenly moist but not soaked.
7. Placement and Care: Place the newly transplanted seedlings in a location that provides adequate sunlight and protects them from strong winds. Continue to monitor watering needs and maintain proper care, including regular fertilization and ongoing maintenance.
8. Gradual Adaptation: After transplantation, give the seedlings some time to adapt to their new containers. Avoid exposing them to extreme temperatures or direct sunlight for extended periods of time. Gradually increase their exposure to outdoor conditions over the course of a week or two.
By transplanting your apple seedlings to larger containers, you provide them with the necessary growing space for their root systems to expand and flourish. This step sets the stage for further growth and prepares them for eventual transplantation into the ground when they are ready.
Harden Off the Apple Seedlings
Hardening off is a critical step in preparing your apple seedlings for their transition from controlled indoor environments to the harsher outdoor conditions. This process gradually acclimates the seedlings to outdoor temperatures, wind, and sunlight, ensuring their successful adaptation. Here’s how to harden off your apple seedlings:
1. Timing: Start the hardening off process when the threat of frost has passed and outdoor temperatures are consistently mild, usually in late spring or early summer. Allow at least 7-10 days for the seedlings to adjust before transplanting them into the ground.
2. Gradual Exposure: Begin by placing the seedlings outdoors in a sheltered, shaded area for 2-3 hours during the mildest part of the day. Choose a location that is protected from strong winds and direct sunlight. Increase the exposure period gradually each day, adding an hour or two to the time spent outdoors.
3. Monitor Conditions: Keep a close eye on the weather forecast during the hardening off period. If there are cold or excessively windy days, it’s best to keep the seedlings indoors or provide additional protection.
4. Incremental Light Exposure: As your apple seedlings become acclimated to outdoor temperatures, slowly introduce them to increasing amounts of direct sunlight. Start with a couple of hours of morning or evening sunlight and gradually expose them to longer periods of direct sunlight during the day.
5. Watering and Fertilization: Adjust your watering schedule during the hardening off period to reflect the changing environmental conditions. Monitor soil moisture levels and water your seedlings as needed. Avoid over-fertilizing during this time to prevent rapid growth that may not be supported by the outdoor environment.
6. Protection from Pests: Be mindful of potential pests that may be present outdoors. Monitor for insects or diseases and take appropriate measures to prevent or treat any issues that arise.
7. Transplantation: After the hardening off period, once your apple seedlings have adjusted to outdoor conditions, they’re ready to be transplanted into the ground. Choose a suitable location, ensure proper soil preparation, and follow the necessary steps for successful transplantation.
By gradually acclimating your apple seedlings to the outdoor environment through the hardening off process, you give them a better chance of thriving in their new surroundings. This step helps prevent shock and allows them to develop stronger stems, foliage, and roots, setting the stage for healthy growth and abundant fruit production in the future.
Plant the Apple Seedlings in the Ground
After successfully hardening off your apple seedlings, it’s time to make the exciting transition from containers to the ground. Planting your apple seedlings in the ground provides them with the space and resources they need to establish deep root systems and grow into healthy, fruitful apple trees. Follow these steps for successful transplantation:
1. Site Selection: Choose a suitable site for planting your apple seedlings. They require a location that receives full sun for at least 6-8 hours a day and has well-drained soil. Ensure there is adequate space for the mature apple tree, considering its size and potential spread.
2. Soil Preparation: Prepare the planting area by removing any weeds or grass. Dig a hole that is wide and deep enough to accommodate the root ball of the seedling. Loosen the soil in the planting hole and amend it with compost or well-rotted manure to improve fertility and drainage.
3. Transplanting: Carefully remove the apple seedling from its container, taking care not to damage the roots. Place the seedling in the planting hole, ensuring the base of the stem is level with the ground. Backfill the hole with soil, gently firming it around the roots to eliminate air pockets.
4. Watering: Give the newly transplanted apple seedling a deep watering to settle the soil around the roots. Water regularly, keeping the soil consistently moist but not waterlogged. As the seedling establishes, gradually reduce the frequency of watering, allowing the roots to search for water deeper in the soil.
5. Mulching: Apply a layer of organic mulch around the base of the apple seedling, leaving a gap around the trunk to prevent moisture-related issues. Mulching helps conserve soil moisture, suppresses weed growth, and regulates soil temperature.
6. Staking: If your apple seedling requires support, install a stake near the base of the tree and secure it using soft tree ties or cloth. This helps ensure stability during windy conditions while allowing the tree to sway naturally.
7. Pruning: While not necessary immediately after planting, proper pruning is essential for shaping the tree’s structure and promoting optimal growth. After a year or two, once the seedling has established itself, consult pruning guides for apple trees and follow best practices.
8. Ongoing Maintenance: Regularly monitor and care for your newly planted apple seedling. Provide adequate water, especially during dry periods, and protect it from pests and diseases. Stay vigilant for signs of stress or any issues that may arise throughout the growing season.
By planting your apple seedlings in a suitable location, providing proper soil preparation, and following the necessary care and maintenance, you’re setting the foundation for healthy growth and future harvests. With time, patience, and proper care, your apple seedlings will transform into beautiful, productive apple trees.
Prune and Train Young Apple Trees
Pruning and training young apple trees is essential for developing strong and healthy trees, shaping their form, and maximizing fruit production. Proper pruning techniques encourage the growth of well-spaced branches, increase sunlight penetration, and facilitate air circulation. Here are some key steps to prune and train your young apple trees:
1. Pruning Timing: Start pruning apple trees in late winter or early spring, before bud break. This ensures the tree is dormant and minimizes the risk of disease transmission.
2. Remove Dead and Diseased Wood: Begin by removing any dead, damaged, or diseased branches using clean, sharp pruning shears. Cut back to healthy tissue just outside the branch collar, the swollen area where the branch meets the trunk or larger branch.
3. Thin Out Overcrowded Branches: Assess the tree’s structure and remove any branches that are crossing, rubbing against each other, or growing in undesirable directions. Maintain a well-spaced framework by eliminating branches that are growing too closely together.
4. Choose a Central Leader: Select a strong, upright central leader branch as the main trunk of the tree. Ideally, it should be well-positioned and have good structural strength. Choose four to six lateral branches evenly spaced around the central leader for the main framework of the tree.
5. Head Back Leading Shoots: To encourage branching and lateral growth, prune the central leader by cutting back the top portion by about a third of its length. This stimulates the development of lateral branches lower down on the tree.
6. Prune Water Sprouts and Suckers: Remove water sprouts, which are vigorous upright shoots growing directly from the trunk or larger branches, as they do not contribute to the tree’s structure and productivity. Also, eliminate suckers that emerge from below the graft union if your apple tree is grafted.
7. Promote Fruit Production: In the second and subsequent years, focus on pruning to encourage fruit production. Identify and retain the most fruitful branches while removing or shortening unproductive branches.
8. Maintain Annual Pruning: Regularly assess and prune your young apple tree every year to maintain its shape, structural integrity, and productivity. Pay attention to removing diseased or damaged wood, thinning out where necessary, and managing the overall framework.
Remember, proper training and pruning of young apple trees are vital for establishing a strong, well-shaped framework and maximizing fruit production. By following these pruning techniques and annually assessing your tree’s growth, you’ll set the stage for healthy, productive apple trees that will reward you with abundant harvests for years to come.
Provide Regular Care and Maintenance
Providing regular care and maintenance is crucial for the ongoing health and productivity of your apple trees. By implementing proper care practices, you can ensure optimal growth, prevent common issues, and maximize fruit production. Here are some essential care and maintenance tasks to consider:
1. Watering: Monitor the moisture level of the soil and provide sufficient water during dry periods. Water deeply and thoroughly to encourage deep root growth. Avoid overwatering to prevent waterlogged soil, which can lead to root rot.
2. Mulching: Apply a layer of organic mulch around the base of the trees. This helps retain soil moisture, suppress weed growth, regulate soil temperature, and improve overall soil health. Keep the mulch several inches away from the trunk to prevent rotting.
3. Fertilization: Regularly fertilize your apple trees to provide them with the necessary nutrients for healthy growth and fruit production. Apply a balanced, slow-release fertilizer in early spring and follow the package instructions for application rates. Consider conducting a soil test to better understand the specific nutrient needs of your trees.
4. Pest and Disease Control: Monitor your apple trees regularly for signs of pests and diseases. Common pests include aphids, codling moths, and apple maggots. Implement integrated pest management techniques, such as using beneficial insects, practicing proper sanitation, and applying organic insecticides when necessary. Stay vigilant and address any signs of disease promptly, such as apple scab or powdery mildew, by using appropriate treatments.
5. Pruning: Continue to prune your apple trees annually to maintain their shape, promote good air circulation, and remove dead or diseased wood. Pruning during the dormant season helps reduce the risk of disease transmission and ensures the best results. Consider consulting pruning guides or seeking advice from local horticultural experts for guidance on proper pruning techniques.
6. Thinning Fruit: To ensure good-sized, high-quality fruit, thin the fruit clusters when they are still small. Remove excess fruit to allow the remaining fruit enough space to grow and develop properly. Thinning also helps prevent the branches from becoming overloaded and breaking under the weight of the fruit.
7. Monitoring and Assessing Tree Health: Regularly inspect your apple trees for any signs of stress, such as wilting leaves, yellowing foliage, or unusual growth patterns. Check for signs of pest infestation, disease symptoms, or any other abnormalities. Prompt action can help prevent further damage and address potential issues early on.
8. Winter Protection: Prior to the onset of winter, protect your apple trees from harsh weather conditions by wrapping the trunks with tree guards or burlap to prevent sunscald or winter injury. Prune any broken or damaged branches and clear debris around the tree to prevent the accumulation of pests or diseases.
By providing regular care and maintenance to your apple trees, you ensure the best possible growing conditions and optimize their overall health and productivity. With proper watering, fertilization, pest control, pruning, and proactive monitoring, you’ll enjoy bountiful harvests of delicious, homegrown apples for years to come.
Harvest Fresh Apples from Your Trees
After dedicating time and effort in nurturing your apple trees, the moment of harvest is both exciting and rewarding. Knowing when to harvest your apples and how to pick and store them properly ensures that you enjoy the full flavor and freshness of your homegrown produce. Here’s what you need to know:
1. Determining Appropriate Harvest Time: Apples are ready for harvest when they reach their mature size, develop their characteristic color, and come off the tree easily when gently twisted or lifted without excessive force. Different apple varieties have varying maturity and ripening times, so refer to recommended harvest periods for each specific cultivar.
2. Harvesting Techniques: Gently twist or roll the apple in your hand, lifting it upwards to detach it from the branch. Be careful not to pull too hard or yank the fruit, as this can damage the branch and other nearby apples. Always handle the apples with care to prevent bruising or puncturing.
3. Handling and Sorting: Place harvested apples in a shallow basket or crate lined with a soft material such as straw or cloth to prevent bruising. Sort through the harvested fruit, removing any damaged or diseased apples to maintain the quality and longevity of the remaining harvest.
4. Proper Storage: Depending on the apple variety, different storage methods can be employed. Some apples, like early-season varieties, are best enjoyed immediately, while late-season apples can be stored for several months. Store apples in a cool, dark, and well-ventilated location, such as a root cellar, basement, or refrigerator with adjustable humidity levels.
5. Appropriate Storage Containers: For longer-term storage, wrap each apple individually in paper or store them in perforated plastic bags to maintain moisture while allowing airflow. Avoid storing apples alongside other fruits, as apples emit ethylene gas, which can accelerate ripening and spoilage.
6. Monitoring and Rotation: Regularly inspect stored apples for any signs of spoilage or rot. Remove any damaged or decaying apples promptly to prevent the spread of fungal or bacterial infections. Rotate the apples periodically to ensure even air circulation and prevent pressure spots.
7. Enjoying Your Apples: When you’re ready to enjoy your freshly picked apples, wash them in cool water just before eating. Apples can be eaten raw, used in various culinary creations, or preserved through methods like canning, drying, or making apple-based recipes.
Remember, proper timing, handling, and storage are crucial for maintaining the flavor, texture, and nutritional value of your harvested apples. By following these guidelines, you can savor the taste of your homegrown apples throughout the season and even beyond, preserving the fruits of your labor for many months to come.