
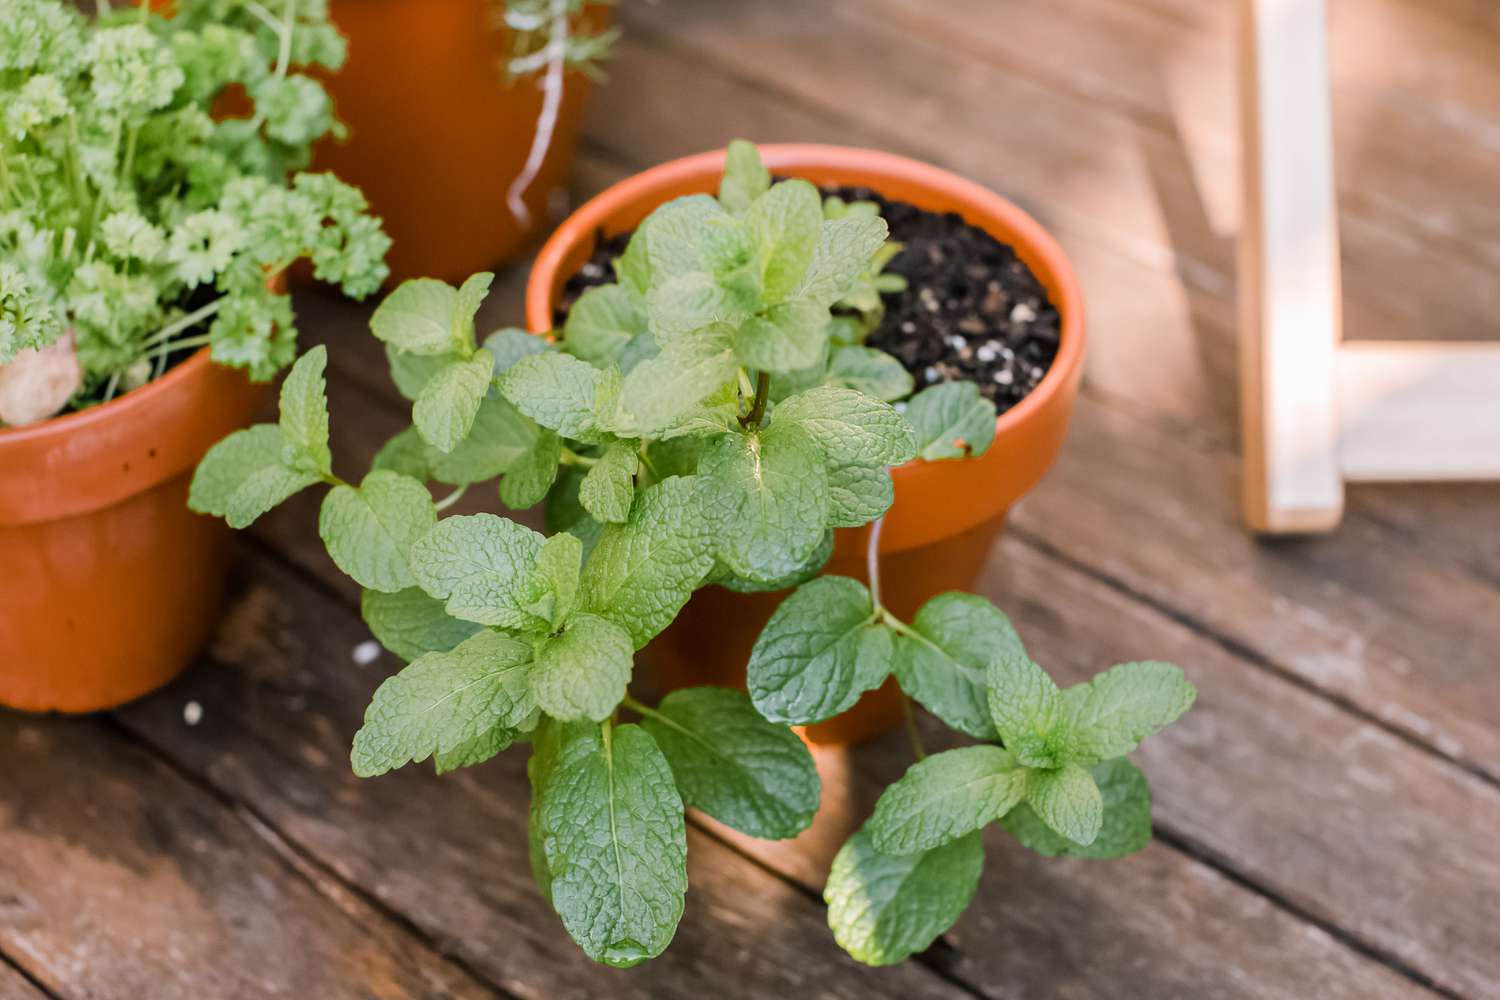
Choosing a Mint Variety
When it comes to growing mint, selecting the right variety is crucial. Mint plants are known for their aromatic leaves and versatile uses, such as adding flavor to beverages and culinary dishes, as well as being used in herbal remedies. With several mint varieties to choose from, it’s important to consider their characteristics and growing requirements before making your selection.
1. Peppermint: Peppermint is a popular choice for many gardeners due to its strong, refreshing menthol flavor. It’s commonly used in teas, desserts, and even cosmetics. Peppermint plants can grow up to 2 feet tall and spread rapidly, so it’s essential to provide sufficient space and containment if planting in a garden.
2. Spearmint: Spearmint has a milder flavor compared to peppermint and is often used in savory dishes, cocktails, and beverages. It grows well in both container gardens and outdoor beds, reaching a height of around 1-2 feet. Spearmint can be easily propagated from cuttings, making it an ideal choice for beginner gardeners.
3. Chocolate Mint: As the name suggests, chocolate mint offers a unique chocolatey aroma and taste. This variety is perfect for adding a delightful twist to desserts, hot chocolate, and even cocktails. Chocolate mint plants grow best in partial shade and moist soil conditions, reaching a height of about 1-2 feet.
4. Orange Mint: With its vibrant citrus scent, orange mint is a refreshing choice for gardeners. It adds a zesty flavor to salads, beverages, and homemade jams. Orange mint plants prefer full sun and well-drained soil, growing up to 1-2 feet tall. They are also attractive to butterflies and bees, making them a great addition to pollinator gardens.
5. Apple Mint: Apple mint is known for its sweet aroma reminiscent of crisp apples. This variety is popular for making herbal teas and garnishing fruit salads. Apple mint plants thrive in full sun to partial shade, growing to a height of 2-3 feet. Their attractive foliage and fragrant flowers make them a lovely addition to any garden.
Before choosing a specific mint variety, consider the space available, sunlight exposure, and soil conditions in your garden. It’s also worth noting that mint plants have a tendency to spread through underground runners, so it’s recommended to plant them in containers or use barrier systems to prevent them from taking over your garden.
Preparing the Soil
Proper soil preparation is essential for the successful growth of mint plants. Mint prefers well-draining soil that is rich in organic matter. Follow these steps to prepare the soil before planting:
1. Choose the right location: Select a spot that receives partial to full sunlight. Mint plants thrive in areas with at least 4-6 hours of direct sunlight per day. Keep in mind that some varieties, like chocolate mint, may prefer partial shade.
2. Clear the area: Remove any weeds, rocks, or debris from the planting area. Mint plants can be vigorous growers, so it’s important to provide them with ample space to spread without competition.
3. Improve soil drainage: If your soil tends to be heavy or clay-based, add organic matter such as compost or well-rotted manure to improve drainage. This will ensure that excess water doesn’t accumulate around the roots, which can lead to root rot.
4. Test the soil pH: Mint prefers a slightly acidic to neutral soil pH, ideally between 6.0 and 7.0. Use a soil testing kit to determine the pH level of your soil. If necessary, adjust the pH by adding organic matter or amendments like lime or sulfur.
5. Loosen the soil: Use a garden fork or tiller to loosen the soil to a depth of around 8-10 inches. This will facilitate root growth and allow the plant to easily access nutrients and water.
6. Incorporate organic matter: Mix in a generous amount of organic matter, such as compost or well-rotted manure, into the soil. This will enhance soil fertility and provide essential nutrients to the growing mint plants.
7. Level and smooth the soil: Once the organic matter is incorporated, level the soil surface and remove any large clumps or rocks. A smooth surface will make it easier for the seeds or seedlings to establish themselves.
Remember to plan ahead and prepare the soil a few weeks before planting. This will allow time for the organic matter to decompose and integrate into the soil, providing optimal conditions for the mint plants.
Planting Mint Seeds
Planting mint from seeds is a cost-effective way to start your mint garden. Follow these steps to ensure successful germination and establish healthy mint seedlings:
1. Timing: Mint seeds can be planted indoors or directly in the garden. If planting outdoors, wait until after the last frost date when the soil has warmed up. For indoor planting, start the seeds 8-10 weeks before the anticipated transplanting date.
2. Prepare seed trays: Fill seed trays or pots with a well-draining seed-starting mix. Moisten the mix before sowing the seeds to ensure proper moisture levels.
3. Sow the seeds: Sprinkle the mint seeds evenly over the soil surface. Gently press the seeds into the soil, but avoid burying them too deeply as mint seeds require light to germinate.
4. Water: After sowing the seeds, water the soil gently to provide adequate moisture. Avoid overwatering, as this can lead to fungal diseases.
5. Provide proper light: Mint seeds require ample light for germination. Place the seed trays in a bright location, preferably near a window or under grow lights. Aim for 12-16 hours of light per day.
6. Temperature: Mint seeds germinate best in temperatures between 65-75°F (18-24°C). Use a propagation mat or maintain a warm indoor environment to ensure optimal germination conditions.
7. Keep soil moist: Check the soil moisture regularly and water as needed to keep it consistently moist, but not waterlogged. Using a spray bottle or misting the soil surface can help prevent overwatering.
8. Transplanting: Once the mint seedlings have developed a few sets of true leaves and the danger of frost has passed, they can be transplanted outdoors. Space the seedlings 12-18 inches apart to accommodate their spreading habit.
With proper care and attention, mint seeds typically germinate within 1-2 weeks. Be patient and provide consistent care to ensure healthy seedlings. Remember to label your seed trays or pots to keep track of the mint varieties you have planted.
Transplanting Mint Seedlings
Once your mint seedlings have grown and developed a few sets of true leaves, it’s time to transplant them into their permanent outdoor or container location. Transplanting mint seedlings is a key step in providing them with the space and resources they need to thrive. Follow these steps for successful transplantation:
1. Choose the right location: Whether planting in a garden bed or a container, choose a location that receives at least 4-6 hours of direct sunlight per day. Mint plants prefer full sun to partial shade.
2. Prepare the planting site: Clear the planting area of weeds, rocks, and debris. Loosen the soil to a depth of about 8-10 inches using a garden fork or tiller. Incorporate organic matter, such as compost or well-rotted manure, to improve soil fertility and drainage.
3. Planting in the garden: Dig a hole in the prepared bed that is slightly larger than the root ball of the mint seedling. Gently remove the seedling from its container, taking care not to damage the roots. Place the seedling in the hole, and backfill with soil, pressing lightly to ensure good contact between the roots and the soil.
4. Planting in containers: Select a container that is at least 12-16 inches in diameter and has drainage holes. Fill the container with a well-draining potting mix, leaving enough space for the seedling. Make a hole in the soil, place the mint seedling in, and backfill with additional soil, gently firming it around the plant.
5. Water: After transplanting, water the mint seedlings thoroughly to settle the soil and help the roots establish. Keep the soil consistently moist, but avoid overwatering, as mint plants are susceptible to root rot.
6. Maintain spacing: Mint plants are known for their vigorous growth and spreading habit. Ensure that you space the seedlings at least 12-18 inches apart to allow sufficient room for the plants to expand.
7. Provide support (optional): If you’re growing tall varieties of mint or have planted them in a windy area, it may be beneficial to provide stakes or trellises for support.
Remember to monitor the transplanting site regularly, checking for watering needs, and attending to any weeds or pests that may appear. Transplant shock is common, but with proper care, the mint seedlings should adjust and continue to grow into healthy, thriving plants that will provide you with delicious and aromatic leaves.
Caring for a Mint Plant
Caring for your mint plant is essential to ensure its health and productivity. Mint plants are relatively low-maintenance, but they still require regular attention and care to thrive. Follow these guidelines to keep your mint plant healthy and flourishing:
1. Watering: Mint plants prefer consistently moist soil. Water the plant regularly, especially during dry periods, but avoid overwatering, as the roots may rot. Check the soil moisture by inserting your finger into the soil up to an inch. If it feels dry, it’s time to water.
2. Fertilizing: Mint plants benefit from regular feeding. Apply a balanced organic fertilizer, such as compost or a slow-release granular fertilizer, at the beginning of the growing season. Be cautious not to over-fertilize, as this can lead to excessive leaf growth and less concentrated flavors.
3. Pruning: Mint plants tend to spread rapidly and can become invasive if not properly managed. Regularly pinch back the stems to promote bushier growth and prevent the plant from becoming leggy. Harvesting the leaves regularly will also help control the plant’s size and maintain its flavor.
4. Sunlight and Temperature: Mint plants thrive in partial to full sunlight. Ensure they receive at least 4-6 hours of sunlight daily. Mint prefers cool temperatures, ideally between 55-70°F (13-21°C). Protect the plant from extreme heat or cold by providing shade or moving it indoors if necessary.
5. Mulching: Apply a layer of organic mulch around the base of the mint plant to help conserve moisture, suppress weed growth, and regulate soil temperature. Use materials such as straw, leaves, or wood chips, but avoid piling the mulch directly against the plant’s stem to prevent moisture accumulation and potential rotting.
6. Managing Spreading: Mint plants have a tendency to spread aggressively through underground runners. To control their growth and prevent them from taking over your garden, consider planting mint in containers or using physical barriers like plastic edging or buried pots to restrict their expansion.
7. Pest and Disease Control: Keep an eye out for common pests, such as aphids, spider mites, and mint rust. Use insecticidal soap or neem oil to control infestations and remove any infected leaves promptly. Good airflow around the plant and proper hygiene practices, such as cleaning garden tools, can also help prevent disease outbreaks.
By following these care guidelines, your mint plant will remain healthy, productive, and ready to provide you with the fresh, aromatic leaves you desire. Regular attention and a little gardening TLC will ensure that your mint plant thrives and continues to be a flavorful addition to your culinary adventures.
Watering Mint Plants
Proper watering is crucial for the health and vitality of mint plants. Mint requires consistently moist soil, but overwatering can be detrimental. Here are some guidelines to help you water your mint plants effectively:
1. Check the soil moisture: Before watering, check the moisture level of the soil by inserting your finger or a moisture meter about an inch deep. If it feels dry, it’s time to water. Avoid watering when the soil is still damp or soggy.
2. Water deeply: When watering, ensure that the water reaches the roots of the plants. This can be achieved by watering slowly and allowing the water to penetrate the soil deeply. Shallow watering may lead to weak root development.
3. Frequency of watering: Mint plants generally require regular watering, especially during hot and dry periods. Aim to water them about 2-3 times per week, depending on the weather and soil conditions.
4. Use the right watering technique: Avoid wetting the foliage when watering mint plants. Instead, direct the water towards the base of the plants, aiming for the soil. This helps prevent the development of fungal diseases and ensures efficient water uptake by the roots.
5. Avoid overwatering: Mint plants are susceptible to root rot if they sit in excessively wet soil. To prevent overwatering, ensure that the soil drains well and never becomes waterlogged. Let the top inch of soil dry out slightly between waterings.
6. Mulching: Applying a layer of organic mulch around the base of the mint plants can help retain soil moisture. Mulch also helps regulate soil temperature and suppresses weed growth. Use materials like straw, wood chips, or leaves, but avoid piling the mulch directly against the stems to prevent moisture accumulation and potential rot.
7. Container watering: If you’re growing mint in containers, ensure that the pots have drainage holes to allow excess water to escape. Water the plants until the water drains freely from the bottom of the container. Avoid leaving containers sitting in standing water, as it can lead to root rot.
By following these watering guidelines, you can provide the right amount of moisture for your mint plants, promoting healthy growth and preventing issues related to both underwatering and overwatering. Regular monitoring of soil moisture and adjusting watering frequency based on environmental factors will ensure the optimal health and productivity of your mint plants.
Fertilizing Mint Plants
Fertilizing mint plants is important to promote healthy growth and maximize their flavor and fragrance. Mint plants benefit from regular feeding, but it’s essential to provide the right nutrients in appropriate amounts. Here are some tips for effectively fertilizing your mint plants:
1. Choose the right fertilizer: Use a balanced organic fertilizer or compost to provide essential nutrients to the soil. Avoid using chemical fertilizers that may contain high levels of nitrogen, as this can result in excessive leaf growth and diluted flavors.
2. Timing: Apply fertilizer to mint plants in early spring or when new growth appears. Mint plants are rapid growers, so regular fertilization during the growing season is beneficial. Avoid fertilizing in late summer or fall to prevent encouraging new growth that may be damaged by cold weather.
3. Follow instructions: Read and follow the instructions on the fertilizer packaging carefully. Different fertilizers have varied application rates and frequencies. Over-fertilizing can lead to nutrient imbalances and harm the plants, while under-fertilizing may result in nutrient deficiencies.
4. Apply evenly: Spread the fertilizer evenly around the base of the mint plants, keeping it away from the stems. This ensures an even distribution of nutrients and prevents burning the plants’ tender roots.
5. Avoid excess nitrogen: While mint plants require nitrogen for healthy growth, excessive nitrogen can compromise flavor and fragrance. Look for fertilizers with lower nitrogen content and higher phosphorus and potassium levels, which promote better flavor development.
6. Use compost: Incorporate compost into the soil before planting mint, or apply a layer of compost around the base of established plants. Compost enriches the soil with organic matter and provides a slow release of nutrients, benefiting the overall health of the plants.
7. Monitor plant response: Observe your mint plants closely after fertilization. If they show signs of yellowing leaves or stunted growth, it may be a sign of nutrient deficiency or excess. Adjust your fertilization routine accordingly to meet the plants’ needs.
Remember, mint plants are relatively resilient and can tolerate a range of soil conditions, but providing adequate nutrients will enhance their growth and flavor. Regular fertilization, appropriate nutrient ratios, and careful observation will ensure that your mint plants thrive and produce abundant, aromatic leaves for your culinary delights.
Pruning Mint Plants
Pruning mint plants is an essential practice for maintaining their health, vigor, and compact growth. Regular pruning helps to prevent the plants from becoming leggy, encourages bushier growth, and enhances their flavor. Here are some pruning tips to keep your mint plants thriving:
1. Pinch back regularly: Pinching back the stems of mint plants is a simple and effective way to encourage branching and bushier growth. Use your fingers or pruning shears to pinch or cut off the top 1-2 inches of the stems, just above a leaf node where new growth emerges. This stimulates the development of side shoots and helps maintain the plant’s compact shape.
2. Harvest and prune together: When harvesting mint leaves for culinary or medicinal purposes, use the opportunity to prune the plant as well. Remove entire stems or cut them back to a desirable length, taking care not to remove more than ⅓ of the plant at once. This promotes regrowth and ensures a continuous supply of fresh leaves.
3. Control spreading: Mint plants have a tendency to spread rapidly through underground runners. To control their growth and prevent them from overtaking your garden, trim or remove any runners that emerge outside the desired planting area. Regularly check for new shoots appearing nearby and remove them promptly to maintain the plant’s boundaries.
4. Monitor for flowering: Mint plants produce small, tubular flowers that can detract from their overall flavor and aroma. If your goal is to maximize leaf production, promptly remove any flower buds or blossoms as they emerge. This redirects the plant’s energy into foliage growth rather than flowering.
5. Remove damaged or diseased stems: Trim away any discolored, wilted, or diseased stems as soon as you notice them. Removing these damaged portions helps to maintain the plant’s overall health and prevents the spread of diseases.
6. Pruning for overwintering: If you plan to overwinter your mint plants indoors, prune them back to around 2-3 inches above the soil line in late fall or early winter. This reduces the plant’s size, minimizes transplant shock, and encourages vigorous regrowth when spring arrives.
Remember to wash your hands and pruning tools thoroughly after pruning mint plants to prevent the potential spread of diseases. Regular pruning, combined with proper harvesting techniques, not only keeps your mint plants compact and well-behaved but also ensures a bountiful supply of fresh, aromatic leaves for your culinary delights and herbal remedies.
Controlling Pests and Diseases
Mint plants are generally resilient, but like any other plant, they can be susceptible to certain pests and diseases. Being proactive in identifying and addressing common issues is key to keeping your mint plants healthy. Here are some strategies for controlling pests and diseases in your mint garden:
1. Monitor regularly: Regularly inspect your mint plants for signs of pests or diseases. Observe both the upper and lower surfaces of the leaves, stems, and the soil around the plant. Early detection allows for prompt action and prevents the problem from escalating.
2. Manage common pests: Common pests that can affect mint plants include aphids, spider mites, and mint flea beetles. To control these pests, you can use insecticidal soap or neem oil, following the instructions on the product label. Another option is to encourage natural predators like ladybugs or lacewings, which are beneficial for controlling these pests.
3. Mint rust: Mint rust is a fungal disease that leads to orange or yellowish pustules on the leaves. To manage mint rust, promptly remove and destroy infected leaves to prevent the spread of spores. Ensure good airflow around the plants by maintaining proper spacing and avoiding excessive humidity, as this can help prevent the disease from thriving.
4. Prevent mildew: Powdery mildew can affect mint plants, especially in humid environments. To prevent this fungal disease, avoid overhead watering and provide adequate spacing between plants for air circulation. Applying a foliar spray of a diluted solution of baking soda and water may also help to prevent mildew development.
5. Weed control: Weeds can compete with mint plants for nutrients and water, and they can also harbor pests and diseases. Regularly remove weeds from the vicinity of the mint plants to prevent these issues. Applying a layer of mulch around the plants helps to suppress weed growth and retains soil moisture.
6. Practice proper hygiene: Practicing good garden hygiene is crucial for preventing the spread of pests and diseases. Regularly clean and sterilize gardening tools before and after use, especially if you’ve been working with infected plants. This minimizes the risk of transferring pathogens from one plant to another.
7. Rotate planting: If you experience recurring pest or disease issues with your mint plants, consider rotating their planting location. This helps to break the life cycle of pests and reduce the likelihood of diseases building up in the soil.
By being vigilant and taking proactive measures, you can effectively control pests and diseases in your mint garden. Regular monitoring, prompt action, and implementing preventative strategies will help ensure that your mint plants remain healthy and productive throughout the growing season.
Harvesting Mint Leaves
Harvesting mint leaves at the right time ensures the best flavor and aroma for culinary use or herbal remedies. Mint is a fast-growing plant that can be harvested multiple times throughout the growing season. Here are some guidelines for harvesting mint leaves:
1. Wait until the plants are established: It’s best to wait until your mint plants are well-established and have developed a few sets of true leaves before harvesting. This allows them to establish a strong root system and ensures continued growth.
2. Harvest in the morning: Harvest mint leaves in the morning when the essential oils responsible for their flavor and aroma are at their peak. This is when the leaves are most flavorful and fragrant.
3. Choose mature leaves: Select mature leaves for harvesting, which are generally larger and darker in color. These leaves contain a higher concentration of essential oils, resulting in more intense flavors.
4. Use sharp, clean scissors or shears: Use sharp and clean pruners or scissors to harvest mint leaves. This helps to minimize damage to the plant and reduce the risk of introducing diseases or pests.
5. Harvest stems or individual leaves: You have the option to harvest either entire stems or individual leaves. If you’re using the leaves fresh, you can pluck individual leaves by pinching them off near the stem. If you’re planning to dry the leaves, it may be more convenient to harvest entire stems.
6. Avoid stripping all leaves: When harvesting, avoid stripping all the leaves from the plant at once. This can stress the plant and hinder its ability to recover and continue growing. Instead, leave some leaves on the plant to maintain its overall health and productivity.
7. Regular harvesting: Mint plants are fast growers, and the more you harvest, the bushier and more productive they become. Regularly harvest mint leaves every few weeks, removing the top portions of the stems or picking individual leaves as needed.
8. Prune while harvesting: As you harvest mint leaves, take the opportunity to prune the plant by removing any long, leggy, or yellowing stems. This helps to maintain the plant’s compact shape and encourages fresh growth.
9. Store harvested leaves: If you’re not using the mint leaves immediately, store them by placing them in a sealed plastic bag or container. Store them in the refrigerator to help retain their freshness for a few days.
Remember that mint plants are prolific growers, so don’t hesitate to harvest and make use of their abundance of leaves. Regular, gentle harvesting not only provides you with the freshest mint for your recipes but also promotes healthy growth and ensures a continuous supply of aromatic leaves throughout the growing season.
Storing Mint Leaves
Properly storing mint leaves is essential to preserve their freshness and flavor for later use. Mint leaves can be stored for short-term or long-term use, depending on your needs. Here are some methods for storing mint leaves:
1. Refrigeration: For short-term storage, refrigeration is a simple and effective method. Place freshly harvested mint leaves in a breathable plastic bag or wrap them in a slightly damp paper towel. Store them in the refrigerator’s crisper drawer or in a cool area. Properly stored, mint leaves can remain fresh for up to a week.
2. Freezing: Freezing is an excellent way to store mint leaves for an extended period. Follow these steps for freezing mint leaves:
- Wash the mint leaves gently and pat them dry using a clean kitchen towel or paper towels.
- Remove the leaves from the stems, discarding any damaged or discolored ones.
- Spread the mint leaves in a single layer on a parchment-lined baking sheet.
- Place the baking sheet in the freezer and allow the mint leaves to freeze for a couple of hours, or until they become firm.
- Transfer the frozen mint leaves into an airtight container or freezer bag, removing as much air as possible.
- Label the container or bag with the date of freezing.
- Return the mint leaves to the freezer, where they can be stored for up to six months.
3. Drying: Drying mint leaves helps preserve them for long-term storage. Use these steps to dry mint leaves:
- Harvest the mint stems in the morning when the essential oils are most potent.
- Hang the stems upside down in bundles in a cool, well-ventilated area away from direct sunlight.
- Allow the mint stems to air dry for about one to two weeks until the leaves are completely dry and crumble easily.
- Remove the dried leaves from the stems, discarding any discolored or damaged ones.
- Store the dried mint leaves in an airtight container, away from sunlight and moisture.
- Label the container with the date of drying.
- Dried mint leaves can be stored for up to a year.
4. Infused oil or vinegar: Another way to preserve mint leaves is by infusing their flavor into oil or vinegar. Fill a clean glass jar with freshly washed and dried mint leaves, then cover them with oil or vinegar of your choice. Seal the jar tightly and store it in a cool, dark place to allow the flavors to infuse. Strain out the leaves before using the infused oil or vinegar in your recipes.
Properly stored mint leaves retain their aroma, flavor, and visual appeal, allowing you to enjoy their freshness even when they are out of season. Whether you choose refrigeration, freezing, drying, or infusing, selecting the appropriate storage method based on your needs ensures a steady supply of flavorful mint for your culinary creations.