
Choosing the Right Container
When it comes to planting a germinated seed, choosing the right container is crucial for ensuring the healthy growth and development of your plant. The container you select will play a significant role in providing the necessary space, aeration, and drainage for the seedling. Here are a few factors to consider when choosing the right container:
- Size: The size of the container should be appropriate for the type of plant you’re growing. Ensure that it has enough room for the roots to grow and expand.
- Material: Containers are available in various materials such as plastic, ceramic, or clay. Each material has its own advantages and disadvantages. Plastic containers are lightweight and retain moisture well, while clay pots are porous and allow for better airflow.
- Drainage: Proper drainage is essential to prevent waterlogged soil, which can lead to root rot. Look for containers with drainage holes or add them yourself if necessary.
- Stability: Choose a container that is sturdy and stable, especially if you plan to grow larger plants. This will prevent tipping or damage to the plant as it grows.
- Suitability for Indoor or Outdoor Use: Consider whether you’ll be keeping the plant indoors or outdoors. Indoor plants may require containers that are aesthetically pleasing, while outdoor plants may need containers that can withstand weather conditions.
Remember that the container you choose should meet the specific needs of your plant. Take into account the type of soil, water requirements, and eventual size of the plant when making your selection. By choosing the right container, you’re providing a solid foundation for your germinated seed to thrive and flourish.
Preparing the Soil
Preparing the soil is a crucial step in planting a germinated seed. By creating a healthy and nutrient-rich environment for your seedling, you’re setting the stage for successful growth and development. Here are some important steps to follow when preparing the soil:
- Remove any weeds: Before planting, ensure that the area is free of any weeds or unwanted plants. Weeds can compete with your seedling for nutrients and hinder its growth.
- Loosen the soil: Use a garden fork or trowel to loosen the soil. This will improve aeration and allow the roots of your seedling to penetrate easily.
- Amend the soil: Depending on the specific requirements of your plant, you may need to add organic matter or compost to enrich the soil. This will provide essential nutrients and improve soil structure.
- Test the soil pH: Different plants thrive in different soil pH levels. Test the pH of your soil using a soil testing kit and adjust it accordingly. Most plants prefer a slightly acidic to neutral pH range.
- Ensure proper drainage: Proper drainage is essential for the healthy growth of your seedling. If your soil retains too much water, consider incorporating perlite or sand to improve drainage.
Additionally, it’s a good practice to research the specific soil requirements of the plant you’re growing. Some plants prefer sandy soil, while others thrive in loamy or clay soil. Understanding the needs of your plant will help you create an ideal soil environment.
By taking the time to properly prepare the soil, you’re providing your germinated seed with the best chances for growth and success. Remember, healthy soil is the foundation for a healthy plant.
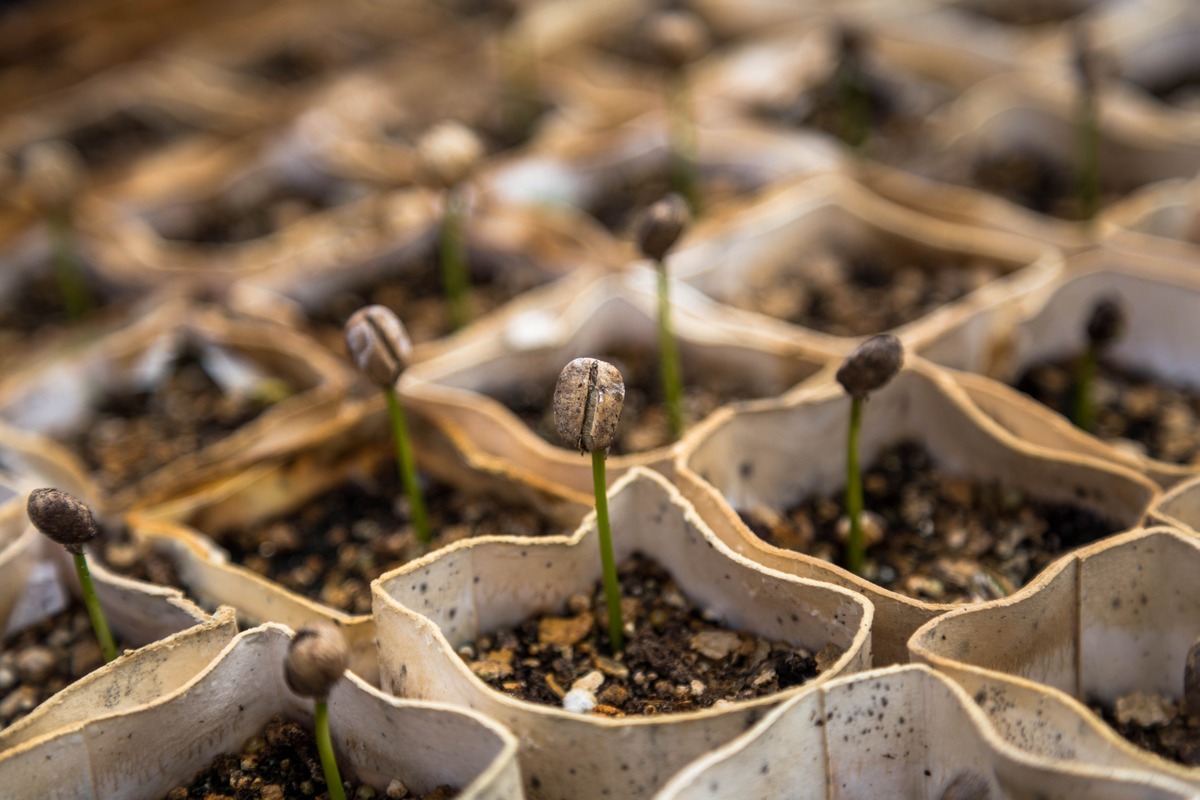
Transferring the Germinated Seed
Transferring the germinated seed to its permanent home is a crucial step in the planting process. This step ensures that the seedling has enough space to grow and establish its roots. Here’s a step-by-step guide on how to transfer the germinated seed:
- Prepare the new container: Select a container that is suitable for your plant’s eventual size and has proper drainage holes. Fill it with fresh potting soil or a well-draining soil mix.
- Handle the seedling with care: Gently remove the germinated seed from its original container or seed tray. Be careful not to damage the delicate roots or stem.
- Dig a hole: Make a hole in the new container that is deep enough to accommodate the seedling’s root system. Use your fingers or a small tool to create the hole.
- Place the seedling: Carefully place the seedling into the hole, ensuring that the roots are spread out and not cramped. The seedling should be at the same depth as it was in its original container.
- Backfill and lightly press: Gently backfill the hole with soil, ensuring that the seedling is well supported. Lightly press the soil around the base of the seedling to secure it in place.
- Water adequately: Give the newly transplanted seedling a thorough watering to help settle the soil around the roots. Ensure that the water reaches the root zone without causing waterlogging.
- Provide proper care: Place the container in a suitable location with adequate sunlight and maintain appropriate watering and temperature conditions for the specific plant.
It’s important to handle the seedling gently during the transfer process to minimize stress and prevent damage. By following these steps, you’re giving your germinated seed the best chance to establish and thrive in its new environment.
Proper Watering
Watering is a crucial aspect of plant care and plays a vital role in the growth and health of your germinated seed. Proper watering ensures that your seedling receives the right amount of moisture to thrive. Here are some key factors to consider for proper watering:
- Watering Frequency: The frequency of watering depends on various factors such as plant type, soil type, and environmental conditions. Generally, it’s best to water when the top inch of soil feels dry. Avoid overwatering, as it can lead to root rot and other issues.
- Watering Technique: When watering your seedling, aim to water at the base of the plant rather than overhead. This helps direct the water to the roots, where it’s needed most. Avoid wetting the leaves excessively, as it can lead to fungal diseases.
- Deep Watering: It’s important to provide deep watering to encourage the development of strong and healthy root systems. Watering deeply allows the roots to reach deeper into the soil in search of water and nutrients. This helps promote overall plant growth.
- Consistency: Consistency is key when it comes to watering. Rather than giving your plant sporadic watering, aim for a consistent watering schedule. This helps prevent stress on the plant and ensures it receives a steady supply of water.
- Monitor the Soil: Regularly check the soil moisture level by inserting your finger into the soil. If it feels moist, hold off on watering. If it feels dry, it’s time to water. Each plant may have specific requirements, so it’s important to understand the specific needs of your seedling.
Remember, it’s better to underwater than to overwater your seedling. Overwatering can lead to waterlogged soil, suffocating the roots and causing rot. By paying attention to your plant’s needs and providing the right amount of water at the right time, you’ll contribute to its overall health and vitality.
Providing Adequate Sunlight
Adequate sunlight is essential for the healthy growth and development of your germinated seed. Sunlight is the primary source of energy for plants, and it plays a crucial role in photosynthesis, the process by which plants convert light into energy. Here’s what you need to know about providing adequate sunlight for your seedling:
- Understanding the Light Requirements: Different plants have varying light requirements. Some plants thrive in full sun, while others prefer partial shade. Research the specific light needs of your plant to ensure you provide the optimal conditions.
- Direct vs. Indirect Sunlight: Direct sunlight refers to sunlight that shines directly on the plant, while indirect sunlight refers to filtered or diffused sunlight. Consider the natural habitat of your plant and replicate the lighting conditions as closely as possible.
- Duration of Sunlight: Most plants require a minimum of 6 hours of sunlight per day for proper growth. Ensure that your seedling receives enough sunlight within this timeframe. If you’re growing plants indoors, consider using grow lights to supplement the natural light.
- Protecting from Intense Sunlight: While sunlight is crucial, intense sunlight can sometimes harm delicate seedlings. If you live in a region with extremely hot or intense sunlight, provide some shade or use shade cloth to protect your seedling during the hottest parts of the day.
- Rotate for Balanced Sun Exposure: To promote even growth, rotate your seedling occasionally so that all sides receive adequate sunlight. This prevents the plant from leaning or growing unevenly towards the light source.
- Monitor for Sunburn: Keep an eye out for signs of sunburn, such as discolored or brown leaves. If your seedling shows signs of sunburn, move it to a location with less intense sunlight or provide some shade until it recovers.
Providing adequate sunlight is crucial for the overall health of your seedling. Proper light exposure promotes strong stems, vibrant foliage, and robust growth. By understanding and meeting the specific sunlight requirements of your plant, you’ll ensure its successful journey from a germinated seed to a thriving plant.
Maintaining the Ideal Temperature
Maintaining the ideal temperature is essential for the successful growth of your germinated seed. Each plant has different temperature requirements, and providing the right conditions will promote healthy development. Here are some key points to consider when it comes to maintaining the ideal temperature:
- Research Optimal Temperature Range: Different plants have specific temperature preferences. Research the optimal temperature range for your particular seedling and aim to provide conditions within that range.
- Daytime and Nighttime Temperatures: Some plants require a temperature differential between daytime and nighttime to stimulate growth. Pay attention to both daytime and nighttime temperatures and adjust as needed.
- Avoid Extreme Temperatures: Extreme temperatures can be detrimental to your seedling. High temperatures can cause wilting, scorching, and even death, while low temperatures can slow growth and damage delicate tissues. Protect your seedling from extreme temperatures by providing shade or insulation when necessary.
- Monitor Indoor Temperatures: Temperature fluctuations indoors can occur due to heating or air conditioning systems. Avoid placing your seedling near drafts or vents that can create temperature imbalances. Monitor room temperatures to ensure they remain within the preferred range for your plant.
- Seasonal Adjustments: As the seasons change, the temperature and daylight hours fluctuate. Adjust the location of your seedling or provide additional heating or cooling measures to accommodate these changes and maintain the ideal temperature.
- Consider Microclimates: Different areas within your garden or indoor space may have slightly different microclimates. Identify spots that may naturally provide warmer or cooler temperatures and position your seedling accordingly.
Maintaining the ideal temperature is crucial for the health and growth of your seedling. By understanding your plant’s temperature requirements and providing a suitable environment, you’ll give your germinated seed the best chance to thrive and flourish.
Regularly Monitoring Growth
Regularly monitoring the growth of your germinated seed is crucial for ensuring its health and making any necessary adjustments along the way. By observing and tracking the progress of your seedling, you can identify potential issues early on and take appropriate actions. Here are some key points to consider when it comes to monitoring the growth of your seedling:
- Observing Leaf Growth: Pay attention to the growth of leaves, their color, and overall appearance. Healthy leaves should be vibrant and show steady growth. Discoloration, wilting, or stunted growth can indicate nutrient deficiencies or improper care.
- Checking Root Development: While it’s not easy to observe the root system directly, you can carefully lift the seedling to check the root growth. Look for healthy, white roots that are spreading and filling the container. Avoid disturbing the roots too much to prevent damage.
- Monitoring Stem Strength: Assess the stem’s strength and stability. A strong stem supports the seedling and allows for proper growth. Weak, floppy stems may indicate a lack of light or insufficient support.
- Tracking Height and Size: Measure the height and overall size of your seedling on a regular basis. This will help you track its progress and ensure that it’s growing at a healthy rate. Keep in mind that different plants have different growth rates.
- Assessing Pest and Disease Issues: Regularly inspect your seedling for any signs of pests or diseases. Look for unusual spots, holes in leaves, or presence of pests. Early detection can prevent further damage and allow for prompt treatment.
- Noting Environmental Changes: Take note of any changes in the environment that may affect your seedling’s growth. This includes temperature fluctuations, changes in light exposure, and variations in humidity. Adjust care accordingly to accommodate these changes.
- Keeping Records: Maintain a growth journal or record to track important observations, measurements, and actions taken. This documentation can be valuable in identifying patterns or referring back to specific care techniques.
Regularly monitoring the growth of your germinated seed is an essential part of successful plant care. By staying vigilant and proactive, you can address any issues promptly and provide the necessary care for your seedling to thrive.
Fertilizing the Seedling
Fertilizing is an important aspect of plant care, providing essential nutrients for the growth and development of your seedling. While germinated seeds often have enough nutrients to start, fertilization becomes necessary as the plant matures. Here are some key points to consider when fertilizing your seedling:
- Choose the Right Fertilizer: Select a fertilizer that is suited for the specific needs of your plant. Different plants require different nutrient ratios, so be sure to read the label and choose a fertilizer that matches your seedling’s requirements.
- Timing of Fertilization: Start fertilizing your seedling after it has developed a few true leaves. This is usually a few weeks after germination. Avoid fertilizing too soon, as it can burn the delicate roots.
- Follow Application Instructions: Read and follow the instructions on the fertilizer package carefully. The instructions will provide guidance on the frequency and amount of fertilizer to apply based on the type of plant and its growth stage.
- Apply Fertilizer Diluted: Dilute the fertilizer in water according to the package instructions. Avoid applying concentrated fertilizer directly to the seedling, as it can cause damage. Instead, water the seedling with the diluted fertilizer solution.
- Consider Organic Alternatives: If you prefer organic gardening, consider using organic fertilizers such as compost, worm castings, or natural plant-based fertilizers. These options provide nutrients in a more sustainable and environmentally friendly way.
- Monitor Nutrient Deficiencies: Keep an eye out for signs of nutrient deficiencies in your seedling, such as yellowing leaves or stunted growth. Adjust your fertilization routine accordingly to address any nutrient imbalances.
- Avoid Overfertilization: Overfertilization can be harmful to your seedling. Too much fertilizer can cause burns, nutrient imbalances, and even death. Stick to the recommended dosage and frequency to prevent overfertilization.
- Regularly Water: Fertilizers are most effective when applied to moist soil. Water your seedling thoroughly before applying fertilizer to ensure proper distribution and absorption of nutrients.
Remember, fertilizing your seedling is a supplement to proper soil, water, and light care. It’s important to strike a balance and provide the appropriate nutrients to support healthy growth without overloading the plant. By fertilizing your seedling at the right time and with the right type of fertilizer, you’ll help create optimal conditions for its vibrant and robust growth.
Pruning and Supporting the Plant
Pruning and supporting your plant are important steps in promoting healthy growth and maintaining its overall structure. Pruning helps remove dead or damaged parts, encourages better air circulation, and shapes the plant. Supporting the plant prevents it from falling over due to its weight or external factors. Here are some key points to consider when pruning and supporting your plant:
- Remove Dead or Damaged Parts: Regularly inspect your plant for any dead or damaged leaves, stems, or branches. Use clean pruning shears to carefully remove these parts. This helps redirect energy to healthier areas and prevents the spread of diseases.
- Encourage Air Circulation: Dense foliage can obstruct proper airflow, leading to increased humidity and potential disease problems. Prune overcrowded areas to improve air circulation within the plant. This will help prevent fungal infections and promote overall plant health.
- Shape and Control Growth: Pruning can help shape your plant and control its growth. Trim back unruly branches to maintain a desired size and shape. This is particularly important for plants that tend to become leggy or bushy.
- Support Heavy Branches: If your plant has branches that are weighed down by foliage or fruit, use stakes, trellises, or plant ties to provide support. This helps prevent breakage and maintains an upright and balanced appearance.
- Timing of Pruning: Prune your plant during its dormant or low-growth period, usually in late winter or early spring. Avoid pruning during stressful periods such as extreme heat or cold. However, always remove dead or diseased parts promptly, regardless of the season.
- Prune with Clean Tools: Use sharp and clean pruning tools to make precise cuts. This reduces the risk of introducing infections or damaging healthy parts of the plant. Disinfect your tools with rubbing alcohol or a bleach solution between cuts to prevent the spread of diseases.
- Observe Branch Collar: When making pruning cuts, aim to retain the branch collar – the swollen area where the branch meets the main stem. Cutting too close or leaving a stub can hinder proper healing and increase the risk of disease or pest infestation.
- Monitor and Adjust Supports: Regularly check the supports of your plant to ensure they are providing adequate support. Adjust the ties or stakes as the plant grows to accommodate its increasing weight and size.
Pruning and supporting your plant are key practices in maintaining its overall health and appearance. By following proper pruning techniques and providing necessary support, you’ll help your plant grow in a balanced and aesthetically pleasing manner while minimizing the risk of damage or disease.
Troubleshooting Common Issues
While caring for your germinated seed, you may encounter common issues that can affect its health and growth. Being able to identify and address these problems promptly will help ensure the success of your plant. Here are some common issues you may encounter and how to troubleshoot them:
- Yellowing Leaves: Yellowing leaves can indicate nutrient deficiencies, overwatering, or insufficient sunlight. Adjust your watering and fertilizing routines and ensure your seedling is receiving adequate light.
- Wilting: Wilting is often a sign of underwatering or root damage. Check the moisture level of the soil and adjust your watering accordingly. If the roots are damaged, consider transplanting to a new container with fresh soil.
- Pest Infestations: Common pests like aphids, mealybugs, or spider mites can attack your seedling. Identify the problematic pest and take appropriate measures, such as using organic insecticides or introducing beneficial insects to control the infestation.
- Fungal Diseases: Fungal diseases like powdery mildew or root rot can affect your seedling. Increase airflow, avoid overwatering, and apply appropriate fungicides to control and prevent these diseases.
- Leggy Growth: Leggy growth occurs when a plant stretches towards a light source, resulting in weak and elongated stems. Provide sufficient light by adjusting the position or using supplementary grow lights to encourage compact and sturdy growth.
- Stunted Growth: Stunted growth can be caused by various factors, including nutrient deficiencies, compacted soil, or improper watering. Ensure your seedling is receiving adequate nutrients, the soil is well-draining, and the watering routine is appropriate.
- Leaf Curling or Discoloration: Leaf curling or discoloration can be a sign of environmental stress, such as high temperatures, low humidity, or exposure to chemicals. Adjust the growing conditions to mitigate these effects and create a more favorable environment for your seedling.
- Root Bound: If you notice crowded or circling roots at the bottom of the container, your seedling may be root bound. Transplant it to a larger container with fresh soil, ensuring that the roots have enough room to grow and expand.
Regular observation and proactive measures are essential in troubleshooting common issues with your seedling. By promptly addressing these problems, you can help your plant recover and continue its healthy growth.