
Choosing an Avocado Seed
When it comes to growing an avocado plant, the first step is to choose a healthy avocado seed. Not all avocado seeds are suitable for planting, so it’s essential to pick the right one. Here are some tips to help you select the perfect avocado seed:
- Look for a ripe avocado: Choose an avocado that is fully ripe but not overripe. The skin should be dark green or black and give slightly when gently squeezed.
- Inspect for blemishes or mold: Check the surface of the avocado seed for any visible blemishes or signs of mold. A seed with smooth, undamaged skin is ideal.
- Consider the size: While size doesn’t affect the viability of the seed, a larger seed may have a higher chance of germination and produce a more robust plant.
- Opt for a fresh seed: The freshness of an avocado seed plays a vital role in successful germination. Choose a seed that has been recently removed from the fruit rather than one that has been sitting around for too long.
- Choose organic if possible: If available, select an organic avocado to minimize the risk of exposure to pesticides or chemicals that could affect the seed’s growth.
Remember, choosing a healthy avocado seed is the foundation for a successful plant. By carefully selecting a ripe, undamaged, fresh seed, you increase your chances of growing a thriving avocado plant.
Preparing the Avocado Seed for Planting
Once you have selected a suitable avocado seed, the next step is to prepare it for planting. Properly preparing the seed will create favorable conditions for successful germination. Here’s how to prepare an avocado seed for planting:
- Remove the seed from the avocado: Carefully cut open the ripe avocado and remove the seed. Rinse off any excess avocado flesh from the seed using lukewarm water.
- Determine the top and bottom of the seed: Avocado seeds have a pointed top (where the sprout will emerge) and a rounded bottom. Identify which end is which, as this will impact the seed’s orientation during planting.
- Peel off the brown skin: Gently peel away the brown skin covering the avocado seed. Be careful not to damage the seed in the process. Removing the skin encourages better water absorption and allows the seed to germinate more efficiently.
- Choose a germination method: There are two common methods for germinating avocado seeds: the water germination method and the toothpick germination method. Decide which method you prefer and proceed accordingly.
Preparing the avocado seed is a crucial step that sets the stage for successful germination. By removing the skin and properly identifying the top and bottom ends of the seed, you provide optimal conditions for the seed to sprout and grow into a healthy avocado plant. Remember to choose a germination method that aligns with your preferences and follow the instructions carefully to ensure the best results.
Water Germination Method
The water germination method is one popular way to germinate avocado seeds. It involves submerging the seed in water to encourage root growth before planting. Here’s how to use the water germination method for your avocado seed:
- Fill a glass or jar with water: Use a clear glass or jar and fill it with enough water to submerge about half of the avocado seed. Make sure the water is lukewarm, as extreme temperatures can inhibit germination.
- Insert toothpicks into the seed: Take four toothpicks and insert them into the middle section of the avocado seed. The toothpicks will help suspend the seed in the water, so only the bottom half is submerged.
- Place the seed in the water: Gently lower the avocado seed into the glass or jar, ensuring that the bottom half is in the water while the top half remains above the surface.
- Find a bright location: Place the glass or jar in a warm spot with plenty of indirect sunlight. Avocado seeds need light for germination, but direct sunlight can be too intense and harm the seed.
- Change the water regularly: Every few days, empty and refill the glass or jar with fresh lukewarm water. This prevents the water from becoming stagnant and promotes better nutrient absorption.
- Patience is key: Germination can take anywhere from two to eight weeks, so be patient and wait for the root to emerge from the bottom of the seed. Once the root is about two inches long, the seed is ready for planting.
The water germination method provides a visual and exciting way to observe the root development of your avocado seed. It allows you to monitor the progress and ensure that the seed is ready for planting. Remember to keep the water fresh and provide adequate light to support healthy growth. Soon, you’ll be ready to transfer the germinated seed into a potting mix and continue the journey of growing your avocado plant.
Toothpick Germination Method
The toothpick germination method is another popular technique for germinating avocado seeds. This method involves suspending the seed in a way that allows the bottom to touch water while keeping the top portion exposed to air. Follow these steps to successfully germinate your avocado seed using the toothpick method:
- Prepare the necessary materials: Gather an avocado seed, four toothpicks, and a glass or jar filled with water. Ensure that the water is lukewarm and at a level that will allow the bottom of the seed to be submerged.
- Locate the broadest end of the seed: Determine which end of the avocado seed is broader, as this will be the bottom. The narrower end will be the top, where the sprout will emerge.
- Insert the toothpicks: Take the four toothpicks and gently insert them into the seed, evenly spaced around the middle section. The toothpicks will act as anchors, allowing the bottom half of the seed to rest in the water without submerging the top half.
- Suspend the seed in the glass or jar: Carefully position the toothpick-embedded avocado seed on the rim of the glass or jar, making sure that the bottom part touches the water while the top remains exposed to air. The toothpicks will keep the seed in place.
- Place it in a suitable location: Find a warm spot with indirect sunlight for the glass or jar. Avoid direct sunlight, as it can be too intense for the seed. Ensure the room temperature is consistent for optimal germination.
- Maintain the water level: Check the water level regularly and ensure that the bottom portion of the avocado seed is always submerged. Add water as needed to maintain the correct level.
- Be patient and monitor progress: Germination can take several weeks, so be patient in waiting for the root to sprout. Once the root emerges and reaches about two inches in length, the seed is ready for planting.
The toothpick germination method is a simple yet effective way to start the germination process for your avocado seed. By carefully suspending the seed in water with the toothpicks, you create an environment that encourages root growth while keeping the top portion exposed to air. Remember to monitor the water level and provide consistent warmth and indirect sunlight. Soon, you’ll witness the sprouting of the root and be ready to transfer the seed into a potting mix for continued growth.
Potting the Germinated Seed
Once your avocado seed has successfully germinated using either the water or toothpick method, it is time to transfer it into a potting mix. Potting the germinated seed is a crucial step in providing the proper growing conditions and nurturing the young avocado plant. Follow these steps to pot the germinated seed:
- Choose a suitable pot: Select a pot that is at least 10 inches in diameter and has drainage holes at the bottom. This ensures proper drainage and prevents waterlogged soil, which can lead to root rot.
- Prepare the potting mix: Use a well-draining potting mix specifically formulated for indoor or container plants. Avoid heavy soils that might retain too much moisture.
- Add the potting mix to the pot: Fill the pot about two-thirds full with the potting mix. Gently tamp it down to remove any air pockets and create a level surface for planting.
- Carefully transfer the seed: Take the germinated avocado seed, making sure to hold it by the leafy sprout rather than the delicate root. Place the root into the potting mix, ensuring that the sprout is above the soil surface.
- Backfill the soil: Gently fill the pot with more potting mix, carefully covering the root and ensuring it is securely anchored. Leave the stem and leaves exposed above the soil.
- Water the soil: Give the newly potted avocado plant a thorough watering, allowing the water to saturate the soil. This helps settle the soil and provides initial moisture for the young plant.
- Place in a suitable location: Choose a location that offers bright, indirect sunlight for your avocado plant. Avoid extreme temperature fluctuations and drafty areas.
- Monitor growth and adjust care as needed: Keep an eye on the plant’s growth and adjust watering and fertilization accordingly. Providing the right amount of water and nutrients is crucial for healthy development.
Potting the germinated avocado seed is a critical step in the journey of growing your avocado plant. By choosing the right potting mix, ensuring proper drainage, and carefully transferring the seed into the pot, you provide the foundation for successful growth. Monitor the plant’s progress and adjust care as needed to support its development. Soon, you’ll have a thriving avocado plant ready to flourish and eventually bear delicious fruits.
Choosing the Right Potting Mix
When it comes to potting your germinated avocado seed, selecting the right potting mix is essential for providing the ideal growing conditions. The right mix will ensure proper drainage, aeration, and nutrient availability for the young plant. Here are some factors to consider when choosing the right potting mix for your avocado plant:
- Well-draining properties: Avocado plants prefer well-draining soil that allows excess water to flow away. Look for potting mixes specifically labeled as “well-draining” or those designed for succulents and cacti. These mixes typically contain materials like perlite, vermiculite, or coarse sand.
- Water retention capacity: While good drainage is crucial, the potting mix should also have sufficient water retention capacity to prevent the soil from drying out too quickly. Look for mixes that contain substances with water-holding capabilities, such as peat moss or coconut coir.
- Nutrient content: Avocado plants require nutrient-rich soil to support their growth. Opt for a potting mix that contains organic matter, such as compost or well-rotted manure. These amendments provide essential nutrients and promote healthy root development.
- pH balance: Avocado plants thrive in slightly acidic to neutral soil with a pH range of 6 to 7. Ensure the potting mix you choose has the appropriate pH level or can be easily adjusted to meet the needs of the plant.
- Fungal disease prevention: Avocado plants are susceptible to certain fungal diseases, such as root rot. Look for potting mixes that include ingredients like beneficial fungi or disease-preventing additives to help protect against such issues.
- Organic vs. synthetic: Consider whether you prefer an organic or synthetic potting mix. Organic mixes are derived from natural materials and are generally considered more environmentally friendly. Synthetic mixes are often formulated with precise nutrient ratios but may contain synthetic additives.
By carefully choosing the right potting mix, you provide your avocado plant with a suitable growing environment. A well-draining mix that retains water, contains essential nutrients, and has a balanced pH will support the plant’s root development and overall growth. Remember to water your avocado plant appropriately after potting and monitor its health to ensure it thrives in its new growing medium.
Planting the Germinated Seed
After successfully germinating your avocado seed and potting it, the next step is to plant the germinated seed in the potting mix. Proper planting ensures that the roots establish themselves in the soil and initiate healthy growth. Follow these steps to plant your germinated avocado seed:
- Prepare the pot: Ensure that the pot has drainage holes at the bottom to prevent waterlogging. Fill the pot with well-draining potting mix, leaving enough space to accommodate the root of the germinated seed.
- Create a hole: Use your finger or a small spoon to create a shallow hole in the center of the potting mix. The hole should be deep enough to hold the root system of the germinated seed.
- Place the seed in the hole: Carefully place the germinated avocado seed into the hole, making sure that the roots rest comfortably in the soil. Gently cover the roots with the surrounding potting mix, leaving the sprout above the soil’s surface.
- Lightly press the soil: Use your fingers to lightly press the soil around the base of the seed, ensuring it is snugly in place. This helps provide stability and fosters good contact between the soil and the roots.
- Water the soil: Give the newly planted avocado seed a thorough watering, allowing the water to penetrate the soil and hydrate the root system. Be careful not to overwater, as this can lead to root rot.
- Place in a suitable location: Find a spot for your potted avocado plant where it can receive bright, indirect sunlight. Avoid exposure to extreme temperatures or drafts that can stress the young plant.
- Maintain proper care: Monitor the moisture level of the soil and water when the top inch feels dry. Overwatering can lead to root damage, while underwatering can cause the plant to wilt. Additionally, adjust the plant’s positioning to ensure balanced growth.
- Be patient and provide care: The germinated seed will gradually establish roots and continue to grow into a young avocado plant. Be patient and provide proper care, including regular watering, adequate sunlight, and occasional fertilization.
By following these steps, you ensure that the germinated avocado seed is planted correctly and has the necessary conditions for successful growth. Proper planting and care will help establish a strong root system and promote healthy development. Remember to provide consistent care and monitor the plant’s progress as it grows into a beautiful avocado plant.
Providing the Ideal Growing Conditions
To ensure the healthy development of your avocado plant, it is crucial to provide the ideal growing conditions. Avocado plants need the right combination of light, temperature, humidity, and air circulation to thrive. Here are some guidelines for creating optimal conditions for your avocado plant:
- Light requirements: Avocado plants require bright, indirect sunlight for at least 8 to 10 hours each day. Place your plant near a south or west-facing window, but make sure to protect it from intense, direct sunlight, as this can scorch the leaves.
- Temperature range: Avocado plants thrive in temperatures between 60 to 85°F (15 to 29°C). Avoid exposing the plant to extreme temperature fluctuations, drafts, or cold drafts from air conditioning or heating vents.
- Humidity levels: Avocado plants prefer moderate to high humidity levels. Increase humidity by misting the leaves with water, placing a tray of water near the plant, or using a humidifier. Avoid placing the plant near sources of dry air, such as heaters or air conditioners.
- Air circulation: Adequate air circulation is crucial to prevent stagnant air and fungal diseases. Place your avocado plant in a well-ventilated area or use a fan to ensure constant airflow without causing direct drafts on the plant.
- Proper drainage: Ensure that your pot has drainage holes and use a well-draining potting mix to prevent waterlogging. Excess moisture can lead to root rot and other water-related issues.
- Stable location: Avoid moving your avocado plant frequently. Once you find the ideal spot with suitable conditions, let the plant settle and acclimate. Sudden changes in location can cause stress and affect overall plant health.
- Pest control: Keep an eye out for common pests like aphids or spider mites. Regularly inspect your plant for any signs of infestation, and if necessary, use organic pest control methods to prevent damage and maintain plant health.
- Regular fertilization: Avocado plants benefit from regular fertilization with a balanced, water-soluble fertilizer. Follow the instructions provided by the manufacturer and feed your plant every 6-8 weeks during the growing season.
By providing the ideal growing conditions, you create a favorable environment for your avocado plant to thrive. The right balance of light, temperature, humidity, air circulation, and proper care will promote healthy growth and increase the chances of your avocado plant reaching its full potential. Monitor your plant regularly and make adjustments as needed to ensure optimal conditions and a vibrant, flourishing avocado plant.
Watering and Fertilizing the Avocado Plant
Proper watering and fertilizing are essential for the healthy growth and development of your avocado plant. Providing the right amount of water and nutrients will ensure that your plant receives the necessary resources to thrive. Here are some guidelines for watering and fertilizing your avocado plant:
- Watering guidelines: Avocado plants prefer consistently moist soil, but they are also susceptible to root rot if overwatered. Allow the top inch of the soil to dry out slightly before watering. Check the moisture level by inserting your finger into the soil. If it feels dry, it’s time to water.
- Watering techniques: Water your avocado plant deeply, ensuring that water reaches the root zone. Avoid frequent shallow watering, as it encourages shallow root growth. Use a watering can or hose with a gentle flow to prevent soil erosion and damage to the plant roots.
- Drainage considerations: Proper drainage is crucial for avocado plants. Make sure your pot has drainage holes to allow excess water to escape. Avoid letting your plant sit in standing water, as it can lead to root rot. Discard any excess water that collects in the saucer or tray beneath the pot after watering.
- Fertilizer requirements: Avocado plants benefit from regular fertilization to provide essential nutrients for healthy growth. Choose a balanced, water-soluble fertilizer specifically formulated for houseplants. Follow the instructions on the fertilizer package for recommended dilution ratios and frequency of application.
- Timing and frequency: Start fertilizing your avocado plant when it is about six months old or has several sets of true leaves. Apply fertilizer every 6-8 weeks during the growing season (spring and summer). Reduce or stop fertilization during the dormant season (fall and winter).
- Applying the fertilizer: Dilute the fertilizer as instructed on the package and apply it to the soil around the plant, avoiding direct contact with the leaves. Water the plant thoroughly after fertilizing to help distribute the nutrients evenly into the root zone.
- Observing plant response: Monitor your avocado plant for signs of nutrient deficiency or excess. If leaves turn yellow or show other signs of nutritional imbalances, adjust your fertilization routine accordingly. Remember not to over-fertilize, as it can burn the roots and negatively impact plant health.
- Organic alternatives: If you prefer organic options, consider using compost or well-rotted manure as natural fertilizers. These organic amendments can provide valuable nutrients and improve soil health. Apply them to the soil surface and gently work them into the top layer of the soil.
By following these watering and fertilizing guidelines, you provide your avocado plant with the necessary moisture and nutrients it needs to thrive. Remember to strike a balance between keeping the soil moist and avoiding overwatering, as well as feeding your plant regularly but not excessively. With proper watering and fertilizing, your avocado plant will grow vigorously, produce healthy foliage, and potentially yield delicious avocados in the future.
Pruning the Avocado Plant
Pruning is an essential practice for maintaining the health, shape, and productivity of your avocado plant. Regular pruning helps to control its size, promote better air circulation, remove dead or diseased branches, and stimulate new growth. Here are some guidelines for pruning your avocado plant:
- Timing: Avocado plants are best pruned during the late winter or early spring, before the new growth emerges. This timing allows the plant to recover from pruning and encourages healthy development during the growing season.
- Tools needed: Use clean, sharp pruning shears or loppers to make precise cuts. Clean the blades with rubbing alcohol before and after pruning to prevent the spread of diseases.
- Remove dead or damaged branches: Start by identifying and removing any dead, diseased, or broken branches. Cut them back to healthy tissue, making clean cuts just above a lateral branch or bud.
- Control size and shape: If your avocado plant is becoming too large or spreading unevenly, prune back the branches to maintain a desired shape and size. Focus on cutting back the longest branches to promote a more compact and manageable plant.
- Encourage bushier growth: To encourage lateral branching and a fuller appearance, prune the tips of the branches. Trim back the new growth by a few inches to stimulate the growth of new side shoots.
- Thin out crowded branches: If your avocado plant has dense foliage, selectively thin out branches to improve airflow and light penetration. Cut back overcrowded or crossing branches to open up the canopy and reduce the risk of disease.
- Prune during dormancy: During the dormant season, you can perform more extensive pruning to shape the overall structure of the plant. Remove any unwanted or inward-growing branches to maintain an open and well-spaced canopy.
- Monitor regrowth and adjust as needed: After pruning, monitor the regrowth of your avocado plant. If certain branches become too dominant or crowded, remove them to maintain a balanced framework. Regularly trim back new growth to encourage bushier and more productive branching.
Remember, pruning should be done with care and precision to avoid unnecessary stress or damage to your avocado plant. Always make clean cuts just above a lateral branch or bud, and avoid removing more than one-third of the total foliage at one time. With proper pruning, you can promote a healthy and attractive avocado plant that thrives and potentially provides you with a bountiful harvest of delicious avocados.
Troubleshooting Common Avocado Plant Problems
While avocado plants are generally resilient, they can encounter some common problems that may affect their growth and overall health. Being able to identify and address these issues promptly is key to maintaining a thriving avocado plant. Here are some common problems you may encounter with your avocado plant and how to troubleshoot them:
- Yellowing leaves: Yellowing leaves can be a sign of overwatering, underwatering, nutrient deficiencies, or poor soil drainage. Adjust your watering routine, ensuring proper drainage, and consider fertilizing with a balanced fertilizer to address nutrient deficiencies.
- Brown leaf tips: Brown leaf tips often indicate underwatering or a lack of humidity. Increase your watering frequency and consider misting the leaves or using a humidifier to boost humidity levels around the plant.
- Leaf drop: Leaf drop can be caused by sudden changes in temperature, drafts, overwatering, or nutrient imbalances. Ensure stable temperatures, avoid drafts, adjust watering as needed, and provide balanced fertilization to address nutrient deficiencies.
- Pests: Common pests that may affect avocado plants include aphids, spider mites, and scale insects. Keep an eye out for signs of infestation, such as distorted leaves, yellowing, or the presence of insects. Use organic pest control methods, such as insecticidal soap or neem oil, to treat affected plants.
- Root rot: Root rot occurs due to overwatering or poorly drained soil, leading to fungal infections. To prevent root rot, ensure proper soil drainage, use well-draining potting mix, avoid overwatering, and maintain good airflow around the plant’s root zone.
- Fungal diseases: Avocado plants are susceptible to fungal diseases such as anthracnose or powdery mildew. Ensure adequate air circulation, avoid overhead watering, and provide proper spacing between plants to reduce humidity levels and prevent the spread of fungal infections.
- Sunburn: Avocado leaves and young branches are sensitive to intense sunlight. Direct exposure to strong sunlight can cause sunburn, resulting in discolored or withered foliage. Protect your avocado plant from intense sunlight by providing shade or moving it to a more suitable location.
Regularly inspecting your avocado plant for any signs of problems and addressing them promptly is essential for maintaining its health and vitality. Remember to correct watering practices, provide balanced fertilization, monitor pest populations, ensure proper drainage, maintain humidity levels, and protect your plant from extreme weather conditions. By troubleshooting and addressing issues early on, you can help your avocado plant thrive and reach its full potential.
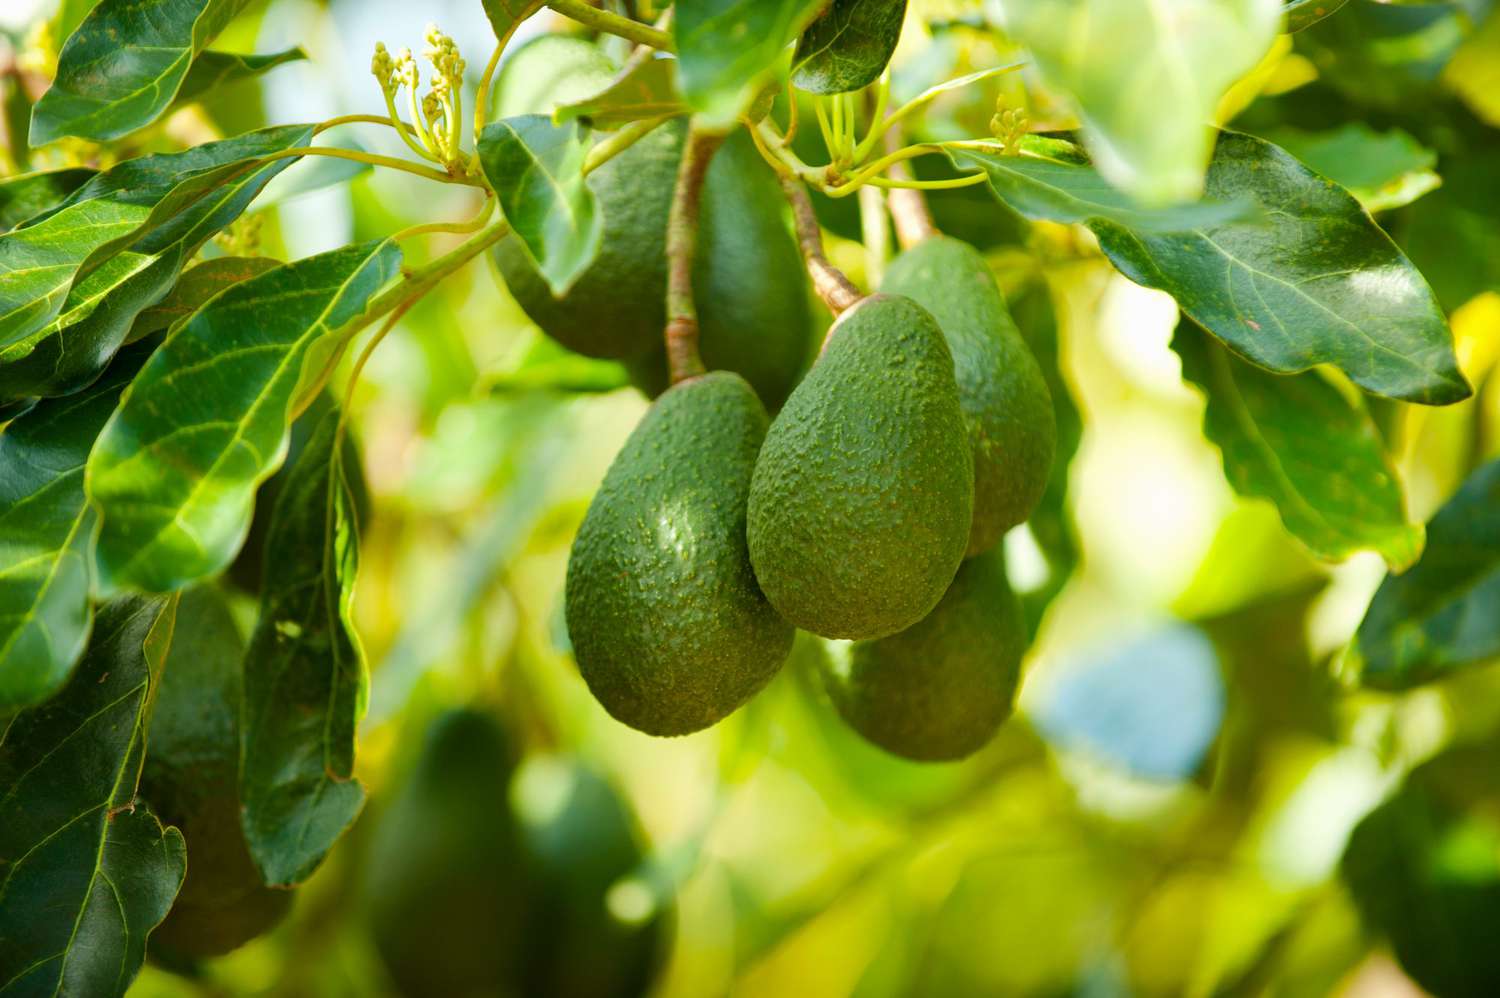
Harvesting Avocado Fruits
After patiently nurturing your avocado plant, the time will eventually come to harvest its delicious fruits. Harvesting avocados at the right stage of maturity ensures optimal flavor and texture. Here are some guidelines to help you know when and how to harvest your avocado fruits:
- Observe color change: Most avocado varieties change color as they ripen. The skins will transition from dark green to a lighter shade of green, purple, or brown, depending on the variety. This color change is an indication that the fruit is reaching maturity.
- Check firmness: Gently apply pressure to the avocado. Ripe avocados yield to gentle pressure while still feeling slightly firm. Avoid squeezing too firmly, as this can bruise the fruit. If the avocado feels mushy or very soft, it may be overripe.
- Look for size and weight: Depending on the avocado variety, a mature fruit will usually have a size and weight appropriate for its type. Familiarize yourself with the expected size and weight of the specific variety you are growing as a guide for determining maturity.
- Consider the stem: To check for readiness, remove a small portion of the stem cap. If the area beneath the stem is green, the avocado is likely not yet mature. If it is yellow or brown, the fruit is likely mature and ready for harvesting.
- Harvesting technique: To harvest the avocados, gently cup them in your hand and twist with a gentle rotational motion. Ripe fruits should detach easily from the tree. If they require excessive force to detach, they may not be mature enough for harvest.
- Timing is key: It is crucial to harvest avocados at the right time. If left on the tree for too long, they may become overripe or susceptible to pest and disease damage. Conversely, if harvested too early, they may not reach their full flavor potential.
- Post-harvest ripening: If your avocados are slightly underripe when harvested, you can ripen them off the tree. Place them in a brown paper bag with a ripe banana or apple, and store at room temperature. The ethylene gas emitted by the fruits will speed up the ripening process.
- Storage and consumption: Once fully ripe, avocados can be stored in the refrigerator for a few days to extend their shelf life. When ready to consume, cut open the avocado, remove the pit, and enjoy the creamy flesh in various culinary creations such as salads, sandwiches, guacamole, or simply spread on toast.
Harvesting avocados at their peak ripeness ensures the best quality and flavor. By observing the color change, checking firmness, considering size and weight, and assessing the stem cap, you can determine when your avocados are ready for harvest. Remember to handle them with care during harvest, and if necessary, ripen them off the tree before enjoying the delicious fruits of your labor!