
Choosing the Right Fabric
When it comes to making a lamp shade cover, choosing the right fabric is crucial. The fabric you select will not only affect the overall look of the lamp shade, but also its functionality. Here are some important factors to consider when choosing the fabric:
- Light transmission: Consider the amount of light you want the lamp shade to diffuse. If you prefer a soft, subtle glow, opt for a fabric with a higher opacity. On the other hand, if you desire a brighter, more vibrant light, choose a fabric with a lower opacity.
- Texture: Determine the texture you want to achieve. Fabrics with a rough texture can create an interesting visual effect when the light shines through, while smooth and shiny fabrics can add a touch of elegance and sophistication.
- Color and pattern: Think about the existing decor and color scheme in the room where the lamp will be placed. Select a fabric that complements or contrasts with the surroundings. Consider patterns that will add visual interest and make a statement.
- Durability: Lamp shades are exposed to daily wear and tear, so it’s important to choose a fabric that is sturdy and long-lasting. Fabrics made from natural fibers like cotton or linen tend to be more durable, whereas synthetic fabrics like polyester may offer greater resistance to fading and stains.
- Care and maintenance: Consider the ease of cleaning and care for the fabric. Some fabrics may require special cleaning methods, while others can be easily cleaned with a damp cloth or vacuumed.
By considering these factors, you can choose a fabric that not only suits your aesthetic preferences but also fulfills your practical needs. Remember to take into account the overall design and purpose of the lamp, as well as your own personal style when making your fabric selection.
Measuring the Lamp Shade
Before you start cutting and preparing the fabric for your lamp shade cover, it’s essential to take accurate measurements. Here’s a step-by-step guide on how to measure your lamp shade:
- Remove the old lamp shade: If you’re replacing an existing lamp shade cover, carefully remove it from the lamp frame to expose the bare frame.
- Measure the top and bottom diameters: Use a measuring tape to determine the width of the top and bottom rings of the lamp shade frame. Measure from one edge to the opposite edge, passing through the center point.
- Measure the height: Determine the height of the lamp shade by measuring from the bottom edge to the top edge of the lamp shade frame. Make sure to measure along the outside edge of the frame.
- Make note of any additional measurements: Depending on the design of your lamp shade, you may need to take additional measurements. For example, if your lamp shade has a slanted or curved shape, measure the slant height or the circumference at the widest part.
- Double-check the measurements: Once you have all the necessary measurements, double-check them to ensure accuracy. It’s important to have precise measurements to create a well-fitting lamp shade cover.
Keep in mind that it’s always better to measure slightly larger than smaller. This will allow you to make adjustments if needed and ensure a proper fit for your fabric when attaching it to the lamp shade frame.
By accurately measuring your lamp shade, you can proceed with confidence to the next steps of cutting and preparing the fabric for your custom lamp shade cover. Taking the time to measure correctly will result in a professional-looking and well-fitting cover for your lamp shade.
Cutting the Fabric
Once you have measured your lamp shade, it’s time to cut the fabric. Follow these steps to ensure accurate and clean cuts:
- Prepare the fabric: Lay your chosen fabric on a flat surface and smooth out any wrinkles or creases. It’s important to work with a neatly folded and wrinkle-free fabric for precise cutting.
- Mark the measurements: Use a fabric pencil or chalk to mark the measurements you took earlier on the fabric. Start by marking the top and bottom diameters, then outline the height. If you have any additional measurements, mark those as well.
- Draw the cutting lines: Connect the marked points to create the cutting lines. This can be done with a ruler or by freehand, depending on your preference and the design of your lamp shade.
- Cut the fabric: Carefully cut along the marked lines using fabric scissors. Take your time to ensure clean and straight cuts. Avoid cutting too close to the lines to give yourself some room to work with when attaching the fabric to the lamp shade frame.
- Double-check the cuts: After cutting the fabric, double-check the pieces to make sure they match the measurements of your lamp shade. Adjust any uneven edges or re-cut any pieces if necessary.
It’s important to handle the fabric with care during the cutting process to prevent fraying or damage. If your fabric has a pattern or specific orientation, make sure to align the pattern or direction accordingly when cutting the pieces.
By following these steps and paying attention to the details, you can achieve clean and accurate cuts that will result in a well-fitted fabric cover for your lamp shade.
Preparing the Fabric
Now that you have cut the fabric for your lamp shade cover, it’s time to prepare it for attaching to the frame. Preparing the fabric involves a few important steps to ensure a smooth and professional-looking finish. Follow these guidelines for optimal results:
- Iron the fabric: Before proceeding, iron the fabric to remove any remaining wrinkles or creases. Set the iron to the appropriate heat setting for your chosen fabric type and gently press the iron over the fabric. Be careful not to scorch or burn the fabric.
- Hem the edges (optional): If you prefer a clean and finished look for the edges of your lamp shade cover, consider hemming them. Fold a small portion of the fabric over the edge and secure it with fabric glue or by sewing a straight stitch along the edge.
- Apply fabric stiffener (optional): If you want your lamp shade cover to have a more rigid and structured appearance, you can apply fabric stiffener. Follow the instructions on the fabric stiffener product and apply a thin, even coat to both sides of the fabric. Allow the fabric to dry completely.
- Trim excess threads: Take a moment to closely inspect the fabric for any loose threads or frayed edges. Trim these carefully with sharp scissors to ensure a neat and tidy final result.
- Double-check the measurements: Before attaching the fabric to the lamp shade frame, double-check the measurements one last time. Ensure that the fabric pieces align properly with the frame and make any necessary adjustments.
Preparing the fabric properly will not only enhance the overall appearance of your lamp shade cover but also make the attachment process easier and more efficient. Take your time to iron, hem (if desired), apply fabric stiffener (if desired), and trim any excess threads for a polished and professional finish.
Attaching the Fabric to the Frame
Now that you have prepared the fabric, it’s time to attach it to the lamp shade frame. Follow these steps to ensure a secure and seamless attachment:
- Place the fabric on a clean surface: Lay the fabric flat on a clean and smooth surface, with the right side facing down. Ensure that the fabric is positioned evenly and centered.
- Position the frame: Gently place the lamp shade frame on top of the fabric, aligning it with the edges and corners. Make sure the frame sits evenly on the fabric without any twisting or misalignment.
- Secure the fabric to the top ring: Start at the top of the frame and secure the fabric to the frame by folding it over the top ring. Use fabric clips or clothespins to hold the fabric in place while you work your way around the entire circumference of the top ring.
- Smooth and tuck the fabric: As you go around the frame, smooth out any wrinkles or folds in the fabric. Tuck the fabric neatly between the frame and the top ring, ensuring a tight and secure fit.
- Continue to secure the fabric: Once the top ring is secured, move to the bottom ring and repeat the process. Fold the fabric over the bottom ring and use clips or clothespins to hold it in place.
- Tighten and adjust the fabric: Once both rings are secured, make any necessary adjustments to tighten the fabric and ensure a smooth appearance. Pull the fabric gently to remove any excess slack or wrinkles, ensuring a snug fit.
During the attachment process, take your time to ensure that the fabric is smooth and secure, without any unevenness or bulges. It’s important to have a clean and seamless attachment for a professional and polished look.
Once the fabric is securely attached to the frame, you can move on to the next steps of securing the edges and adding any embellishments or decorations to personalize your lamp shade cover.
Securing the Edges
Securing the edges of your lamp shade cover is an important step to ensure a neat and finished appearance. Here’s a step-by-step guide on how to secure the edges:
- Trim the excess fabric: Start by trimming any excess fabric along the edges. Use fabric scissors to carefully cut off the excess, leaving a clean and even edge. Take your time and make precise cuts to achieve polished results.
- Apply fabric glue: To secure the fabric edges, apply a thin line of fabric glue along the cut edge of the fabric. Make sure to cover the entire edge, using the glue sparingly to avoid excessive seepage.
- Press the fabric: Once the glue is applied, press the fabric gently onto itself, creating a folded edge. Hold the fabric in place for a few seconds to allow the glue to set. Repeat this process along all the edges of the lamp shade cover.
- Use fabric tape (optional): If you prefer an alternative to fabric glue, you can use fabric tape to secure the edges. Simply peel off the backing and position the tape along the edge of the fabric, pressing it firmly to create a secure bond.
- Trim any excess tape or glue: After securing the edges, trim any excess fabric tape or glue using fabric scissors. This will create clean and tidy edges for your lamp shade cover.
By securing the edges of your lamp shade cover, you not only ensure a visually appealing finish but also prevent the fabric from fraying or unraveling over time. It’s important to select an appropriate method for securing the edges based on your preferred aesthetics and the durability of the lamp shade cover.
Once the edges are securely in place, you can move on to adding embellishments, such as trim, ribbons, or decorative elements, to further personalize and enhance the appearance of your lamp shade cover.
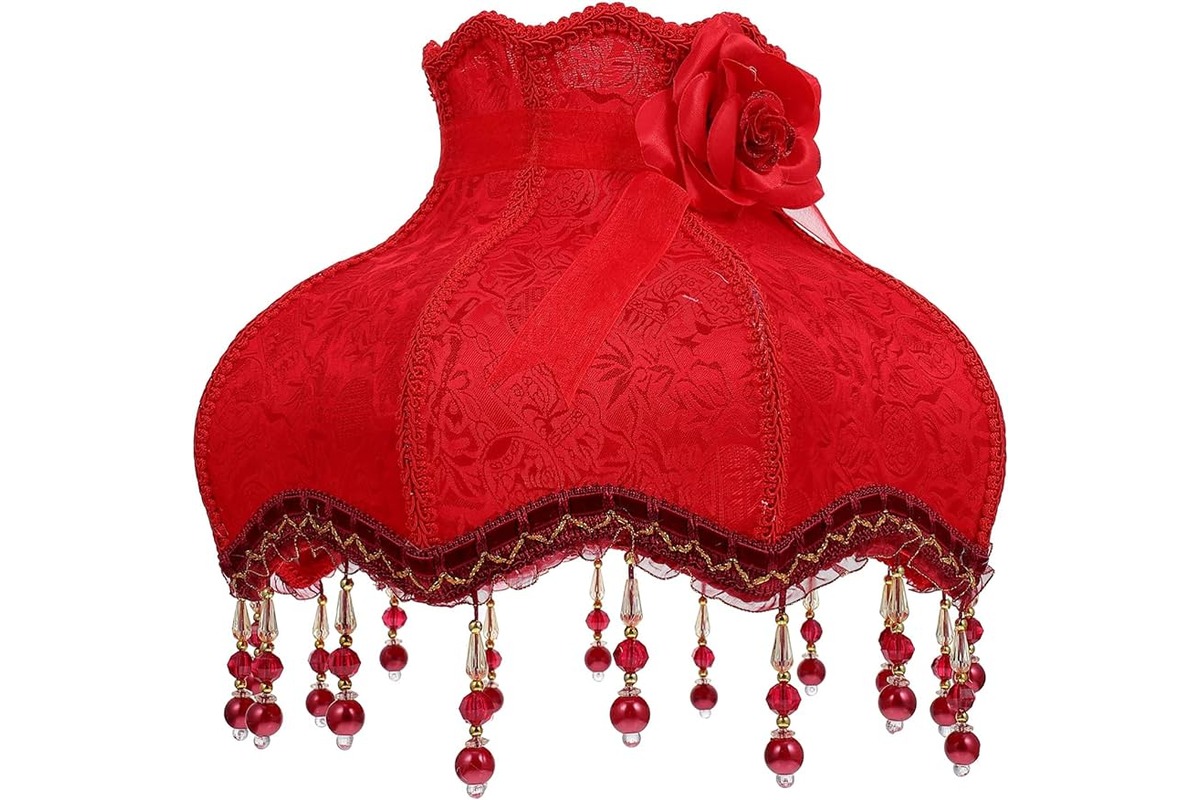
Adding Embellishments
Adding embellishments to your lamp shade cover is a great way to personalize and enhance its overall look. Whether you want to add a touch of elegance, a pop of color, or a unique design element, here are some ideas to inspire you:
- Trims and Ribbons: Attach decorative trims or ribbons along the top and bottom edges of the lamp shade cover. Choose trims that complement the fabric and the style of your room. Whether it’s a delicate lace trim, a bold patterned ribbon, or a glamorous beaded trim, it can transform the look of your lamp shade cover.
- Fabric Appliques: Incorporate fabric appliques to create texture and visual interest. These can be in the form of flowers, geometric shapes, or any other design that suits your taste. Attach the appliques using fabric glue or by stitching them onto the fabric.
- Buttons: Add buttons as embellishments to your lamp shade cover. You can create a pattern or arrangement with different-sized buttons, or simply add a single statement button as a focal point. Sew the buttons securely onto the fabric for a unique and eye-catching detail.
- Ribbons and Bows: Tie ribbons into bows and attach them to the lamp shade cover. Choose ribbons in colors or patterns that complement the fabric and the room. You can place them at the corners, along the edges, or in a more elaborate design, depending on your preference.
- Paint or Stencil Designs: If you’re feeling creative, you can paint or stencil designs on the fabric of your lamp shade cover. Use fabric paint or fabric markers to create intricate patterns, motifs, or even a personalized message. This allows for a truly customized and one-of-a-kind piece.
Remember to carefully plan the placement and design of your chosen embellishments before attaching them to the lamp shade cover. Experiment with different options and consider the overall aesthetic of the room in which the lamp will be placed.
Adding embellishments to your lamp shade cover is a fun and creative way to make it truly unique. Let your imagination run wild and have fun with the process of transforming your lamp shade cover into a personalized work of art.
Decorating the Lamp Shade
Now that you have attached the fabric and added embellishments to your lamp shade cover, it’s time to focus on the final step – decorating the lamp shade. Decorating the lamp shade allows you to add a finishing touch and bring your creative vision to life. Here are some ideas to inspire your lamp shade decoration:
- Stencil Designs: Use stencils to create intricate designs on the fabric of your lamp shade cover. You can choose from a variety of stencil patterns, such as florals, geometrics, or even whimsical motifs. Apply paint or fabric markers to fill in the stencil and create a unique and eye-catching design.
- Hand-Painted Artwork: If you have artistic skills, consider hand-painting a design or artwork on the lamp shade cover. This can be a landscape, abstract design, or any image that reflects your personal style. Use fabric paint and brushes to create a masterpiece on the fabric.
- Decoupage: Decoupage is a technique where you adhere paper cutouts or fabric onto the lamp shade cover using glue or decoupage medium. Choose patterned or textured papers, or even cutouts from magazines or old books, to create a collage effect on the lamp shade.
- Fabric Wrapping: If you want to add a different texture and dimension to your lamp shade, try fabric wrapping. Select a complementary fabric and wrap it tightly around the lamp shade frame, securing it with fabric glue. This technique can create a cozy and personalized look.
- Layering Fabrics: For a more intricate and detailed look, consider layering fabrics on the lamp shade cover. Cut different fabric pieces into varying shapes and sizes, and then layer them on top of each other, securing them with glue or stitching. This creates depth and visual interest.
Don’t be afraid to get creative and experiment with different decorating techniques. Always consider the overall aesthetic and theme of the room where the lamp will be placed. The goal is to create a lamp shade that not only provides functional lighting but also adds a touch of style and personality to the space.
While decorating the lamp shade, ensure that the embellishments and decorations are securely attached and won’t interfere with the functionality of the lamp. Pay attention to details and take your time to achieve the desired result.
By exploring different decorating options, you can transform your lamp shade cover into a visually stunning piece that perfectly complements your home decor.