
Choosing the Wood
When it comes to making a wooden spatula, choosing the right type of wood is crucial. The wood you select will not only determine the durability and functionality of the spatula but also its overall appearance. Here are some important factors to consider when choosing the wood for your spatula.
- Hardwood vs. Softwood: Hardwoods, such as maple, cherry, or walnut, are ideal for making spatulas due to their durability and resistance to moisture. Softwoods like pine or cedar are less suitable as they are more prone to splintering.
- Grain Pattern: Look for wood with a straight and tight grain pattern. Avoid woods with large or irregular grain patterns as they may weaken the spatula or cause it to warp over time.
- Sustainability: Consider using sustainably sourced or reclaimed wood to reduce the environmental impact of your project. Look for wood that is certified by organizations like the Forest Stewardship Council (FSC).
- Availability: Choose wood that is readily available in your local area to ensure you can easily obtain the necessary materials. This can save you time and effort in sourcing the wood.
Keep in mind that different types of wood will have different characteristics and working properties. Research the specific traits of the wood you choose to ensure it aligns with your desired outcome for the spatula.
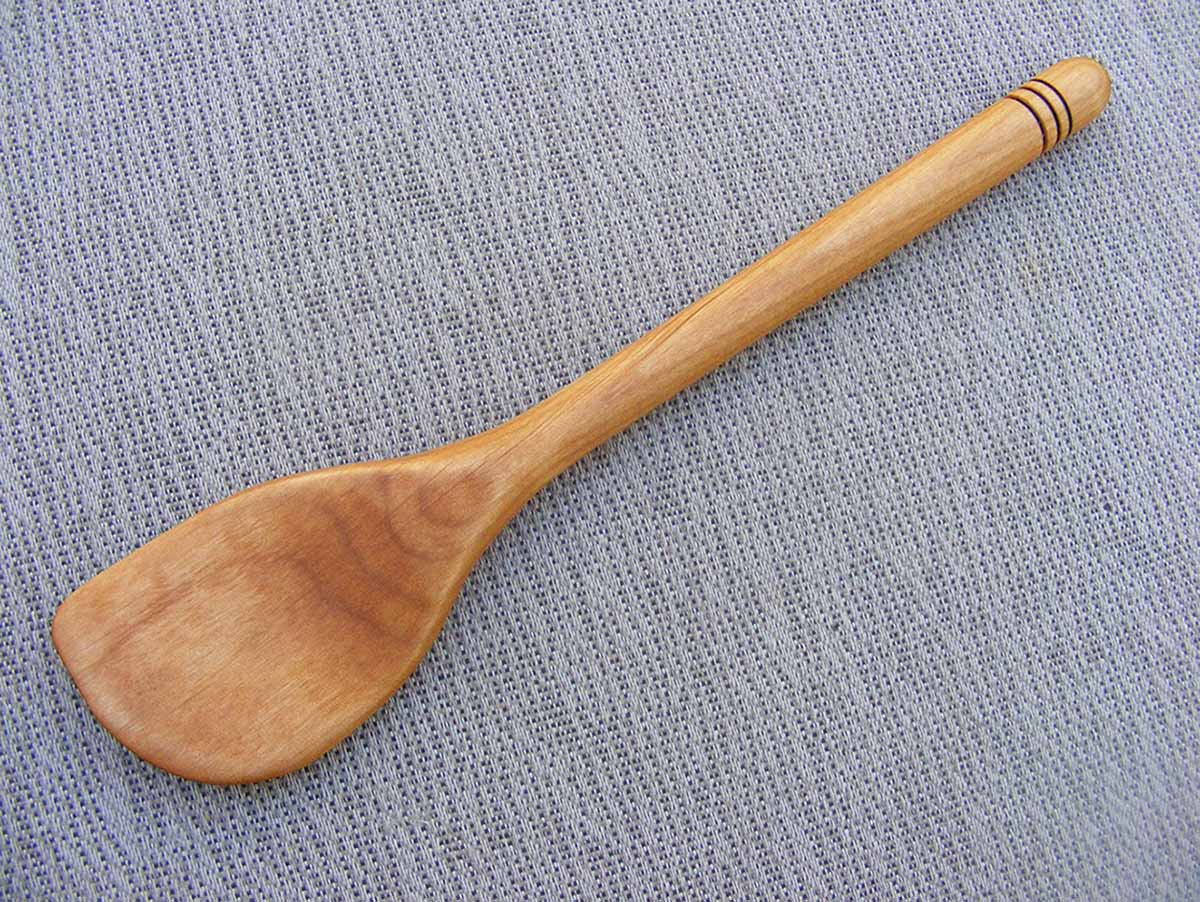
By selecting the right wood for your spatula, you can ensure that it will withstand the rigors of everyday cooking while adding a touch of natural beauty to your kitchen.
Preparing the Wood
Before you can start creating your wooden spatula, you’ll need to properly prepare the wood. This involves a few essential steps to ensure the wood is in the best condition for shaping and finishing. Here’s what you need to do:
- 1. Acquire the Wood: If you haven’t already, obtain a piece of wood that is suitable for making a spatula. Ensure the wood is clean, free of any defects, and has been properly dried to avoid any warping or cracking later on.
- 2. Remove any Existing Coating: If the wood has been previously coated with paint, varnish, or any other finish, you’ll need to strip it off completely. Use sandpaper, a scraper, or a chemical finish remover to gently remove the existing coating.
- 3. Smooth the Surface: After removing any existing coating, use sandpaper or a sanding block to smooth the surface of the wood. Start with a coarse grit sandpaper and gradually move to a finer grit to achieve a smooth and even surface.
- 4. Remove Sharp Edges: Use a file or sandpaper to round off any sharp edges or corners of the wood. This will make the spatula more comfortable to use and reduce the risk of splintering.
- 5. Seal the Wood: Applying a sealant or wood conditioner is optional but recommended. It helps to protect the wood from moisture and extends its lifespan. Choose a food-safe wood sealer or conditioner and follow the manufacturer’s instructions for application.
By properly preparing the wood, you create a solid foundation for crafting your spatula. It ensures that the wood is smooth, free from any previous finishes, and protected from potential damage. Once the wood is properly prepared, you can move on to creating a template and shaping the spatula.
Creating a Template
Creating a template is an essential step in making a wooden spatula. The template serves as a guide for cutting and shaping the wood, ensuring consistency and accuracy in the final product. Here’s how you can create a template:
- Get a Piece of Cardboard: Start by obtaining a piece of thick cardboard or poster board. This will serve as the base for your template.
- Draw the Shape: Using a pencil, draw the desired shape and size of your spatula on the cardboard. Take into consideration the length, width, and curvature of the blade and handle.
- Cut Out the Template: Carefully cut out the spatula shape using scissors or a craft knife. Take your time to ensure smooth and precise cuts.
Alternatively, you can use a pre-made spatula as a template. Simply trace the shape onto the cardboard and cut along the lines. This is especially useful if you want to replicate the design of an existing spatula.
Once you have your template ready, you can move on to the next steps of the process, which involve cutting out the shape from the wood and shaping the handle of the spatula. Having a template ensures that each step is carried out consistently and helps you achieve the desired final result.
Cutting Out the Shape
Once you have your template ready, it’s time to transfer the shape onto the wood and cut it out. This step is crucial in forming the basic structure of the spatula. Follow these steps to cut out the shape:
- Place the Template: Position the template onto the wood, making sure it is aligned according to your desired grain direction and overall look of the spatula.
- Secure the Template: Use clamps or weights to secure the template firmly onto the wood. This will prevent any movement or shifting while you cut.
- Trace the Shape: Use a pencil or a marker to trace along the outline of the template onto the wood. Take your time to ensure accuracy and precision.
- Choose the Cutting Method: Depending on your skills and the tools available, you can use various cutting methods. A bandsaw, jigsaw, coping saw, or even a scroll saw may be used to cut out the shape. Select the method that suits your comfort level and provides the cleanest cuts.
- Cut Along the Lines: Carefully follow the traced lines and cut along the outline of the spatula shape. Take your time and make smooth, controlled cuts to avoid any mistakes or wood damage.
Remember to prioritize safety during this process. Wear protective goggles and gloves, and always use appropriate tools for cutting.
Once the shape is cut out, you’ll have the basic form of your spatula. The next step is to focus on shaping the handle to add functionality and comfort to your wooden spatula.
Shaping the Handle
After cutting out the shape of the spatula, the next step is to focus on shaping the handle. The handle not only provides a comfortable grip but also enhances the overall aesthetics of the spatula. Here’s how you can shape the handle:
- Mark the Handle: Begin by marking the desired length of the handle on the wooden piece. This will help you visualize the final size and ensure consistency.
- Remove Excess Wood: Use a saw or a carving knife to remove any excess wood from the handle area. Take small, controlled cuts and gradually shape the handle to your desired thickness and contour.
- Create a Comfortable Shape: Consider ergonomics when shaping the handle. Rounds, curves, and beveled edges can enhance the grip and make the spatula more comfortable to hold. Experiment with different shapes until you find one that feels natural and fits your hand well.
- Smooth the Surface: Use sandpaper or a sanding block to smooth the surface of the handle. Start with a coarser grit and gradually move to finer grits, ensuring a smooth finish. Pay attention to any sharp edges or rough spots that may cause discomfort during use.
- Check for Balance: Hold the spatula and evaluate its balance and weight distribution. Make any necessary adjustments by removing or adding wood to achieve a well-balanced tool.
Take your time when shaping the handle to achieve the desired look and feel. Remember that the handle should not only be functional but also visually appealing.
Once the handle is shaped, it’s time to focus on refining the spatula’s surface by sanding it smooth.
Sanding the Spatula
After shaping the handle, it’s important to sand the spatula to smooth out any rough edges and create a polished finish. Sanding not only enhances the overall appearance but also prepares the wood for the application of a finish. Here’s how you can sand the spatula:
- Select the Right Sandpaper: Choose a sandpaper with a medium grit (around 150-180) to start with. You can then move on to finer grits (220 or higher) for a smoother finish.
- Sand the Surface: Begin by sanding the surface of the spatula, moving in the direction of the wood grain. Apply even pressure and make sure to sand the entire surface, including the handle and the blade.
- Smooth the Edges: Pay special attention to sanding the edges of the spatula to remove any sharp or rough areas. Be careful not to round the edges too much, as you still want the spatula to have a defined shape.
- Gradually Increase the Grit: As you progress, switch to a finer grit sandpaper to achieve a smoother finish. This will help remove any remaining imperfections and leave the wood surface silky to the touch.
- Remove Dust: After sanding, use a soft cloth or a compressed air canister to remove any sanding dust from the spatula. This will ensure a clean surface for the application of a finish.
Remember to take your time during the sanding process and check the smoothness of the spatula by running your hand over it. If needed, repeat the sanding steps with finer grits until you are satisfied with the surface texture and overall appearance.
Once the spatula is sanded to your liking, the final step is to apply a suitable finish to protect the wood and bring out its natural beauty.
Applying a Finish
Applying a finish to your wooden spatula not only protects the wood but also enhances its appearance, making it more durable and resistant to moisture. There are various finishes you can choose from, depending on your preference and the level of protection you desire. Here’s how to apply a finish to your spatula:
- Choose a Food-Safe Finish: Since the spatula comes into contact with food, it’s important to select a food-safe finish. Look for finishes specifically labeled as food-safe or approved for culinary use. Examples include mineral oil, beeswax, or a food-grade varnish.
- Prepare the Spatula: Ensure that the spatula is clean and free from any dust or debris before applying the finish. Use a clean cloth to wipe away any remaining sawdust or residue.
- Apply the Finish: Follow the instructions provided with the chosen finish and apply it to the spatula using a clean brush or cloth. Start by applying a thin, even coat, and allow it to penetrate the wood for the recommended drying time.
- Repeat the Process: Depending on the finish you choose, you may need to apply several coats. Follow the instructions from the manufacturer to determine the number of coats needed and the recommended drying time between each application.
- Allow the Finish to Cure: After applying the final coat, allow the spatula to dry and cure according to the finish instructions. This will ensure that the finish fully hardens and provides optimal protection for the wood.
Remember to work in a well-ventilated area when applying the finish and follow all safety precautions outlined by the manufacturer.
Once the finish is fully cured, your wooden spatula is ready to be used in the kitchen. With proper care and periodic reapplication of the finish, your spatula will enjoy a longer lifespan and continue to provide reliable service while exuding natural beauty.