
Materials Needed
To make a rope plant hanger, you will need a few essential materials. Gather the following items before you begin:
– Rope: Select a strong and durable rope that can support the weight of your plant and withstand outdoor conditions. Natural fibers like cotton or jute work well for this project.
– Metal Ring: Choose a sturdy metal ring that is large enough to fit the rope comfortably and serve as the hanger’s top attachment point.
– Scissors: Ensure you have a sharp pair of scissors to cut the rope cleanly and easily.
– Measuring Tape: Use a measuring tape to determine the desired length of your plant hanger. This will depend on the height at which you plan to hang your plant.
– Plant Pot: Have a suitable plant pot or container ready to hold your plant. Choose one that fits well within the dimensions of your rope hanger.
– Optional: If you want to add a decorative touch to your plant hanger, consider incorporating beads, feathers, or other embellishments of your choice.
Now that you have gathered all the necessary materials, you are ready to move on to the next step of creating your rope plant hanger.
Step 1: Measure and Cut the Rope
The first step in making a rope plant hanger is to measure and cut your rope to the desired length. Here’s how you do it:
1. Determine the Hanging Length: Use a measuring tape to measure the distance from the intended hanging spot to the desired length of the plant hanger. Add a few extra inches for knots and adjustments.
2. Cut the Rope: Once you have determined the hanging length, use a pair of scissors to cut the rope to that measurement. Make sure to cut the rope cleanly and avoid any frayed ends.
Remember, it’s always a good idea to start with a longer rope length than you think you’ll need. You can always trim it down later if necessary.
By measuring and cutting the rope to the intended length, you are one step closer to creating your beautiful rope plant hanger. Let’s move on to the next step to continue the process.
Step 2: Attach the Metal Ring
Now that you have your rope cut to the desired length, it’s time to attach the metal ring. The ring will serve as the top attachment point for your rope plant hanger. Follow these steps to securely attach the ring:
1. Fold the Rope in Half: Take your rope and fold it in half, making sure both ends are even. This will create a loop at the top of the rope.
2. Insert the Ring: Slide the metal ring through the looped end of the rope. Make sure the ring is positioned in the center of the loop.
3. Secure with a Knot: Take the loose ends of the rope and thread them through the loop, pulling them tightly. This will create a secure knot that attaches the metal ring to the rope.
Double-check that the knot is tight and the ring is securely attached. This will ensure the stability of your plant hanger when it is hung.
By successfully attaching the metal ring, you have completed an important step in the creation of your rope plant hanger. Let’s move on to the next step to continue the process.
Step 3: Begin the Square Knots
With the metal ring securely attached, it’s time to start creating the square knots that will form the body of your rope plant hanger. Follow these steps to begin the square knots:
1. Divide the Rope: Take the rope below the metal ring and divide it into four separate strands. You will have two strands on the left and two strands on the right.
2. Cross the Left Strands Over the Right Strands: Take the left strands and cross them over the right strands. The left strands should now be on the right side, and the right strands on the left side.
3. Create the First Knot: Take the left strands and cross them over the right strands again, this time bringing them under and through the opening at the top. Pull the strands tightly to form the first half of the square knot.
4. Repeat the Process: Now, repeat the same process with the right strands. Cross the right strands over the left strands, then bring them under and through the opening at the top. Pull the strands tightly to complete the square knot.
5. Continue with Square Knots: Repeat these steps to continue creating square knots. Make sure to pull the knots tight after each one to maintain a secure and sturdy plant hanger.
By beginning the square knots, you are creating the foundation of your rope plant hanger. The square knots will provide support and stability for your plant pot. Keep going to the next step to further develop your plant hanger.
Step 4: Create the Hanger Loop
In this step, you will create the hanger loop that will enable you to hang your rope plant hanger securely. Follow these steps to create the hanger loop:
1. Measure the Loop Length: Decide how long you want your hanger loop to be. Measure and mark this length on one side of the rope, below the last square knot.
2. Fold the Rope: Once you have marked the desired length, fold the rope at the marking point. This will create a loop.
3. Position the Loop: Take the folded end of the rope and position it just below the last square knot. The loop should be facing upwards.
4. Cross the Strands: Cross the loose ends of the rope over the loop, wrapping them around the loop from front to back.
5. Feed the Ends Through: Take the loose ends of the rope and feed them through the loop, pulling them tightly. This will secure the loop in place.
Make sure the hanger loop is secure and has enough room to fit comfortably on your hanging hook. Adjust the loop length if necessary to ensure a proper fit.
With the hanger loop created, you are one step closer to completing your rope plant hanger. Move on to the next step to continue the process.
Step 5: Continue with Square Knots
Now that you have created the hanger loop, it’s time to continue with the square knots to build the body of your rope plant hanger. Follow these steps:
1. Divide the Rope: Below the hanger loop, divide the rope into four strands – two on the left and two on the right, just like in Step 3.
2. Cross Left Over Right: Take the left strands and cross them over the right strands. The left strands should now be on the right side, and the right strands on the left side.
3. Create the Square Knot: Take the left strands and bring them over the right strands, then pass them under and through the opening at the top. Pull the strands tightly to complete the square knot.
4. Continue with Right Over Left: Repeat the process with the right strands. Cross the right strands over the left strands, bring them under and through the opening, and pull them tightly to form the square knot.
5. Repeat the Steps: Continue alternating between left over right and right over left, tying square knots along the length of the rope. Make sure to pull the knots tightly to maintain a secure and even structure.
Continue tying square knots until you reach your desired length or until you have enough knots to support your plant pot. The alternating knots will create a patterned look and add visual interest to your plant hanger.
With each square knot, you are making progress in creating a beautiful rope plant hanger. Let’s move on to the next step to further develop your hanger.
Step 6: Adjust the Length of the Hanger
Now that you have continued tying square knots along the length of your rope, it’s time to adjust the overall length of your plant hanger. Follow these steps to make the necessary adjustments:
1. Evaluate the Length: Step back and assess the length of your plant hanger. Consider the height at which you plan to hang it and the desired position of your plant pot.
2. Trim the Excess Rope: If your plant hanger is too long, you can trim the excess rope. Carefully use a pair of scissors to cut the strands below the last square knot. Make sure to leave enough rope to tie a secure knot at the bottom.
3. Re-tie the Knots: Once you have trimmed the rope, re-tie the square knots at the bottom to secure the strands. Ensure that the knots are tight and the rope ends are neatly trimmed.
By adjusting the length of your plant hanger, you can customize it to fit perfectly in your desired space. Take your time to find the ideal length that will showcase your plant beautifully.
With the length adjusted, you are almost finished creating your rope plant hanger. Let’s move on to the next step to complete the final touches.
Step 7: Finish with Square Knots
As you near the end of creating your rope plant hanger, it’s time to finish off the bottom with a final set of square knots. Follow these steps to complete your hanger:
1. Divide the Rope: Divide the strands of the rope into four equal sections – two on the left and two on the right.
2. Create the Square Knot: Take the left strands and cross them over the right strands. Bring the left strands under and through the opening, then pull them tightly to form a square knot.
3. Repeat with the Right Strands: Now, cross the right strands over the left strands. Bring the right strands under and through the opening, and pull them tightly to complete another square knot.
4. Repeat the Process: Continue alternately tying square knots with the left and right strands until you have reached the desired length for the bottom section of your hanger. Make sure to tighten the knots and maintain a consistent pattern.
5. Secure the Knots: Once you are satisfied with the number of square knots at the bottom of your hanger, ensure they are secure. Double-check that the knots are tight and the strands are securely intertwined.
By finishing off the bottom section with these square knots, you are creating a cohesive and visually appealing rope plant hanger. Keep up the great work!
You are now ready for the final steps of adding the plant pot and hanging your beautiful new creation. Let’s move on to the next step to complete your rope plant hanger.
Step 8: Add the Plant Pot
With your rope plant hanger nearly complete, it’s time to add the plant pot. Follow these steps to securely attach your plant pot to the hanger:
1. Select the Plant Pot: Choose a plant pot or container that fits well within the dimensions of your rope hanger. Make sure the pot has drainage holes to allow excess water to escape.
2. Adjust the Hanger Length: Hold your plant pot up to the hanger and adjust the length if necessary. You want the pot to be positioned at a height that suits your plant and complements your desired aesthetic.
3. Lift the Plant Pot: Lift the plant pot and carefully insert it into the open space at the bottom of the hanger. Ensure that the pot is centered and securely held by the ropes.
4. Level the Pot: Once the pot is in place, check that it is level and adjust the ropes if needed. You want the pot to hang straight and balanced within the hanger.
5. Double-check Stability: Gently give the plant pot a slight tug to check if it feels secure. Ensure that it is tightly held by the ropes and won’t slip or tip over easily.
By adding the plant pot, you are bringing life and vitality to your rope plant hanger. Take a moment to admire your creation and ensure that everything is securely in place.
Your rope plant hanger is almost ready to be enjoyed! The final step is to hang it up and bask in the beauty of your plant-filled space. Let’s move on to the last step to complete your rope plant hanger.
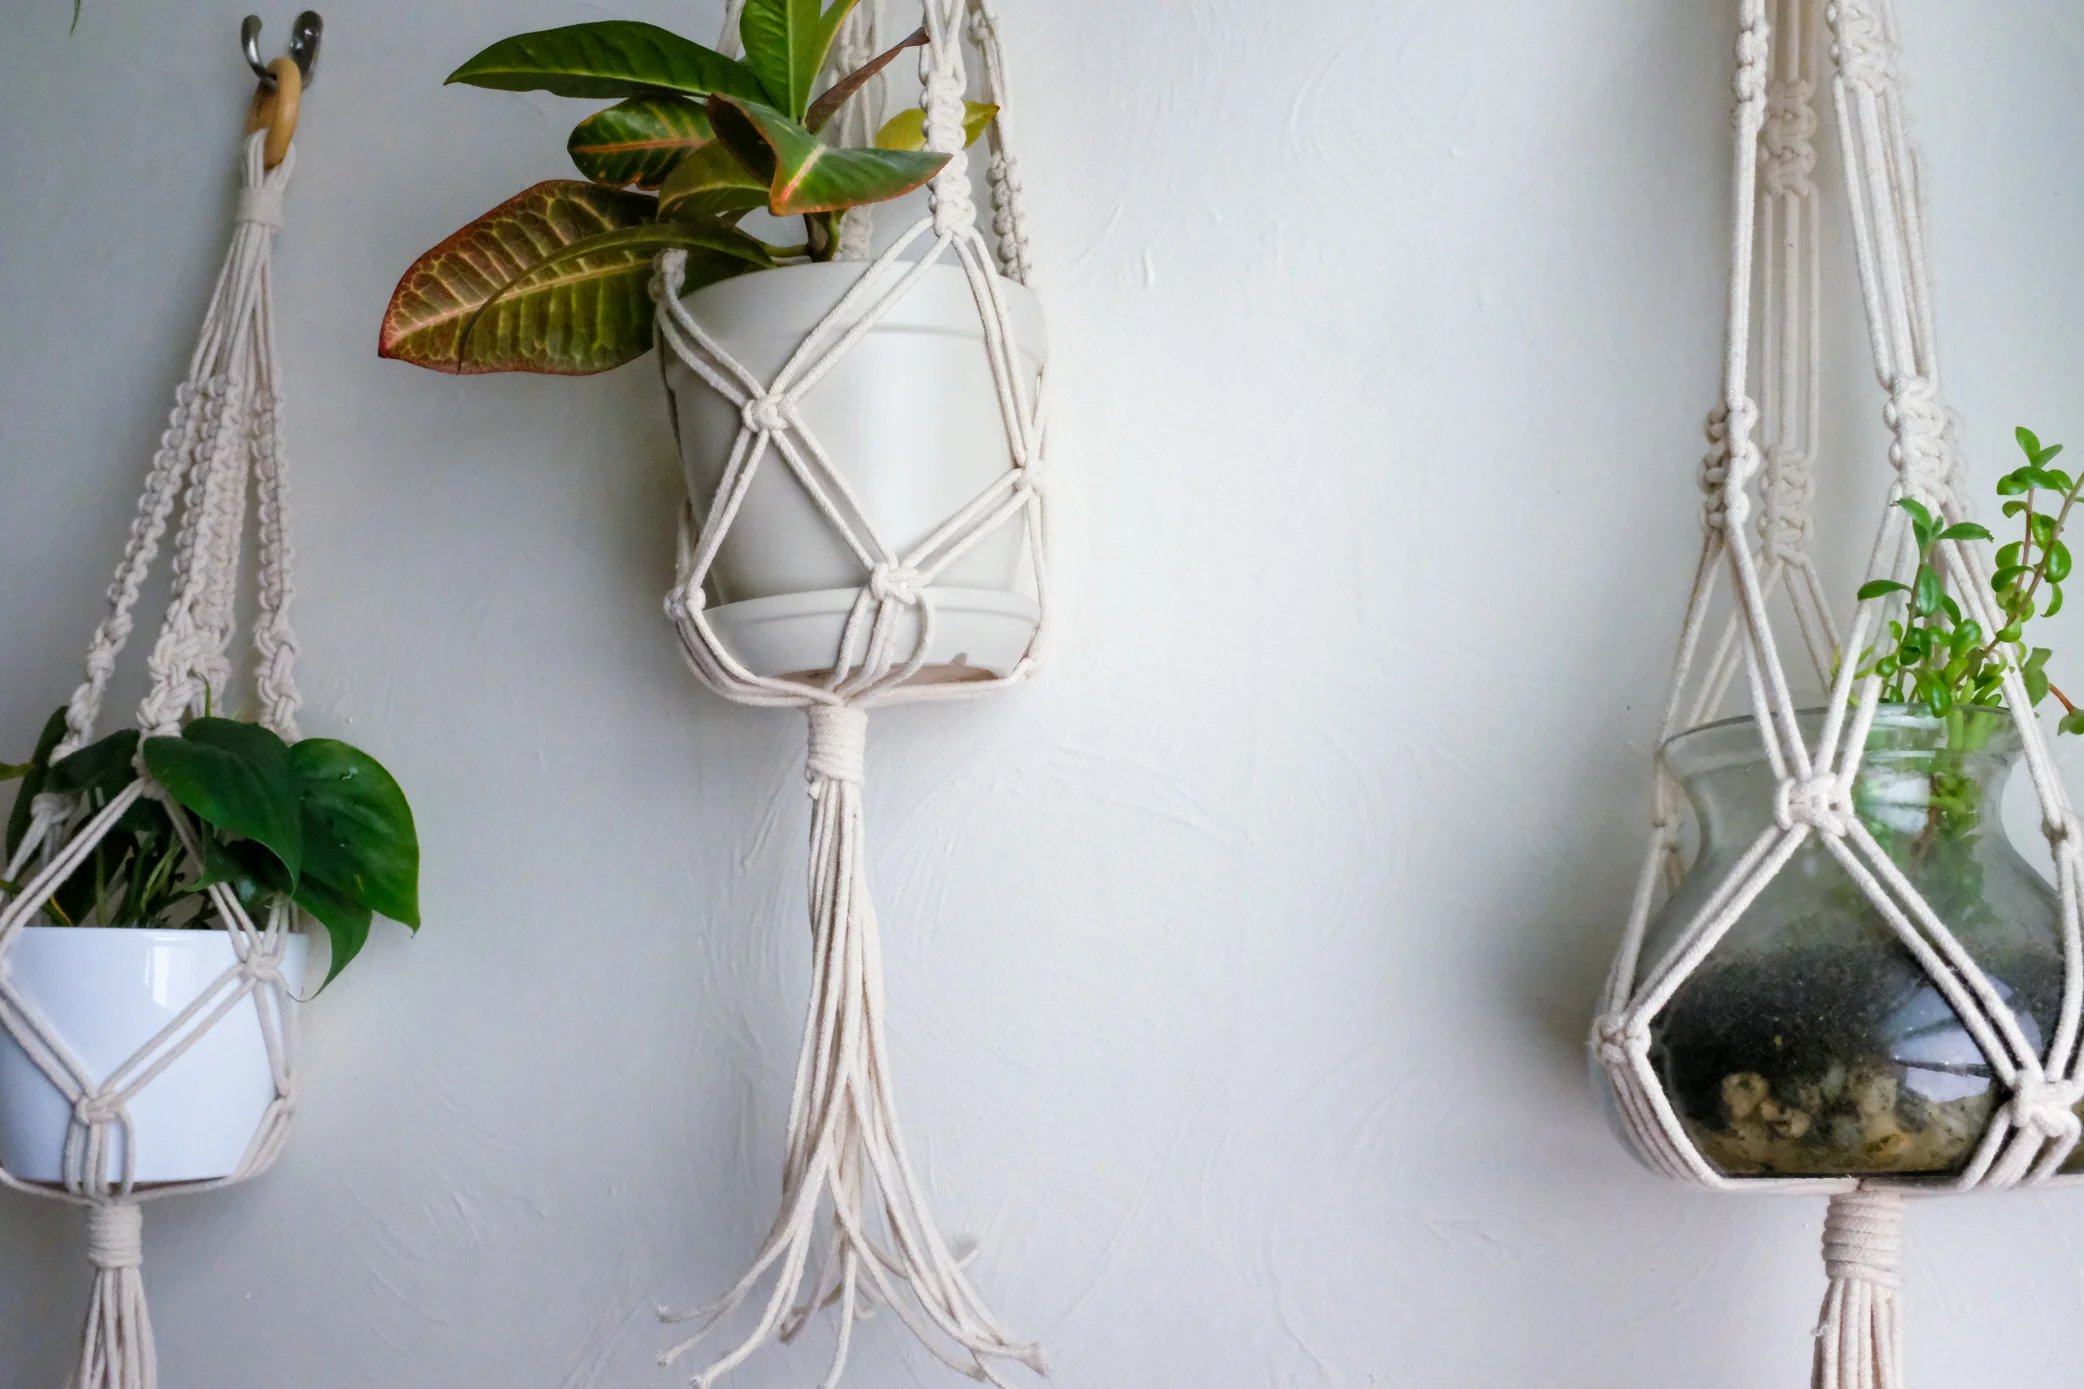
Step 9: Hang and Enjoy!
Congratulations on completing your rope plant hanger! The final step is to hang it up and enjoy the beauty it brings to your space. Follow these steps to hang your hanger:
1. Choose the Hanging Location: Select a suitable location for your plant hanger based on the lighting requirements of your plant and the overall aesthetic you desire. Consider using ceiling hooks, wall brackets, or outdoor hooks, depending on where you plan to hang it.
2. Attach the Hanger: Hold the metal ring at the top of your plant hanger and securely attach it to the hanging spot using the appropriate hardware or hooks. Make sure it is firmly fixed to prevent any accidents or damage.
3. Adjust the Position: Once your hanger is hung, step back and check that it is level and positioned correctly. Make any necessary adjustments to ensure that your plant hanger enhances the overall visual appeal of your space.
4. Care for Your Plant: Now that your plant hanger is hanging beautifully, remember to care for your plant. Provide it with the proper sunlight, water, and nutrients to ensure its health and vitality.
5. Enjoy the Beauty: Sit back, relax, and take pleasure in the beauty of your plant-filled space. Admire the way your plant hanger adds a touch of nature and style to your home or outdoor area.
Remember to periodically check the ropes and knots to ensure everything remains secure. With proper maintenance, your rope plant hanger can bring joy and greenery to your space for years to come.
It’s time to step back and appreciate the fruits of your labor. Enjoy the calming presence of your plant as it thrives within your newly created rope plant hanger. Well done!