
Materials Needed
Creating a homemade lava lamp is a simple and enjoyable project that requires just a few basic materials. Before getting started, make sure you have the following items on hand:
- A clean and empty water bottle (plastic or glass)
- Vegetable oil or baby oil
- Food coloring
- Alka-Seltzer tablets
- Water
- A funnel (optional, but helpful for pouring liquids)
These materials are easily accessible and can be found in your kitchen or purchased at a local grocery store. The water bottle serves as the base for your lava lamp, while the oil, food coloring, and Alka-Seltzer tablets create the mesmerizing lava lamp effect.
When choosing a water bottle, consider using one with a wide opening to make it easier to add and mix the ingredients. Additionally, the size of the bottle can vary depending on your preference.
As for the oil, vegetable oil or baby oil can be used interchangeably. Vegetable oil is a common household item, while baby oil often contains added fragrance, adding a delightful scent to your lava lamp. Choose the oil that best suits your taste.
Food coloring is essential in creating vibrant and colorful lava lamp blobs that float up and down in the bottle. Choose your favorite colors or experiment with different combinations to achieve unique and eye-catching effects.
Alka-Seltzer tablets are the secret ingredient in making your homemade lava lamp come to life. These effervescent tablets create a chemical reaction when combined with water, resulting in fizzing bubbles that float the colorful blobs up and down, mimicking a lava lamp’s mesmerizing motion.
Lastly, water is needed to dilute the Alka-Seltzer tablets and activate the chemical reaction. It’s important to note that the amount of water required will depend on the size of your water bottle. Make sure to have enough water to create a noticeable reaction without overflowing the bottle.
By gathering these simple materials, you’re ready to embark on an exciting journey to create your very own homemade lava lamp.
Step 1: Gather the Ingredients
Before diving into the process of making a homemade lava lamp, it’s important to gather all the necessary ingredients. By doing so, you’ll ensure a smooth and uninterrupted creation process. Here’s what you’ll need:
- A clean and empty water bottle: Choose a plastic or glass water bottle that is free from any residue. Make sure the bottle is large enough to allow the ingredients to move and mix inside.
- Vegetable oil or baby oil: Both vegetable oil and baby oil work well for this project. Vegetable oil is a common household item, while baby oil often adds a pleasant fragrance to the lamp. Select the oil that suits your preference.
- Food coloring: Add vibrant and eye-catching hues to your lava lamp with food coloring. Choose your favorite colors or experiment with different combinations for a truly unique effect.
- Alka-Seltzer tablets: These effervescent tablets will create the fizzing bubbles that make your lava lamp come to life. They are readily available at most pharmacies or grocery stores.
- Water: You’ll need water to dilute the Alka-Seltzer tablets and activate the bubbly reaction. The amount of water required will depend on the size of your water bottle.
- A funnel (optional): While not necessary, a funnel can make it easier to pour the liquids into the bottle without any spills or messes.
By having all the ingredients ready, you’ll be fully prepared to start the lava lamp-making process. Take a moment to ensure that you have everything listed above before moving on to the next step.
Step 2: Fill the Water Bottle
With all the necessary ingredients gathered, it’s time to start building your homemade lava lamp. The first step is to fill the water bottle. Follow these instructions to ensure a successful project:
- Clean the water bottle: Make sure the water bottle is thoroughly cleaned to ensure there is no residue or impurities inside. A clean and clear bottle will help create a visually appealing lava lamp.
- Remove the cap: Take off the cap or lid of the water bottle to allow easy access for pouring the liquids.
- Use a funnel (optional): If you have a funnel available, it can be helpful in preventing spills and ensuring a smooth pouring process. Place the funnel securely in the opening of the water bottle.
- Slowly pour the water: Begin pouring water into the bottle. The amount of water needed will depend on the size of your water bottle. Aim to fill the bottle around one-fourth to one-third of the way full.
- Be cautious: While pouring, be mindful not to overfill the bottle, as this could cause the liquids to overflow once the reaction begins. Start with a smaller amount and add more if needed.
- Remove the funnel: Once the water is added, carefully remove the funnel from the water bottle. Take your time to avoid any spills or splashes.
Remember, the water acts as the base for your lava lamp and provides the medium for the other ingredients to interact. By following these steps, you have successfully completed the second step of your lava lamp creation process.
Step 3: Add Oil to the Water Bottle
Now that you have filled the water bottle with water, it’s time to add the oil. This step is crucial in creating the iconic lava lamp effect. Follow these instructions to ensure proper oil addition:
- Choose your oil: Decide whether you want to use vegetable oil or baby oil for your lava lamp. Both options work well, so choose the one that suits your preference.
- Prepare the oil: If you are using a new bottle of oil, remove the cap or seal. Ensure that the oil is at room temperature to make it easier to pour.
- Safely pour the oil: Slowly pour the oil into the water bottle. The oil will sit on top of the water, creating two distinct layers.
- Fill the bottle: Continue pouring the oil until it fills the water bottle almost to the top. Leave some space at the top to allow the other ingredients to be added later.
- Observe the separation: Once you have added the oil, observe how it separates from the water. The oil will rise to the top while the water sinks to the bottom, forming distinct layers.
- Do not shake the bottle: It’s essential to resist the temptation to shake or stir the bottle at this point. The separation of the oil and water creates the necessary conditions for the lava lamp effect.
Adding the oil to the water bottle sets the stage for the vibrant motion that follows. The oil will provide the medium through which the the colored blobs will move, resembling the lava lamp phenomenon. Take your time during this step to ensure a smooth and visually appealing outcome.
Step 4: Add Food Coloring
With the oil added to the water bottle, it’s time to introduce some color to your homemade lava lamp. Follow these instructions to achieve vibrant and mesmerizing hues:
- Select your food coloring: Choose the colors you want to incorporate into your lava lamp. You can stick to a single color or blend multiple colors for a more captivating effect.
- Prepare the food coloring: Shake the food coloring bottles gently to ensure the color is well-mixed. This will help achieve a uniform distribution of color in your lava lamp.
- Add the food coloring: Carefully drop a few drops of the food coloring into the water and oil mixture. Observe the colors spread through the liquid and create vibrant contrasting patterns.
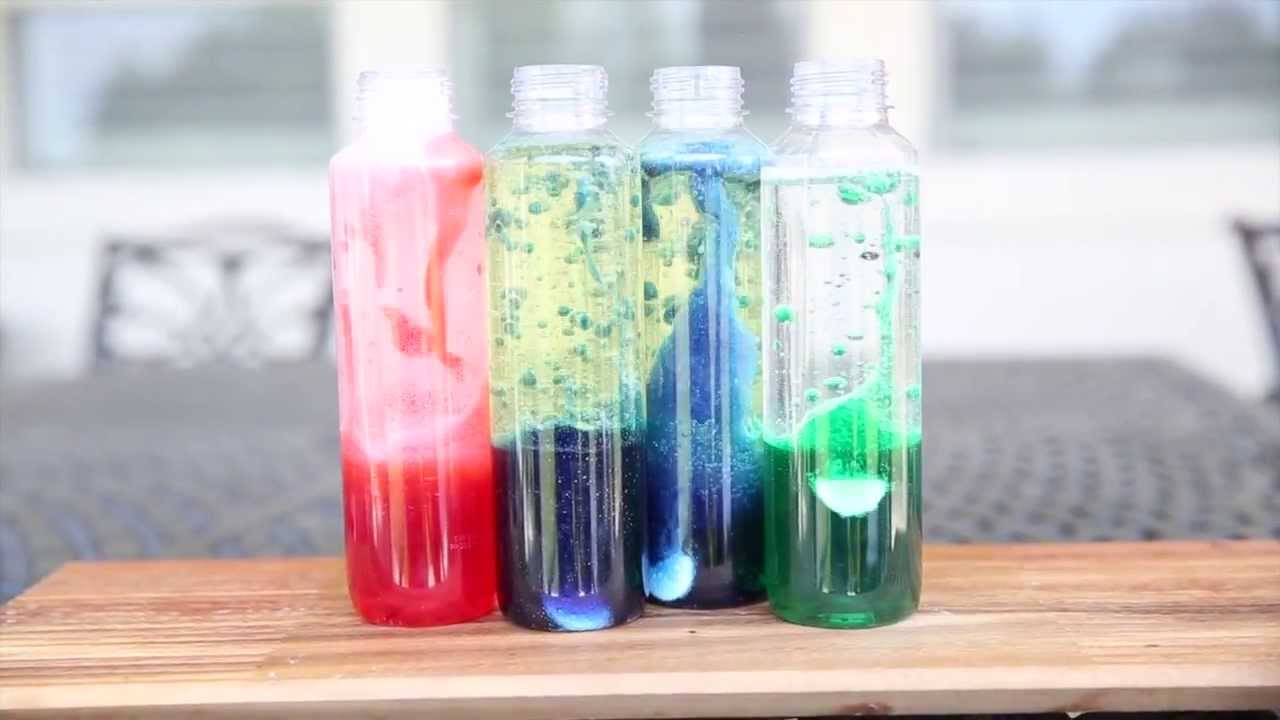
- Experiment with different color variations: If you’re feeling adventurous, try different combinations of food coloring to create unique and striking color schemes. For example, mixing blue and yellow food coloring will result in a green lava lamp.
- Use the desired amount of food coloring: The number of drops you add will determine the intensity of the colors in your lava lamp. Start with a few drops and increase as needed to achieve your desired visual effect.
- Observe the color dispersion: As you add the food coloring, watch how it spreads and interacts with the oil and water. This adds an extra layer of visual interest to your lava lamp.
Adding food coloring to your lava lamp not only enhances the visual appeal but also allows you to personalize your creation. By following these steps, you’ll infuse your homemade lava lamp with stunning colors that will mesmerize anyone who sees it.
Step 5: Break Alka-Seltzer Tablets into Pieces
Now that the water, oil, and food coloring are in place, it’s time to add the final ingredient that will bring your lava lamp to life – Alka-Seltzer tablets. Follow these steps to prepare the tablets:
- Gather the Alka-Seltzer tablets: Retrieve the Alka-Seltzer tablets from the packaging. These effervescent tablets are readily available at most pharmacies and grocery stores.
- Break the tablets: Using your fingers or a small tool, carefully break the Alka-Seltzer tablets into smaller pieces. Aim for pieces that are about the size of a pea or slightly larger.
- Break them proportionately: It’s important to break the tablets into sizeable pieces to ensure a controlled reaction. Breaking them into small portions helps to prevent overwhelming bubbles and excessive fizzing.
- Consider the number of tablets: The number of Alka-Seltzer tablets used will depend on the size of your water bottle and the desired reaction. Start with one or two tablets and adjust accordingly to achieve the desired effect.
Breaking the Alka-Seltzer tablets into pieces preps them for the chemical reaction that will create the mesmerizing lava effect. Take care to break the tablets into appropriate sizes to ensure a controlled and visually appealing reaction.
Step 6: Drop the Alka-Seltzer Pieces into the Bottle
With the Alka-Seltzer tablets broken into pieces, it’s time to introduce them into the water bottle. Follow these steps to create the mesmerizing reaction:
- Prepare the Alka-Seltzer pieces: Make sure you have the broken Alka-Seltzer tablet pieces ready at hand. These pieces will be responsible for generating the fizzing and bubbling action in your lava lamp.
- Add the Alka-Seltzer pieces: Carefully drop the Alka-Seltzer tablets into the water and oil mixture inside the bottle. Watch as they sink to the bottom and start interacting with the liquids.
- Start the reaction: As soon as the Alka-Seltzer pieces come into contact with the water, they will initiate a chemical reaction that produces carbon dioxide gas. This gas will create bubbles that rise through the oil, carrying the colored blobs with them.
- Observe the lava lamp effect: Once the reaction starts, sit back and enjoy the mesmerizing lava lamp effect. Watch as the colorful blobs rise and fall, creating a mesmerizing motion that mimics the movement of a lava lamp.
- Control the duration: Depending on the size of the Alka-Seltzer tablet pieces and the desired duration of the lava lamp effect, you can adjust the number of Alka-Seltzer pieces you drop into the bottle. Adding more pieces will typically result in a longer-lasting reaction.
By dropping the Alka-Seltzer tablet pieces into the bottle, you activate the chemical reaction that gives life to your homemade lava lamp. Sit back and enjoy the captivating display of bubbles and floating colored blobs.
Step 7: Watch the Lava Lamp in Action
Now comes the most exciting part of your homemade lava lamp project – watching it come to life! Follow these steps to witness the mesmerizing action:
- Find a suitable location: Place your lava lamp on a flat surface in a dimly lit room. This will enhance the visual impact of the colorful blobs and the calming ambiance.
- Observe the reaction: As soon as the Alka-Seltzer tablet pieces come into contact with the water, the chemical reaction will begin. Watch as the carbon dioxide gas is released, creating bubbles that carry the colored blobs up through the oil.
- Enjoy the motion: Sit back and take in the mesmerizing motion of the lava lamp. The rising and falling blobs of color create a captivating dance that resembles the lava lamp’s trademark effect.
- Admire the colors: Appreciate the vibrant hues of the colored blobs as they travel through the oil. The contrast against the clear liquid creates a visually stunning display.
- Experiment: Move or tilt the bottle gently to see the blobs change direction and create intriguing patterns. Experiment with different movements to enhance the visual appeal.
- Take photos or videos: Capture the mesmerizing action by taking photos or videos of your lava lamp in motion. Share these moments with others and showcase your creative lava lamp project.
Watching your homemade lava lamp in action is a truly satisfying experience. Take the time to relax, enjoy the calming ambiance, and marvel at the captivating motion of the colorful blobs as they rise and fall through the oil.
Step 8: Repeat the Process
Once you’ve witnessed the stunning display of your homemade lava lamp, it’s time to repeat the process and enjoy the magical motion all over again. Here’s how you can continue to create and enjoy your lava lamp:
- Allow the reaction to settle: After the bubbling action subsides and the colored blobs settle, allow the lava lamp to rest for a while. This will give time for the liquids to separate once more.
- Reset the lamp: Empty the contents of the water bottle by carefully pouring them out. Make sure to dispose of the liquids properly.
- Clean the bottle: Rinse the water bottle thoroughly with warm water and soap to remove any residue from the previous lava lamp. This will ensure a clean and fresh start for your next creation.
- Refill the bottle: Follow the steps outlined earlier to fill the water bottle with water, oil, and food coloring once again.
- Break Alka-Seltzer tablets: Repeat step 5 by breaking the Alka-Seltzer tablets into pieces, ensuring they are proportionate to the desired reaction.
- Add the Alka-Seltzer pieces: Drop the Alka-Seltzer tablet pieces into the bottle, just like in step 6.
- Watch the magic: Sit back, relax, and enjoy the captivating motion of your lava lamp as it comes to life once more.
By repeating the process, you can enjoy the mesmerizing lava lamp effect again and again. Feel free to experiment with different color combinations, varying amounts of ingredients, or even different-sized water bottles to create unique and personalized lava lamps.