
Choosing the Right Faux Fur Fabric
When it comes to making a faux fur rug, one of the most important factors to consider is the fabric you choose. The right faux fur fabric can make all the difference in achieving a high-quality and realistic-looking rug. Here are some tips to help you choose the right faux fur fabric for your project:
- Consider the Purpose: Think about where the rug will be placed and how it will be used. If it will be in a high-traffic area, consider opting for a more durable faux fur fabric that can withstand daily wear and tear. On the other hand, if it will be mainly for decorative purposes, you may have more flexibility in terms of fabric selection.
- Texture: Faux fur fabrics come in a variety of textures, ranging from short and velvety to long and shaggy. Consider the desired texture of your rug and choose a fabric accordingly. Keep in mind that longer pile fabrics may require more maintenance and may not be suitable for households with pets.
- Color: Faux fur fabrics come in a wide range of colors, from natural shades like white and brown to vibrant and bold colors. Consider the color scheme of your space and choose a fabric color that complements it. If you’re unsure, opt for neutral tones that can easily blend with different interior styles.
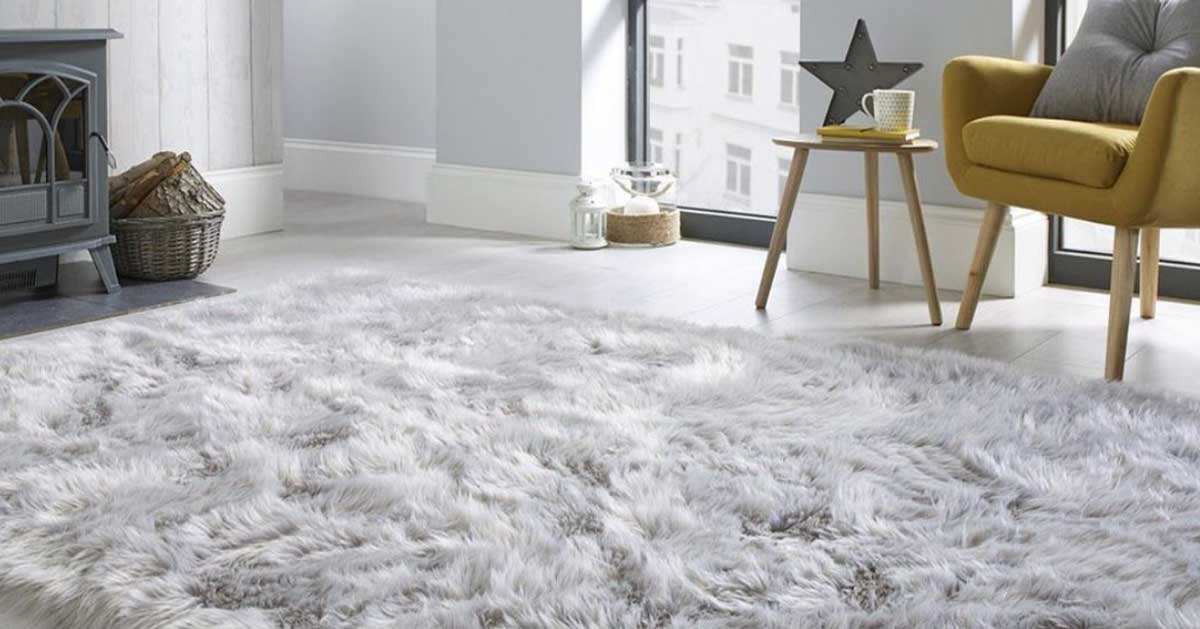
- Realistic Look: If you want your faux fur rug to closely resemble real fur, look for fabrics that have a realistic look and feel. The texture, color variations, and sheen can contribute to a more authentic appearance. Take the time to touch and feel the fabric samples to ensure they meet your expectations.
- Sustainability: If you’re environmentally conscious, consider choosing a faux fur fabric made from recycled materials or those that are produced using eco-friendly processes. These fabrics are not only sustainable but can also be of high quality.
Remember to take your time when selecting the right faux fur fabric for your rug. Play around with different options, and if possible, request fabric samples to help you make an informed decision. By carefully considering these factors, you can ensure that your faux fur rug will be both visually appealing and durable for years to come.
Preparing the Work Area
Before you start making your faux fur rug, it’s important to properly prepare your work area to ensure a smooth and efficient crafting process. Here are some essential steps to follow when preparing your work area:
- Clean and Clear the Space: Begin by clearing your work area from any clutter or objects that may obstruct your movements or cause accidents. This will provide you with a clean and organized space to work in, allowing you to focus better on your rug-making task.
- Lay Out Protective Sheets: Protect your work surface by laying out a large plastic sheet or drop cloth. This will help to catch any loose fur fibers or stray threads that may be created during the crafting process. It will also make cleanup easier after you’re done.
- Gather the Necessary Tools and Materials: Make sure you have all the tools and materials you’ll need within reach. This includes scissors, needles, thread, pins, a ruler or measuring tape, and any other supplies specific to your chosen method of rug construction. Having everything ready beforehand will save you time and prevent unnecessary interruptions.
- Ensure Adequate Lighting: Good lighting is essential for accurately measuring, cutting, and stitching faux fur fabric. Position your work area near a window or use bright ambient lighting to ensure that you can see the details clearly. This will help you avoid errors and achieve precise results.
- Consider Ventilation: Working with certain adhesives or sprays may release fumes. If you’re using any such products, make sure your work area is well-ventilated by opening windows or using fans. This will help maintain a comfortable and safe environment while you work.
- Maintain a Comfortable Work Posture: Crafting a faux fur rug can take some time, so it’s essential to prioritize your comfort. Use a chair or stool that provides proper back support and maintain a good posture to prevent any strain or discomfort. Take breaks when needed to rest and stretch.
By following these steps to prepare your work area, you’ll create an organized and conducive space for making your faux fur rug. This will allow you to work efficiently, minimize distractions, and focus on creating a beautiful and functional rug that you can be proud of.
Measuring and Cutting the Fabric
Accurate measurements and precise cutting are crucial steps when making a faux fur rug. Properly measuring and cutting the fabric will ensure that your rug fits perfectly in its intended space and has clean, even edges. Here’s a step-by-step guide to help you with measuring and cutting the fabric:
- Measure the Space: Start by measuring the area where you plan to place the faux fur rug. Use a measuring tape or ruler to determine the length and width of the desired rug. Make sure to leave some extra fabric on each side for seam allowances.
- Prepare the Backside of the Fabric: Flip the faux fur fabric upside down so that you can mark and cut on the backside. This will help prevent any accidental cutting of the fur on the front side, ensuring a neat and professional finish.
- Mark and Cut the Fabric: Using a fabric marking pen or chalk, mark the measurements on the backside of the fabric. Use a straight edge, such as a ruler or T-square, to ensure straight lines. Then, carefully cut along the marked lines using sharp fabric scissors. Take your time and make slow, deliberate cuts to avoid any mistakes or uneven edges.
- Deal with Long Fur Pile: If you’re working with faux fur fabric with a long pile, you may need to trim the fur along the edges of your rug. This will help achieve a consistent look and ensure that the fur doesn’t get caught in the seams. Use small scissors or a razor blade to carefully trim the fur, taking care not to cut too close to the backing.
- Check and Adjust as Needed: Once you’ve cut the fabric to the desired size, carefully check the edges to ensure they are straight and even. If you find any areas that need adjustment, make small and precise trims to achieve the desired shape and look.
Remember to handle the faux fur fabric with care during the cutting process to avoid unnecessary stretching or pulling. Take your time and double-check your measurements before cutting to minimize the risk of errors. By measuring and cutting the fabric accurately, you’ll be one step closer to creating a well-fitted and visually appealing faux fur rug for your space.
Sewing the Edges of the Rug
Once you have measured and cut your faux fur fabric, the next step in making a faux fur rug is sewing the edges. This will help secure the fabric and prevent it from unraveling over time. Here’s a step-by-step guide to sewing the edges of your rug:
- Prepare your Sewing Machine: Set up your sewing machine with a heavy-duty needle suitable for sewing through thick fabrics. Choose a thread color that matches or complements your faux fur fabric. Wind the bobbin and thread the machine, ensuring it is ready for sewing.
- Pin the Edges: Lay the cut fabric flat, with the right side facing down. Fold each edge of the fabric inward, creating a neat 1-inch seam allowance. Pin the folded edges in place, securing them with straight pins every few inches. This will keep the edges aligned and in place during the sewing process.
- Start Sewing: Begin sewing along one edge of the fabric, removing the pins as you go. Use a straight stitch or a zigzag stitch to securely sew along the folded edge, about 1/4 inch from the edge. Go slowly and evenly, ensuring that the fabric is feeding through the machine smoothly.
- Backstitch at the Ends: When you reach the corner or the end of a side, backstitch a few stitches to reinforce the seam. This will prevent the thread from unraveling. Trim any excess thread.
- Repeat for all Edges: Continue sewing along each edge of the fabric, removing pins as you go. Remember to backstitch at the start and end of each edge to secure the stitches. Take your time and sew with precision to ensure clean and even edges.
After sewing the edges of your faux fur rug, give it a gentle tug to release any puckering or unevenness in the fabric. This will help the rug lay flat and even on the floor. If desired, you can reinforce the seams by sewing a second row of stitches parallel to the first. This will provide extra durability and stability to the rug.
Once you have finished sewing the edges, trim any excess fabric or stray threads for a tidy and professional finish. Your faux fur rug is now ready for the next step – adding a non-slip backing.
Adding a Non-Slip Backing
Adding a non-slip backing to your faux fur rug is an important step to ensure that it stays securely in place on your floor. A non-slip backing will provide stability, prevent the rug from shifting, and reduce the risk of slips or falls. Here’s a simple guide to help you add a non-slip backing to your faux fur rug:
- Clean the Rug: Before adding the non-slip backing, make sure your faux fur rug is clean and free from any dust or debris. Give it a gentle shake or vacuum it to remove any loose particles that may interfere with the adhesive.
- Choose the Right Non-Slip Material: There are various non-slip materials available, such as rug pads, rubberized mesh, or silicone grip mats. Consider your specific needs and preferences when selecting the non-slip material. Look for one that is suitable for your floor type and can be easily trimmed to fit the size of your rug.
- Position the Non-Slip Material: Lay out the non-slip material on a flat surface. Carefully place your faux fur rug on top of the non-slip material, ensuring it is centered and aligned properly. Trim the non-slip material if needed to match the exact dimensions of your rug.
- Secure the Non-Slip Material: If your non-slip material has adhesive backing, peel off the protective film and press the non-slip material onto the backside of the rug. Smooth it out to ensure good contact and eliminate any wrinkles or bubbles. If the non-slip material is not adhesive, use double-sided carpet tape to secure it to the rug.
- Trim any Excess Material: Once the non-slip backing is securely attached to the back of the rug, trim any excess material that extends beyond the edges. This will give your rug a clean and finished look.
Adding a non-slip backing to your faux fur rug will not only enhance its safety and stability but also help to prolong its lifespan. The non-slip backing will provide an extra layer of protection for your rug, preventing it from sliding or shifting when walked upon.
Remember to periodically check the condition of the non-slip backing and replace it if it becomes worn or loses effectiveness. Maintaining a secure non-slip backing will ensure that your faux fur rug continues to provide both comfort and safety in your living space.
Fluffing and Styling the Faux Fur
After completing the main construction of your faux fur rug, it’s time to give it a final touch by fluffing and styling the fur. This step will help enhance the rug’s appearance and create a more luxurious and realistic look. Here are some tips to help you fluff and style your faux fur rug:
- Gently Brush the Fur: Use a wide-toothed comb or a soft-bristled brush to gently brush the fur of your faux fur rug. Start from the center and work your way out towards the edges. This will help to loosen and separate the fur strands, giving your rug a fuller and fluffier appearance.
- Use a Blow Dryer: If the fur looks flat or compressed, you can use a blow dryer on a low heat setting to fluff it up. Hold the blow dryer a few inches away from the fur and use your hand or a brush to gently fluff the fur as you blow dry. Be careful not to overheat or melt the faux fur.
- Shake or Beat the Rug: Take your faux fur rug outside and give it a good shake or beat it with a broom handle to remove any trapped dust or debris. This will help to revive the fur and restore its natural bounce. Avoid shaking or beating the rug indoors to prevent spreading dust or fur fibers throughout your space.
- Arrange the Fur: Once the fur is fluffed up, take some time to arrange and style it as desired. Use your hands to gently shape the fur and create a visually pleasing pattern. You can brush the fur in a specific direction or give it a tousled look for a more casual and relaxed appearance.
- Vacuum if Needed: If your faux fur rug gets dirty or accumulates dust over time, you can use a vacuum cleaner on a low suction setting to remove any debris. Use a brush attachment or a vacuum specifically designed for faux fur to prevent damage to the rug.
By fluffing and styling your faux fur rug, you can bring it to life and create a luxurious and inviting atmosphere in your space. Experiment with different techniques and find the method that works best for your rug’s particular texture and pile length. Regularly fluffing and styling your faux fur rug will help maintain its appearance and ensure that it continues to look plush and vibrant.