
Materials Needed
Before you begin making a clay bowl, gather the following materials:
- Clay: Choose a type of clay suitable for pottery, such as earthenware or stoneware. You can find clay at art supply stores or online.
- Clay tools: Have a set of pottery tools, including a clay cutter, shaping tools, a sponge, and a smoothing rib.
- Water: Keep a small container of water nearby to moisten your hands and clay as needed.
- Work surface: Prepare a clean, flat surface to work on, such as a pottery wheel or a smooth table covered with canvas or plastic.
- Rolling pin: Use a rolling pin or a slab roller to flatten and shape the clay.
- Measuring tools: Have a ruler or measuring tape handy for precise measurements.
- Decorative elements: Gather any items you want to use to add texture or design to your clay bowl, such as stamps, textures mats, or found objects.
- Optional: Kiln access or access to a pottery studio if you plan to fire your clay bowl.
Make sure you have all these materials ready before you start your clay bowl project. Having everything prepared will make the process smoother and more enjoyable.
Step 1: Prepping the Clay
Preparing the clay is the first crucial step in making a clay bowl. Follow these steps to get your clay ready:
- Cut a piece of clay: Start by cutting a piece of clay from your supply. The size will depend on the desired size of your bowl. Use a clay cutter or a wire tool to make a clean cut.
- Knead the clay: Take the clay piece and begin to knead it with your hands. This helps to remove air bubbles and make the clay more pliable. Fold, press, and rotate the clay until it becomes smooth and workable.
- Add water if necessary: If the clay feels dry or hard, moisten your hands with water and knead it again. Add small amounts of water at a time to avoid making the clay too wet.
- Check for air bubbles: Gently press the clay with your hands to check for any remaining air bubbles. If you notice any, use a needle tool or a pin to create small holes and release the air.
- Let the clay rest: Allow the clay to rest for a few minutes to relax before shaping it. This step is called “wedging” and helps to further remove air bubbles and even out the clay’s consistency.
By following these prepping steps, you ensure that your clay is in the best condition for molding and shaping into a bowl. The kneading, adding water, and checking for air bubbles are essential to create a smooth and structurally sound clay piece.
Step 2: Shaping the Clay
Once you have prepped the clay, it’s time to shape it into a bowl. Follow these steps to shape the clay effectively:
- Flatten the clay: Start by using a rolling pin or a slab roller to flatten the clay into a uniform thickness. Aim for a thickness of about ¼ to ½ inch, depending on your desired bowl size and thickness.
- Create a base: Use a circular template or a rounded object like a bowl to trace a circle on the clay surface. Cut out the circle using a clay cutter or a sharp knife. This will be the base of your bowl.
- Mold the walls: To create the walls of your bowl, gently lift and shape the clay circle using your hands. Gradually press the clay upwards, using your fingers to shape and smooth the sides. Work from the center outwards, keeping the wall thickness even.
- Adjust the shape: Use your hands or wooden tools to refine the shape of the bowl. Smooth out any imperfections or unevenness in the clay, ensuring a pleasing and uniform shape.
- Consider decorative elements: If you want to add any decorative elements, such as textures or patterns, now is the time to do it. Press stamps, texture mats, or other objects onto the clay’s surface to create interesting designs. Be careful not to distort the bowl’s shape while adding the decorative elements.
Remember to work slowly and gently as you shape the clay into a bowl. Take breaks if needed to prevent the clay from drying out or becoming too difficult to manipulate. With patience and attention to detail, you will create a beautifully shaped clay bowl ready for further refinement.
Step 3: Smoothing the Surface
After shaping the clay into a bowl, the next step is to smooth the surface to achieve a polished and professional finish. Follow these steps to smooth the surface of your clay bowl:
- Mist the surface: Spray a fine mist of water over the clay bowl’s surface. This helps to prevent drying and makes it easier to smooth out any imperfections.
- Use a sponge or smoothing rib: Moisten a sponge or a smoothing rib and gently run it over the entire surface of the clay bowl. Apply light pressure and make smooth, even strokes to minimize any bumps or ridges.
- Smooth the inside: To smooth the inside of the bowl, use a smaller sponge or a finger wrapped in damp cloth. Reach inside the bowl and carefully smooth out any unevenness or imperfections on the interior surface.
- Pay attention to edges: Pay special attention to the edges of the bowl. Run your finger or a damp sponge along the rim to ensure a clean, even edge. Smooth out any rough edges or finger marks, taking your time to achieve the desired finish.
- Inspect the surface: After smoothing, carefully inspect the surface of the clay bowl for any remaining imperfections. If you notice any bumps, lumps, or uneven areas, gently smooth them out using your smoothing tool or wet fingertips.
By smoothing the surface of your clay bowl, you create a polished and professional look. Taking the time to achieve a smooth finish enhances the overall aesthetics and ensures that the bowl is both functional and visually appealing.
Step 4: Adding Decorative Elements
To add a personal touch and make your clay bowl unique, you can incorporate decorative elements. Follow these steps to enhance the visual appeal of your bowl:
- Choose your decorative elements: Decide on the type of decorative elements you want to add to your clay bowl. This could include stamps, texture mats, found objects, or even hand-carved designs.
- Prepare the clay: If you’re using stamps or texture mats, roll out a small piece of clay and press the stamp or mat onto it. This creates the textured element that you will later attach to the bowl.
- Attach the decorations: Dampen the area of the bowl where you want to attach the decorative element. Gently press the textured clay onto the dampened area and ensure it adheres firmly. Smooth the edges to blend it seamlessly into the surface.
- Experiment with patterns: If you’re adding hand-carved designs, use various clay carving tools to create intricate patterns or shapes. Take your time and be creative, as this is an opportunity to showcase your artistic vision.
- Consider color and glaze: If desired, you can also add color to your bowl by applying underglazes or glazes after the clay has dried and been fired. This adds an additional layer of visual interest and can enhance the overall appearance of the bowl.
Adding decorative elements allows you to personalize your clay bowl while showcasing your creativity. Experiment with different techniques and designs to create a bowl that truly reflects your style and artistic expression.
Step 5: Drying the Clay
Once you have added decorative elements to your clay bowl, it’s important to allow the clay to dry properly. Follow these steps to ensure a successful drying process:
- Air drying: Start by allowing the clay bowl to air dry at room temperature. Find a well-ventilated area away from direct sunlight or drafts. Place the bowl on a clean, dry surface and let it sit undisturbed for several days. The drying time will vary depending on the thickness of the clay and the humidity levels in your environment.
- Slow drying method: To prevent the clay from cracking during the drying process, you can cover the bowl loosely with plastic wrap or place it under a plastic bag. This slows down the drying process and helps to prevent uneven drying.
- Check for dryness: To ensure the clay is completely dry before moving on to the next step, gently touch the surface of the bowl. It should feel cool to the touch and no longer be soft or pliable. If any parts still feel moist, continue air drying until the entire bowl is dry.
- Trim if needed: Once the clay bowl is dry, you can trim any excess clay or refine the edges using pottery tools. This step helps to achieve a clean and polished look for your bowl.
Properly drying the clay bowl is essential to prevent cracking or warping during the firing process. Be patient and allow the clay to dry thoroughly to ensure the best possible outcome for your finished bowl.
Step 6: Firing the Clay
Firing the clay bowl is a crucial step to transform it into a durable and functional piece. The firing process involves subjecting the clay to high temperatures to achieve its final form. Here’s how to fire your clay bowl:
- Kiln selection: If you have access to a kiln, use it to fire your clay bowl. Kilns provide controlled temperatures for a successful firing. If you don’t have a kiln, you can explore local pottery studios or ceramic centers that offer kiln firing services.
- Preparation: Prepare your clay bowl for firing by checking it for any debris or loose particles. Brush off any dust or dirt to ensure a clean surface. If desired, you can apply a pottery glaze to add color and a glossy finish.
- Loading the kiln: Carefully place your clay bowl in the kiln, ensuring that it is supported and not in contact with any other pieces. Overlapping or touching items may cause them to fuse together during firing.
- Firing schedule: Follow the recommended firing schedule for the type of clay you are using. Each type of clay has specific temperature and time requirements for firing. Consult the manufacturer’s guidelines or seek advice from pottery professionals if you are unsure.
- Cooling down: Once the firing is complete, allow the kiln and the clay bowl to cool down gradually. Sudden changes in temperature can cause cracking or thermal shock. Opening the kiln too soon can also damage the clay bowl.
- Inspecting the results: After the clay bowl has cooled down, carefully remove it from the kiln. Inspect the fired bowl for any cracks, warping, or other deformities. If everything looks good, congratulations! You have successfully fired your clay bowl.
Firing your clay bowl adds strength and durability to the piece, making it suitable for everyday use or display. Following the proper firing process is essential to achieve the desired results and ensure the longevity of your clay bowl.
Step 7: Finishing Touches
After firing your clay bowl, there are a few final touches you can add to enhance its overall appearance. Follow these steps to give your bowl a polished and finished look:
- Sanding: If there are any rough areas or imperfections on the surface of the fired clay bowl, you can gently sand them using fine-grit sandpaper. Be careful not to remove too much material and maintain the shape of the bowl.
- Applying a final glaze: If you haven’t applied a glaze before firing, you can choose to add a final glaze now. A glaze will give your bowl a smooth and glossy finish while protecting it from moisture and staining. Follow the instructions provided with the glaze for proper application and firing.
- Trimming the foot: If your clay bowl has a foot or a base, you can use pottery tools to trim and refine it. This step helps to achieve a more professional and balanced look.
- Cleaning and polishing: Before displaying or using your clay bowl, make sure it is clean and free of any dust or debris. Use a soft cloth to gently wipe the surface and give it a final polish.
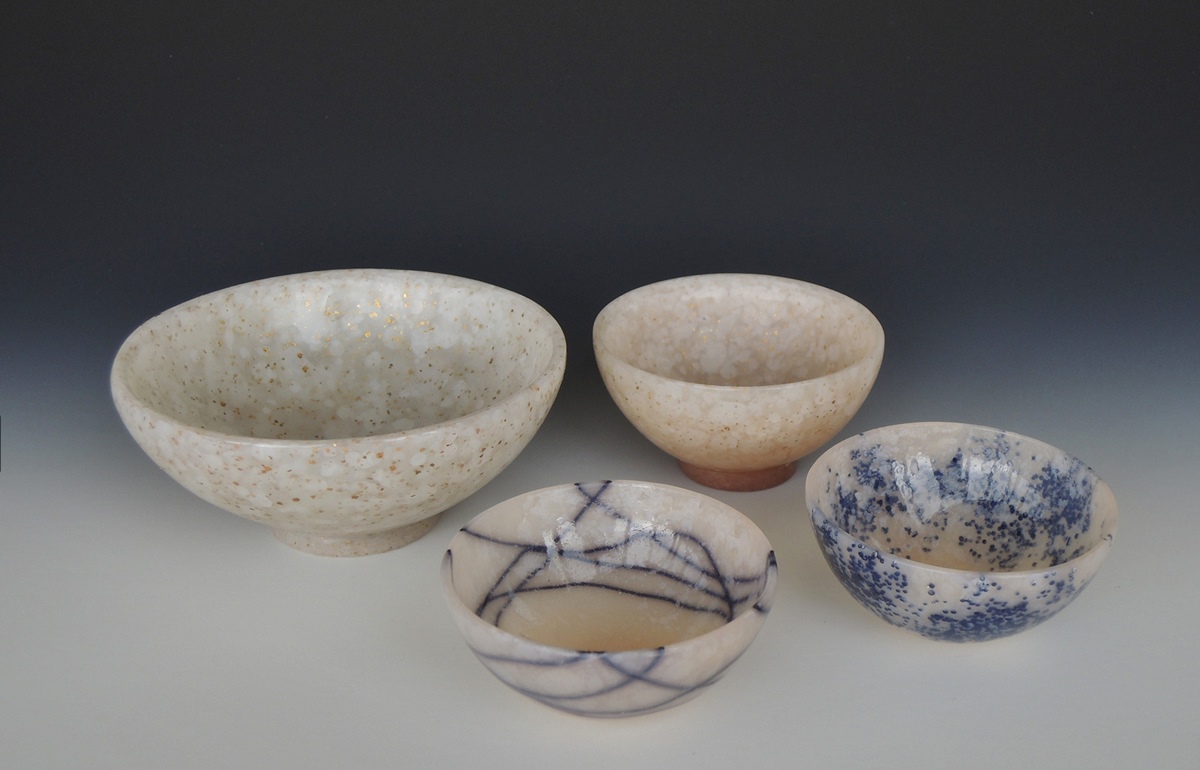
- Enjoy your finished clay bowl: Now that your clay bowl is complete, it’s time to enjoy and appreciate your creation. Whether you use it for serving or as a decorative piece, your clay bowl showcases your creativity and craftsmanship.
By adding these final touches, you can take your clay bowl to the next level and ensure it is a visually appealing and functional piece of art. Remember to handle your bowl with care and enjoy the satisfaction of creating something beautiful with your own hands!