
Choosing the Bear Skin
When it comes to making a bear rug, selecting the right bear skin is crucial. Not all bear skins are suitable for rug making, so it’s important to choose one that is in good condition and appropriate for your needs. Here are some factors to consider:
- Species: There are several species of bears, each with different characteristics. The most common species used for rugs are grizzly bears, black bears, and polar bears. Consider the size, color, and fur quality of each species to determine which one suits your preferences.
- Size: Bear skins come in various sizes, ranging from small to extra-large. Consider the space you have available for the rug and the desired dimensions. Keep in mind that larger skins may require more effort and materials during the tanning and mounting process.
- Condition: Inspect the bear skin to ensure it is in good condition. Look for signs of damage, such as holes, tears, or thinning fur. Avoid skins with significant damage, as it may be challenging to repair and may affect the final appearance of the rug.
- Legality: Check the local regulations regarding the purchase and possession of bear skins. In some areas, it may be illegal to obtain certain bear species or require permits. Ensure that you acquire the bear skin legally and comply with the necessary requirements.
When choosing a bear skin, it’s also essential to consider your personal preferences and intended use for the rug. Whether you prefer a large grizzly bear rug as the centerpiece of your living room or a smaller black bear rug for a cozy cabin, selecting the right bear skin is the first step towards creating a stunning and unique bear rug.
Preparing the Bear Skin
Once you have chosen the perfect bear skin for your rug, the next step is to prepare it for the tanning process. Proper preparation ensures that the skin is clean, free from any remaining flesh or fat, and ready for tanning. Here’s how to prepare the bear skin:
- Cleaning: Begin by thoroughly cleaning the bear skin. Use a mild detergent or specialized leather cleaner to remove any dirt, debris, or external contaminants. Gently scrub the skin with a soft-bristle brush or sponge, paying attention to areas with stains or discoloration.
- Soaking: After cleaning, it’s crucial to soak the bear skin in water to soften any remaining dried flesh or fat. Fill a large container or bathtub with warm water and submerge the skin for a few hours. Periodically agitate the water to ensure proper penetration and loosen any debris.
- De-fleshing: Once the skin has sufficiently softened, remove any remaining flesh or fat. Carefully scrape the flesh side of the skin with a dull-edged knife or specialized fleshing tool. Work in small sections, using gentle, sweeping motions to remove the tissue. Take care not to puncture or damage the skin.
- Rinsing: After de-fleshing, thoroughly rinse the bear skin with clean water to remove any loose debris or residue. Gently squeeze the skin to eliminate excess water, but be careful not to wring or twist it excessively, as this can damage the fur and shape of the skin.
- Drying: Finally, allow the bear skin to dry naturally in a well-ventilated area. Lay it flat on a clean and absorbent surface, such as a towel or clean cloth. Avoid direct sunlight or excessive heat, as these can cause the fur to fade or become brittle. Depending on the size and thickness of the skin, drying may take several days to a few weeks.
By properly preparing the bear skin, you ensure that it is clean and ready for the tanning process. This initial step sets the foundation for creating a beautiful and durable bear rug that will be enjoyed for many years to come.
Removing Flesh and Fat
After preparing the bear skin, the next crucial step in making a bear rug is to remove any remaining flesh and fat from the skin. This process, known as fleshing, is essential for ensuring that the rug remains clean, durable, and free from any potential odors. Here’s how to remove flesh and fat from the bear skin:
- Fleshing Knife: Start by securing the bear skin on a flat and stable surface, such as a fleshing beam or a large worktable. Use a specialized fleshing knife or a dull-edged instrument to gently scrape away any remaining flesh from the skin. Work in small sections at a time, applying steady, even pressure to remove the tissue. Take care not to cut or damage the skin.
- Fat Removal: After fleshing, it’s important to remove any excess fat from the bear skin. Fat can attract insects, cause odors, and affect the tanning process. Use a dull-edged knife or a specialized tool to carefully scrape away the fat layer from the flesh side of the skin. Take your time and work diligently to ensure thorough fat removal.
- Repeat and Check: Depending on the condition of the bear skin, you may need to repeat the fleshing and fat removal process multiple times to ensure optimal cleanliness. After each round, check the skin carefully for any remaining tissue or fat, and continue until the skin is clean and smooth.
- Cleaning: Once all the flesh and fat have been removed, clean the bear skin again to remove any debris or residue from the fleshing process. Use a mild detergent or specialized leather cleaner and gently scrub the skin with a soft-bristle brush or sponge. Rinse thoroughly with clean water and squeeze out any excess moisture.
Removing flesh and fat is a critical step in the bear rug-making process, as it ensures that the skin is clean, odor-free, and ready for the next stages of tanning and preserving. By taking the time to carefully flesh and remove fat, you are laying the foundation for a high-quality and long-lasting bear rug.
Tanning the Bear Skin
Once the bear skin has been properly prepared and the flesh and fat have been removed, the next step in making a bear rug is the tanning process. Tanning is essential for preserving the skin, making it soft, durable, and resistant to decay. Here are the steps to tan the bear skin:
- Pick Your Tanning Method: There are several tanning methods to choose from, including traditional brain tanning, chrome tanning, and synthetic tanning. Each method has its own advantages and techniques, so research and decide the best approach for your project.
- Prepare Tanning Solution: Depending on the tanning method chosen, you’ll need to prepare the appropriate tanning solution. This may involve mixing natural substances like brains, oils, or salts or using commercial tanning chemicals. Follow the instructions carefully to create the tanning solution.
- Apply Tanning Solution: Submerge the bear skin in the tanning solution, ensuring it is fully saturated. Use a container large enough to accommodate the skin. Gently massage the solution into the skin, making sure it reaches all areas thoroughly. Allow the skin to soak in the tanning solution for the recommended amount of time.
- Monitor pH Levels: During the tanning process, it’s crucial to monitor and adjust the pH levels of the tanning solution. Maintaining the proper pH helps ensure effective tanning and long-term preservation of the skin. Use pH strips or a pH meter to regularly test and adjust the levels as necessary.
- Rinse and Neutralize: After the tanning period is complete, rinse the bear skin thoroughly with clean water to remove any excess tanning solution. Gently squeeze the skin to remove excess moisture. Next, neutralize the tanning solution by soaking the skin in a neutralizing agent, such as bicarbonate of soda or vinegar, for the recommended time.
- Drying: Once the bear skin has been rinsed and neutralized, it’s time to dry it. Lay the skin flat on a clean and absorbent surface, such as a towel or clean cloth. Avoid direct sunlight or excessive heat, as this can damage the skin. Allow the skin to dry slowly and completely, which may take several days to a few weeks.
Tanning the bear skin is a critical step in the rug-making process as it transforms the raw skin into a preserved and supple material. By following the appropriate tanning method and ensuring proper pH levels and neutralization, you will create a beautiful and durable bear rug.
Stretching and Drying the Bear Skin
Once the bear skin has been tanned, the next step in creating a bear rug is to stretch and dry the skin. Stretching helps to even out the shape and size of the rug, while drying ensures that the skin is preserved and ready for further processing. Here’s how to stretch and dry the bear skin:
- Prepare the Stretching Frame: Begin by setting up a stretching frame or mounting board. This frame should be larger than the size of the bear skin to accommodate stretching. Secure the bear skin onto the frame, making sure it is evenly distributed and taut.
- Stretch the Skin: Start stretching the bear skin to achieve the desired size and shape of the rug. Begin at one end of the skin and work your way across, gradually pulling it in all directions. Use tacks or staples to secure the skin onto the stretching frame, making sure it is smooth and free from folds or wrinkles.
- Allow Air Circulation: Proper air circulation is crucial for drying the bear skin. Place the stretching frame in a cool, well-ventilated area. Avoid direct sunlight or excessive heat, as this can cause the skin to become brittle or fade. A fan or open window can help facilitate air circulation.
- Patience is Key: Drying the bear skin is a time-consuming process that requires patience. It may take several days to a few weeks for the skin to completely dry, depending on its thickness and environmental conditions. Avoid rushing the drying process, as improper drying can lead to mold or uneven texture.
- Monitor and Adjust: Regularly check the bear skin during the drying process. Ensure that it remains securely fastened to the stretching frame and inspect for any signs of moisture or problems. Make any necessary adjustments to the stretching if needed.
- Flexibility Check: Once the bear skin appears dry, carefully remove it from the stretching frame and gently flex the skin. It should feel supple and pliable without cracking or breaking. If any stiffness or brittleness is observed, additional drying time may be necessary.
Stretching and drying the bear skin allows it to maintain its shape and size while preserving its natural beauty. By following these steps and exercising patience throughout the drying process, you will be on your way to creating a stunning bear rug.
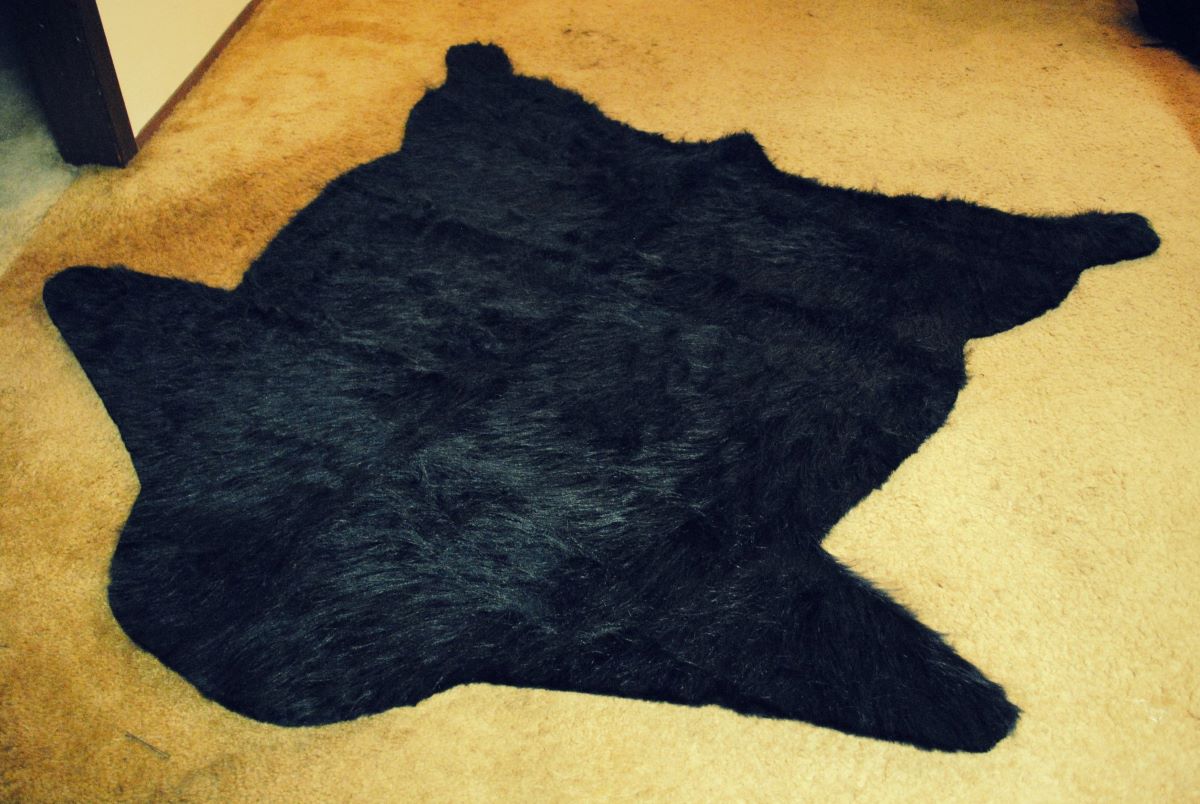
Trimming and Shaping the Bear Rug
After stretching and drying the bear skin, the next step in creating a bear rug is trimming and shaping. This process involves removing any excess fur, shaping the rug to your desired dimensions, and ensuring that the edges are clean and neat. Here’s how to trim and shape the bear rug:
- Assess the Fur: Inspect the bear rug to determine if any areas of excess fur need to be trimmed. Look for uneven or long strands of fur that may affect the overall appearance or texture of the rug.
- Trimming Excess Fur: Using sharp scissors or a specialized fur trimmer, carefully trim any excess fur from the surface of the rug. Take your time and work slowly, being cautious not to cut too much or damage the surrounding fur.
- Shaping the Rug: If necessary, shape the bear rug to your desired dimensions. Use a marker or chalk to outline the desired shape, then carefully trim along the lines. Ensure that the edges are smooth and even.
- Blending Fur: After trimming and shaping, gently brush the fur to blend the cut ends with the surrounding fur. This helps create a seamless appearance and ensures that the rug looks natural and well-maintained.
- Cleaning Up Edges: Pay attention to the edges of the bear rug and ensure they are clean and neat. Trim any loose or stray fur strands to maintain a tidy appearance.
- Final Inspection: Once you have completed trimming and shaping, thoroughly inspect the bear rug. Check for any missed areas, uneven edges, or other imperfections. Make any necessary adjustments to achieve the desired look.
Trimming and shaping the bear rug is a crucial step in the process, as it helps refine its appearance and ensure that it meets your vision. By carefully trimming excess fur, shaping the rug to your desired dimensions, and tidying up the edges, you will create a beautiful and professionally finished bear rug.
Mounting and Displaying the Bear Rug
Once the bear rug is fully trimmed and shaped, the final step is to mount and display it. Proper mounting ensures that the rug is securely attached and preserved, while the right display method showcases its beauty. Here’s how to mount and display your bear rug:
- Select a Mounting Method: There are several mounting methods to choose from, including flat mounting, wall hanging, or full-body mounting. Consider the size of the rug, the space available, and your personal preference when selecting a mounting method.
- Consult a Professional: For more complex mounting methods, such as full-body mounting, it’s recommended to consult a professional taxidermist or rug mounter. They have the expertise and tools to ensure the rug is mounted securely and in a lifelike manner.
- Prepare the Backing: Depending on the mounting method, you may need to prepare a backing for the rug. This could be a sturdy plywood board or a specialized rug backing material. Cut the backing to the appropriate size and shape to complement the bear rug.
- Attach the Rug: Carefully attach the bear rug to the backing using strong upholstery thread or heavy-duty stapler. Follow the natural contours of the rug, ensuring that it is evenly stretched and secured. Take care not to damage the fur or alter the rug’s shape during this process.
- Secure the Edges: Check the edges of the rug and make sure they are securely fastened. Use additional stitching or staples if needed to keep the rug firmly in place. Take your time to ensure the rug is properly aligned and centered on the backing.
- Consider Framing: If you choose to mount the bear rug flat against a wall, consider framing it for added protection and aesthetic appeal. Select a frame that complements the rug’s style and size, ensuring it is securely attached to prevent any damage.
- Display with Care: Once the rug is mounted and secured, carefully choose the display location. Ensure that it is away from direct sunlight, high humidity areas, or places where it can be easily damaged. Regularly dust and clean the rug, following the appropriate care instructions for fur preservation.
Mounting and displaying the bear rug is the final step in the process, showcasing the beauty and craftsmanship of your creation. By selecting a suitable mounting method, ensuring secure attachment, and displaying the rug with care, you will have a stunning focal piece that can be cherished for years to come.